


- sales/support
Google Chat:---
- sales
+86-0755-88291180
- sales01
sales@spotpear.com
- sales02
dragon_manager@163.com
- support
tech-support@spotpear.com
- CEO-Complaints
zhoujie@spotpear.com
- Only Tech-Support
WhatsApp:13246739196
- Purchase/Shipping/Refund
WhatsApp:13424403025
Raspberry Pi UPS Module 3S User Guide
Introduction
This is a 3S output Uninterruptible Power Supply (UPS) module that supports simultaneous charging and discharging and can provide stable 5V/3.3V voltage output. It also supports IIC output and can display the IP address, battery voltage, current, power, and other parameters.
Features
- Adapting various interfaces via wires, easy to integrate into car design, and industrial control equipment.
- I2C bus communication, monitoring the batteries voltage, current, power, and remaining capacity in real time.
- Multi battery protection circuits: overcharge/discharge protection, over current protection, short circuit protection, and reverse protection, along with the equalizing charge feature, more safe and stable.
- Onboard 5V regulator, up to 5A continuous output current, more sufficient power source for Raspberry Pi and Jetson Nano.
- Batteries warning indicators, easy to check if the battery is connected correctly.
- Comes with online development resources and manuals.
Parameters
- Output voltage: Battery voltage; 5V 5A; 3.3V 300mA
- Control interface: I2C
- Battery: 2600mAh 18650 lithium battery × 3 (in series)
- Charging power: 12.6V 2A
- Dimensions: 60mm × 93mm
- Mounting hole diameter: 3.0mm
Interface Definition

8-INPUT is a 12.6V 2A charging interface, and you can use a 12.6V 2A power supply to charge it; 9-SWITCH is the switch of power supply; 10-BAT is 12.6V 2A voltage output; 11-5V is 5V voltage output; 12 is battery reverse connection warning light if the battery is reversed, then the warning light is on; 13 is the pin header control interface.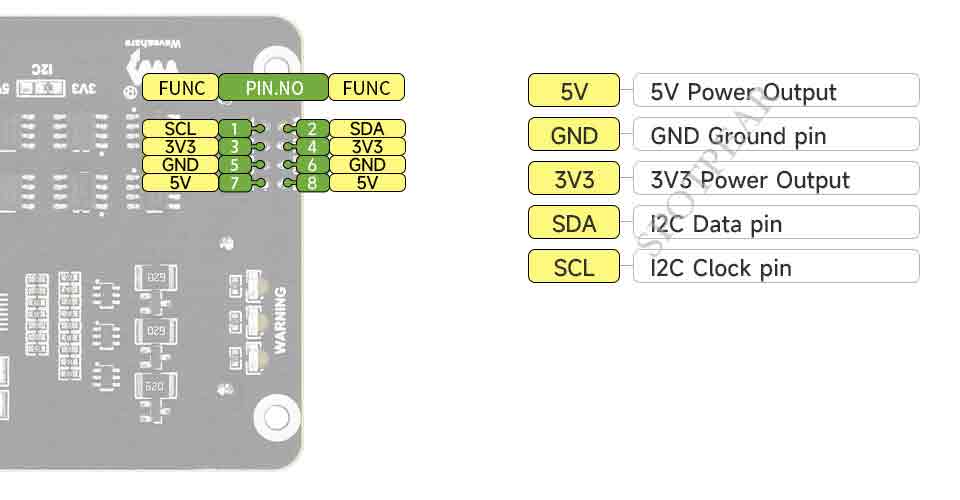
The pin header interface includes 5V voltage output, 3V voltage output and IIC output.
Note 1: When mounting the battery for the first time, you need to pay attention to whether the LED is on. If the LED is on, it means that the corresponding battery is reversed. Do not charge the battery if it is reversed.
Note 2: There may be no power output when the battery is connected for the first time. You need to press the BOOT button on the circuit board to activate the battery protection chip to have power output.
Note 3: Use the power supply configured by the product to charge. Using other power supplies may cause the product to be damaged if the output power ripple is too large and unstable.
Note 4: If the positive insulation pad of the battery is broken, it is recommended not to continue to use it, which may cause a short circuit and fire. When removing the battery, do not use a screwdriver to pry the positive pole of the battery, which may cause a short circuit, and pry the negative pole of the battery.
SAFETY CAUTIONS
Li-ion and Li-po batteries are quite unstable. They may cause fire, personal injury, or property damage, if they're not properly recharged or used.
Do not reversely connect the polarities when recharging or discharging the battery. Do not use inferior charger/charging panel to recharge the battery.
Do not mix use old batteries with new ones, avoid using batteries of different brands.
When buying Lithium battery, should always make sure the battery specification is compatible with the expansion board. Choose batteries from formal manufacturer, and ensure the batteries will work stably and safely by aging test.
Lithium batteries have limited cycle life, they will also deteriorate as time goes by. Should be replaced with new ones when the batteries reaching their max cycle life, or working over two years, whichever comes first.
Should be placed carefully and properly, keep it away from inflammables and explosives articles, away from children, avoid any safety accident caused by careless storage.
Raspberry Pi Demo
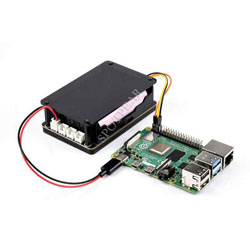
Connect To RPI
- Please connect to the Raspberry Pi as the following diagram:

Enable IIC Interface
- Open the Raspberry Pi terminal and input the following commands to enter the config interface:
sudo raspi-config
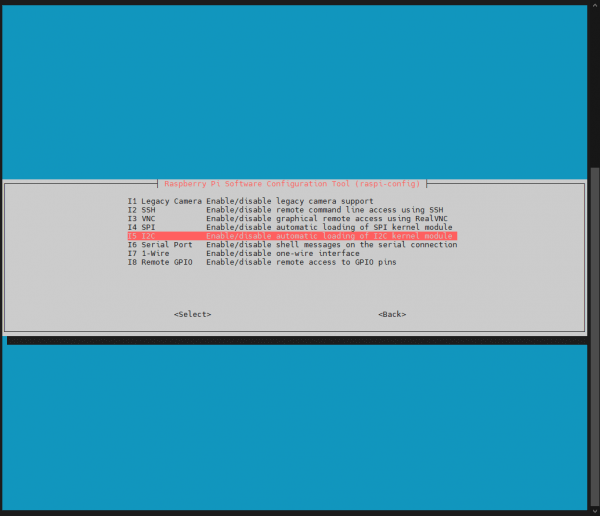
Choose Interface Options -> I2C -> Yes.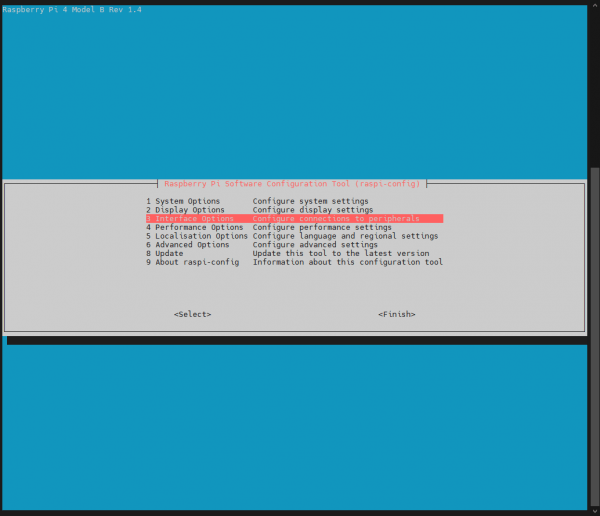
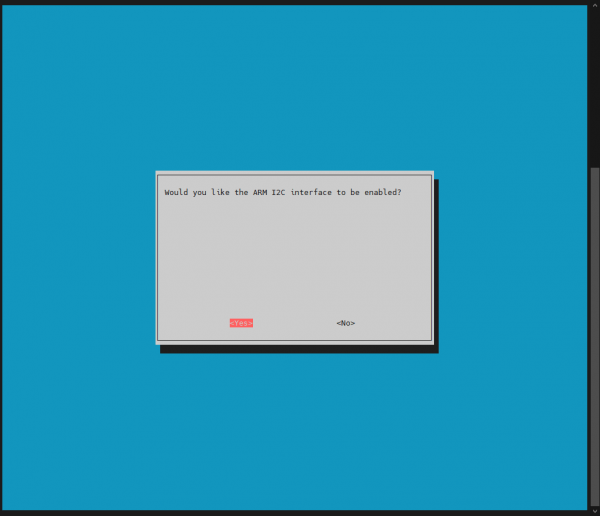
- After enabling the IIC function, download the sample demo, unzip the downloaded file in the Raspberry Pi, and enter the following commands:
cd UPS\ Module\ 3S/
sudo python3 INA219.py
- After running the demo, the voltage, current, power, and battery percentage can be displayed.
