




- sales/support
Google Chat:---
- sales
+86-0755-88291180
- sales01
sales@spotpear.com
- sales02
dragon_manager@163.com
- support
tech-support@spotpear.com
- CEO-Complaints
zhoujie@spotpear.com
- Only Tech-Support
WhatsApp:13246739196
- Purchase/Shipping/Refund
WhatsApp:13424403025
- HOME
- >
- ARTICLES
- >
- Common Moudle
- >
- LCD
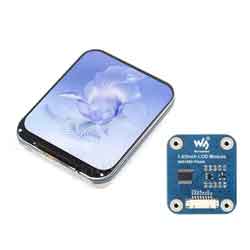
Displaying a new image on 1.83inch LCD Module
【Step 1 Software 】
[] Custom pictures
Supports JPG BMP ico (PNG is not supported)
【STEP 2 Operation steps】
[] Adjust custom pictures
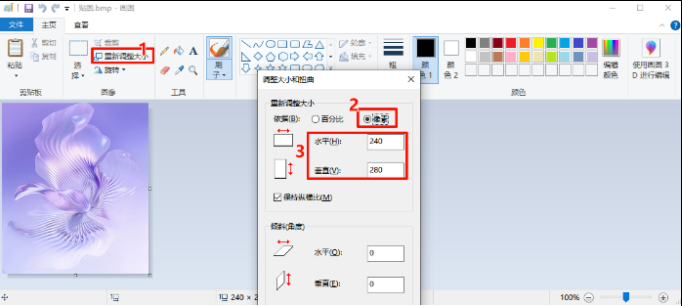
Resizes the image to the desired display size, making sure the image is not larger than the
display sizes
[] Image2Lcd software settings
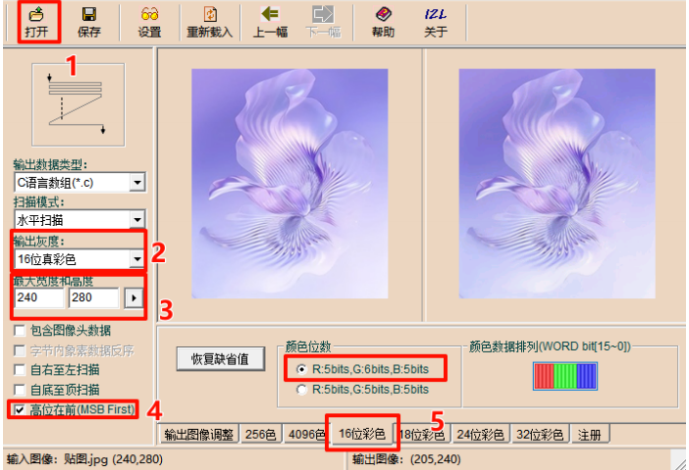
For example, if LCD _ 1in83 displays a full-screen picture (resolution 240 X 280): 1. Open Custom
Picture 2. Select Output Grayscale 3. Set the maximum width and height 4. Select MSB First 5.
Select 16-bit color (RGB 565)
[] Generate the.c file and add it to the project
Click the Save button to save the.c file locally
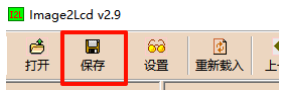
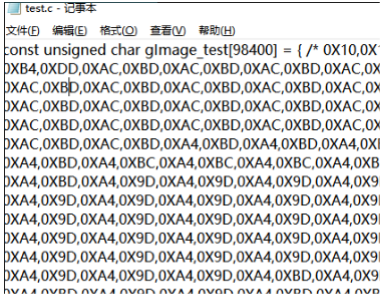
Open the image. CPP! In the corresponding project folder

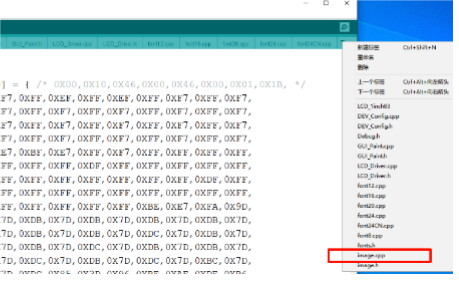
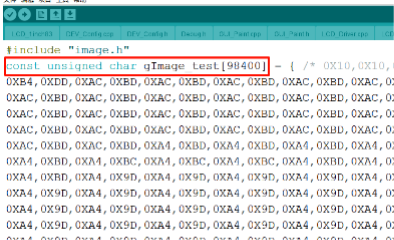
Add the array generated by the picture to it
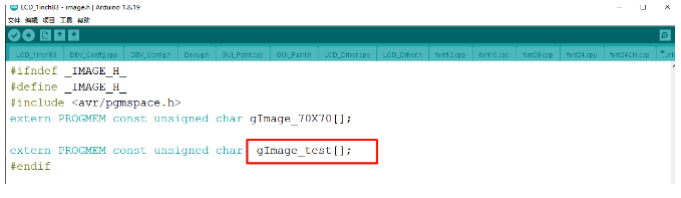
Open the image. H to add the variable declaration
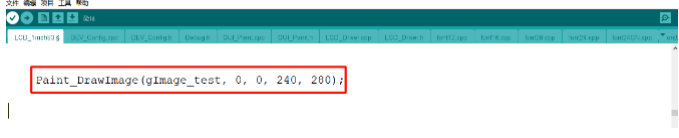
Use API to call image display in the application
TAG:
Raspberry Pi Pico 7inch DVI LCD
Milk-V Duo Tutorial
Raspberry Pi 1.3inch IPS LCD display HAT
ESP32-C6 2.16inch AMOLED Display AI Development Board 480×480 2.16 inch TouchScreen Deepseek
Raspberry Pi CSI-to-HDMI
Raspberry Pi 5 Active Cooler
Raspberry Pi 5 8 inch DSI LCD Captive TouchScreen MIPI Display 1280x800 Industrial One-Body Tablet PC With 5MP Front Camera
Raspberry Pi 1.54inch LCD Bookworm-Desktop Display and Touch
Raspberry Pi 5 Power
Milk-V Duo S eMMC version firmware burning
Raspberry Pi PICO Keyboard
Raspberry Pi 5 Case
SpotPear
CAN Analyzer
ESP32-C6 Geek 1.14inch Development Board with 1.14 inch 65K Color LCD
Raspberry Pi 5 PCIe to M.2 NVMe SSD Adapter Board HAT
DAPLINK
ESP32 S3 Development Board 1.85 inch Round LCD Display 360×360 QMI8658 Sensor / MIC / SD /MP3 Audio /Battery Port LVGL/HMI For Arduino
SpotPear
Raspberry Pi Pico Basics User Guide
TAG:
BPI
STM32 programmer
Raspberry Pi 5 CSI Cable
Raspberry Pi 0.85inch LCD
Raspberry Pi Pico Buzzer
ESP32 S3 1.43 inch AMOLED Display Screen Arduino LVGL SD-Port QMI8658C 6-Axis Sensor
ESP32 Mini TV
Watchy
Milk-V Duo
Raspberry Pi 24.5 inch Type C/HDMI 2K Display 24.5inch Screen 2560x1440 Computer PC Phone For Xbox/PS4/Switch
Arduino Thermal imaging
ADXL354BEZ
ESP32 Thermal imaging
ESP32 Drone Development board DIY Flight Controller Open-Source Mini Quadcopter
Raspberry Pi 5inch DSI LCD B Display MIPI IPS 800x480 Capacitive TouchScreen
Raspberry Pi 10.1 inch QLED Quantum Dot Display 1280x720 Capacitive Touchscreen DDC/CI For Computer PC/Jetson/Game
Rail-type
Raspberry Pi Pico 2 RP2350B Linux
ESP32-S3 AI Electronic Eye Development Doard DualEye TouchEye 1.28 inch TouchScreen LCD Round Display N16R8 Toy Doll Robot
USB Binocular Camera 2MP OS02G10 Distortion Free Binocular Synchronous Frame USB 2.0 Plug and Play