- sales/support
Google Chat:---
- sales
+86-0755-88291180
- sales01
sales@spotpear.com
- sales02
dragon_manager@163.com
- support
tech-support@spotpear.com
- CEO-Complaints
zhoujie@spotpear.com
- sales/support
WhatsApp:13246739196
- HOME
- >
- ARTICLES
- >
- Common Moudle
- >
- ESP
ESP32-S3-Nano User Guide
Overview
Introduction
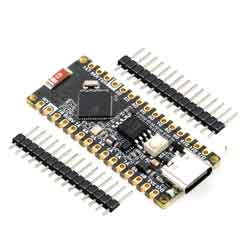
ESP32-S3-Nano adopts ESP32-S3R8 as the main controller, compatible with Arduino Nano ESP32, and is suitable for applications such as IoT or MicroPython. Compact in size while with powerful performance, it is applicable for the standalone project.
Features
- Adopting ESP32-S3R8 as the main controller with Xtensa® 32-bit LX7 dual-core processor, capable of running at 240 MHz.
- Integrated 512KB SRAM, 384KB ROM, 8MB PSRAM, 16MB Flash memory.
- Integrated 2.4GHz Wi-Fi and Bluetooth LE dual-mode wireless communication, with superior RF performance.
- Supports seamless switching between Arduino and MicroPython programming, offering greater flexibility.
- Compatible with Arduino IoT Cloud, enabling users to monitor and control their projects from anywhere with Arduino Internet of Things (IoT) cloud applications.
- Supports HID (Human Interface Device), emulating Human Interface Devices such as keyboards or mice via USB port for easier interaction with PC.
Version Options
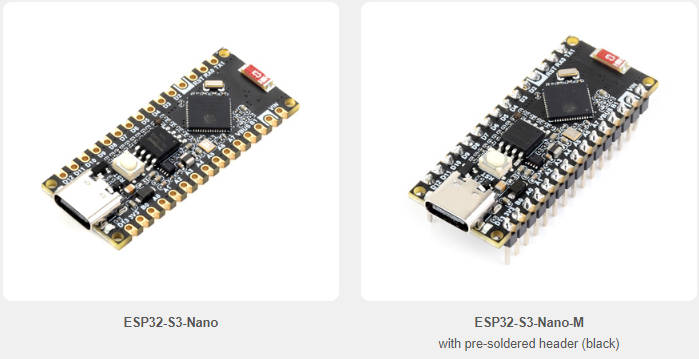
Product Parameters Comparison
| MODEL |
|
|
|
|---|---|---|---|
| MICROCONTROLLER | R7FA4 (32-bit ARM Cortex-M4) | R7FA4 (32-bit ARM Cortex-M4) | ESP32-S3R8 (Dual-core 32-bit Xtensa LX7) |
| ESP32-S3FN8 (Dual-core 32-bit Xtensa LX7) | |||
| CLOCK FREQUENCY | R7FA4: 48MHz | R7FA4: 48MHz | ESP32-S3R8: 240MHz |
| ESP32-S3FN8: 240MHz | |||
| STORAGE | R7FA4: 256kB Flash, 32kB RAM | R7FA4: 256kB FLASH, 32kB RAM | ESP32-S3R8: 384kB ROM, 512kB RAM, 16MB Flash, 8MB PSRAM |
| ESP32-S3FN8: 384kB ROM, 512kB RAM, 8MB Flash | |||
| WIRELESS COMMUNICATION | None | 2.4GHz WiFi + Bluetooth LE | |
| OPERATING VOLTAGE | Options for 5V/3.3V, support more shields | 3.3V | |
| POWER INPUT | 6~24V | 6~21V | |
| RESET BUTTON | Lateral, easier to use when connecting with shield | Vertical | |
| IO PIN OUTPUT CURRENT | 8mA | 40mA | |
| DIGITAL PINS | 14 | 14 | |
| ANALOG PINS | 6 | 8 | |
| DAC | 2 | None | |
| PWM | 6 | 5 | |
| UART | 1 | 2 | |
| I2C | 1 | 1 | |
| SPI | 1 | 1 | |
| CAN | 1 | None | |
| DC JACK | Low profile, shields won't be blocked anymore while connecting | None | |
| POWER OUTPUT HEADER | Provides 5V OR 3.3V power output and common-grounding with other boards | None | |
| 5V POWER OUTPUT | Up to 2000mA Max, features higher driving capability | 1000mA Max | |
| EXPERIMENTAL BOARD | Support, the solder pad is provided for DIY interfaces to connect with the experimental board | Support | |
Hardware Description
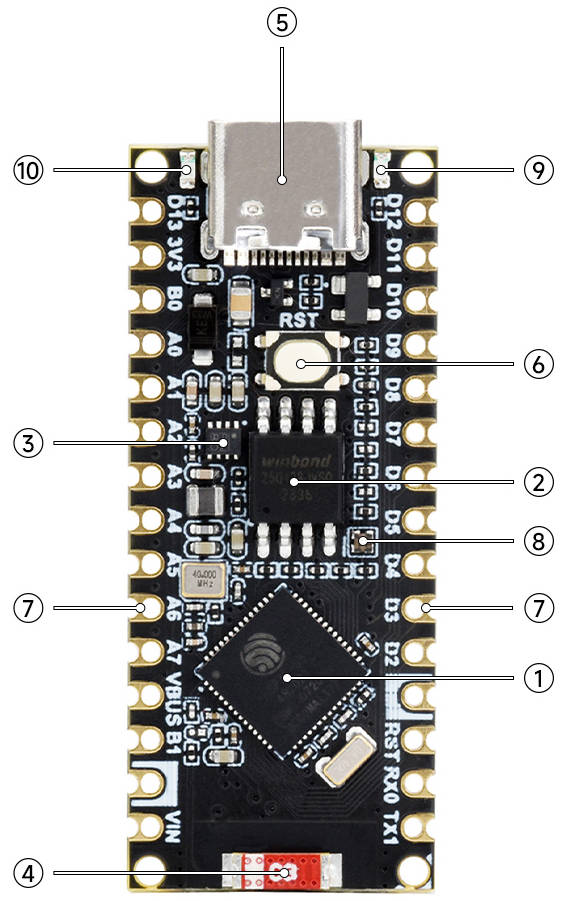

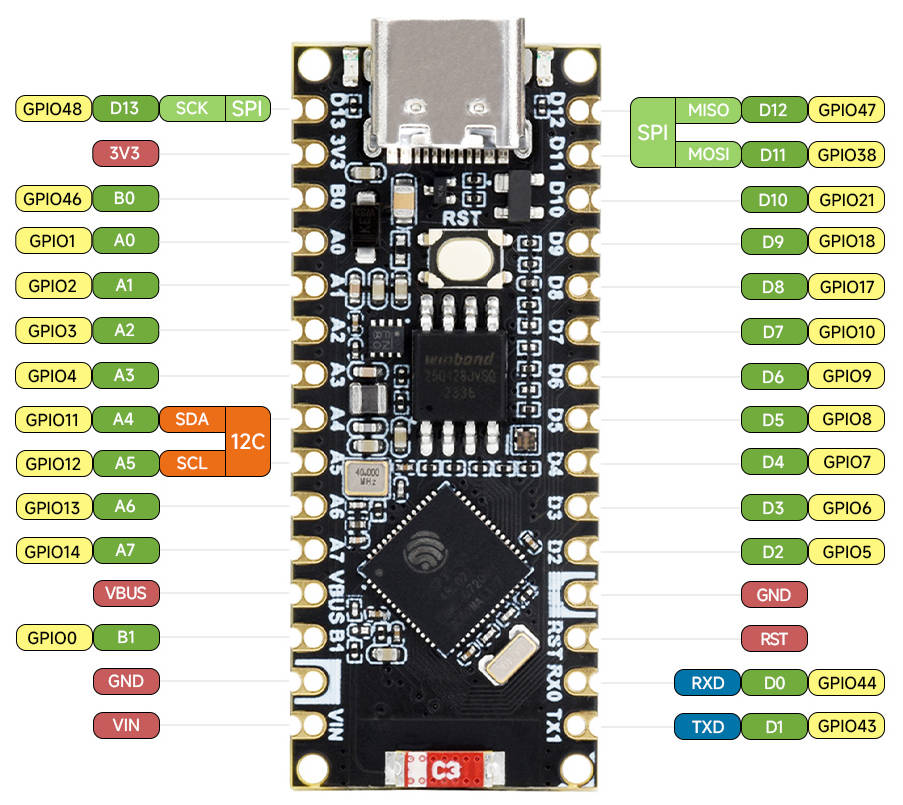
Pinout Definition
Dimensions
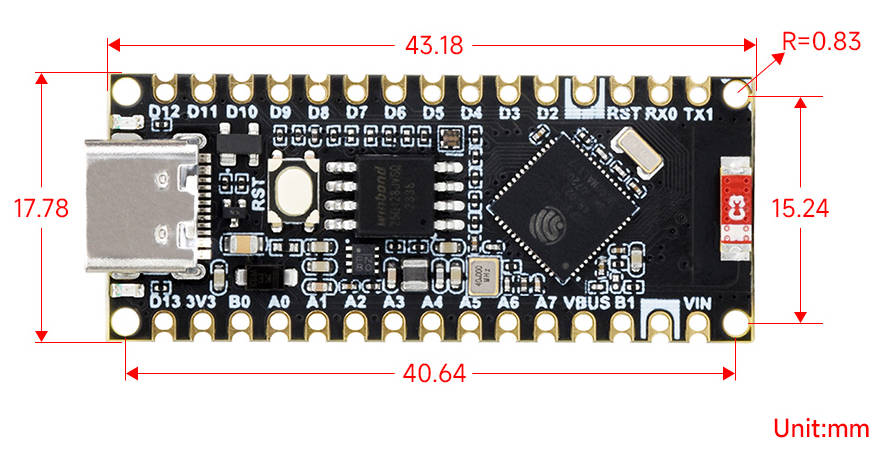
User Guide
Environment Setting
The software framework for ESP32 series development boards is mature, and you can use CircuitPython, MicroPython and C/C++ (Arduino, ESP-IDF) for rapid prototyping of product development. Here's a brief introduction to these three development approaches:
- CircuitPython is a programming language designed to simplify coding tests and learning on low-cost microcontroller boards. It is an open-source derivative of the MicroPython programming language, primarily aimed at students and beginners. CircuitPython development and maintenance are supported by Adafruit Industries.
- You can refer to development documentation for CircuitPython-related applications development.
- The GitHub library for CircuitPython allows for recompilation for custom development.
- MicroPython is an efficient implementation of the Python 3 programming language. It includes a small subset of the Python standard library and has been optimized to run on microcontrollers and resource-constrained environments.
- You can refer to development documentation for MicroPython-related application development.
- The GitHub library for MicroPython allows for recompilation for custom development.
- The official libraries and support from Espressif Systems for C/C++ development make it convenient for rapid installation.
- Arduino development manual for ESP32 series
- ESP-IDF development manual for ESP32 series
- The environment is set up under Windows 10, users can choose to use Arduino or Visual Studio Code (ESP-IDF) as IDE for development. For Mac/Linux OS users please refer to the official instructions.
Arduino
Install Arduino IDE
- The following development system is Windows.
- 1. Open the official software download webpage, and according to the corresponding system and system bits to download.
- 2. You can choose "Just Download", or "Contribute & Download".
- 3. Run to install the program and install it all by default.
Install Nano ESP32 Package
- Install Nano ESP32: Open Boards Manger -> Search "Nano ESP32" and install the latest version (or the version to use).
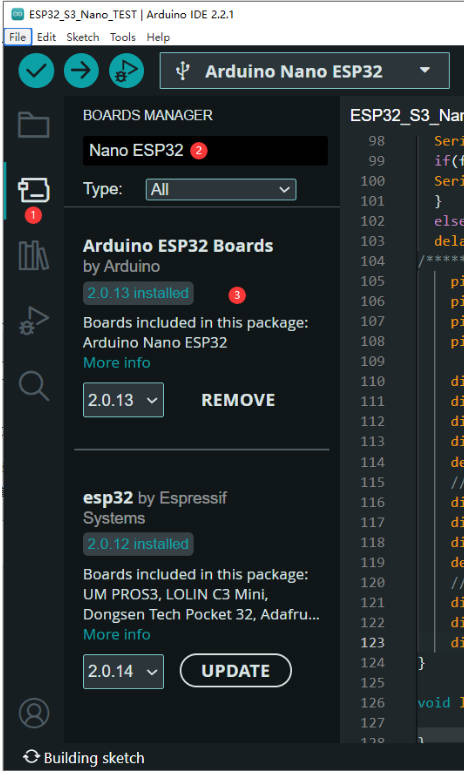
Create Example
- The following example is about how to make LED blinking. (File -> examples -> Blink under 01.Basics)
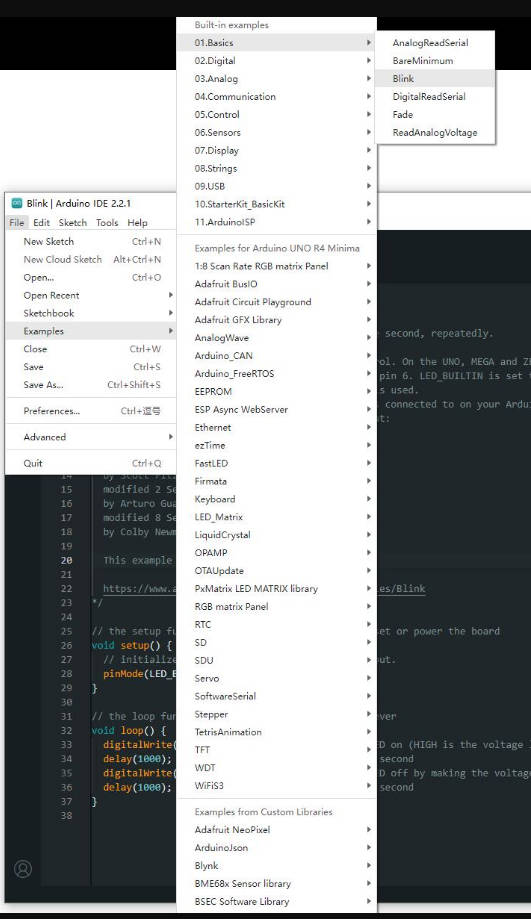
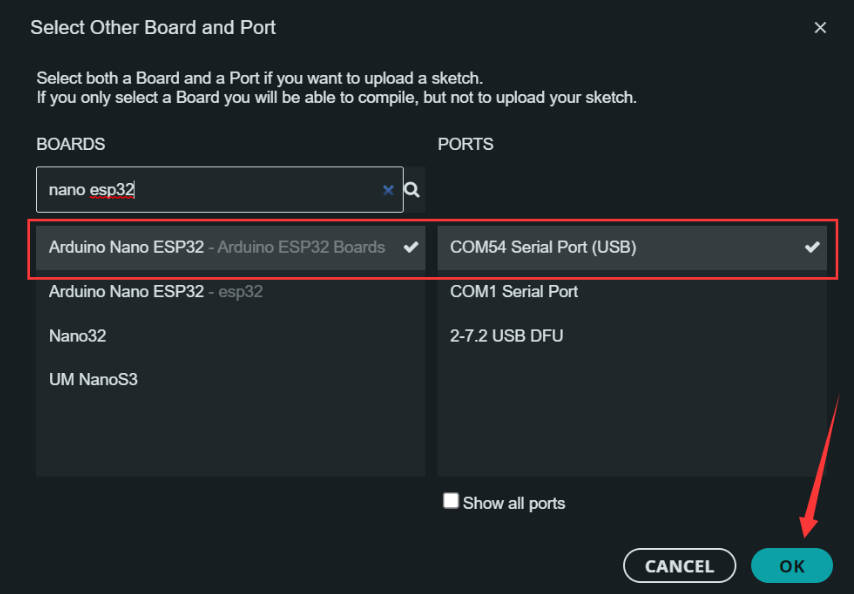
- Select the development board and COM ports.
Search "Nano ESP32", select "Arduino Nano ESP32", and then click on OK (the following picture is for reference only, you need to select the corresponding board.)
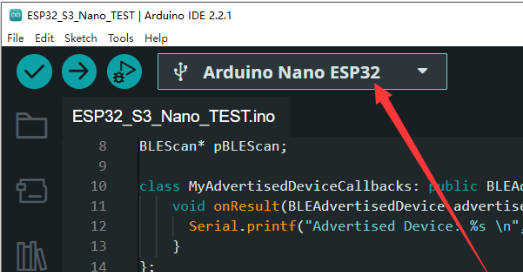
- Click ✓ in the menu bar to compile and → to burn the compiled demo to the board.
Open Example
- Open the existing example, it is easier to operate. Directly run the ".ino" demo and refer to the operation above, and select the corresponding board and COM port to compile, download and burn.
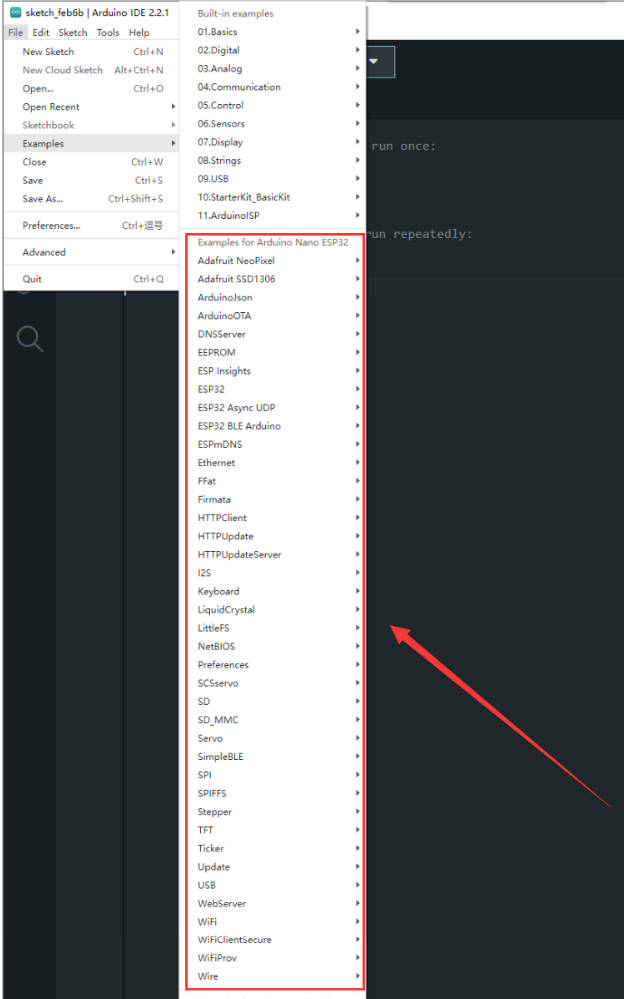
- ESP32-S3-Nano opens the Arduino demo: Open File -> Examples. These demos can be directly used without other external libraries.
MicroPython
1. Download and install the latest Thonny IDE, open Thonny IDE -> Configure interpreter... as shown below:
2. Press the BOOT key on the board, connect to the USB cable, and find the Device Manager or the corresponding COM port. Download or run the demo, and you can see the Hardware Description chapter for more details.
3. According to the steps below, download the online MPY firmware of the ESP32 series, and clean the Flash content of the development board before downloading, and the whole download process lasts about 1 minute.
4. If the Tonny IDE needs to download the local firmware, you can operate it by following the steps below. Select Step 3 or Step 4, and Step 4 is recommended.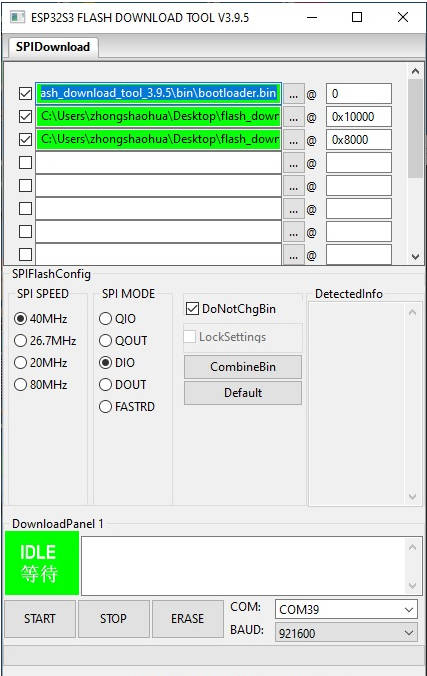
5. Please refer to MicroPython Documentation, releases note for programming.
Sample Demo
- For the Arduino example demo, please refer to arduino-esp32 or File -> examples in Arduino IDE, these examples can be used directly without external libraries.

- for mpy example, you can refer to MicroPython documentation and sample demo.
Resource
Document
Demo
Software
Datasheet
Support
Monday-Friday (9:30-6:30) Saturday (9:30-5:30)
Mobile: +86 13434470212
Email: services01@spotpear.com


