


- sales/support
Google Chat:---
- sales
+86-0755-88291180
- sales01
sales@spotpear.com
- sales02
dragon_manager@163.com
- support
tech-support@spotpear.com
- CEO-Complaints
zhoujie@spotpear.com
- Only Tech-Support
WhatsApp:13246739196
- Purchase/Shipping/Refund
WhatsApp:13424403025
Pico2Go-Kit User Guide
Overview
Introduction
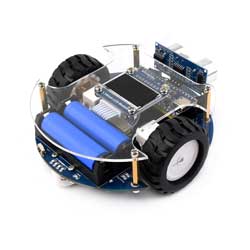
The Pico2Go is a smart mobile robot based on RP2350-Plus, it includes ultrasonic module, LCD module, Bluetooth module, line following module, and obstacle avoidance module. All these functions are highly integrated for easily achieving IR obstacle avoidance, auto line following, Bluetooth/IR remote control, and more. With various advanced features, it will help you quickly get started with smart robot design and development.
Features
- Standard Raspberry Pi Pico header, supports RP2350-Plus series boards
- Battery protection circuit, preventing overcharge, overdischarge, overcurrent, short circuit, and reverse connection, ensuring stable operation and safety.
- Recharge/Discharge circuit, allows programming/debugging concurrently while recharging.
- 5-channel analog output infrared sensor, combined with PID control algorithm, the line tracking speed is faster and more stable.
- Multiple smart robot sensors like line tracking, obstacle avoidance, and no more messy wiring.
- 1.14inch IPS colorful LCD display, 240 x 135 pixels, 65K colors.
- Integrated Bluetooth module allows teleoperations like robot movement, RGB LED display color, buzzer, etc. by using mobile phone APP.
- N20 micro gear motors, with metal gears, low noise, and high accuracy.
- Cool colorful RGB LED.
Precautions
- Support 3.7V 14500 rechargeable batteries.
- When installing the battery, pay attention to the positive and negative poles marked in the battery slot.
- The warning indicator will be on and the self-recovery fuse will be overheated severely if the batteries are connected reversely. It is necessary to remove and reinstall the batteries immediately.
- After reinstalling the batteries, you need to connect the power to Picogo to activate the batteries if you change batteries, otherwise, the Picogo cannot be powered normally.
- Connect USB power to the Picogo or turn on the power switch, the power indicator and battery indicator will always be on. After disconnecting the USB cable and turning off the switch, the power indicator (red light) will turn off, and the battery indicator (yellow-green light) will be off after a while, press the key and the battery indicator will be on for a while and then turn off.
- The onboard infrared obstacle avoidance sensor, RGB LEDs, and motors all need a 5V power supply. If you don't turn on the power switch and only connect to the USB power supply, these functions will not work normally.
- The yellow and green LED indicators are the battery indicators. When only one LED indicator flashes, it indicates that the battery is low and needs to be connected to the power supply for charging.
- Some demos will call other modules. The sample demo must be saved to Raspberry Pi Pico before running, otherwise, the running demo may show that the corresponding module cannot be found.
- After Pico is started, it will automatically run the main.py demo. If you need the PicoGo to start the corresponding demo, you need to save the demo as a main.py file.
MicroPython Demo
Before running the MicroPython demo, you should download the MicroPython firmware on the Pico first, and then install Thonny IDE. Please select Raspberry Pi option when configuring the board environment.
Motor Test
- Open the motor.py in Thonny IDE, and run it. The PicoGo will move forward, then backward, turn left, and turn right after running the demo.
Note: You need to turn the power switch to ON, otherwise the motor will not move. Make sure that the PicoGo has enough place to move, and prevent it from falling and getting damaged..
Infrared Remote Control
- Open the IRremote.py in ThonnyIDE and run it. Press the button on the infrared remote control to control the PicoGo.
- 2, 8, 4, 6, 5 are used for forwarding, backward, turn left, turn right, and stop. You can press the - or + keys to adjust the speed and press EQ to restore the default speed setting.
- Different infrared remote controllers may have different key codes, if you use other controllers, you may need to modify the codes.
Note: The motor will rotate only if the power switch is turned on. To run the demo without the USB cable, save IRremote.py as main.py to the Raspberry Pi Pico. The demo also needs to call the Motor.py, you need to save it to Raspberry Pi Pico.
Infrared Obstacle Avoidance
- Open the Infrared-Obstacle-Avoidance.py in Thonny IDE, rename it as main.py, and save it to Pico. Disconnect the USB cable and run it.
- When there is no obstacle in front of the robot, the green LED light in front of the robot will be off. When the robot meets an obstacle, the green LED light in front will be on.
- If the LED light is not on or always on, you can adjust the two potentiometers on the bottom of the robot to make the LED just turn off. The detection distance is the farthest.
- Procedure phenomenon is no obstacle when the robot straight, encountered obstacles when the robot turns right.
Ultrasonic Ranging
- Open the Ultrasionc_Ranging.py in Thonny IDE, the detected distance will be shown on the shell.
Because the ultrasonic wave will be reflected, the measured distance may be inaccurate when the front side of the obstacle plane is not in front of the ultrasonic wave but forms an angle with the ultrasonic wave.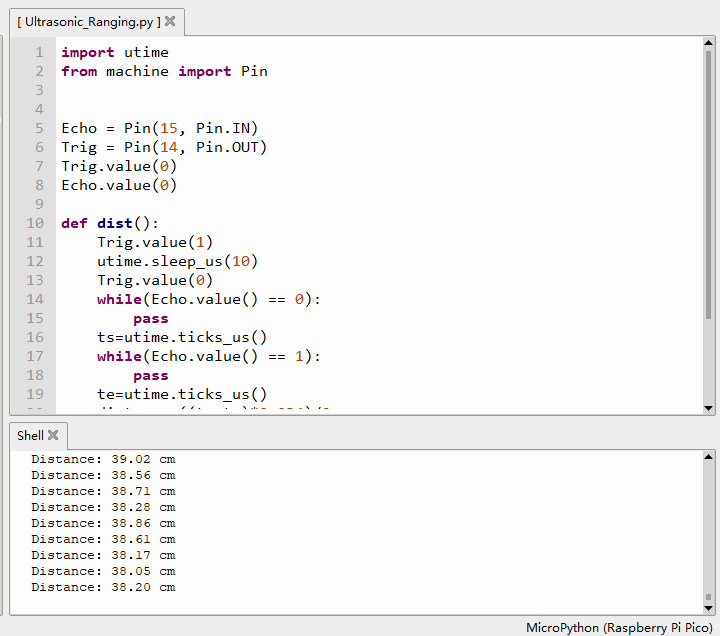
Ultrasonic Obstacle Avoidance
- Open the Ultrasionc-Obstacle-Avoidance.py in Thonny IDE, rename it as main.py, and save it to Raspberry Pi Pico.
- Disconnect the USB cable and run it. Go straight when there is no obstacle, and turn right when there is an obstacle.
Ultrasonic Infrared Obstacle Avoidance
- Open the Ultrasionc-Infrared-Obstacle-Avoidance.py in Thonny IDE, rename it as main.py, and save it to Raspberry Pi Pico.
- Disconnect the USB cable and run it. Go straight when there is no obstacle, and turn right when there is an obstacle.
The combination of ultrasonic and infrared has a better obstacle avoidance effect and a higher success rate.
RGB LED
- Open the WS2812.py in Thonny and run it.
- Four colored LED lights at the bottom of the robot will show red, yellow, green, cyan, blue, purple, and white, and then show the color light effect.
1.14inch LCD
- Open the ST7789.py in Thonny and run it.
- After the demo runs normally, LCD will display the string.
Battery Voltage Detection
- Open the Battery_Voltage.py in Thonny and run it.
- The LCD will display chip temperature, battery voltage, and battery percentage. The percentage of electric quantity is obtained by simple linear conversion of voltage. The actual battery voltage and electric quantity are not linear, so there will be some errors in this percentage.
Ultrasonic Infrared Following
- Open the Ultrasionc-Infrared-follow.py in Thonny, rename it as main.py, and save it to Raspberry Pi Pico.
- Run the program after disconnecting the USB cable, place the object in the sensing range of the robot, and the robot will automatically follow the object to move.
- The following distance of the robot can be set, the default following distance is 5cm, the robot will stop when it is 5cm away from the object, and the robot will continue to run when it is larger than 5cm and smaller than 7cm.
- Turn left and right by infrared.
- When the robot is running, the RGB LED will display the color light effect.
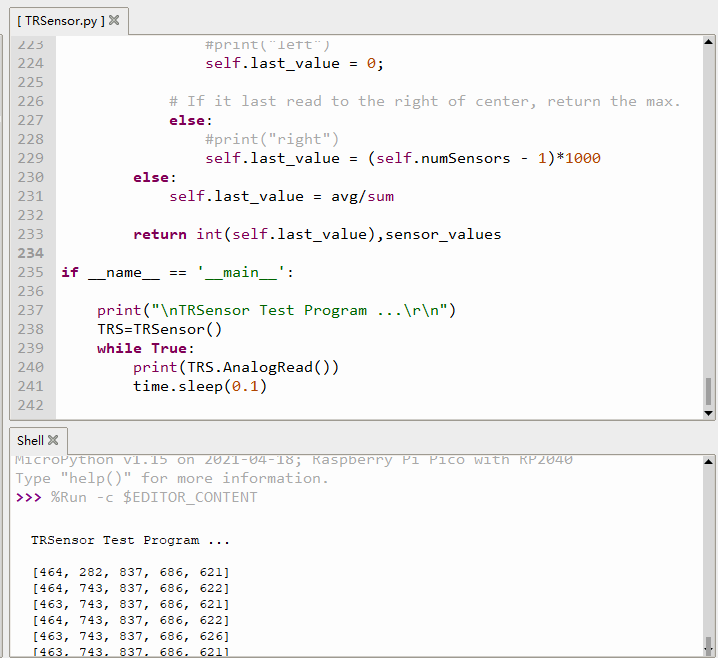
Tracking Sensor Test
- Open the TRsensor.py in Thonny IDE and run it.
- The shell interface will display the values of the five tracking sensors. The data range is 600~900 when the PicoGo is put on the white paper, and the data range is 0~50 when the PicoGo is put in the air.
Infrared Tracking
- Open the Line-Tracking.py file in Thonny IDE, rename it as main.py, and save it to Raspberry Pi Pico.
- The tracking sensor can detect black lines with a white background (or white lines with a black background, need to modify the demo).
- The tracking field can be made by sticking black tape in the white KT board. The width of the black track is 15mm. If the background color is too dark, the tracking effect will be affected.
- After disconnecting the USB cable, running the demo, and putting the robot in the black line, the robot will rotate left and right, this is the robot calibration stage. The operation error in the calibration phase will directly affect the tracking effect.
Infrared Tracking-Integrated
- Open the Line-Tracking2.py in Thonny IDE, rename it as main.py, and save it to Raspberry Pi Pico.
- After disconnecting the USB cable, running the program, and putting the robot in the black line, the robot will rotate left and right to calibrate. After calibration, it will run along the black line.
- When there is an obstacle in front of the robot, the robot will stop and the buzzer will sound. After the obstacle is cleared, the robot will continue to run. Lift the robot and the motors will stop. Place the robot in the black line, and it will continue to run.
- During the calibration stage of the robot, the four RGBs display red, green, blue and yellow respectively. The RGB LED will display the color light effect when tracking is running.
Bluetooth Remote Control
- Open the bluetooth.py in the Thonny IDE, rename it as main.py, and save it to Raspberry Pi Pico.
- The PicoGo APP is installed on the mobile phone, and it only supports Android system.
- Start the APP, select Bluetooth control, and click "Search" in the upper right corner. After about a few seconds, the corresponding Bluetooth device will be displayed in the list normally.
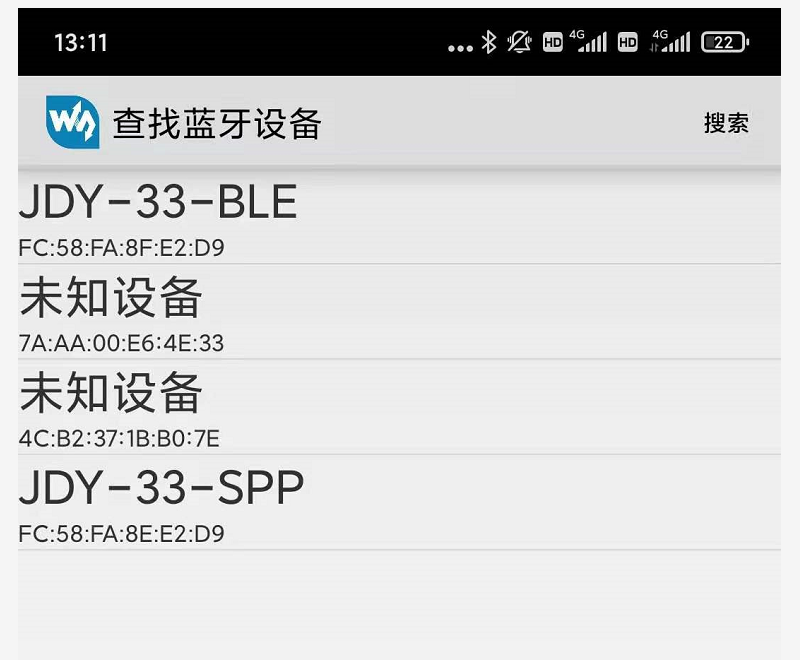
- Select "JDY-33-SPP" device. *If you select "JDY-33-BLE" device, the connection to the device will fail. Go to the next page and select “Remote Control".
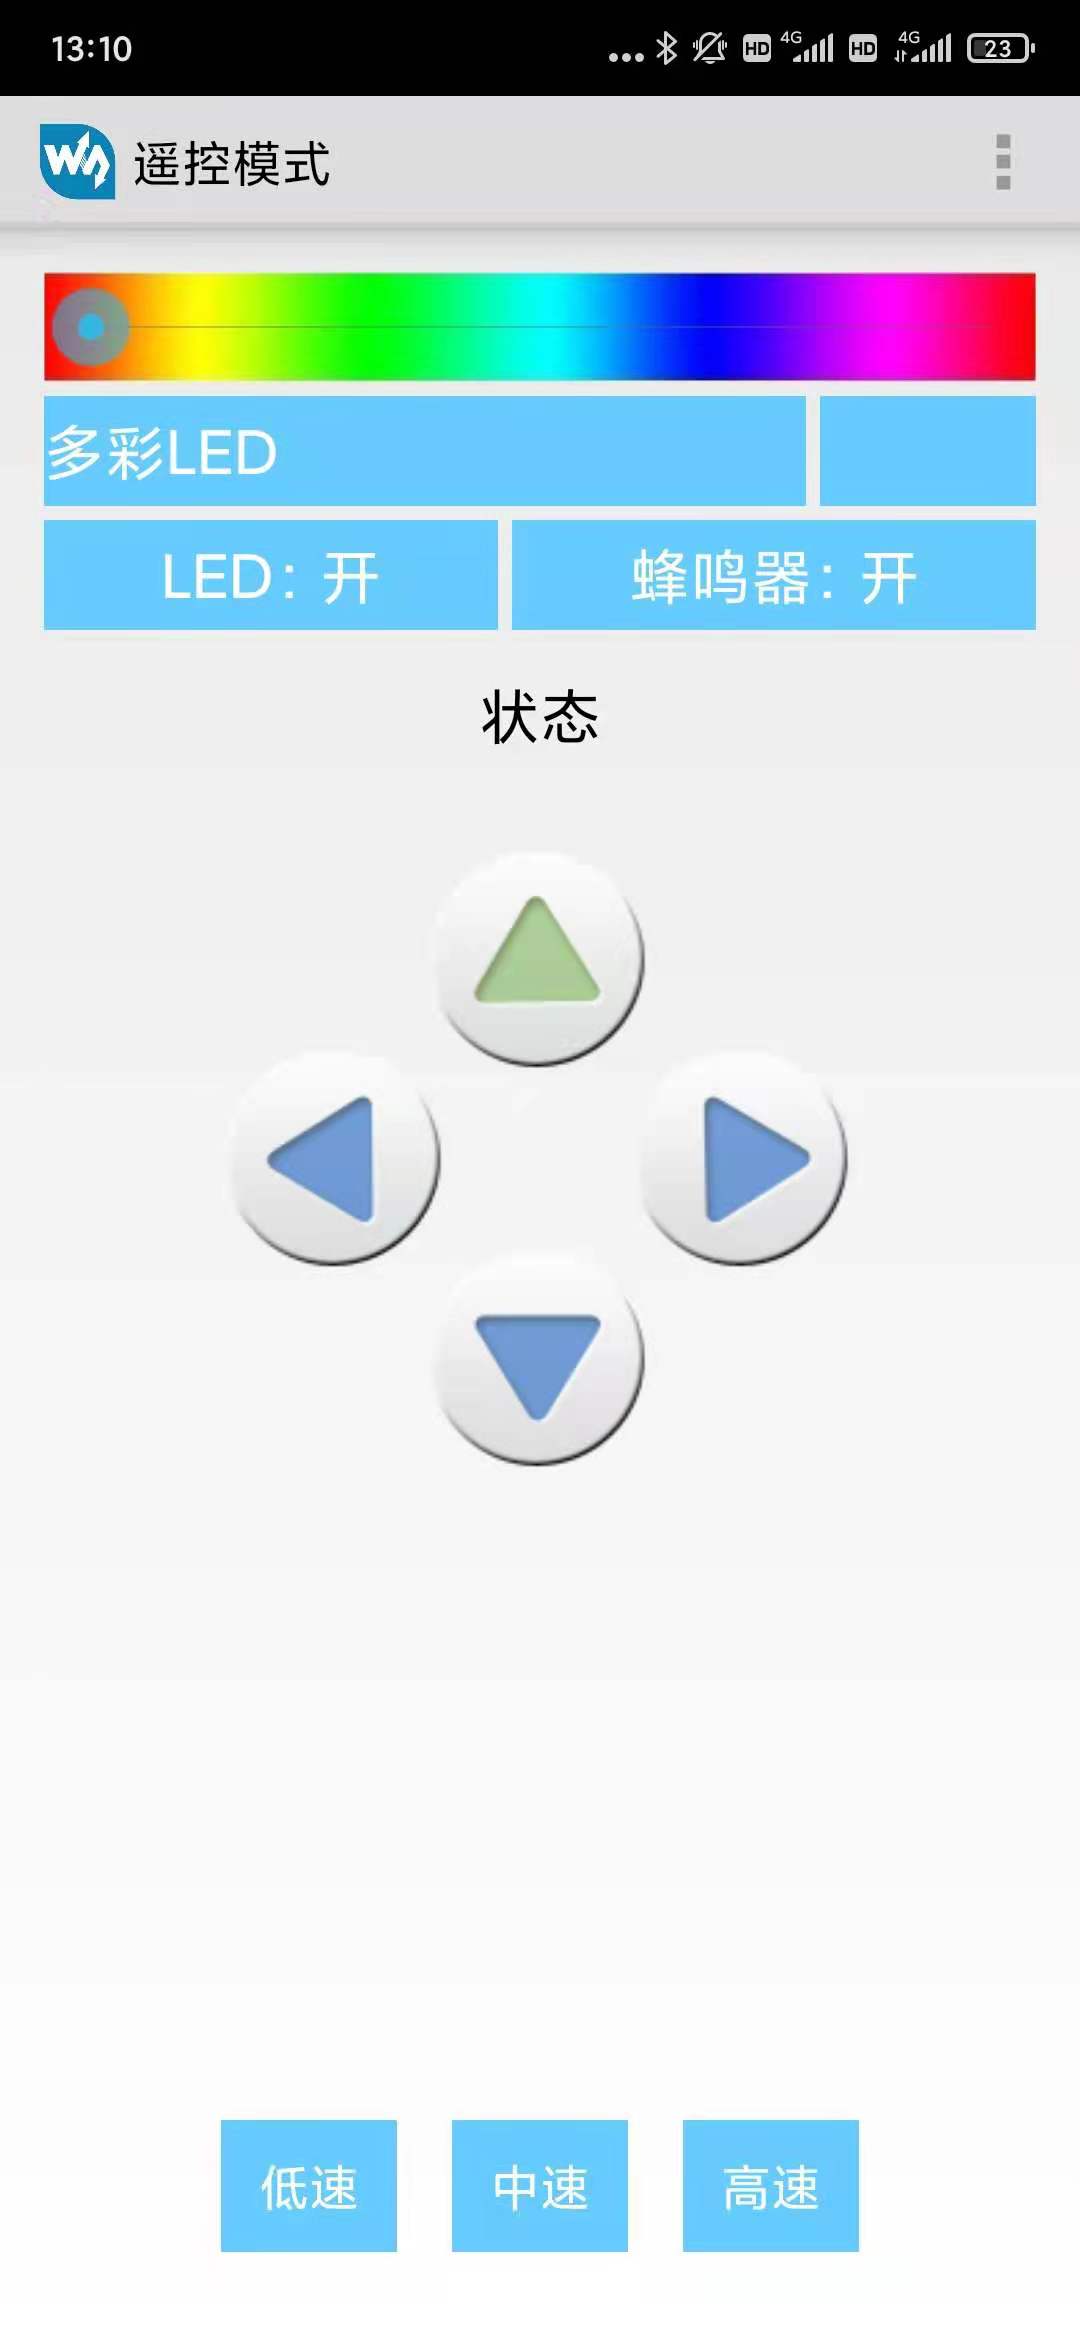
- Press the button to remotely control the mobile robot, and at the same time you can also control the buzzer to ring, and RGB LED to display different colors
Resources
From September 2022, the V2 version will be shipped as the original ADC chip is out of stock.
The ADC chips are different in the V1 and V2 versions, the tracking demos are not compatible, but the function effects are the same.
Documents
Demo
Related Softwares
Datasheets
Related Tutorial
FAQ
Question: What kinds of batteries are recommended for Picogo?
Support
Monday-Friday (9:30-6:30) Saturday (9:30-5:30)
Email: services01@spotpear.com
[Tutorial Navigation]
- Overview
- Precautions
- MicroPython Demo
- Motor Test
- Infrared Remote Control
- Infrared Obstacle Avoidance
- Ultrasonic Ranging
- Ultrasonic Obstacle Avoidance
- Ultrasonic Infrared Obstacle Avoidance
- RGB LED
- 1.14inch LCD
- Battery Voltage Detection
- Ultrasonic Infrared Following
- Tracking Sensor Test
- Infrared Tracking
- Infrared Tracking-Integrated
- Bluetooth Remote Control
- Resources
- FAQ
- Support