


- sales/support
Google Chat:---
- sales
+86-0755-88291180
- sales01
sales@spotpear.com
- sales02
dragon_manager@163.com
- support
tech-support@spotpear.com
- CEO-Complaints
zhoujie@spotpear.com
- Only Tech-Support
WhatsApp:13246739196
- Purchase/Shipping/Refund
WhatsApp:13424403025
- HOME
- >
- ARTICLES
- >
- Common Moudle
- >
- ESP
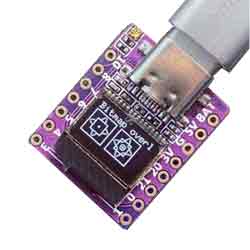
ESP32 C3 0.42LCD WIFI
1. Open the arduino IDE
2. Select Chip
2.1. Click on tools
2.2. Click on board
2.3. Click on esp32 and select esp32-c3
3.Substitution code burning
#include<WiFi.h>
voidsetup()
{
WiFi.softAP("ESP32_AP_TEST");
}
voidloop()
{
}
3.1. Copy the code into the Arduino IDE
3.2. Use a type-c cable to connect the computer to the ESP 32-c3 development board. After successful connection, the serial port will be displayed in the computer management window
3.3Click on Tools in the Arduino IDE, then click on Port and select the serial port Adafruit QT ESP32-C3
3.4Click on Verify
3.5.Click on upload
3.6 The test results are as follows
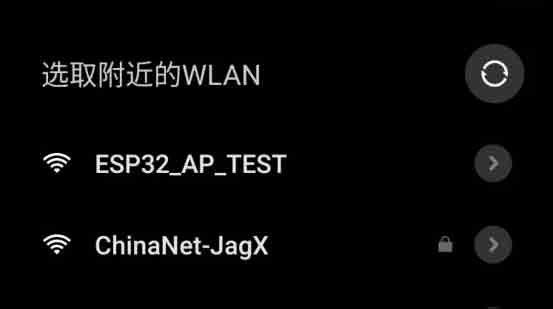
TAG:
Raspberry Pi 5 AI kit Hailo8 26Tops PCIe to M.2 NVMe HAT Plus For Pi5
NVIDIA-acess User Guide
LuckFox
Jetson Nano Case
USB TO M.2 Key B 5G DONGLE For SIM8202/SIM8262/RM520/RM530
Industrial ESP32-S3 Relay 8-Channel 8-Ch ESP32-WROOM IOT WiFi Bluetooth HAT For Arduino
Raspberry Pi USB Camera 2MP OV2735 Distortion-Free USB 2.0 For Jeston RDK
Cyberpunk LED Matrix Hourglass Gravity Sensor DIY Countdown Timer Clock STEM Educational Soldering Project for Beginners & Adult
GC9107
ESP32 S3 LCD 1.3 inch Holographic Display Screen 1.3inch 3D Transparent Refractive Prism Mini TV For Arduino
Jetson-nano-to-boot-the-system User Guide
ESP32 S3 Development Board 1.46 inch Round LCD 1.46inch Display 412x412 QMI8658 Sensor / MIC / SD /MP3 Audio /Battery Port LVGL/HMI For Arduino
Sensor
2.13inch e Paper HAT+ Black-White 250x122 E-Ink For Raspberry Pi /Jetson Nano /Sunrise X3 Pi /Pwnago
Jetson Orin Case
3D Display Transparent Screen
Raspberry Pi 8.8 inch DSI MIPI LCD TouchScreen Display 8.8inch 480x1920 For Luckfox Lyra RK3506/ESP32-P4/Luckfox Omni3576
XIAO RA4M1 Tiny SuperMini Board For Arduino Uno IDE For SeeedStudio R7FA4M1
Power
Jetson
TAG:
High Precision 360&deg;Metal Servo Motor 45KG.CM 24V RS485 Closed-Loop Feedback Real-Time Protection
Raspber Pi 5 PD Power
ESP32 P4 Development Board 7 inch LCD Capacitive Touch Screen 7inch Display ESP32-C6 1024×600
Raspberry Pi 5 PCIe to NVMe
Raspberry Pi MIPI
ESP32-S3 1.28inch Round LCD
ISX031 GMSL Camera H100 H190 Image Sensor IP67 protection rating For Jetson Orin And MAX96717 GMSL camera
Raspberry Pi RP2040 Long-Rang
ESP32-S3 AI E-Paper Ink Screen 7.3-inch E6 Full-Color Electronic PhotoPainter Frame Deepseek
ESP32 Thermal imaging
Raspberry Pi 5
Raspberry Pi 5
Milk-V RJ45
Raspberry Pi 5
Core2021 LoRa LR2021 HF LF SPI LoRaWAN For Sub-GHz and 2.4GHz
Jetson Nano
ESP32-S3 AI RLCD Total Reflection Screen 4.2 inch Development Board Deepseek
ESP32 RJ45
Flipper Zero Ethernet
Raspberry Pi 5 PD Induction