- sales/support
Google Chat:---
- sales
+86-0755-88291180
- sales01
sales@spotpear.com
- sales02
dragon_manager@163.com
- support
tech-support@spotpear.com
- CEO-Complaints
zhoujie@spotpear.com
- sales/support
WhatsApp:13246739196
WAVEGO-Development Environment Configuration
Development Environment Setup
Introduction
- This chapter mainly introduces the development environment setup for WAVEGO on the Arduino IDE. By studying this chapter, you can begin your development journey for the WAVEGO slave ESP32.
Install Arduino IDE
- First, go to Arduino official website to download the installation package of the Arduino IDE.
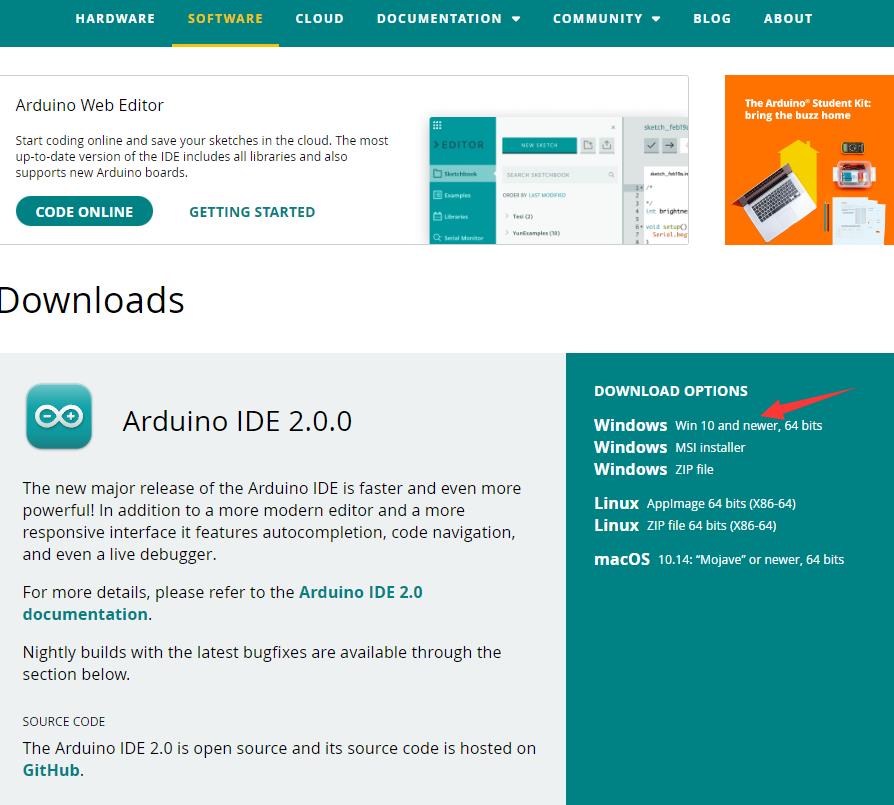
- Once the download is complete, click Install.
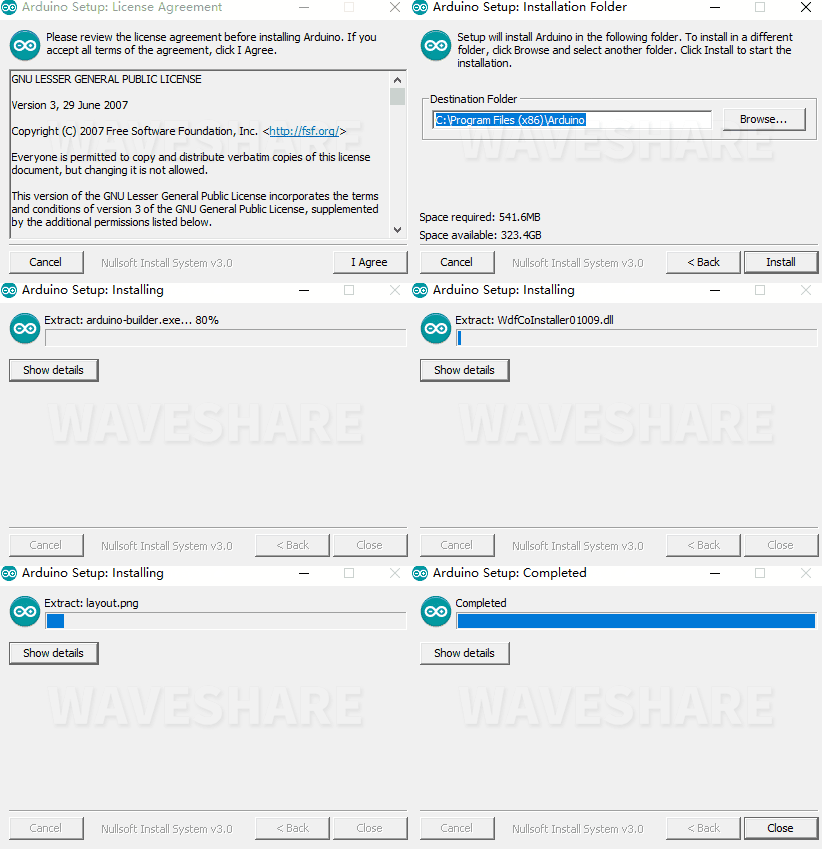
Notice: During the installation process, it will prompt you to install the driver, just click Install
Arduino IDE Interface
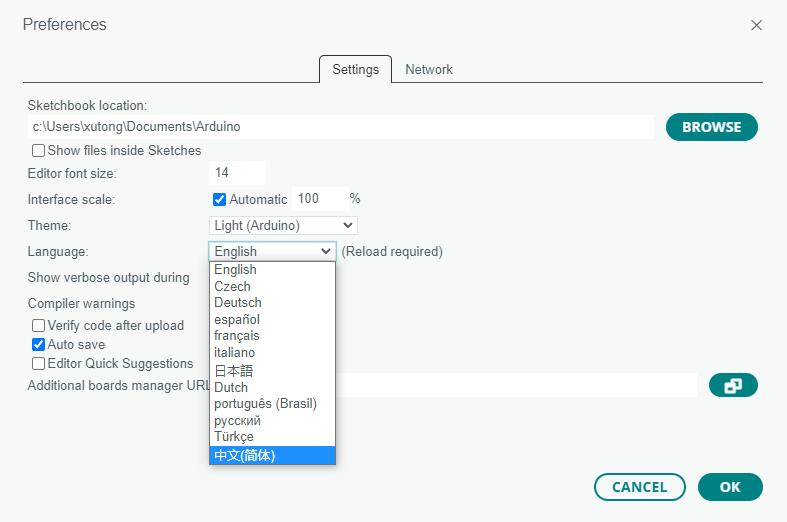
- After the first installation, when you open the Arduino IDE, it will be in English. You can switch to other languages in File --> Preferences, or continue using the English interface.
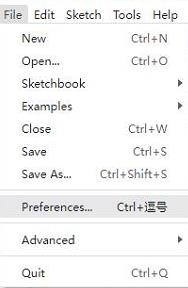
- In the Language field, select the language you want to switch to, and click OK.
Installing ESP32 Plugin in Arduino IDE
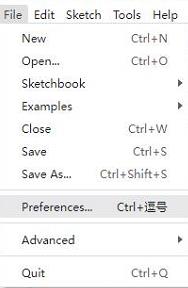
- Open the Arduino IDE, click on the file in the top left corner, and select Preferences
- Add the following link to the attached board manager URL, and then click OK
https://dl.espressif.com/dl/package_esp32_index.json
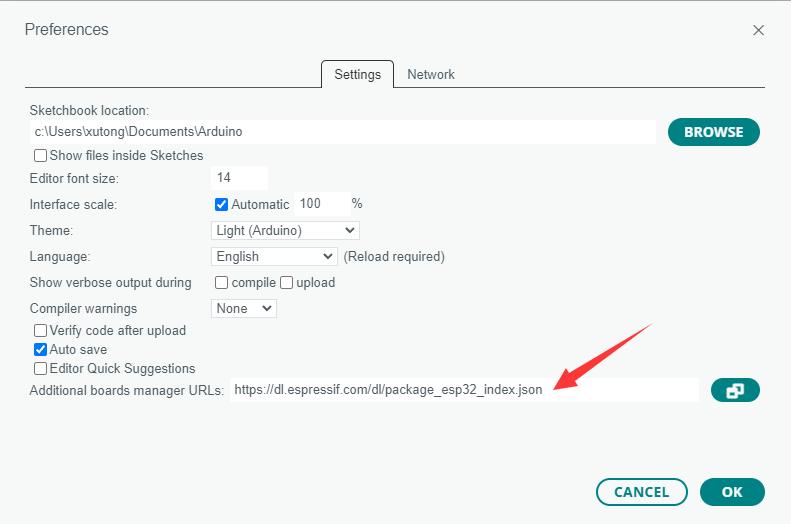
Note: If you already have an ESP32 board URL, you can use a comma to separate the URLs as follows:https://dl.espressif.com/dl/package_esp32_index.json,http://arduino.esp8266.com/stable/package_esp8266com_index.json
- Download packages package, and copy the extracted packages folder to the following path
C:\Users\xutong\AppData\Local\Arduino15
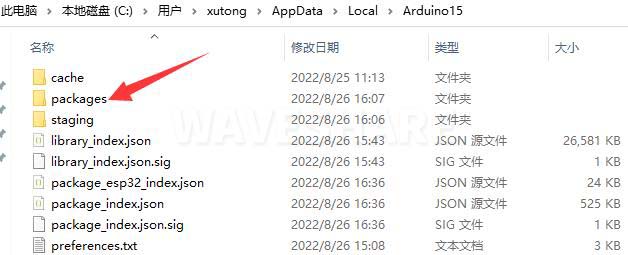
Note: Replace the username: xutong with your own username
Install Dependency Libraries
- Download and extract the Libraries dependency library. Open the default Arduino installation location C:\Users\xutong\AppData\Local\Arduino15\libraries (based on your actual location), and then copy these folders to Libraries
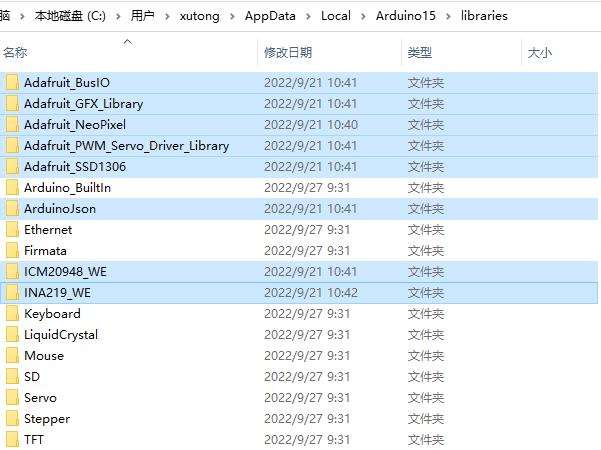
Upload Demo
- Download WAVEGO open-source demo (Arduino), double-click Arduino\WAVEGO\WAVEGO.ino

- Click Tools --> Port, remember the existing COM, do not click this COM (the COM displayed is different on different computers, remember the COM on your own computer)
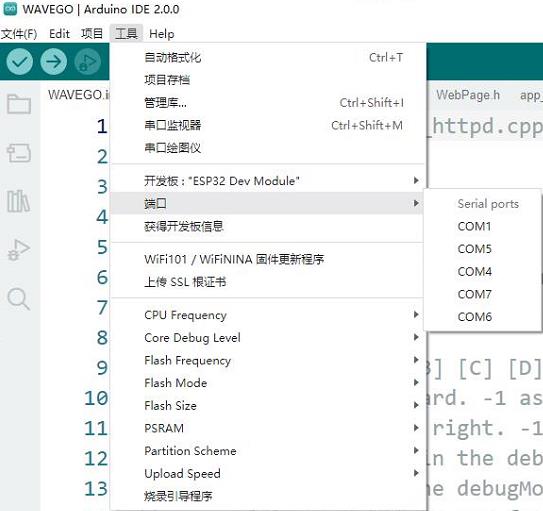
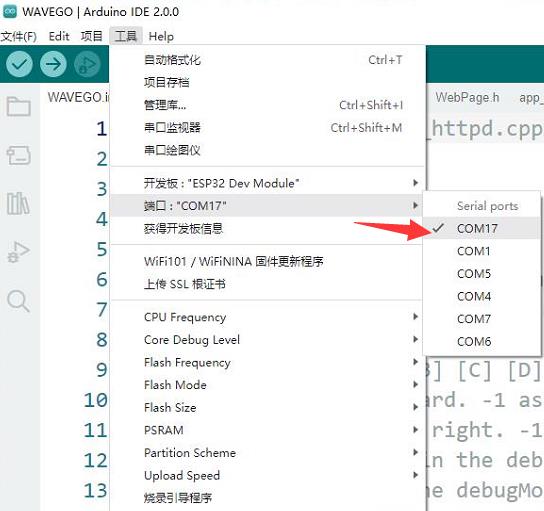
- Connect the driver board to the computer using a USB cable. Then, go to Tools > Port, and click the newly appeared COM
- Click Tools > Development Board > ESP32 Arduino > ESP32 Dev Module
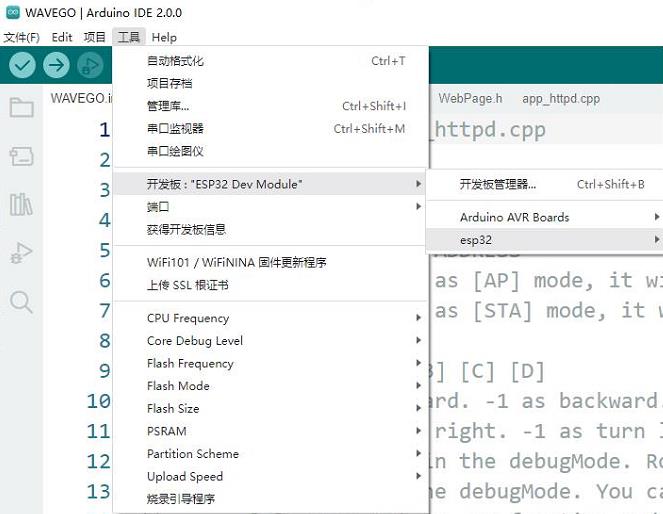
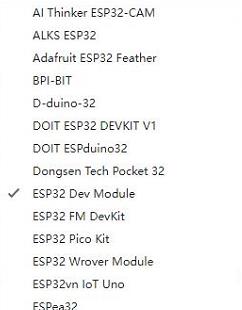
- Click Tools, and the other settings are as follows (it is best to set Partition Scheme as Huge APP, and PSRAM must be set to Enabled, otherwise the camera will flash black):
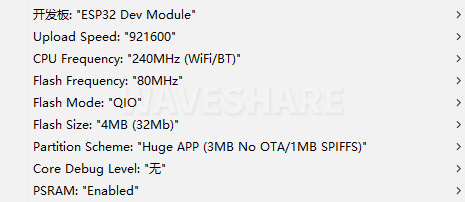
- Once all settings are configured, click "Upload" to upload the demo to the device

- If issues arise during this period, and if you need to reinstall or update the Arduino IDE version, it is necessary to uninstall the Arduino IDE completely. After uninstalling the software, you need to manually delete all contents within the C:\Users\[name]\AppData\Local\Arduino15 folder (you need to show hidden files to see this folder). Then, proceed with a fresh installation.
All Tutorials
- WAVEGO-Development Environment Configuration
- WAVEGO-GPIO Control
- WAVEGO-WAS2812 RGB_LED
- WAVEGO-PCA9685 Servo Control
Resources
Robot Diagram
Open Source Resources
Raspberry Pi Learning Resources
TAG:
Milk-V Duo User Guide
RP2040-PiZero
Raspberry Pi Pico 10.1inch DVI LCD
USB-CAN-B
Raspberry Pi 5
Arduino Thermal imaging
Raspberry Pi 5 POE + PCIe to M.2 NVMe SSD Board HAT+ Pi5 2242/2230 Power over Ethernet
LuckFox SC3336
USB TO RS485
X1011 Raspberry Pi 5 PCIe to M.2 NVMe 4-Ports SSD Board HAT Pi5 Four-Times 2280
UART
Raspberry Pi 0.96inch OLED
Raspberry Pi Pico 2 RP2350 0.85 inch LCD Display mini Development Board 0.85inch Screen RGB LED/SD Slot /QMI8658 Gyroscope Sensor
Milk-V Duo S WIFI Configuration
Raspberry Pi
Raspberry Pi 1.5inch LCD
Information
Sensor
Raspberry Pi 5 PD Induction
ESP32 Display
TAG:
Industrial RS485 Modbus RTU Relay
ESP32-S3R2
Horizon Sunrise RDK X5 Dedicated Heat Dissipation Shell Aluminum Alloy Material Cooling Fan Camera Mount
Raspberry Pi 13.3 inch FHD AMOLED Capacitive TouchScreen Display Type-C HDMI Computer PC
Raspberry Pi 5 8mp Camera
Raspberry Pi Pico 2 RP2350 Zero
TTL To CAN
Finger Vein Scanner Module (B) Cortex M4F UART serial port EAL4+ security certification qualification
LuckFox
Industrial Isolated USB TO 4CH RS485 BConverter UART CH344L
Raspberry Pi 5 PCIe to SSD
USB To CAN FD Bus Data Analyzer Bus Communication
ESP32-S3 Development Board 1.47 inch LCD 1.47B Display 1.47inch Screen SD 172×320 RGB LED
Jetson 64MP Camera
Round screen
DDSM400 Servo Motor All-In-One Hub LIN Bus
SpeedyBee F405 V4 BLS 60A FC ESC Stack Flight Controller DJI FPV Drone
Raspberry Pi 5 Heatsink
Raspberry Pi 0.85inch LCD
Milk-V Duo RJ45


