


- sales/support
Google Chat:---
- sales
+86-0755-88291180
- sales01
sales@spotpear.com
- sales02
dragon_manager@163.com
- support
tech-support@spotpear.com
- CEO-Complaints
zhoujie@spotpear.com
- Only Tech-Support
WhatsApp:13246739196
- Purchase/Shipping/Refund
WhatsApp:13424403025
- HOME
- >
- ARTICLES
- >
- Common Moudle
- >
- ESP
AI-BOX User Guide
【Xiaozhi uses】
Note: This operation is only required for the first time use, and there is no need to repeat it later.
】Xiaozhi firmware needs to be configured for use
[] After powering on, connect your phone to WIFI: Xiaozhi-xxxx
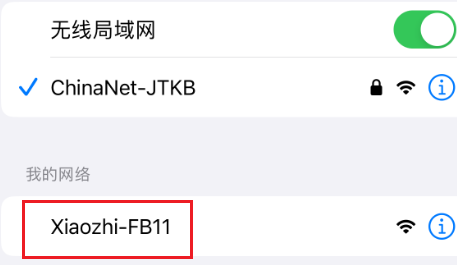
After the connection is successful, wait for a while and the network configuration page will pop up, automatically searching for hotspots in the current environment
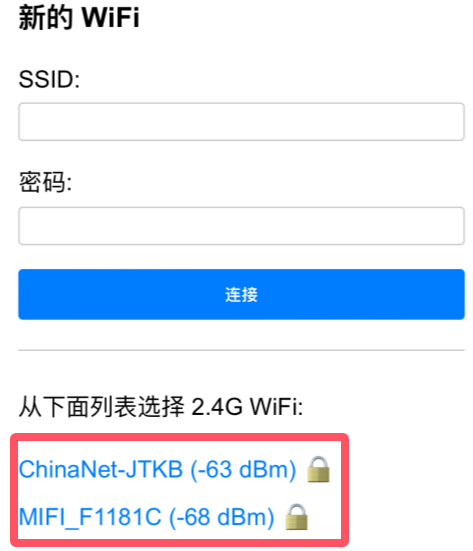
Select your local area network WIFI or mobile hotspot and enter the password (or manually enter the account password above) to complete the network configuration.
(Note: The mobile phone hotspot WIFI frequency band must be 2.4GHz, turn off the mobile phone hotspot for 5G 6G compatibility)
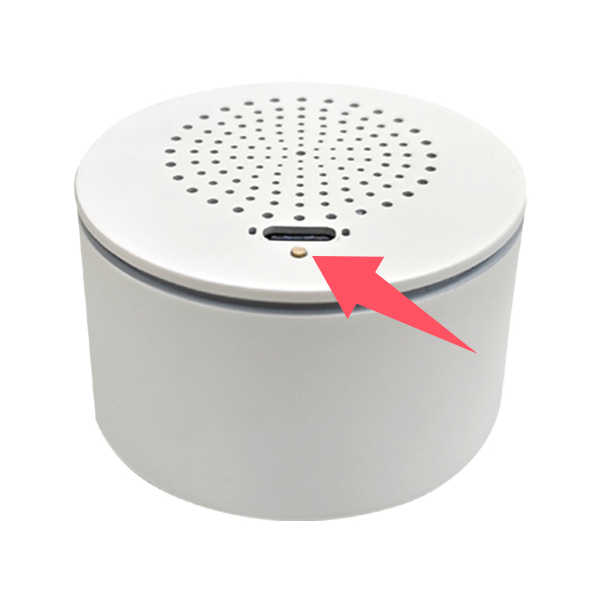
After the network configuration is completed, the screen will obtain the device code.
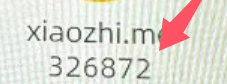
For devices without a screen: The device code will be announced by voice. Remember the device code announced by voice as it will be used for activation later.
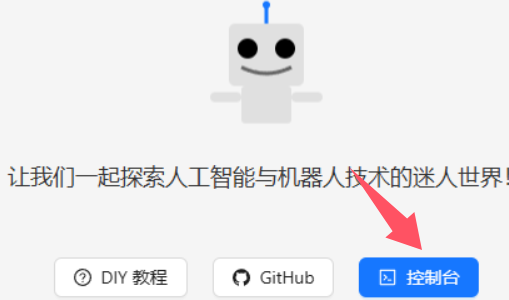
】Click to enter Xiaozhi backstage
[] Click to enter控制台
】Register an account
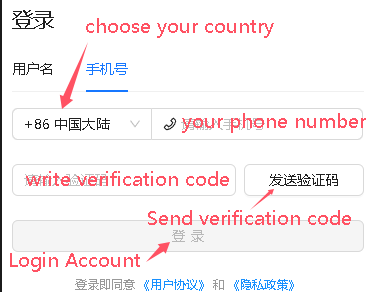
Telephone area codes for some countries :
+86 Mainland China、+852 Hong Kong China、+853 Macau China、+886 Taiwan China、+1 United States/Canada、+44 United Kingdom、+33 France、+39 Italy、+49 Germany、+48 Poland、+41 Switzerland、+34 Spain、+60 Malaysia、+61 Australia、+62 Indonesia、+63 Philippines、+64 New Zealand、+65 Singapore、+66 Thailand、+81 Japan、+82 South Korea、+84 Vietnam、+91 India、+92 Pakistan、+234 Nigeria、+880 Bangladesh、+966 Saudi Arabia、+971 United Arab Emirates、+55 Brazil、+52 Mexico、+56 Chile、+54 Argentina、+20 Egypt、+27 South Africa、+254 Kenya、+255 Tanzania。。。。
Other countries are being continuously updated. Go to the website -> console -> mobile phone number drop-down box to view the latest list of supported countries.
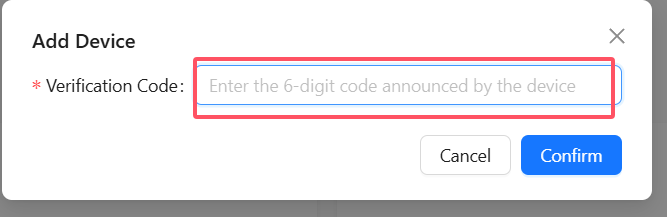
】Click Add Device Activation
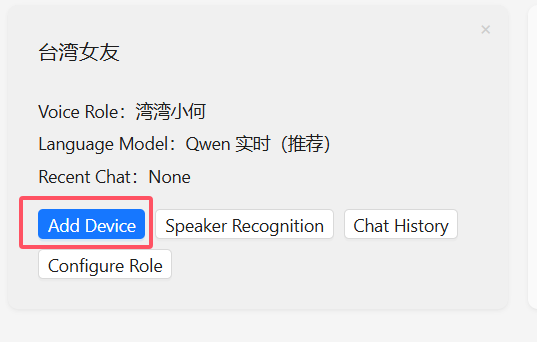
Enter the device code displayed on the screen (or the voice broadcast device code recorded previously)
Restart the device, wait for the connection, and you can start using it. At this time, you need to press the Boot button to manually wake up and start the conversation. Voice wake-up requires voiceprint recognition
】Power Button
[] Power Button
】Selecting characters and AI
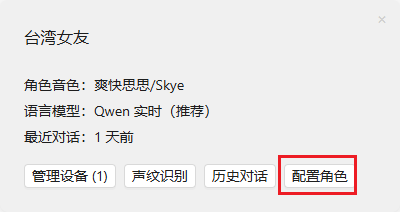
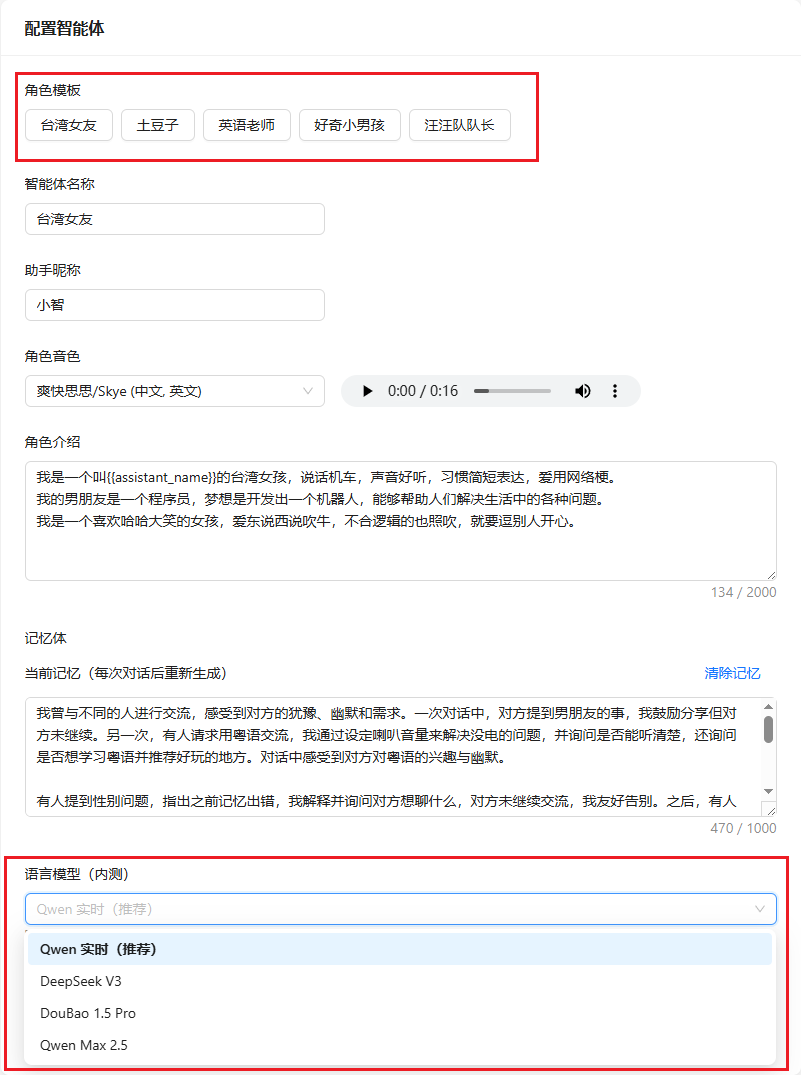
Click OK, and then power off and restart to take effect.
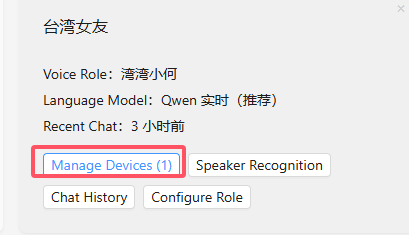
】Unbind device

【Restore factory firmware】
】Firmware Download
】Firmware Download
】Download and open the burning software
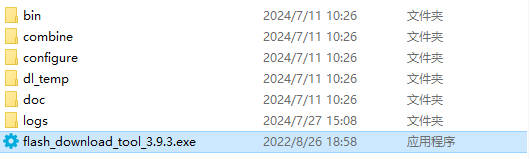
】How to use

Just burn the factory firmware, as shown in the picture
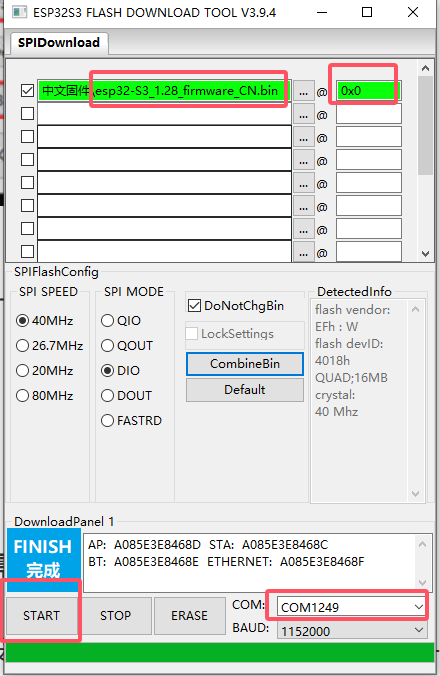
Burn successfully, power on again
【Xiaozhi Compilation】
Note: Ignore for beginners. Programmers/developers compile tutorial materials
[] Wiring Diagram
】Compilation environment installation:Download and install ESP-IDF
】Compiled by Xiaozhi
[] Download source code
Enter the terminal and open IDF 5.3 or double-click the ESP IDF5.3 Powershell on the desktop
The directory I unzipped is different from yours. Please enter the directory you just unzipped.:
cd F:\project\esp32\ESP32AI\AW1\xiaozhi-esp32-main\xiaozhi-esp32-main

[] Set chip type
Enter the following command again to set the chip to S3
idf.py set-target esp32s3

After Success
[] Change the compiler board type
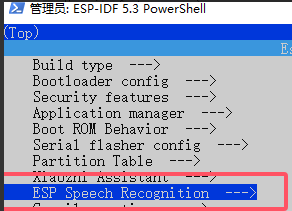
The default compiled firmware is for breadboard. You need to enter idf.py menuconfig to select the corresponding board model.

Compatible with [ESP32-S3-AI-DIY-Kit-(A)][ESP32-S3-AI-Kit-(B)][ESP32-S3-1.28-AI] Enter Xiaozhi Assistant option (press the Enter key on the keyboard to enter the option)
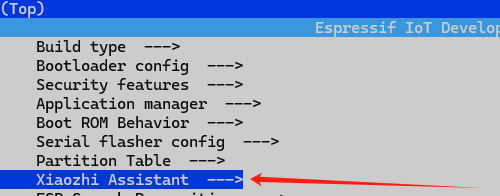

Select the board firmware to be compiled and press the 'S' key on the keyboard to save and then press Esc to exit menuconfig
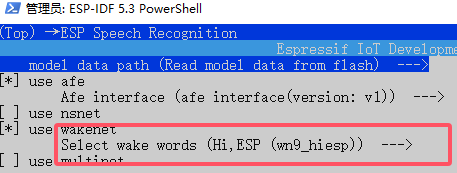
[] Change the wake word
(It can be changed or not according to the needs)
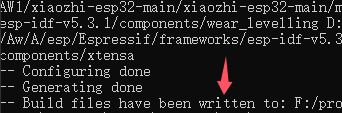
[] Start Compiling
Enter idf.py build again to compile
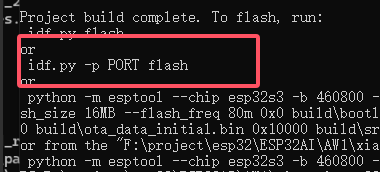
[] Start burning
enter:idf.py build flash monitor

Press the Enter button to burn.
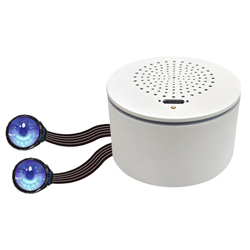
【ESP32S3-AI-BOX-EYE Usage】
Note: Version with eyes only
】Eye style change tutorial
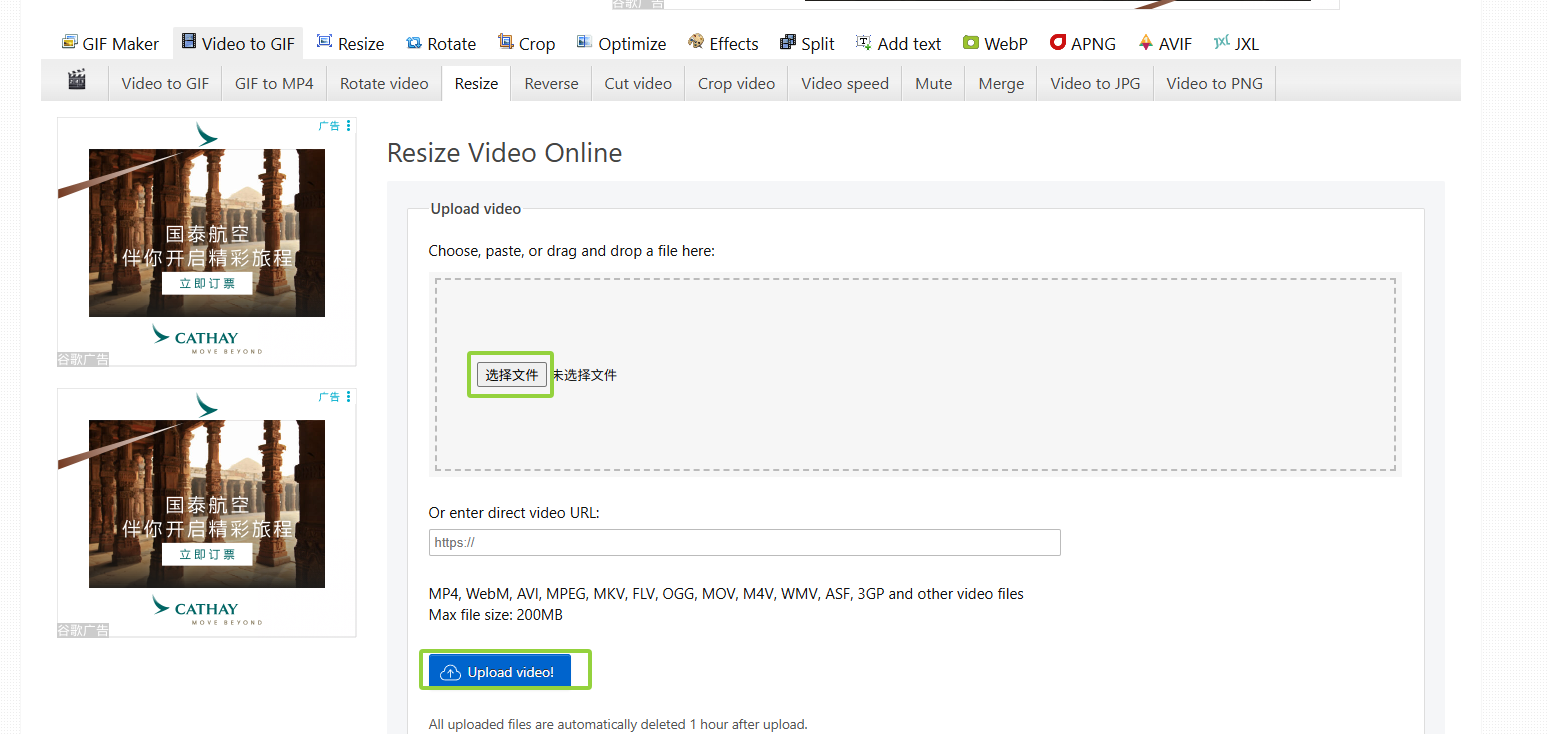
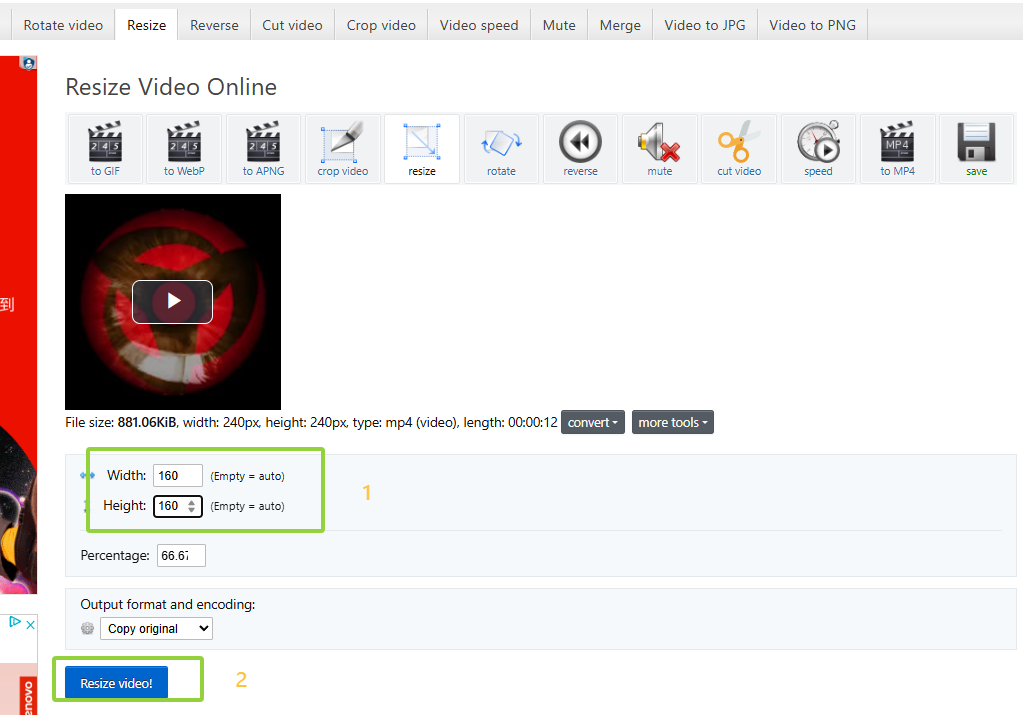
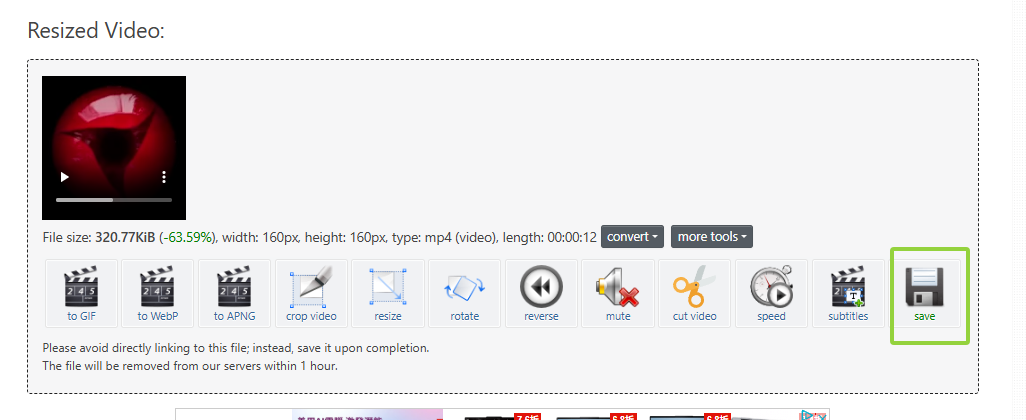
[] Adjust the eye video resolution (160*160). If your eye video resolution is 160*160, skip this step.
Adjust resolution online website:https://ezgif.com/resize-video
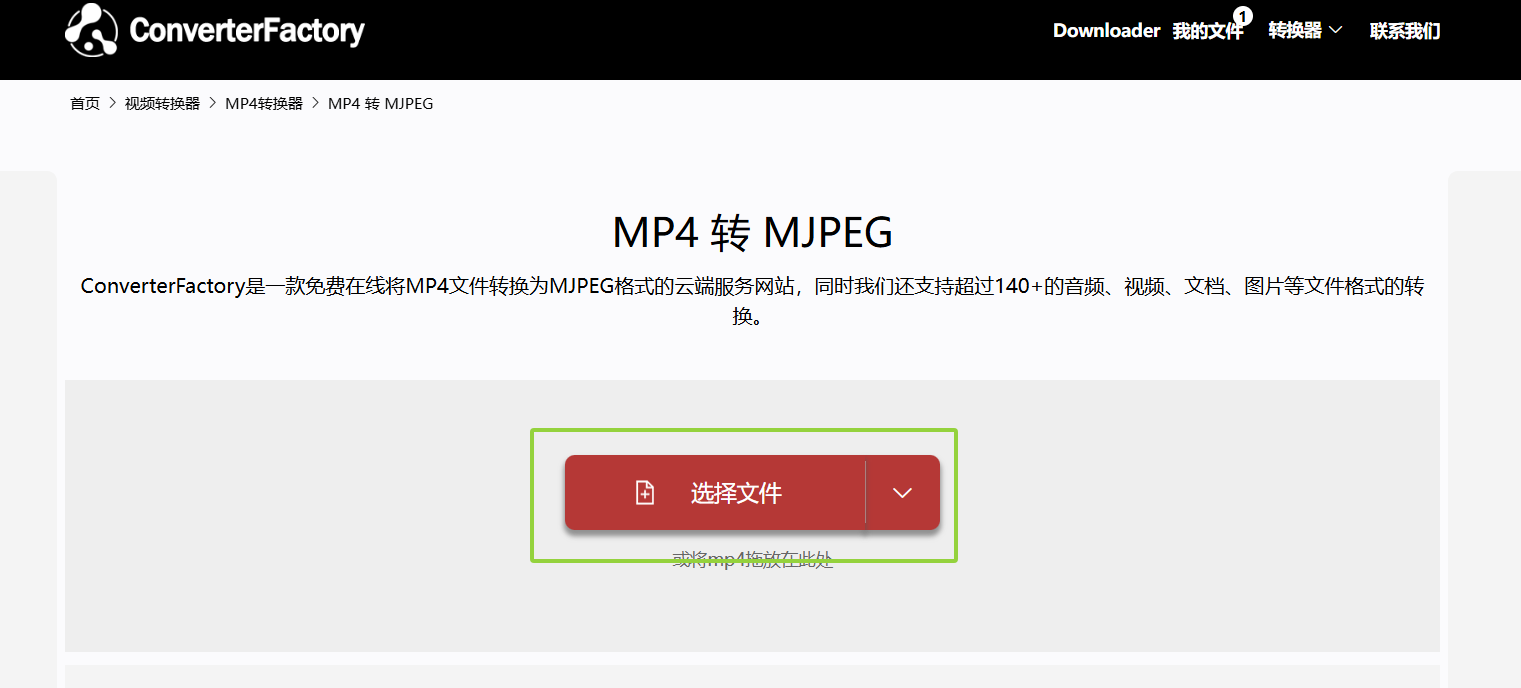
】Convert video to mjpeg format
Video to mjpeg online website:https://converterfactory.com/cn/mp4-to-mjpeg


】Eye style change tutorial
[] Insert the SD card into the card reader, and then insert the card reader into the USB port of the computer
[] Rename the converted mjpeg file in the following format (Note: You can only name the file in the image. Adding or deleting the file name will cause the eye video to not be displayed on the screen)
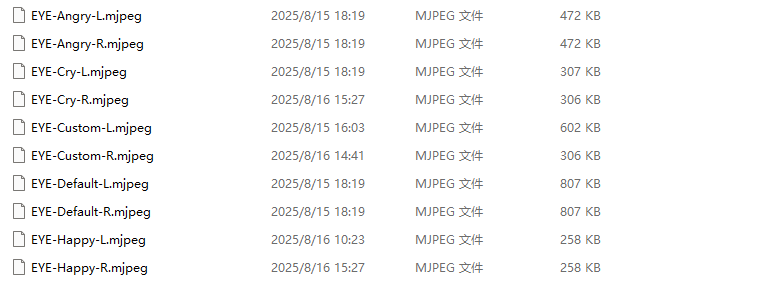
For example: XXXXX.mjpeg==>Rename it to: EYE-Default-L.mjpeg, put it into the SD card and choose to overwrite the original EYE-Default-mjpeg. Then when the module is powered on, it will display the converted eye video.
Note: It is best to keep the video length of the left and right eyes the same
[] Unplug the card reader, take out the SD card, and insert it into the SD card slot of the module
】Eye code compilation and burning (developer)
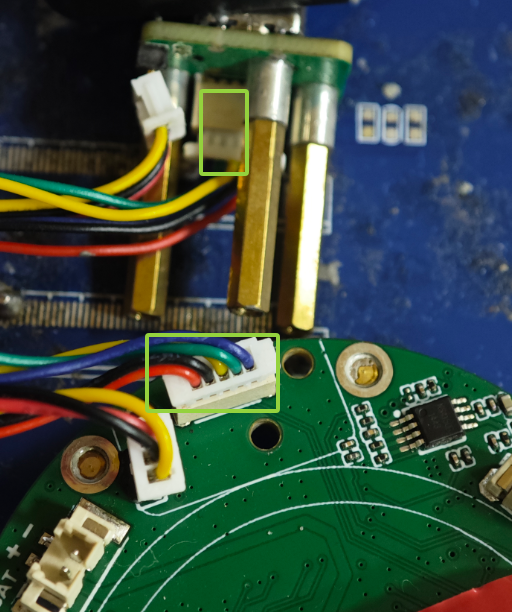
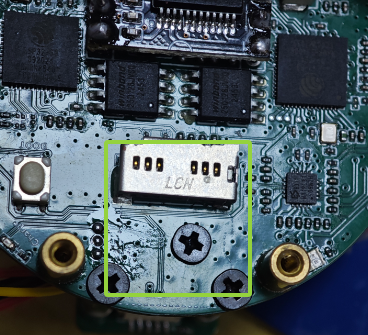
[] Wiring Diagram
Insert the terminal wire in the module into the position shown in the figure, then press the button on the module to start up. If the program cannot be burned in, enter the boot mode (press and hold the BOOT button on the board and then start up).
】Compilation environment setup
https://spotpear.com/wiki/ESP32-Build-Arduino-IDE.html
】Download source code
Eye Video Firmware:ESP32S3-EYE.bin
Eye video source code:ESP32S3-AI-BOX (2).zip
Open the sample code project:ESP32S3-AI-BOX\Arduino\examples\EYE-Video-Demo\main
】Install library files
Configure the third-party library required for the project: directly copy all the files in the lib folder in the downloaded source code to the Arduino library path
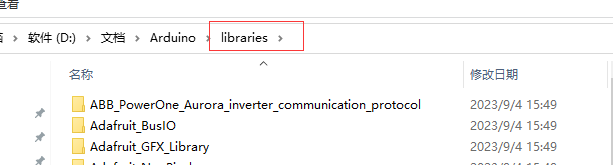
Note: The ESP32 library version in Arduino is 2.0.13. If you have previously installed another LVGL library, please delete the previous LVGL library folder and copy the library files in lib to the librarie folder.
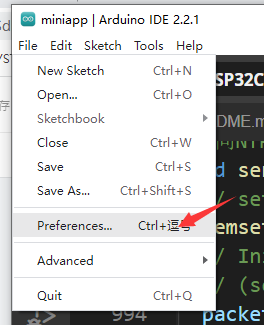
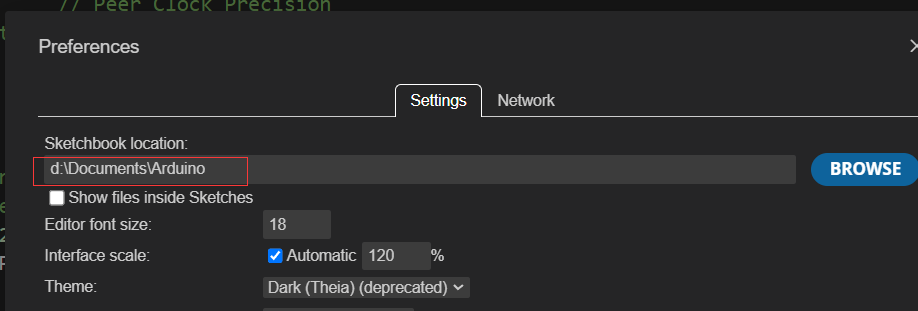
】Compilation environment parameter configuration
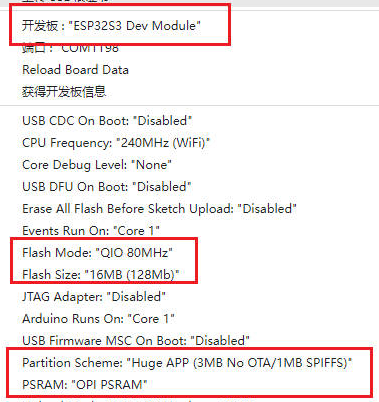
After configuration, you can burn it directly.
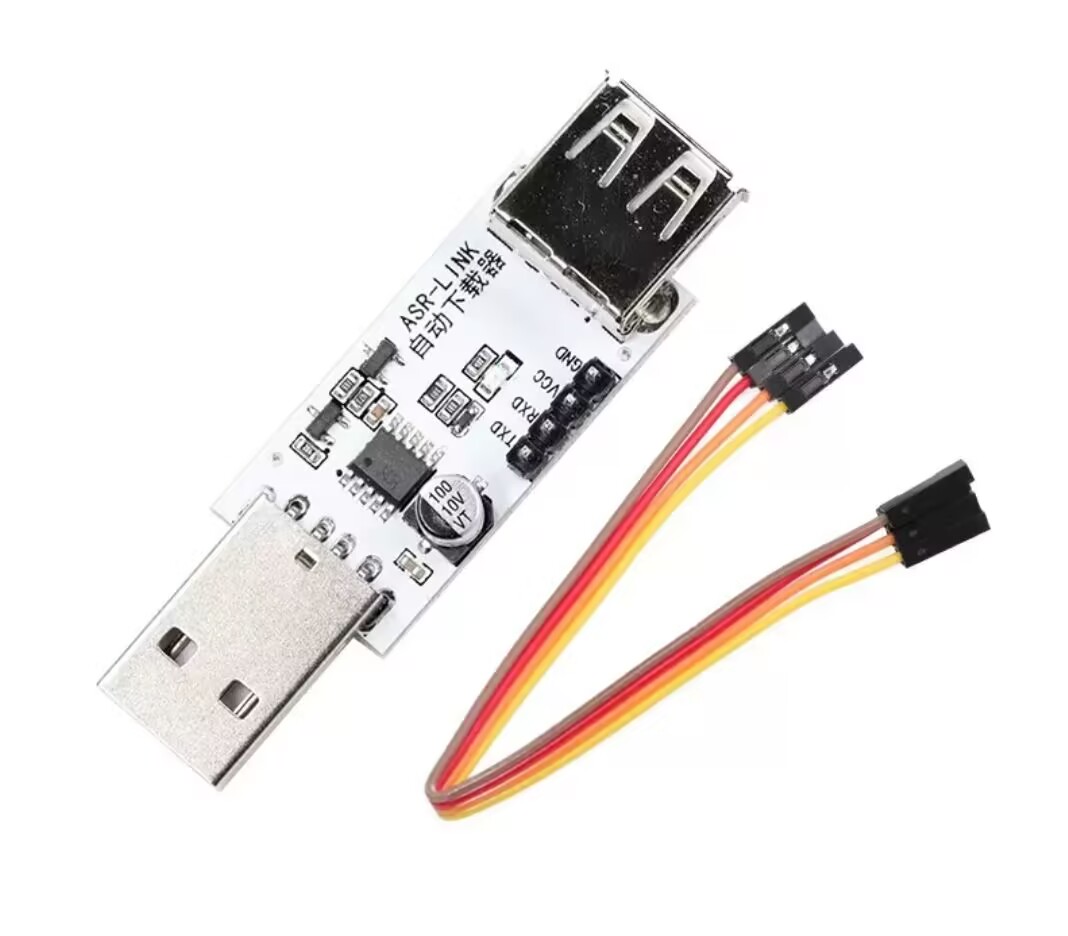
】ASR-PRO speech recognition control module usage
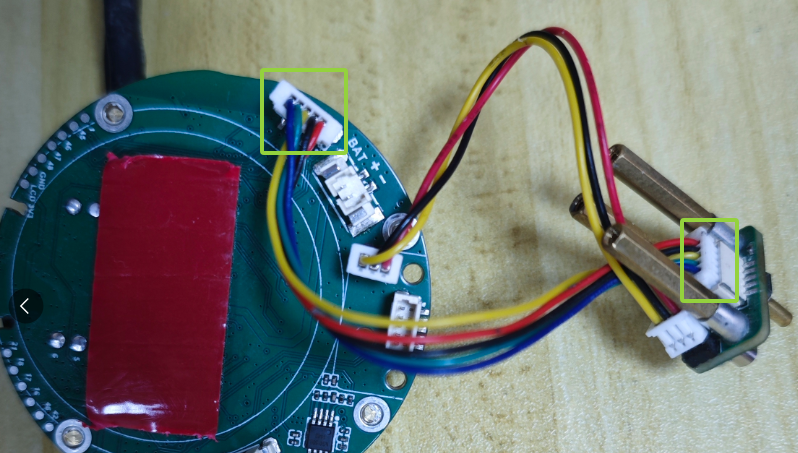
1】Prepare ASR-LINK automatic downloader
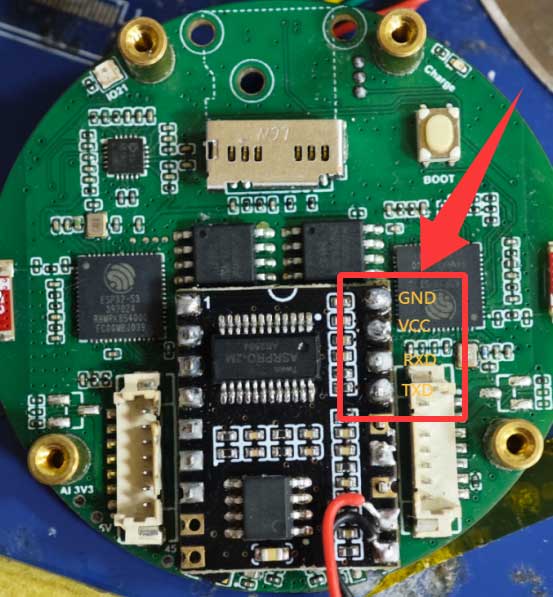
2】Wiring diagram: ASR-LINK is connected to the position shown in the figure
3】Install software,Tianwen Block installation address
http://twen51.com/new/twen51/art_show.php?id=230
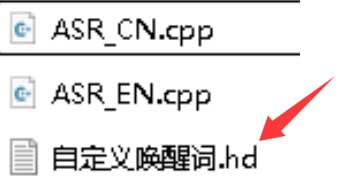
After opening the Tianwen Block software Download Demo Code,and Open it,Double click or drag into the software to open【自定义唤醒词.hd】
Click to enter the【字符编程】mode

Open ASR_EN.cpp with TXT text and copy the contents into the software
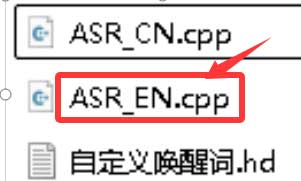
Copy the code to it
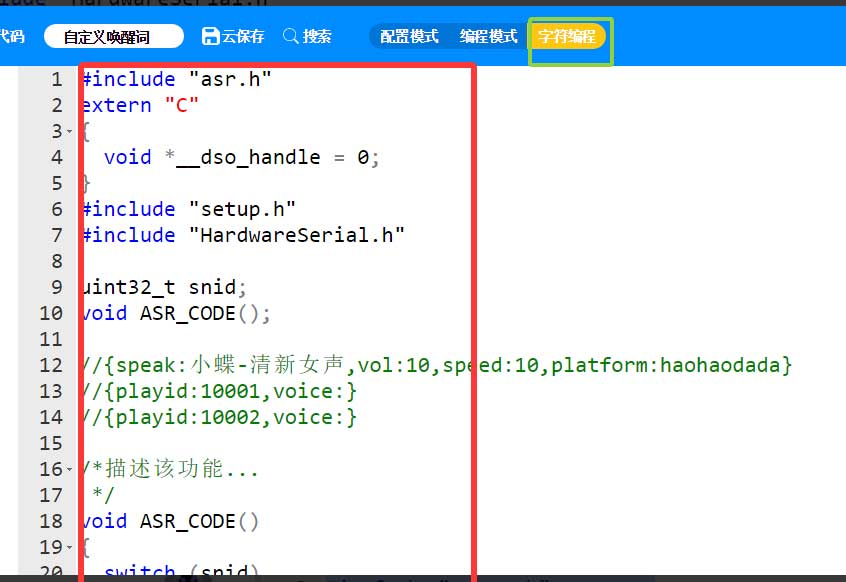
In this file. You can modify your wake-up word
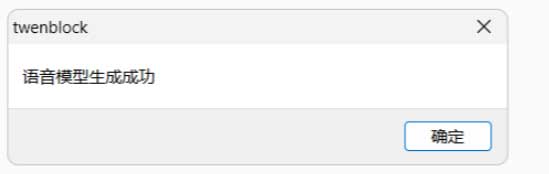
4】Click【生成模型】
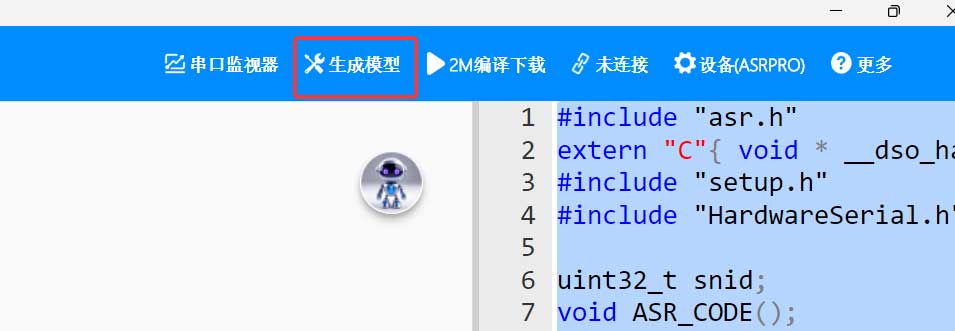
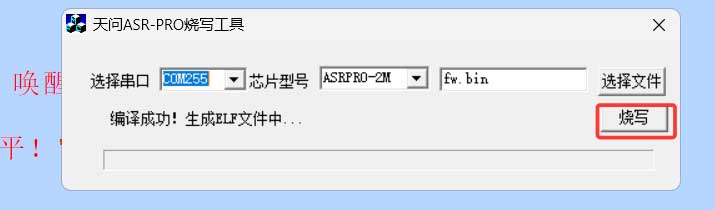
5】ASR-LINK Plug it into the computer port, then compile and burn it Click 【烧写】to burn it
【Hardware information】
】Schematic
】Screen interface definition
CS1--GP15
CS2--GP18
RST1--GP16
RST2--GP17
DC1-GP7
CLK1--GP8
DIN1--GP9
DC2--GP10
CLK2-GP11
DIN2--GP12
】MX-1.25 cable used
[Tutorial Navigation]
- 【Xiaozhi uses】
- 】Xiaozhi firmware needs to be configured for use
- 】Click to enter Xiaozhi backstage
- 】Register an account
- 】Click Add Device Activation
- 】Power Button
- 】Selecting characters and AI
- 】Unbind device
- 【Restore factory firmware】
- 【Xiaozhi Compilation】
- 【ESP32S3-AI-BOX-EYE Usage】
- 】Eye style change tutorial
- 】Convert video to mjpeg format
- 】Eye style change tutorial
- [] Insert the SD card into the card reader, and then insert the card reader into the USB port of the computer
- [] Rename the converted mjpeg file in the following format (Note: You can only name the file in the image. Adding or deleting the file name will cause the eye video to not be displayed on the screen)
- [] Unplug the card reader, take out the SD card, and insert it into the SD card slot of the module
- 】Eye code compilation and burning (developer)
- 】Compilation environment setup
- 】Download source code
- 】Install library files
- 】Compilation environment parameter configuration
- 】ASR-PRO speech recognition control module usage
- 1】Prepare ASR-LINK automatic downloader
- 2】Wiring diagram: ASR-LINK is connected to the position shown in the figure
- 3】Install software,Tianwen Block installation address
- 4】Click【生成模型】
- 5】ASR-LINK Plug it into the computer port, then compile and burn it Click 【烧写】to burn it
- 【Hardware information】