- sales/support
Google Chat:---
- sales
+86-0755-88291180
- sales01
sales@spotpear.com
- sales02
dragon_manager@163.com
- support
tech-support@spotpear.com
- CEO-Complaints
zhoujie@spotpear.com
- Only Tech-Support
WhatsApp:13246739196
- Purchase/Shipping/Refund
WhatsApp:13424403025
Jetson Nano UPS Power Module User Guide
Introduction
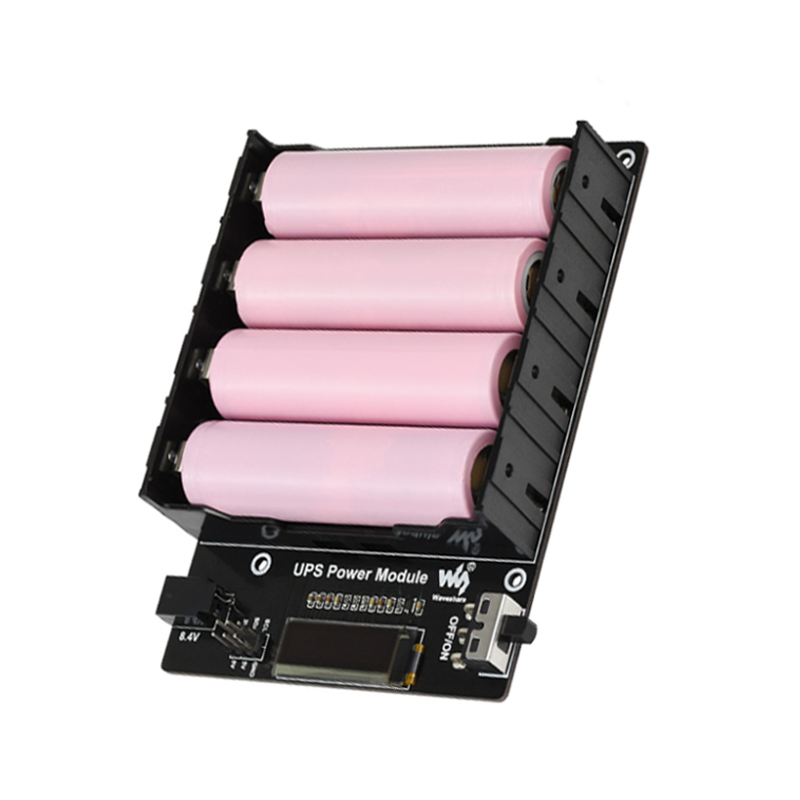
UPS Power Module For Jetson Nano, 5V Uninterruptible Power Supply, Multi Battery Protection Circuits
Features
- I2C bus communication, monitoring the batteries voltage, current, power, and remaining capacity in real-time
- 0.91" OLED for displaying info like batteries voltage, IP address, RAM usage, etc.
- Multi battery protection circuits: overcharge/discharge protection, over current protection, short circuit protection, and reverse protection, along with the equalizing charge feature, more safe and stable
- Onboard 5V regulator, up to 2.5A continuous output current
- Batteries warning indicators, easy to check if the battery is connected correctly
Specifications
- Output Voltage:5V
- Charger:8.4V 2A
- Conttrol bus:I2C
- Supported battery:18650 Li battery (NOT included)
- Dimension:113mm × 79mm
- Mounting hole:2.5mm
Hardware
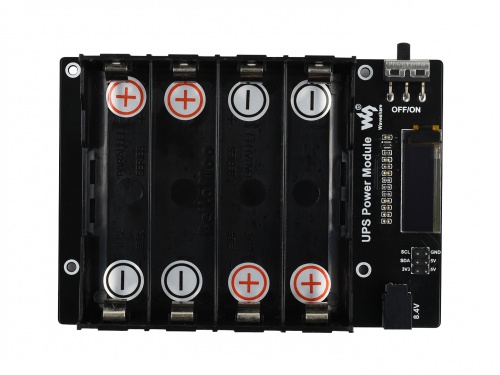
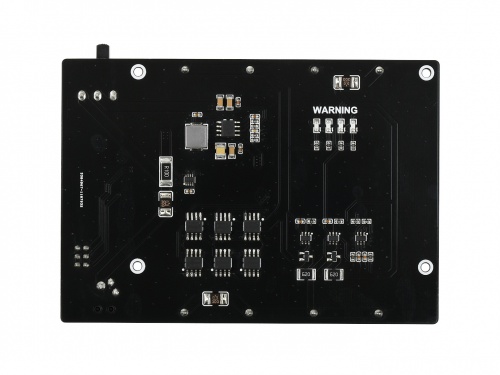
The 8.4V interface is the charge port. You can plug the 8.4V 2A charger provided for charging the batteries.
The switched is the power switch, you can turn it into ON/OFF to turn on/off Jetson Nano Developer Kit
WARNING LED are the indicators of batteries, they turn on if you reverse batteries.
Note 1: Please check the WARNING LED when you mounting batteries, make sure that you set all the batteries in the correct way. You cannot charge batteries if you reverse them.
Note 2: The board may not work when you mount the batteries for the first time, you need to charge batteries on board for a while to activate them.
Note 3: Please use the charger provided, the module may be destroyed by other unsuitable power adapters/chargers.
How to use
You should connect the UPS Power Module with your Jetson Nano Developer Kit by the 6PIN cable. You should connect 5V to 5V, 3.3V to 3.3V, otherwise, you may destroy the Jetson Nano Developer Kit because of wrong connection.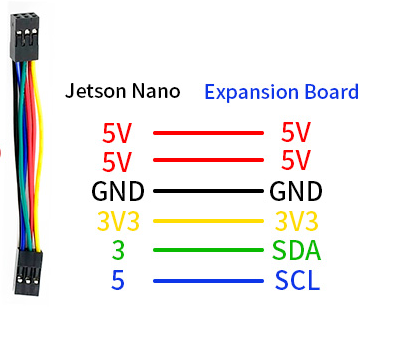
Open a terminal and install the display code by the following command. The codes are used for display information on OLED like the voltage, current, etc.
git clone https://github.com/waveshare/UPS-Power-Module
cd UPS-Power-Module
sudo ./install.sh
OLED will display the IP address, battery voltage, current and the percentage of battery quantity, as well as the CPU, GPU and memory information after starting the server.
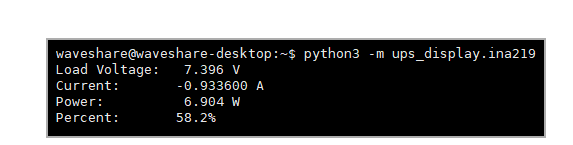
Note: if the current value is negative, it means that the batteries are feeding the Jetson Nano Developer Kit. If the current value is positive, it means that the batteries are charging.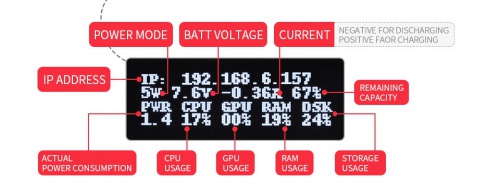
If you want to print the battery information to the terminal you can refer to the following script.
https://github.com/waveshare/UPS-Power-Module/blob/master/ups_display/ina219.py
The script can be run by the following command.
python3 -m ups_display.ina219