


- sales/support
Google Chat:---
- sales
+86-0755-88291180
- sales01
sales@spotpear.com
- sales02
dragon_manager@163.com
- support
tech-support@spotpear.com
- CEO-Complaints
zhoujie@spotpear.com
- Only Tech-Support
WhatsApp:13246739196
- Purchase/Shipping/Refund
WhatsApp:13424403025
- HOME
- >
- ARTICLES
- >
- LuckFox
- >
- LuckFox Pico
Luckfox Pico RV1103【Use the serial port to log in to the system】
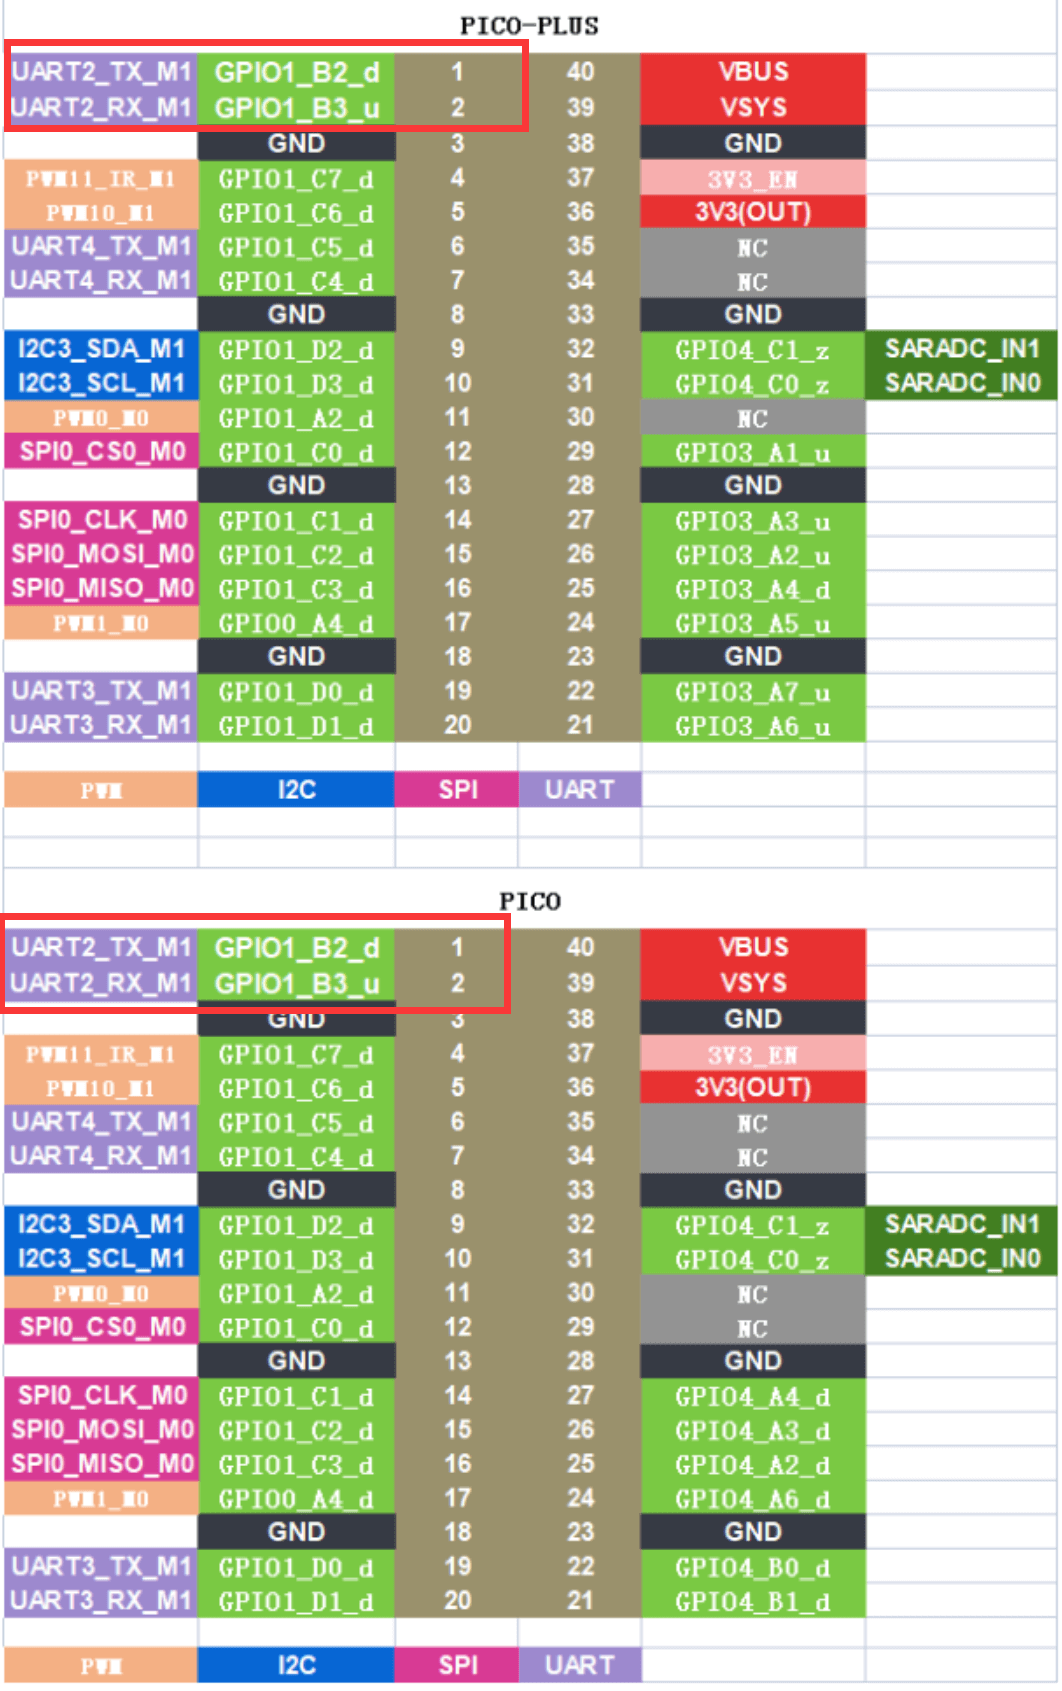
1] The default serial debug is on physical pins 1 and 2:
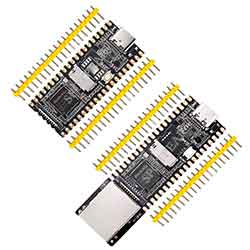
2] Connect the serial communication module to the pins of the Pico board:

(Serial communication module and Pico pin connection diagram;)
3] Use PUTTY to enter serial debugging:
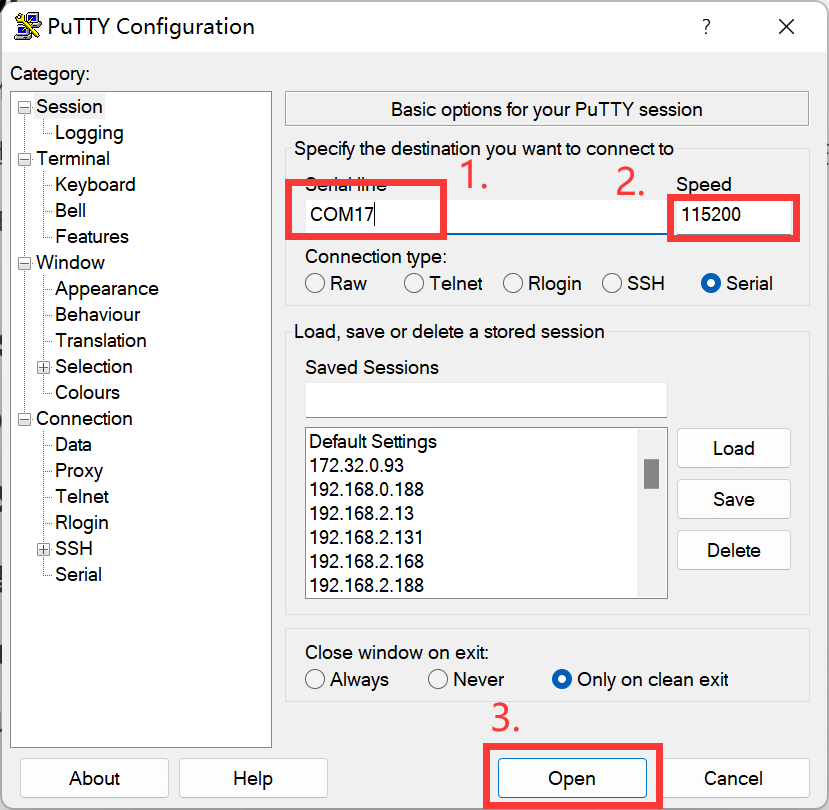
(Note: The serial device number should be filled in according to the actual serial device number of the user.)
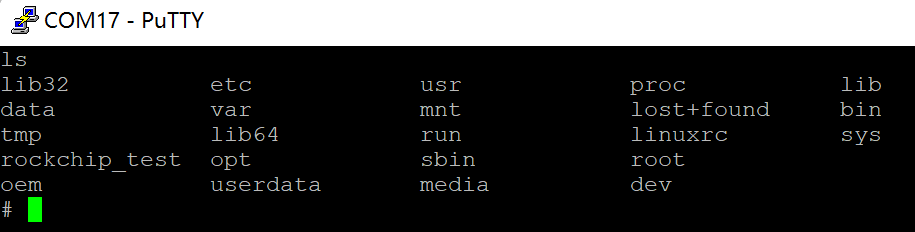
After configuring the serial port, you can successfully enter the system by inputting commands and receiving feedback results.
TAG:
Raspberry Pi Mipi display
3.4inch Round LCD HDMI Capacitive Touchscreen Display 800x800 For Raspberry Pi/Jetson Nano/mini PC
Industrial
Desktop
Wiki
ESP32 S3 5 inch LCD Development Board 800x480 TouchScreen Display TVBOX LVGL HMI Sensor CAN RS485
Raspberry Pi CM5 Compute Module 5 Dual Gigabit Ethernet RJ45 Expansion IO Base Board
MPW7 Raspberry Pi 5 PCIe to WIFI7 Adapter Board HAT Pi5 For Google TPU BE200 AX210 AI
Gyroscope Sensor
Raspberry Pi 1.3inch LCD
Milk V Duo
NanoKVM-USB-Development
Raspberry Pi 5
ESP32 S3 Development Board 1.91 inch AMOLED Display Screen For Arduino LVGL With SD-Port/ QMI8658C 6-Axis Sensor
Raspberry Pi 5 8mp Camera
ESP32-S3 7inch LCD Display 7 inch TouchScreen 7B 1024×600 N16R8 CAN RS485 Sensor
ESP32-S3 Nano ESP32-S3R8 development board compatible with Arduino Nano ESP32
Industrial Modbus RTU 8 ch Relay Module
Raspberry Pi 5 Audio Card
Raspberry Pi 5 ABS Case
TAG:
DeepSeek ESP32-S3 Voice Chat Robot
BPI-M4 Zero
Electronic EYE 0.7 1inch Round LCD Display Screen Arduino Raspberry Pi ESP32 Pico STM32
Raspberry Pi Pico 2 RP2350 LCD 0.96 inch Displayscreen RP2350A
Milk-V Duo 256MB
ESP32-S3 1.28inch LCD
Raspberry Pi 13.3 inch DSI Display MIPI LCD Capacitive TouchScreen 1920x1080 Bookworm
Spotpear
SP485EN
RP2040-PiZero
Active Cooler
Raspberry Pi 5 Cooling
Raspberry Pi LCD 3D Display Transparent Screen Refractive Prism Game Mini TV For Raspberry Pi Zero
Jetson
Spotpear Project Customization Raspberry Pi / Arduino / ESP32 / Jeston Nano Related project customization
Raspberry Pi 5 4B UPS PD Trigger Activation Uninterruptible Power Bank Supply Phone Mini Computer PC
Raspberry Pi 5 Display Cable
Raspberry Pi DSI Screen
Raspberry Pi 5 22Pin to 15Pin
ESP32-S3 Development Board 1.47 inch LCD 1.47B Display 1.47inch Screen SD 172×320 RGB LED