- sales/support
Google Chat:---
- sales
+86-0755-88291180
- sales01
sales@spotpear.com
- sales02
dragon_manager@163.com
- support
tech-support@spotpear.com
- CEO-Complaints
zhoujie@spotpear.com
- sales/support
WhatsApp:13246739196
Raspberry Pi Automatic temperature control version User Guide
Automatic temperature control version
The Raspberry Pi RGB_Cooling_HAT needs to be properly plugged into the GPIO port of the Raspberry Pi and open the Raspberry Pi system I2C function.
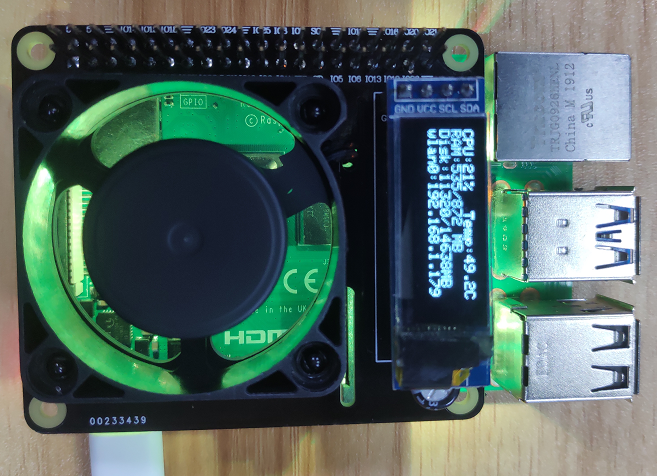
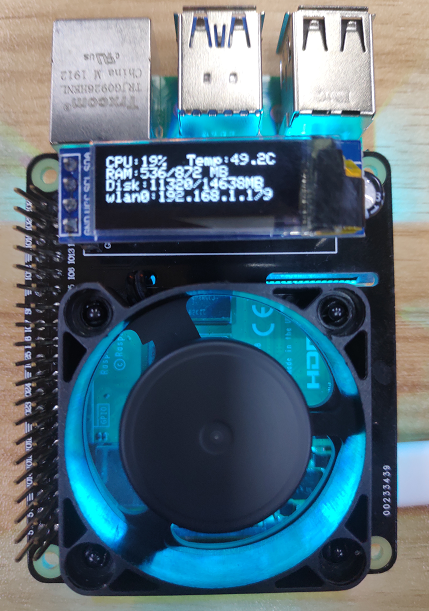
This experimental phenomenon shows that the OLED displays the CPU usage, CPU temperature, running memory usage, disk usage and IP address of the Raspberry Pi. The RGB light turns on the special effect. Then speed of fan will be adjusted due to CPU temperature.
1. File transfer
1.1 Install WinSCP tool on the computer side, connect the Raspberry Pi and transfer the temp_control.zip package to the pi directory of the Raspberry Pi.
Path of WinSCP:[Raspberry Pi RGB_Cooling_HAT]---[Tools]---[winscp556_setup.1416364912.exe]
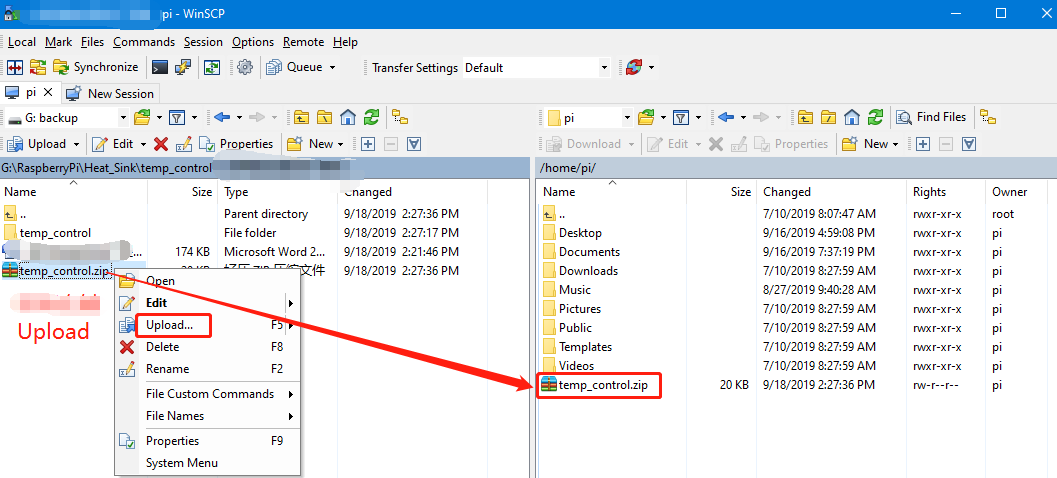
1.2 Extract file
Open the Raspberry Pi terminal and input command ls to find the temp_control.zip file.
As shown below:

Input command to extract file:
unzip temp_control_1.zip
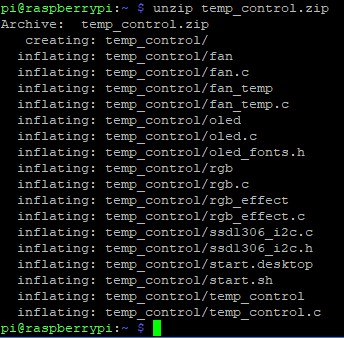
2.Compiling and running program
2.1 Input command to enter temp_control find file:
cd temp_control_1/
ls

2.2 Input command to compile:
gcc -o temp_control_1 temp_control_1.c ssd1306_i2c.c -lwiringPi

Among them, the gcc compiler is called, -o means to generate the file, temp_control_1 is the generated file name, temp_control_1.c is the source program, ssd1306_i2c.c is the library that drives oled, and -lwiringPi is the wiringPi library that references the Raspberry Pi.
2.3 Input command to run the program
./temp_control_1

At this point, the system will prompt “init ok!”, RGB lights show special effects, and the OLED screen displays information such as CPU usage, CPU temperature, running memory usage, disk usage and IP address of the Raspberry Pi. And speed of fan will be adjusted due to CPU temperature.
3. Add boot self-starting
3.1 Input command to enter relate folder
cd /home/pi/temp_control_1
3.2 Input command t view script file
ls

3.3 Run script command to install
sudo sh install_1.sh
Finally, system will prompt “install ok!”

!Note: If you already have the autostart folder, it will be prompt can not create the autostart folder, which will not affect our use.
4.Restart Raspberry pi
Input command to restart Raspberry Pi:
sudo reboot


