- sales/support
Google Chat:---
- sales
+86-0755-88291180
- sales01
sales@spotpear.com
- sales02
dragon_manager@163.com
- support
tech-support@spotpear.com
- CEO-Complaints
zhoujie@spotpear.com
- Only Tech-Support
WhatsApp:13246739196
- Purchase/Shipping/Refund
WhatsApp:13424403025
DTM3202 voice module user guide
Resource
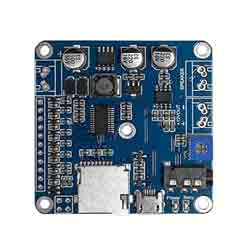
DTM3202
Step 1】 Functional Overview
Supports direct USB update of voice content, with adjustable volume.
Supports memory cards up to 32G.
Provides a 12V output voltage; outputs 12V voltage during sound playback.
Ten channels of one-to-one voice control (can trigger 10 different voices).
Supports control via a microcontroller's serial port, TTL serial communication, single-wire serial communication.
Ten channels of voice can be individually set for each type of voice playback mode (pulse repeatable, level hold loop, etc.).
It is possible to set the device to automatically cycle through all voices upon power-up.
Step 2】Electrical Parameters
Operating voltage: DC6V~35V
Rated output power: 20W/8Ω
Audio format: MP3
Maximum working current: 1000mA
Working environment temperature: -40~+85℃ industrial grade standard
Working environment humidity: 10%~98%
Step 3】Audio File Naming Rules
Audio files must be in MP3 format; if the files are generated through voice synthesis software, they can be copied directly.
Note: The order of the sounds is arranged by the filename. The filenames should be named with a 5-digit number, that is: 00001, 00002......00010
00001.mp3 corresponds to Voice 1
00002.mp3 corresponds to Voice 2
00003.mp3 corresponds to Voice 3
......
00010.mp3 corresponds to Voice 10
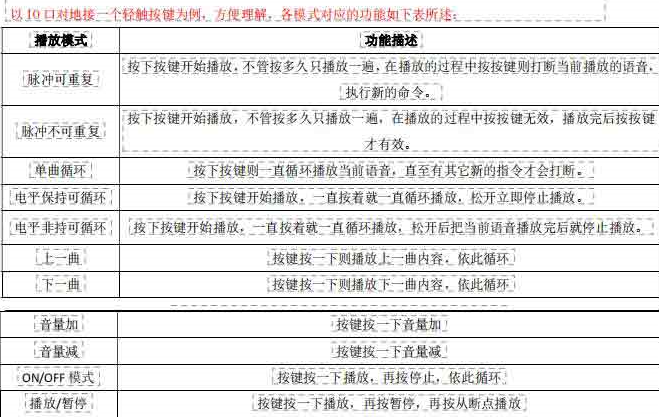
Step 4】Configuration Instructions for 1-10 Channels Voice Playback Mode
If the playback mode for channels 1-10 has not been configured, the default mode is: Pulse Repeatable Mode.
Other playback modes can be configured using our company's "IO Port Function Configuration Software" as shown below: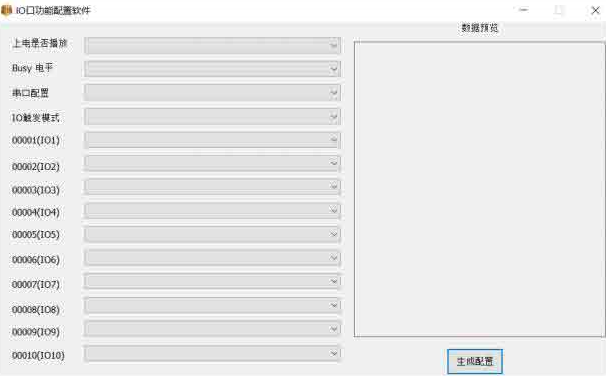
After configuring each IO port, click "Generate Configuration", and then save the configuration file to the desktop, with the filename as config.bin.
Then copy the config.bin file to the TF card.
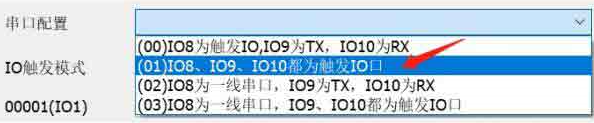
IO9 and IO10 are by default set for serial port control. If these two ports are to be set for IO-triggered playback,
they need to be set in the "Serial Port Configuration" section of the software, to the mode shown in the following diagram:
Step 5】IO Combination Playback
Through IO port combination playback, up to 1023 sections of voice are supported. This can be set via the PC software to "Play Once and Stop" or "Loop Playback".
An unconnected (floating) IO port represents "1", while connection to GND (Ground) represents "0".
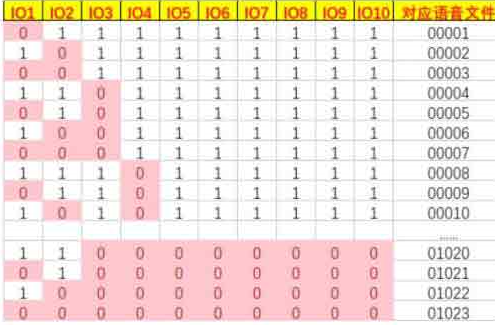
For using more combination segments, please refer to the "IO Combination Playback Query Table".
Step 6】Serial Port Control Instructions
This module supports single-wire serial port and TTL serial port control.
For single-wire serial port, the control port needs to configure IO8 as "single-wire serial port".
First, use the "IO Port Function Configuration Software" to set IO8 as a single-wire serial port, leave others as default, as shown in the following diagram:
Click "Generate Configuration", then save the configuration file to the desktop, with the filename as config.bin. After that, copy the config.bin file to the TF card.
The control pin for the single-wire serial port is on the "ONE" interface on the board, as shown in the following diagram: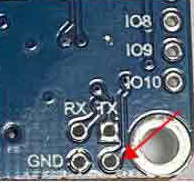
The communication protocol refers to the "DTM Serial Communication Protocol".
TTL Two-Wire Serial Control
The TTL two-wire serial control pins are on the "RX, TX" interface on the board, as shown in the following diagram: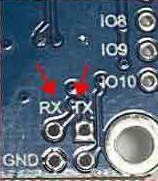
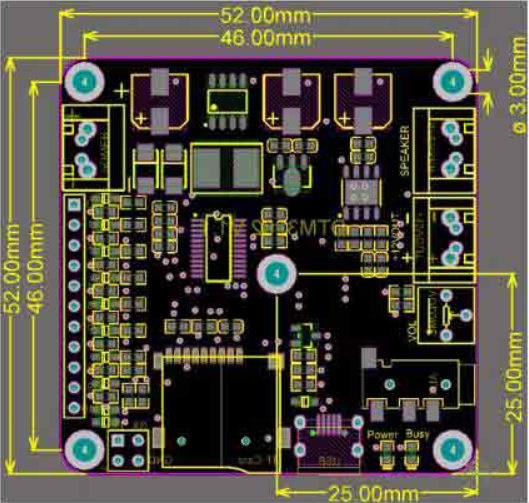
Step 7】Interface Description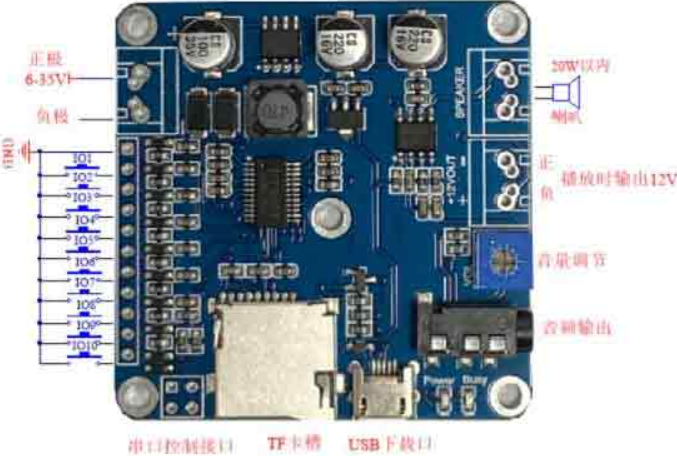
Step 8】Size