


- sales/support
Google Chat:---
- sales
+86-0755-88291180
- sales01
sales@spotpear.com
- sales02
dragon_manager@163.com
- support
tech-support@spotpear.com
- CEO-Complaints
zhoujie@spotpear.com
- Only Tech-Support
WhatsApp:13246739196
- Purchase/Shipping/Refund
WhatsApp:13424403025
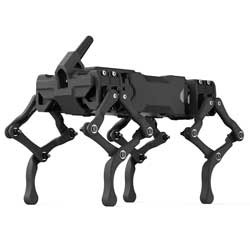
WAVEGO Pro User Guide
Introduction
This is a bionic quadruped robot with 12 degrees of freedom, equipped with 12 2.3kg.cm high torque servos. It is structurally reliable and has flexible movements, integrating cameras, 9-axis motion trackers, RGB and other devices. It also opens up a cross-platform web application for controlling the robot, which can be accessed via a browser on a phone or computer. The ESP32 can be used as the lower computer for link inverse solution and gait generation, sharing computing power with the upper computer. Raspberry Pi can also be installed as the upper computer for high-order decision-making operations.
Features
- 12 degrees of freedom (DOF), with more flexible and diverse movements.
- Multi-link leg structure + inverse kinematics algorithm, increasing the effective torque of the servo.
- ICM20948 9-axis motion tracker with self-balancing mode available.
- 2.3kg.cm high-torque servo, with a locked rotor torque of up to 5.2kg.cm, offering better expandability.
- It is composed of 5052 aluminum alloy and PA12 nylon parts. There are 40 sets of bearings used for all joints of the whole body, and the structure is firm and reliable.
- Integrated with various interactive devices, including a 0.96inch OLED screen, two RGB-LED indicators, and an active buzzer, etc.
- The demo is developed using Arduino IDE, and there is no need to manually configure the compilation environment. The ESP32 will automatically establish a WIFI hotspot when it is turned on, you can use a mobile phone (Android/iOS) or a computer (Linux/Windows/Mac). Only a browser based on Chromium is required, and there is no need to download an app.
- With a charging port and an automatic download circuit, you can use it while charging.
- Onboard two series 18650 batteries, 5200mAh, larger output current, and more powerful servo.
- Integrated with a lithium battery protection circuit, featuring protection against overcharging, overdischarging, overcurrent, and short circuits.
- Onboard INA219 acquisition chip, convenient for real-time monitoring of battery voltage and charging current.
- 2*5P expansion ports are reserved for the remaining IO and serial ports of the ESP32, with functions including RGB expansion, RX0, TX0, G21, G15, G12, 3V3, 5V, GND. This can be used for communication with a host computer or to connect to other devices.
- The Raspberry Pi can be installed as the upper computer to communicate with the lower computer through the serial port. The ESP32, as the lower computer, can share a lot of computing power for link inverse solution and gait generation, leaving more resources for Raspberry Pi to develop advanced functions.
- The Raspberry Pi kit comes with a cooling fan and an ultra-wide-angle lens. The Raspberry Pi demo includes a web application based on Flask-Streaming that can use OpenCV-based features such as face recognition/color tracking/motion detection.
- All code is open source and rich development documentation and tutorials are provided.
WAVEGO Tutorial Catalog
Resources
Robot Diagram
Open Source Resources
Raspberry Pi Learning Resources
Development Resources
FAQ
Question: 1. What kind of batteries does the WAVEGO Pro smart robot dog use?
It uses 2 18650-type batteries, which are 18mm in length and 65mm in length. The nominal voltage of a single cell is generally 3.7V, and the fully charged voltage is generally 4.2V.
Question: 2. What are the system account and password?
The default account for Raspberry Pi system: ws; password: ws
Question: 3. It prompts to enter the password, but I cannot enter the password, or receive an error?
Linux systems do not print the input content when entering passwords, which means blind typing is required. Just type "raspberry" directly with the keyboard and press Enter.
Question: 4. What should I do if the servo motor cannot rotate to the specified position after entering the assembly mode?
If the servo does not turn as specified in the tutorial, check if the servo is installed correctly. In assembly mode, the white arm should be installed at a 45-degree angle.
Question: 5. After entering assembly mode, the RGB-LED is not showing orange. Is the indicator light in an abnormal state?
It is normal. Due to the color change of RGB-LED lights, RGB-LED will now appear green when entering assembly mode.
Question: 6. Regarding the need to short the G12 and 3V3 when entering the assembly mode, does it also need to keep the short circuit in the assembly mode when entering the web interface calibration?
When entering the web interface for calibration, there is no need to keep the G12 and 3V3 shorted in assembly mode.
Question: 7. No response when adjusting PWM on the web end of the ESP32 or unable to access the webpage?
Please note that the browser must be Google Chrome or Microsoft Edge. When adjusting PWM, a single click is a fine-tuning and the change is subtle; multiple clicks will be more noticeable. If it cannot be adjusted, it may also be that there was a mistake when installing the servo, back to Q5.
Question: 8. What should I do if an error occurs when running the setup.py for WAVEGO on Raspberry Pi?
If an error occurs when running setup. py, please check if the source or network issues are causing the download to fail. After installation, please enter the Python environment by inputting python3 in the terminal and then input import cv2 to check for any error reports If no errors are reported, the installation is successful. If there are error reports, you can run setup.py multiple times or directly use the installed image.
Question: 9. Upload program error: A fatal error occurred: Failed to connect to ESP32: Timed out waiting for packet header
First, check if the Raspberry Pi is occupying the serial port of the lower computer. If the lower computer is connected to the Raspberry Pi, disconnect it and then re-upload the demo again. If the demo fails to download automatically, enter the download mode manually. After compiling the demo, press and hold the boot button while uploading it and release the boot button during the RST button press. If the problem cannot be solved, please return it for repair.
Question: 10. What if the Raspberry Pi cannot connect to the Internet or cannot be remotely logged in?
Please check the configuration you set when flashing the image. For more information, please refer to the product installation tutorial on the WAVEGO Raspberry Pi Wiki page. If you still cannot flash the image successfully, please help the customer flash the image through remote login.
Question: 11. How long is the battery life of WAVEGO Pro?
The battery life of WAVEGO Pro depends on various factors such as usage and environment. In general, a single charge can support continuous use for 1 to 2 hours, and for continuous high-intensity operation, it can last 20-30 minutes. However, the specific usage time will vary depending on usage (such as different power settings, different wavelengths) and working environment (such as temperature, and humidity).
Support
Monday-Friday (9:30-6:30) Saturday (9:30-5:30)
Email: services01@spotpear.com
[Tutorial Navigation]
- Introduction
- WAVEGO Tutorial Catalog
- Resources
- FAQ
- Question: 1. What kind of batteries does the WAVEGO Pro smart robot dog use?
- Question: 2. What are the system account and password?
- Question: 3. It prompts to enter the password, but I cannot enter the password, or receive an error?
- Question: 4. What should I do if the servo motor cannot rotate to the specified position after entering the assembly mode?
- Question: 5. After entering assembly mode, the RGB-LED is not showing orange. Is the indicator light in an abnormal state?
- Question: 6. Regarding the need to short the G12 and 3V3 when entering the assembly mode, does it also need to keep the short circuit in the assembly mode when entering the web interface calibration?
- Question: 7. No response when adjusting PWM on the web end of the ESP32 or unable to access the webpage?
- Question: 8. What should I do if an error occurs when running the setup.py for WAVEGO on Raspberry Pi?
- Question: 9. Upload program error: A fatal error occurred: Failed to connect to ESP32: Timed out waiting for packet header
- Question: 10. What if the Raspberry Pi cannot connect to the Internet or cannot be remotely logged in?
- Question: 11. How long is the battery life of WAVEGO Pro?
- Support