


- sales/support
Google Chat:---
- sales
+86-0755-88291180
- sales01
sales@spotpear.com
- sales02
dragon_manager@163.com
- support
tech-support@spotpear.com
- CEO-Complaints
zhoujie@spotpear.com
- Only Tech-Support
WhatsApp:13246739196
- Purchase/Shipping/Refund
WhatsApp:13424403025
WAVEGO servo is assembled and calibrated properly
How do I know WAVEGO servo is assembled and calibrated properly
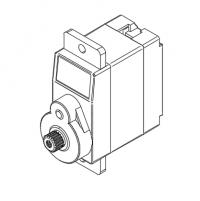
- Firstly, you need to understand how the servos work. The servos of WAVEGO can be controlled within 180 degrees, and do not need limit blocks as a result of its large torque. However, there is no way to confirm the angular position of the current servo output shaft by appearance as the round-copper gear output shaft can rotate continuously under the external force.
Due to the above reasons, before installing the servo rocker arm, it is necessary to use the driver board of the robot to control the servo to rotate to the middle position of its motion range (180°), and then install the servo rocker arm according to the specified angle. For the specific method and installation angle, please refer to the product WIKI assembly tutorial. The tutorial also includes the servo calibration method. The following describes how to determine whether the product is properly assembled and calibrated, which is convenient for quickly locating the problem.
- Assemble and calibrate the servo according to the tutorial.
- Turn on.
- Use your mobile phone to search for the WIFI hotspot name WAVESHARE Robot and enter the password 1234567890 to connect to the hotspot.
Generally. after the mobile phone is connected to the hotspot, it will prompt that it is not connected to the Internet due to the failure of Ping to the Internet server. The mobile phone may automatically disconnect the hotspot. After reconnecting the hotspot, it will not be automatically disconnected in the future.
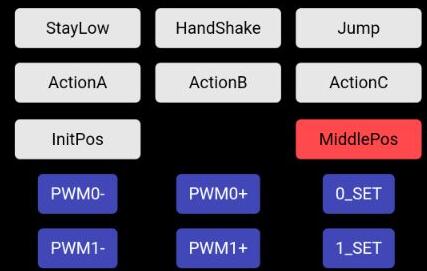
- Open the browser on the mobile phone (Google Chrome is recommended, other browsers may have button compatibility issues), and visit page 192.168.4.1.
- The content of the page is as follows. There are two buttons on the page: InitPos and MiddlePos. The former is the middle position of the servo angle during assembly (same as the assembly mode), and the latter is the position of the servo after calibration. After pressing the button, all servos will rotate to the corresponding angle.
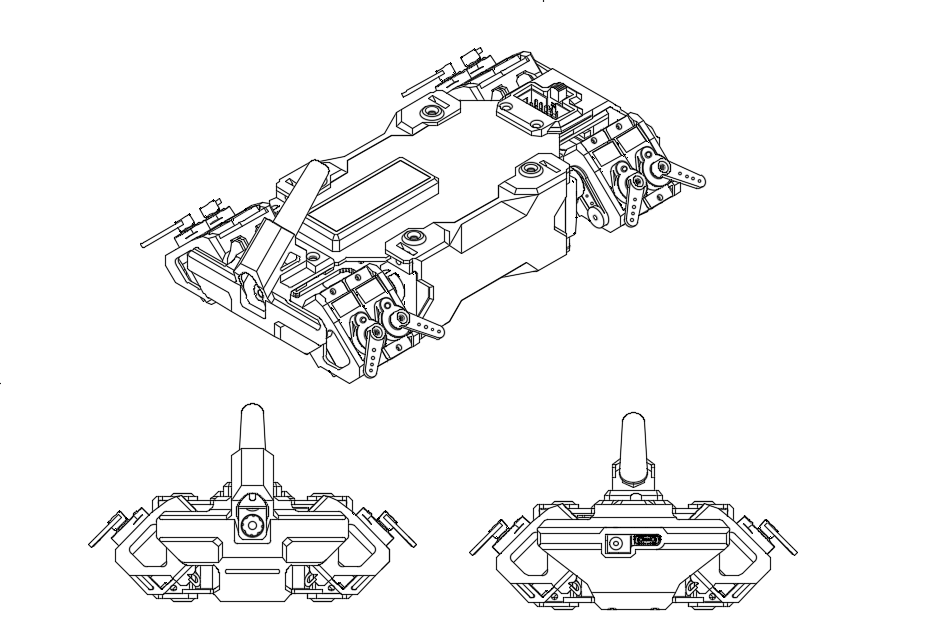
- After pressing the InitPos button, the servo swing angle is as follows. Due to the mechanical structure, an error within ±10° is allowed here (for this reason, the servo needs to be calibrated). If the error is too large, you need to re-install the corresponding servo rocker arm according to the assembly tutorial.
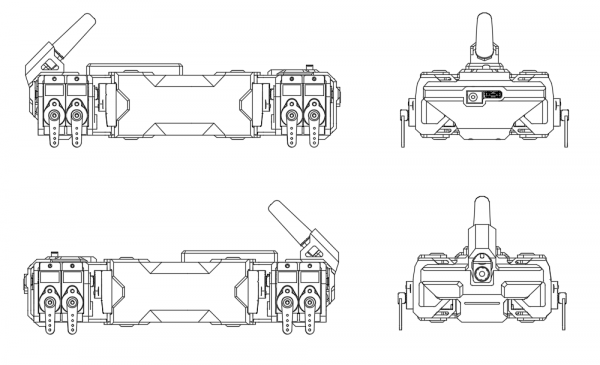
- After pressing the MiddlePos button, the servo swing angle is as follows. Since this position is the position after software calibration, the error needs to be as small as possible. If the error is larger than the picture, the servo needs to be re-calibrated.
TAG:
2.15 inch e-Paper HAT+ B E-Ink Red/Black/White 296×160 Screen Display For Arduino /Raspberry Pi /Jetson Nano /STM32
ESP32-S3 Development Board 4 inch LCD TouchScreen Display 480x480 RS485 /SHT20 /Relay For Arduino LVGL 86 TVbox
RP2040-PiZero
UGV Rover PT Kit AI OpenCV Robot Car MediaPipe For Jetson Orin
Screen
Industrial UART USB TO 8CH RS485 Isolated Converter For 35mm standard rail and stacked installation
Arduino MLX90640
Python UART Communication
Pan-Tilt Kit
Raspberry Pi 5 PCIe to SSD
UART Serial Server
AURORA AI Laser Radar And Dual Eye Camera IMU Integrated Positioning Map For Android/ROS+RoboStudio
Raspberry Pi ZERO
ESP32
Raspberry Pi 5 PCIe to USB3.2 Gen1 Hub 5Gbps For Raspberry Pi OS Drive free
A7670E LTE Cat-1 HAT for Raspberry Pi Multi Band 2G GSM / GPRS LBS
Raspberry Pi 3 display HAT
Raspberry Pi 5 PD Activation
D-Robotics RDK X3 Module Core MD Module Horizon Sunrise Pi ARM Cortex-A53 5Tops Size Compatible With Raspberry Pi CM4 Size
Xiaozhi AI video tutorial
TAG:
Pi5 Pure-
Raspberry Pi 12.3 inch DSI MIPI Display TouchScreen LCD 720x1920 Luckfox Lyra Omni3576 RK3576
Modbus RTU CAN
Raspberry Pi 5 PCIE to MiniPCIe For wireless network WIFI Card USB Bluetooth
ESP32-S3 SIM7670G 4G LTE Cat-1 4G GNSS
PoE IO Expansion Board Raspberry Pi Compute Module CM4S/CM3
Raspberry Pi 5 9layer Case
Raspberry Pi UPS
ESP32-C6 2.16inch AMOLED Display AI Development Board 480×480 2.16 inch TouchScreen Deepseek
ESP32 C3
GPU Monitor Screen
ESP32-H2 Microcontroller Development Board
Luckfox Lyra B RK3506G2
Raspberry Pi 5 Rainbow Acrylic Case Colorful Translucent Acrylic Case Supports Installing Official Active Cooler
360° Sensor
Pi5 Active Cooler Silver
Raspberry Pi 5 ABS Case
4inch 480x480 LCD Captive TouchScreen Display Luckfox Pico Ultra
ESP32-C6 AI Voice Chat Robot For Xiaozhi 1.8 inch AMOLED Development Board 1.8inch TouchScreen Deepseek
1.46inch LCD TouchScreen Display 412×412 SPD2010 For Arduino /Raspberry Pi /ESP32 /Pico /STM32