- sales/support
Google Chat:---
- sales
+86-0755-88291180
- sales01
sales@spotpear.com
- sales02
dragon_manager@163.com
- support
tech-support@spotpear.com
- CEO-Complaints
zhoujie@spotpear.com
- Only Tech-Support
WhatsApp:13246739196
- Purchase/Shipping/Refund
WhatsApp:13424403025
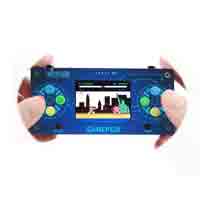
Raspberry Pi GamePi20
Support Raspberry Pi
- Raspberry Pi Zero
- Raspberry Pi Zero W
- Raspberry Pi Zero WH
How to use it
Assembly
Hardware connection
- Attach Raspberry Pi Zero/Zero W to GamePi20 extension board. Note that you need to first set up SD card according to the instruction below, before you assemble it.
- Mount the extension board to the metal box
- Place conductive rubber mats and buttons on it, finally assemble the front panel.
To use the GamePi20, you can use the pre-configured image or install driver to a fresh image yourself.
Hardware connection
- Attach Raspberry Pi Zero/Zero W to GamePi20 extension board. Note that you need to first set up SD card according to the instruction below, before you assemble it.
- Mount the extension board to the metal box.
- Place conductive rubber mats and buttons on it, finally assemble the front panel.
To use the GamePi20, you can use the pre-configured image or install driver to a fresh image yourself.
Method 1: Pre-configured Images
- Here we provide a pre-configured image, you can download and test
| OS | Version | Raspberry Pi | Default user/password | Download link |
|---|---|---|---|---|
| Recalbox | 6.0-DragonBlaze | Raspberry Pi 1/Zero/Zero W | root/recalboxroot | Google Drive |
| Recalbox | v7.1.1 | Raspberry Pi 1/Zero/ZeroW | root/recalboxroot | Google drive |
| Retropie | v4.4 | Raspberry Pi 1/Zero/Zero W | pi/raspberry | Google Drive |
| Retropie | v4.7.1 | Raspberry Pi 1/Zero/Zero W | pi/raspberry | Google Drive |
| Retropie | v4.8 | Raspberry Pi Zero 2W | pi/raspberry | Google Drive |
- Download the image file, unzip and write it to the SD card
- Insert the SD card to Raspberry Pi, assemble GamePi20 as #Hardware connection
- turn the switch to ON. Generally, LCD is light on and Raspberry Pi is booting. It may cause about 2 minutes for Raspberry Pi 1/zero/zero W to starting.
- Raspberry Pi is failed to start if the battery is low. In this case, you can connect 5V/2A power adapter to the Power interface for charging. Capacity indicators
- If the buttons cannot work normally, please add a line to the /boot/config.txt file, then reboot and try again.
dtparam=spi=on
Basic operations
- Retropie
- After booting, you can select emulators by direction buttons on the left, then press "A" to confirm. For example, choose "A" and then "Start"
- Choose the games and press "A" to play
- Press "Start"+"Select" buttons to exit games
- You can adjust the potentiometer to adjust the volume. Or Press "Start" and choose "SOUND SETTINGS" to adjust volume
- Recalbox
- After booting, you can select emulators by direction buttons on the left, then press "B" to confirm.
- Choose the games and press "A" to play, press "A" or "Start" to start games
- Press "Start"+"Select" buttons to exit games
- you can adjust the potentiometer to adjust volume. Or Press "Start" and choose "SOUND SETTINGS", press "B" confirm, then adjust "SYSTEM VOLUME" by direction buttons.
Method 2: Install driver
Install driver on Retropie
Download Retropie image from Retropie websit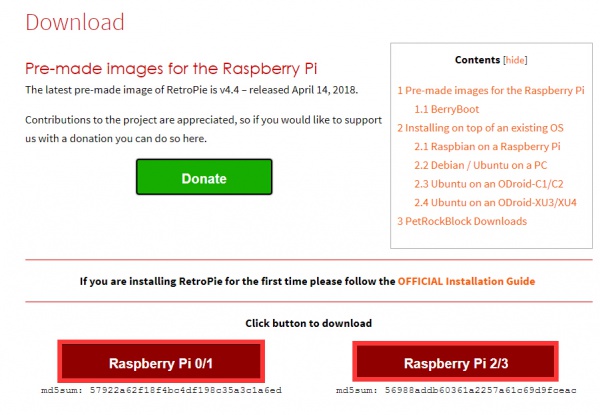
- Write the image to SD card
- Connect SD card, keyboard and a HDMI display to Raspberry Pi, Turn the switch into ON side to power on Raspberry Pi. Press F4 (Keyboard) after booting. You may require an
- Configure as below:
- Configure modules file to enable fbtft module for displaying
sudo nano /etc/modules
you will open a file, please add lines below to the file
spi-bcm2835
flexfb
fbtft_device
- Create a fbtft.conf file
sudo nano /etc/modprobe.d/fbtft.conf
- Add two lines below to the fbtft.conf file
options fbtft_device name=flexfb gpios=reset:27,dc:25,cs:8,led:24 speed=96000000 bgr=1 fps=60 custom=1 height=240 width=320
options flexfb setaddrwin=0 width=320 height=240 init=-1,0x11,-2,120,-1,0x36,0xA0,-1,0x3A,0x05,-1,0x21,-1,0x2A,0x00,0x01,0x00,0x3F,-1,0x2B,0x00,0x00,0x00,0xEF,-1,0xB2,0x0C,0x0C,0x00,0x33,0x33,-1,0xB7,0x35,-1,0xBB,0x1F,-1,0xC0,0x2C,-1,0xC2,0x01,-1,0xC3,0x12,-1,0xC4,0x20,-1,0xC6,0x0F,-1,0xD0,0xA4,0xA1,-1,0xE0,0xD0,0x08,0x11,0x08,0x0C,0x15,0x39,0x33,0x50,0x36,0x13,0x14,0x29,0x2D,-1,0xE1,0xD0,0x08,0x10,0x08,0x06,0x06,0x39,0x44,0x51,0x0B,0x16,0x14,0x2F,0x31,-1,0x29,-3
- Reboot Raspberry Pi
sudo reboot
- After reboot, enter terminal again. and check if you can find the fb1 device under /dev
- Install tools:
sudo apt-get install cmake git
cd ~
git clone https://github.com/tasanakorn/rpi-fbcp
cd rpi-fbcp/
mkdir build
cd build/
cmake ..
make
sudo install fbcp /usr/local/bin/fbcp
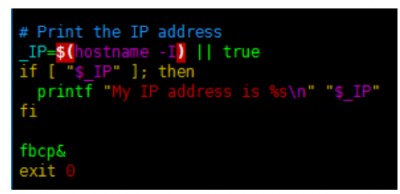
- Set rc.local file
sudo nano /etc/rc.local
- Add sentence fbcp& in the front of exit 0
- Configure /boot/config.txt file
sudo nano /boot/config.txt
#add lines below to config.txt file
hdmi_force_hotplug=1
hdmi_cvt=640 480 60 1 0 0 0
hdmi_group=2
hdmi_mode=1
hdmi_mode=87
dtoverlay=pwm
- Install driver for josytic
git clone https://github.com/waveshare/mk_arcade_joystick_rpi.git
cd mk_arcade_joystick_rpi
sudo ./install.sh 3
- Finally, reboot it.
sudo reboot
- Long-press "A" button (GamePi20) to enter the configuration page, configure it by pressing related buttons (GamePi20), you can also long-press to skip any button
After configuring, you can press "A" (GamePi20) to save configured and exit, or press "B" or "Start" (GamePi20) to exit without saving.
Install driver on Recalbox
Download the latest image from Recalbox website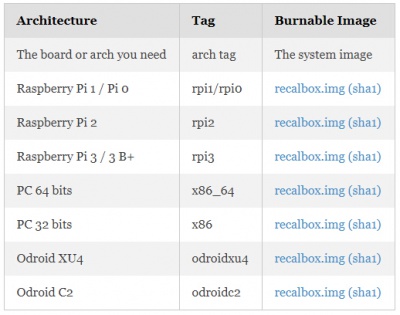
- Unzip the files download to get the .img file
- Write the .img file to SD card
- Copy driver to root directory of SD card
- Connect SD card, keyboard and an HDMI display to Raspberry Pi, Turn the switch into ON side to power on Raspberry Pi. Press F4 then Alt+F2(Keyboard) after booting. (user: root; password: recalboxroot)
- Setup display with commands below:
mount -o remount, rw /boot
mount -o remount, rw /
- Configure modules file:
sudo nano /etc/modules.conf
- Append lines to the file:
flexfb
fbtft_device
- Enable SPI by adding statement to config.txt
sudo nano /boot/config.txt
- add line below to the file
dtparam=spi=on
- Create a fbtft.conf
nano /etc/modprobe.d/fbtft.conf
- Add two lines to the fbtft.conf file
options fbtft_device name=flexfb gpios=reset:27,dc:25,cs:8,led:24 speed=96000000 bgr=1 fps=60 custom=1 height=240 width=320
options flexfb setaddrwin=0 width=320 height=240, init=-1,0x11,-2,120,-1,0x36,0xA0,-1,0x3A,0x05,-1,0x21,-1,0x2A,0x00,0x01,0x00,0x3F,-1,0x2B,0x00,0x00,0x00,0xEF,-1,0xB2,0x0C,0x0C,0x00,0x33,0x33,-1,0xB7,0x35,-1,0xBB,0x1F,-1,0xC0,0x2C,-1,0xC2,0x01,-1,0xC3,0x12,-1,0xC4,0x20,-1,0xC6,0x0F,-1,0xD0,0xA4,0xA1,-1,0xE0,0xD0,0x08,0x11,0x08,0x0C,0x15,0x39,0x33,0x50,0x36,0x13,0x14,0x29,0x2D,-1,0xE1,0xD0,0x08,0x10,0x08,0x06,0x06,0x39,0x44,0x51,0x0B,0x16,0x14,0x2F,0x31,-1,0x29,-3
- Reboot Raspberry Pi and check if fb1 is recognized under /dev
reboot
- Configure rcS file
nano /etc/init.d/rcS
- Add a line to the rcS file
fbcp &
- Modify recalbox.conf. Please check it again after save.
#global.videomode=CEA 4 HDMI
global.videomode=default

#global.ratio=auto
global.ratio=4/3
- Modify /boot/config.txt file ,add lines to it
sudo nano /boot/config.txt
#添加
hdmi_force_hotplug=1
hdmi_cvt=640 480 60 1 0 0 0
hdmi_group=2
hdmi_mode=1
hdmi_mode=87
dtoverlay=pwm
- Finally, configure GPIO by modifing recalbox.conf file
# ------------ D2 - GPIO Controllers ------------ #
## GPIO Controllers
## enable controllers on GPIO with mk_arcarde_joystick_rpi (0,1)
controllers.gpio.enabled=1
## mk_gpio arguments, map=1 for one controller, map=1,2 for 2 (map=1,map=1,2)
controllers.gpio.args=map=5 gpio=12,20,21,13,26,16,23,4,6,17,22,5,-1
- Reboot Raspberry Pi
Add new games (Retropie)
Maybe default games in test image are not those you want, you can also add games as you like.
- Size of most games are always large, so we need to expand filesystem fist. Choose RASPI-CONFIG on configure page and press enter
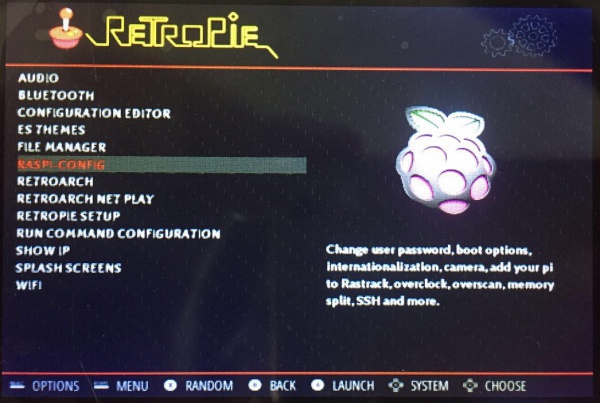
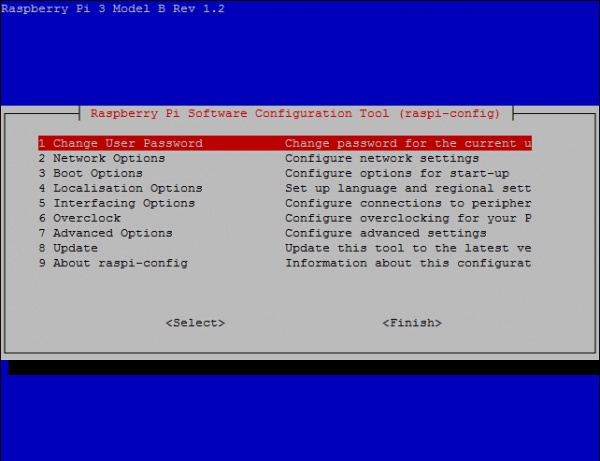
- Choose 7 Advanced Options -> A1 Expand Filesystem, Enter->Finish, (physical keyboard is required)
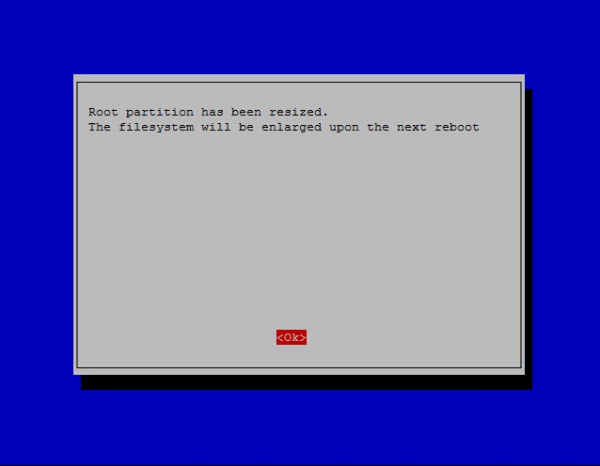
- Choose OK, and reboot.
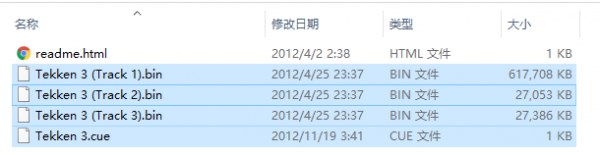
- Download ROMS of games you like
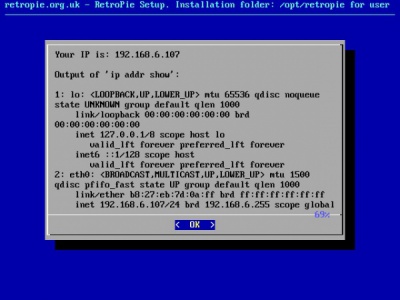
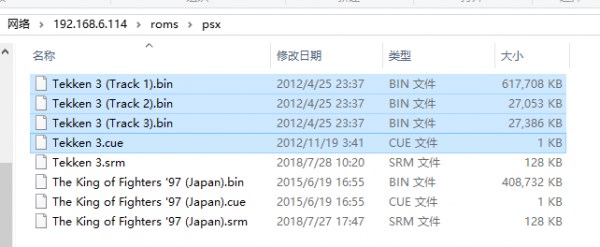
- Connect your Raspberry Pi to network (Make sure the network you connect is in the same LAN as your PC). Find SHOW IP in Retropie list, press “A” to query current IP address of your Raspberry Pi.
- Open it with the IP address on your PC

- Then on emulator choose page, you can press “Start”->QUIT->RESTART EMULATIONSTAION, press “A” to confirm. Then restart emulator, you can find the game added.
For more operations, you can read Retropie Instructions