


- sales/support
Google Chat:---
- sales
+86-0755-88291180
- sales01
sales@spotpear.com
- sales02
dragon_manager@163.com
- support
tech-support@spotpear.com
- CEO-Complaints
zhoujie@spotpear.com
- Only Tech-Support
WhatsApp:13246739196
- Purchase/Shipping/Refund
WhatsApp:13424403025
- HOME
- >
- ARTICLES
- >
- Jetson Series
- >
- Jetson Kits
Jetson Nano JetBot AI Kit Assemble Manual User Guide
JetBot AI Kit Assembly
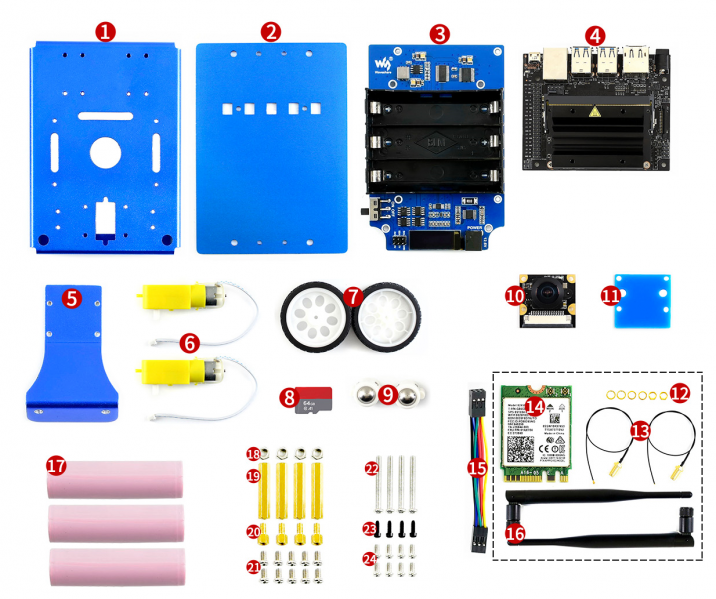
- Components and screws
- Please check the components and screws
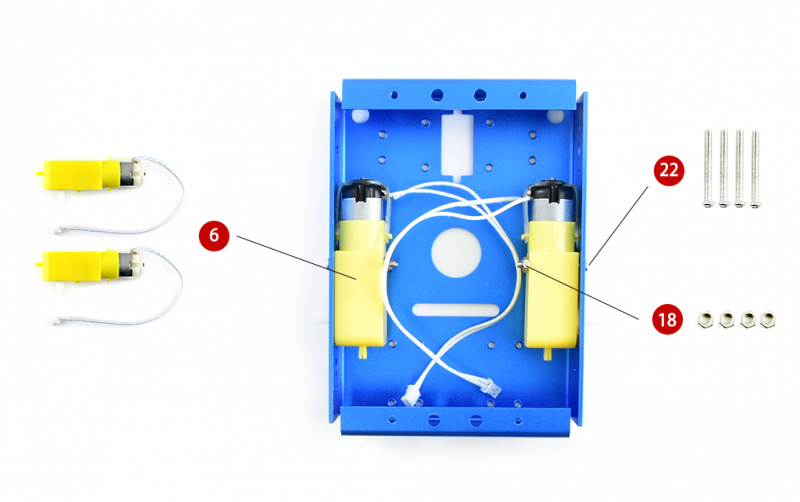
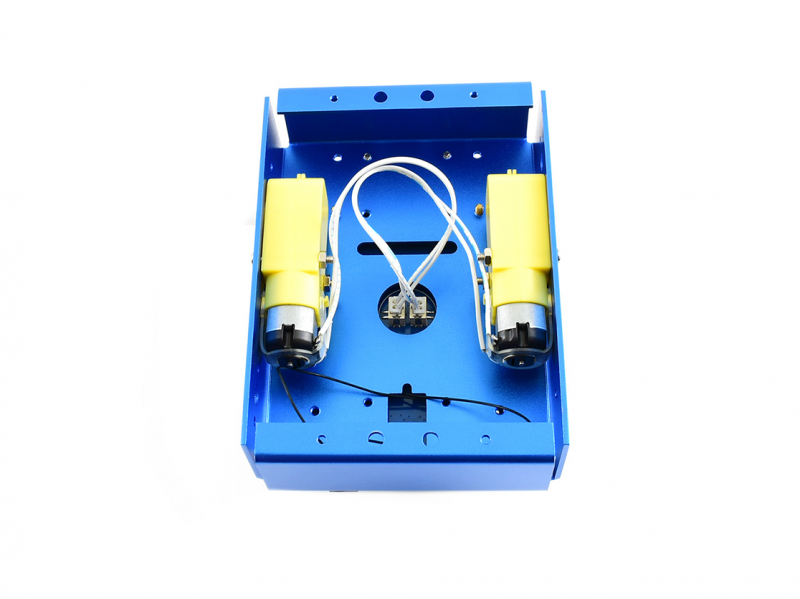
1. Assemble motors
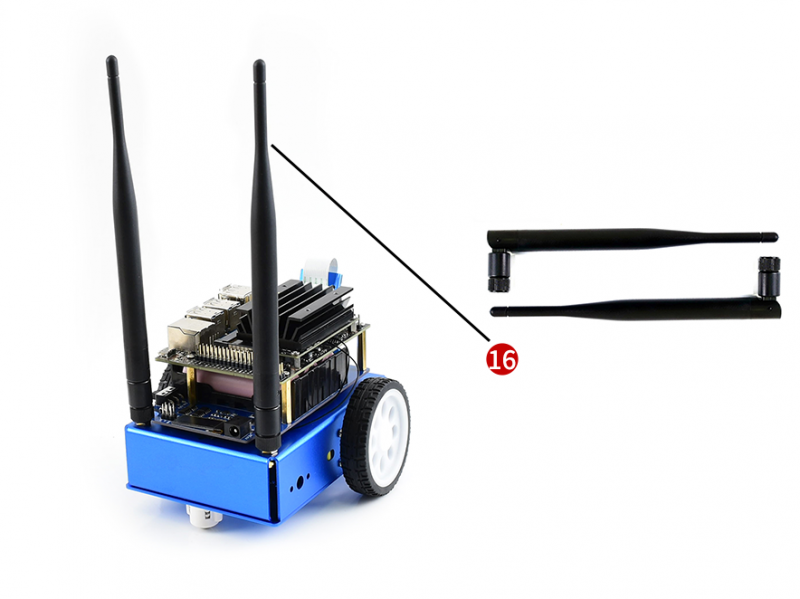
2. Assemble the antennas

3. Mounting the Camera holder to metail box

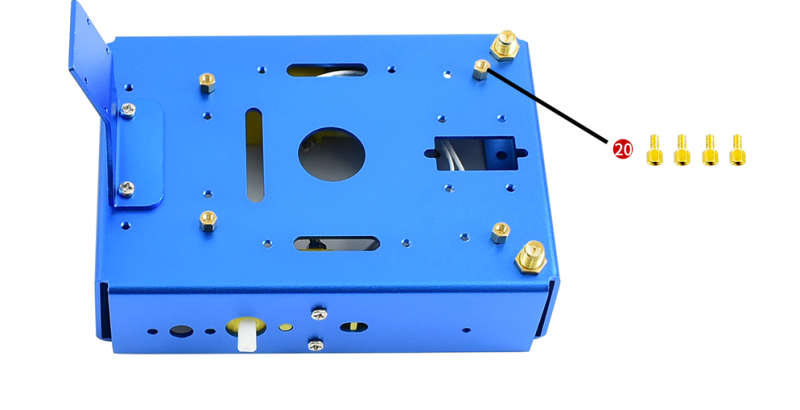
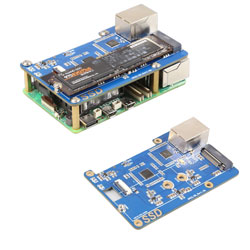
4. Set standoffs on metal box for assembling JetBot expansion board
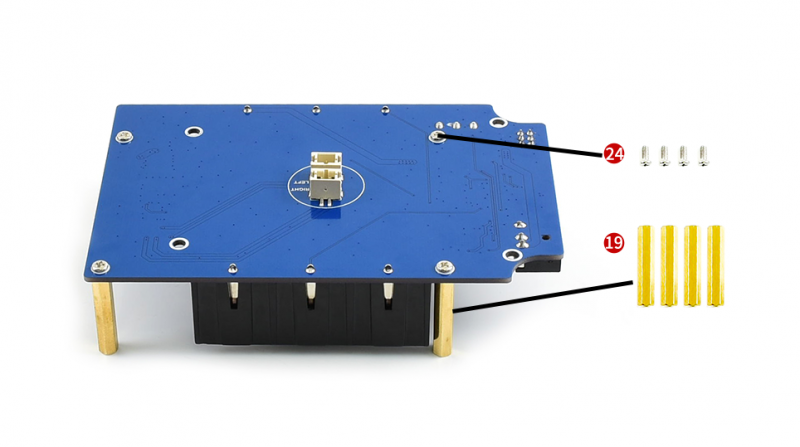
5. Set standoffs on jetbot expansion board for assembling jetson nano developer kit
6. Assemble Jetbot expansion board, adjust place of antennas
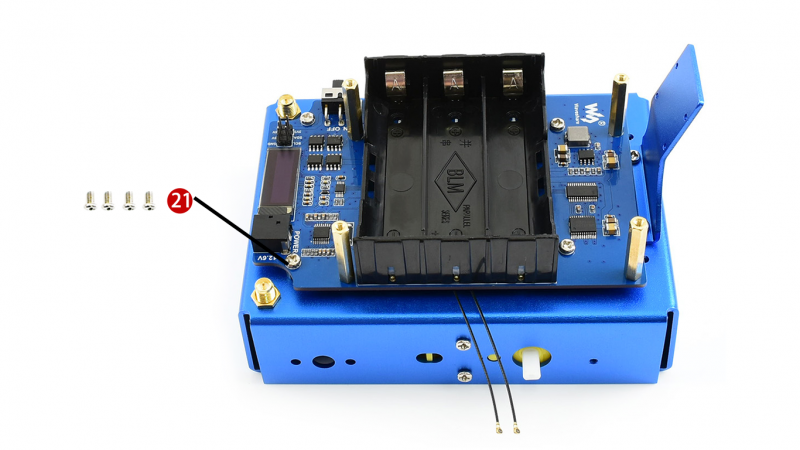
- Connect motors to jetbot expansion board, connect left motor to the left interface, and right to the right
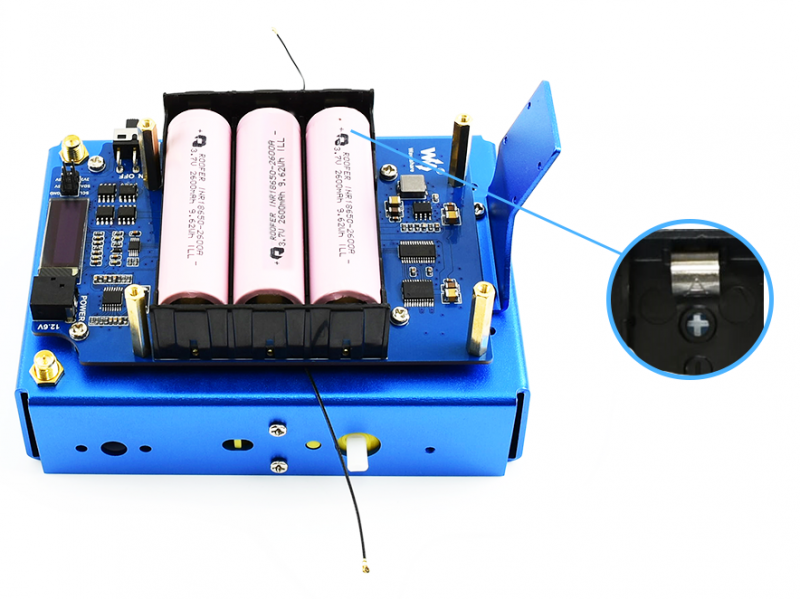
7. Mounting 18650 batteries to batteries holder, note that you should recognize direction of batteries according to the white screen silk printing.
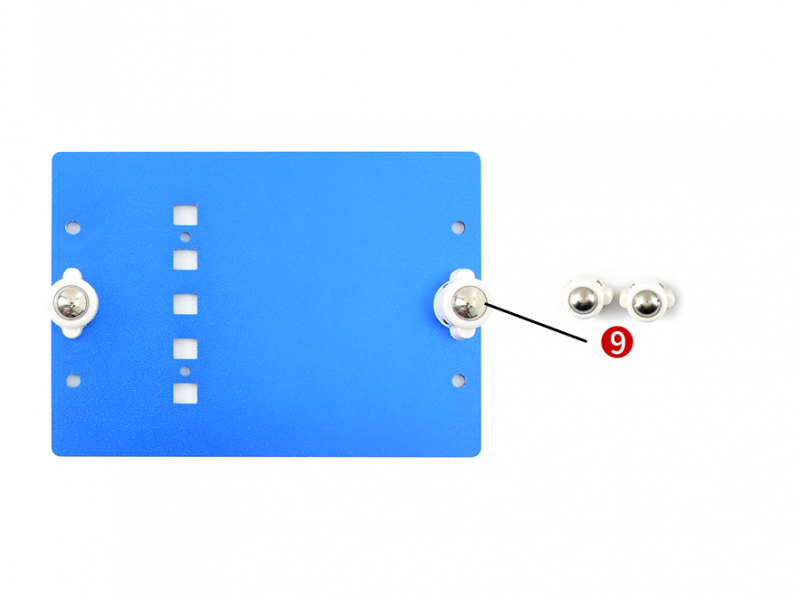
8. Turn out screws from Omni-direction wheels, then fixing the wheels to metal bottom board
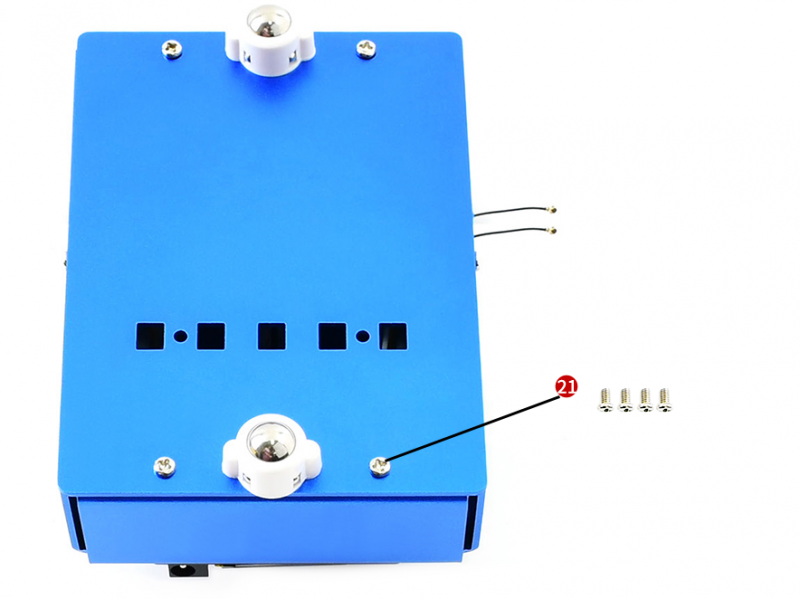
9. Assemble metal box
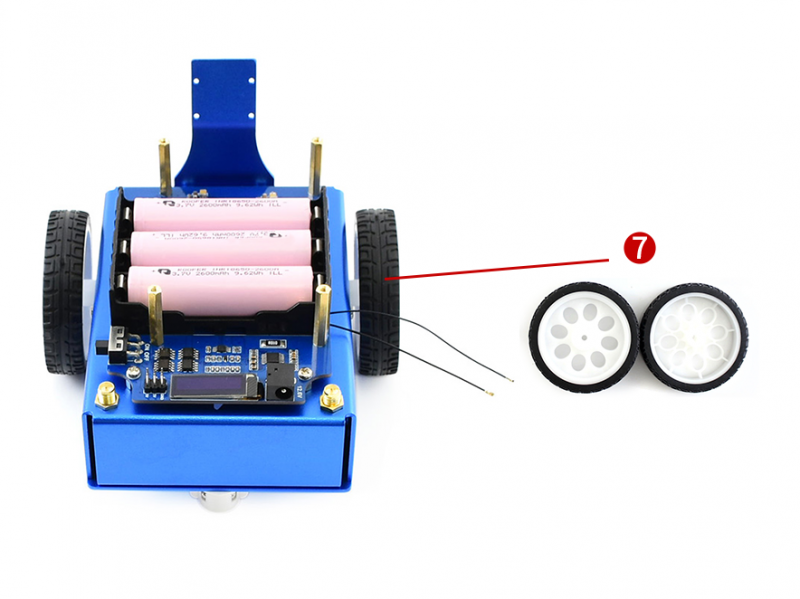
10. Assemble wheels
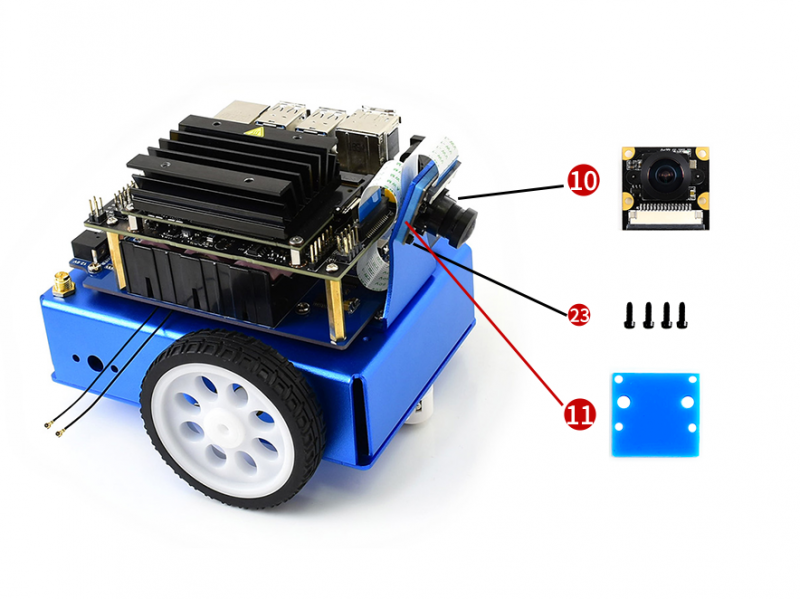
11. Assemble camera, don't forget the set the Acrylic piece between holder and camera
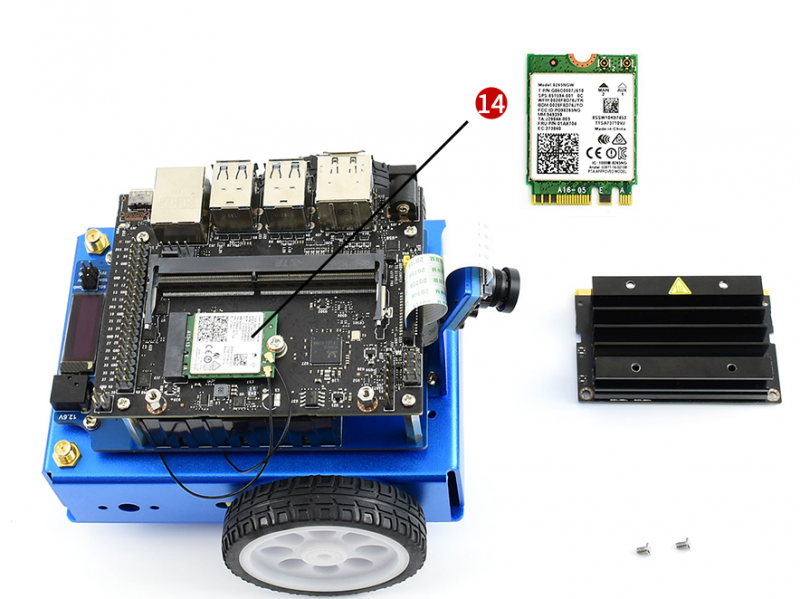
12. Take out the jetson nano board, and assemble wireless-AC 8265
13. Connect antennas
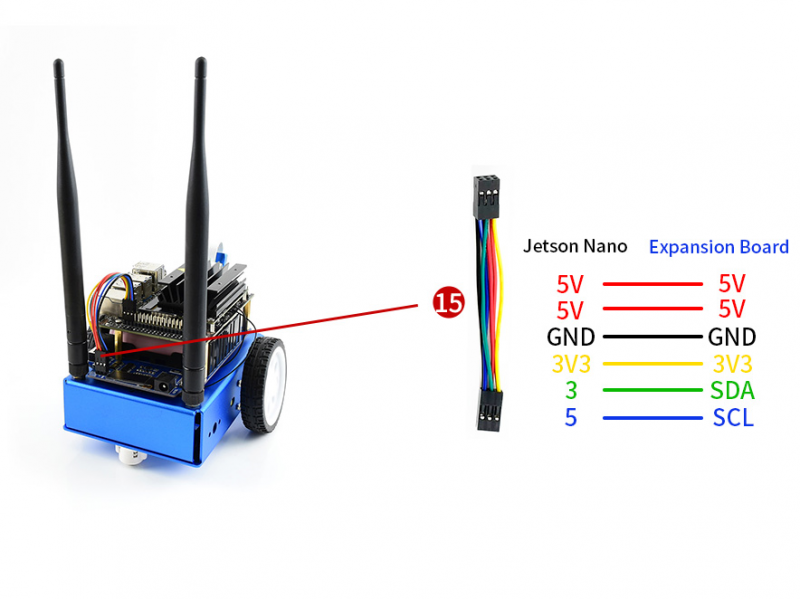
14. Finally, connect the 8PIN cable according to screen silk printing.
TAG:
ESP32-S3 Nano ESP32-S3R8 development board compatible with Arduino Nano ESP32
SIM7600G H Mini PCIe SIMCom Original 4G LTE Cat-4 Module Global Coverage GNSS
7.5 inch Passive NFC e-Paper V2 BW Display 7.5inch E-ink Screen No Need Battery Wireless Powered Data Transfer For Mobile APP
Raspberry Pi Screen
Spotpear
Jetson Nano Development
TOF Time of Flight Laser Range Sensor Mini Radar module UART Serial / I2C Port For Arduino / Raspberry Pi / ESP32
4.26inch
Raspberry Pi 7 inch CAPLCD 1280x800 Capacitive TouchScreen HDMI/Type C Display Monitor For Computer mini PC
SpotPear
Raspberry Pi 5 5V5A Power
Developer Kit
ESP32-S3 AI RGB Matrix Driver Board Dual Microphone DeepSeek
Raspberry Pi RTC WatchDog HAT (B) Real time clock Onboard DS3231SN High Precision RTC Chip
Raspberry Pi OpenWrt Tutorial 1
Raspberry Pi 5 8 inch DSI LCD Captive TouchScreen MIPI Display 1280x800 Industrial One-Body Tablet PC With 5MP Front Camera
Raspberry Pi Pico 10.1inch DVI LCD
D-Robotics RDK X3 MD Carrier Board For RDK X3 Module Horizon Sunrise Pi ARM Cortex-A53 5Tops
Milk-V
ESP32 C6 Development board 1.9 inch LCD display 1.9inch Screen 172×320 With SD slot RGB LED QMI8658 6-Axis-Sensor ST7789 CST816
TAG:
ESP32 S3 Round LCD
Raspberry Pi USB Camera 8MP IMX415 Distortion-Free Dual Microphones USB 2.0 For Jeston RDK
Raspberry Pi 4.3 inch DSI IPS-LCD QLED Display MIPI 800x480 Touchscreen
Raspberry Pi 5 PoE MINI HAT (J) 5V/5A Power over RJ45 Ethernet 802.3af/at Moudle for Pi5/CM5
Retail electronic Labe
Raspberry Pi 5
Rounded LCD
ESP32-S3 Industrial 8-Channel Controller with WiFi Bluetooth CAN IoT RS485 and RJ45 ETH POE
Raspberry Pi IR Array Thermal Imaging Camera Far infrared 80×62 Pixels 44/90 Degree FOV
Electronic EYE 0.71inch Round LCD Display Screen Arduino Raspberry Pi ESP32 Pico STM32
ESP32 RJ45
LoRa32-Heltec V4 ESP32-S3 LoRa SX1262 Development Board 863-928MHz Meshtastic For Arduio
7inch Monitor Display
ESP32-S3 Mini
Raspberry Pi IR-CUT 2MP Camera with IMX327 Starlight Sensor
Milk-V Duo
Raspberry Pi 5 Ethernet
Raspberry Pi
MPTPU Raspberry Pi 5 TPU AI Kit PCIe Google Coral Edge
Arduino Atmega328P Nano