


- sales/support
Google Chat:---
- sales
+86-0755-88291180
- sales01
sales@spotpear.com
- sales02
dragon_manager@163.com
- support
tech-support@spotpear.com
- CEO-Complaints
zhoujie@spotpear.com
- Only Tech-Support
WhatsApp:13246739196
- Purchase/Shipping/Refund
WhatsApp:13424403025
- HOME
- >
- ARTICLES
- >
- Common Moudle
- >
- LCD
12.5inch FHD Monitor User Guide
Overview
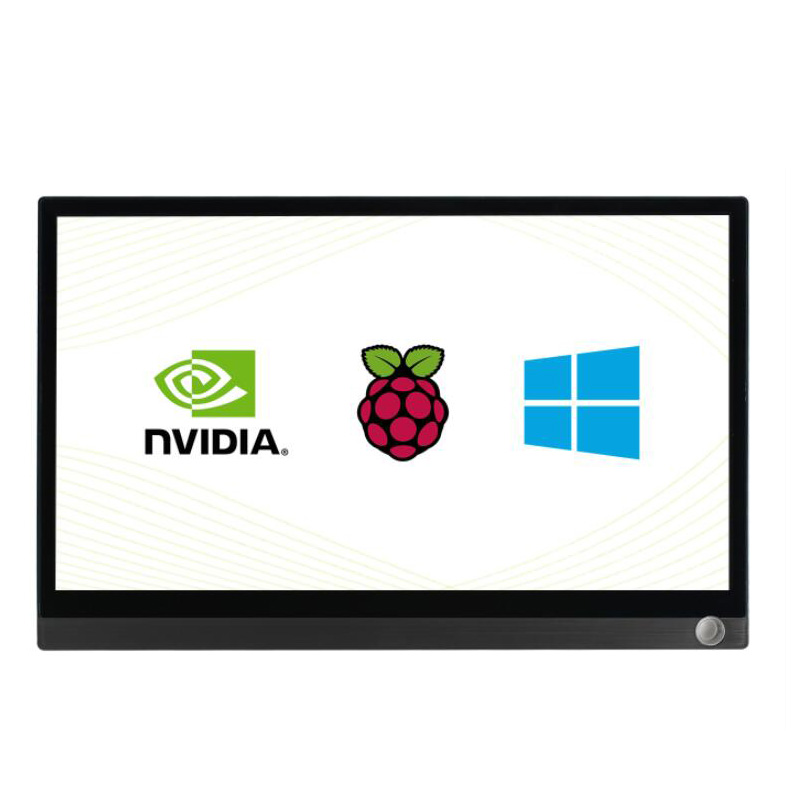
12.5inch Universal Portable Touch Monitor, 1920×1080 Full HD, IPS Screen, HDMI/Type-C, Ideal Companion for Various Host Devices
Features
- Display: 12.5inch, 1920×1080 pixels, IPS screen (up to 178° viewing angle)
- Touch panel: capacitive, toughened glass panel, 6H hardness
- Display interface: Type-C/HDMI
- Touch interface: Type-C/USB
- Supports popular mini PCs such as Raspberry Pi, Jetson Nano
- When works with Raspberry Pi, supports Raspbian/Ubuntu/Kali/Retropie/WIN10 IOT, driver free
- Supports desktop computers with Windows 10/8.1/8/7, 10-point touch, and driver free
- Supports notebooks from Apple, HUAWEI, Lenovo, HP, DELL, etc. dual-screen display, balance the work and entertainment
- Supports cell phones from HUAWEI, OPPO, Samsung, etc. mirror cast via the Type-C connection, ideal companion for travelling
- Supports popular game consoles like Microsoft XBOX360, Sony PS4, and Nintendo Switch
- Multi-languages OSD menu, for power management, brightness/contrast adjustment, etc.
- USB expansion port for mouse/keyboard
- Type-C/HDMI audio input, 3.5mm headphone/speaker jack
- Embedded ferrite Hi-Fi speaker
Instruction
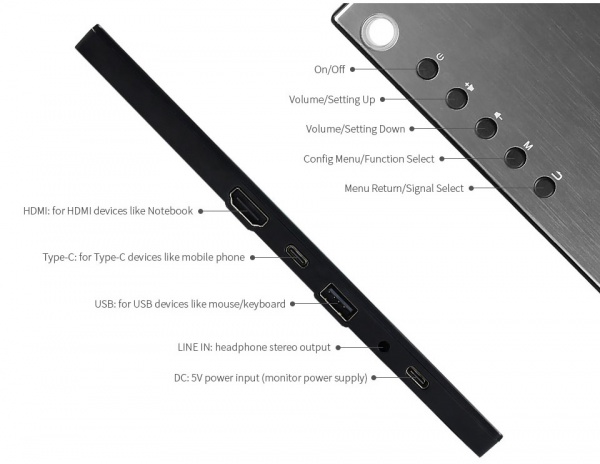
Interfaces and Buttons
How to Use
Working with PC
This LCD supports Winodows 7/8/8.1/10 when working with PC via HDMI interface
- Connect 5V/4A power adapter to DC interface of LCD, the backlight of the LCD will turn on after powering on
- Connect Touch interface of LCD to USB port of PC by USB cable. Touch function is enabled after that.
- Connect HDMI interface of LCD to HDMI interface of PC by HDMI cable. LCD displays normally after seconds.
Note:
1) If you connect multiple screens to your PC, please set this LCD as main display for properly touching
2) Some PC cannot support hot-plug, in this case, you should restart LCD to make LCD available
3) Audio output is only available when using HDMI interface
Working with Raspberry Pi
When working with Raspberry Pi, this LCD supports Raspbian/Ubuntu mate/Kali/Retropie/Windows 10 iot Core
When working with Raspberry Pi, you should set the resolution of the LCD by yourself, or else the LCD screen will not work. For more detail information, please read the following section.
Download the Raspbian image from Raspberry Pi web site. Write the image to a TF card and append the following lines to the config.txt file which is located in the root of your TF card:
max_usb_current=1
hdmi_group=2
hdmi_mode=82
hdmi_cvt 1920 1080 60 6 0 0 0
You must make sure that there are no spaces on either side of the equal sign.
- Connect 5V power adapter to DC interface of LCD (if the internal batteries is fulled, you can skip this step)
- Connect the Touch interface of LCD to USB port of Raspberry Pi
- Connect HDMI interface of LCD to HDMI port of Raspberry Pi
- Save and connect the TF card to your Pi then power up.
Working with Smart Phone
- Connect 5V power adapter to DC interface of LCD (if the internal batteries is fulled, you can skip this step)
- Connect Type C of LCD to Type C port of smartphone.