


- sales/support
Google Chat:---
- sales
+86-0755-88291180
- sales01
sales@spotpear.com
- sales02
dragon_manager@163.com
- support
tech-support@spotpear.com
- CEO-Complaints
zhoujie@spotpear.com
- Only Tech-Support
WhatsApp:13246739196
- Purchase/Shipping/Refund
WhatsApp:13424403025
- HOME
- >
- ARTICLES
- >
- Common Moudle
- >
- Camera
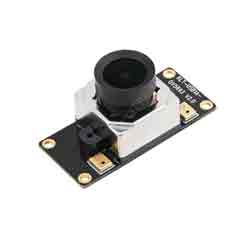
OV5693 5MP USB Camera (A) User Guide
Resource
Documents
Software
Specification
- Pixel: 5MP
- Sensor: OV5693
- DSP: Automatic white balance(AWB)\Automatic exposure(AEC)\Automatic gain control(AGC)
- Camera:
- CCD Size: 1/4inch
- Aperture (F): 2.1
- Focus length (EFL): 2.5mm
- Field of View (FOV): 135°
- Focus Type: Auto focus
- Interface: USB2.0
- Image:
- Format: MJPG, YUY2
- Static image resolution: 2592 × 1944
- Video recording (MJPG):
- 15 FPS 2592 × 1944
- 15 FPS 1920 × 1080
- 15 FPS 1280 × 720
- Video recording (YUY2):
- 3 FPS 2592 × 1944
- 5 FPS 1920 × 1080
- 10 FPS 1280 × 720
- 15 FPS 640 × 480
- Operating Voltage: 5V ± 5%
- Operating Temperature: 0°C ~ 50°C
- Len Size: 18.00 × 18.00 × 19.39 mm
- Dimensions: 18.00 × 36.00 mm
- OS Support: Windows, Linux, MacOS
Working with Windows PC
Test Software
Most of the Windows 10 PC has pre-install Camera software, you can use it to test the USB camera.
If your PC doesn't have Camera software, you can also download the AMCap test software from Resouce->Software and test.
Testing
- Use Camera Software of Windows
- Search "Camera" and open the software.
- Click the setting icon on the top left to configure the image/video.

- You can click the icons on the right to switch between Image Capture or Video Recording.
- AMCap Software
- Download and install the AMCap software.
- You can click the Options option, choose Video Capture Pin... or Still Capture Pin... to configure image/video.

Working with Raspberry Pi
Buster
- Open a terminal of Raspberry Pi (You can use the Ctrl+Alt+T shortcut):
- Edit the modules file:
sudo nano /etc/modules
- Add the following command in the document and save:
bcm2835-v4l2
- Ues command sudo raspi-config to open the configuration:
- Choose Interface Option -> Camera -> Yes to enable the camera and reboot.
Bullseye
You can directly test the USB camera on the Bullseye system.
Camera Test
- Open a Terminal of Pi and install luvcview tool with the following command:
- sudo apt-get install luvcview -y
- After installing, use the following command to test the USB camera.
- sudo luvcview -s 1920 x 1080


Working with Jetson Nano Developer Kit
- Open a terminal of Jetson Nano Developer Kit (You can use the Ctrl+Alt+T shortcut or open it by Mouse)
- Use the following command for previewing:
- nvgstcapture-1.0 --camsrc=0
- With the command, a preview window is opened

【Notice】You may need to use the camera by script/codes, in this case, you can refer to tools/libraries like Opencv yourself.
FAQ
Question:Why does the camera display abnormally when my hand touches it back?
Answer:
Do not touch the components on the back of the PCB with your hands, so as not to affect the electrical characteristics.
Question:Does the module get hot during use?
Answer:
It is normal that the module would generate a lot of heat during use.
Question:Why can't I control brightness, contrast, or other parameters?
Answer:
If you are using a Mac system and Opencv, some parameter settings are not available, so we recommend using a Linux system and the V4L2 driver.
TAG:
Raspberry Pi UGV Rover ROS2 PT AI OpenCV Robot Car MediaPipe
Raspberry Pi 64MP Camera
ESP32-S3 Smart 86 Box Development Board with 4 inch 480x480 Display Touch Screen For AI and DeepSeek
Jetson Nano Fan
7inch LCD 1024×600 Computer PC Monitor Display Secondary Screen TypeC USB CPU RAM Only For Windows
Raspberry Pi 6.25 inch DSI Display MIPI LCD (B) Capacitive TouchScreen 720x1560
RV1103 SC3336
Horizontal Drag Instructions
Bevelopment Board
ESP32 C3 Zero
Raspberry Pi 12.3 inch HDMI LCD Captive TouchScreen Display 1920x720 For Jetson Series/Computer PC
Milk V Duo IO Board
Raspberry Pi Display
NVIDIA Jetson Orin Nano Developer Kit Official Original 8GB AI 40Tops For Embedded and Edge Systems
Raspberry Pi Thermal imaging
Raspberry Pi Pico 2 RP2350 1.69 inch LCD TouchScreen Development Board 240x280 1.69inch Display QMI8658 6-Axis
RS485 TO ETH (B) Connect Alibaba Cloud And EMQX
Raspberry Pi 1.54inch OLED
Arduino MLX90641
Raspberry Pi RTC WatchDog HAT (B)
TAG:
Raspberry Pi
ESP32-C6
Raspberry Pi Pico 2 RP2350 LCD 0.96 inch Displayscreen RP2350A
Raspberry Pi 5 PCIe to M.2 4G 5G USB 3.2 HUB HAT SIMCom Quectel 4G 5G M.2 Key B
ESP32 S3 4.3inch LCD 800x480 Captive TouchScreen Display Board LVGL Sensor CAN I2C RS485
Raspberry Pi 5 Original FFC Cable
JETSON NANO
Luckfox Lyra RK3506G2
CM5 Cooler Fan Heatsink Raspberry Pi Compute Module 5
Raspberry Pi Pico 2 RP2350 1.47 inch LCD B Display Development board RP2350A 1.47inch Screen RGB color
Raspberry Pi 15.6 inch QLED Quantum Dot Display 1920x1080 Capacitive Touchscreen Computer PC Jetson Game
Raspberry Pi Pico 2 RP2350A Zero-CM Mini Board
Jetson Orin NX Case
Raspberry Pi Pico Camera
Milk-V Duo HUB
Raspberry Pi USB Camera 5MP
Raspberry Pi 7 inch CAPLCD 1280x800 Capacitive TouchScreen HDMI Type C Display Monitor Computer PC
ESP32 Thermal imaging
Raspberry Pi IR Ther
Raspberry Pi Compute Module 5 CM5