


- sales/support
Google Chat:---
- sales
+86-0755-88291180
- sales01
sales@spotpear.com
- sales02
dragon_manager@163.com
- support
tech-support@spotpear.com
- CEO-Complaints
zhoujie@spotpear.com
- Only Tech-Support
WhatsApp:13246739196
- Purchase/Shipping/Refund
WhatsApp:13424403025
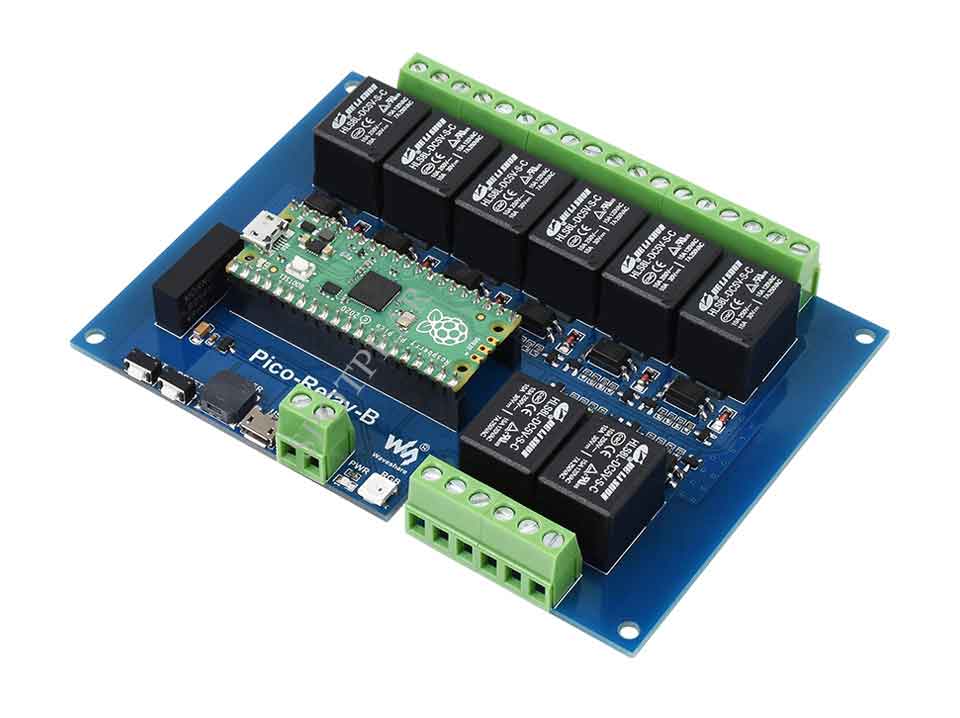
Raspberry Pi Pico Relay B User Guide
Overview
Industrial 8-Channel Relay Module For Raspberry Pi Pico, Power Supply Isolation, Photocoupler Isolation
Features
- Onboard unibody power supply isolation, provides stable isolated voltage, needs no extra power supply for the isolated terminal
- Onboard photocoupler isolation, prevent interference from external high-voltage circuit connected to the relay
- High-quality relay, contact rating: 10A 250V AC or ≤10A 30V DC
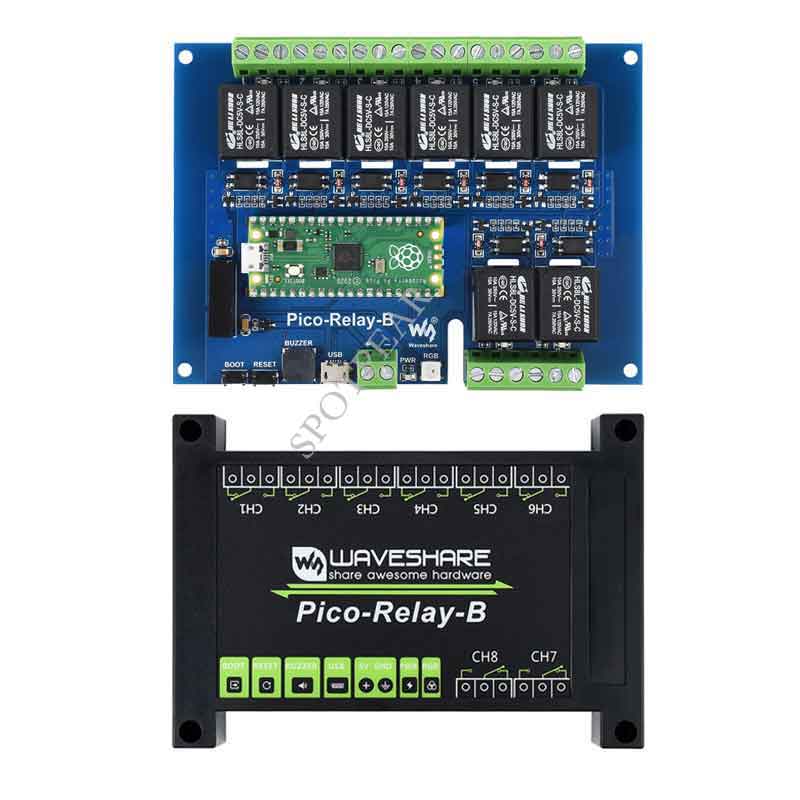
- ABS protection enclosure with rail-mount support, easy to install, safe to use
- Breakout USB port and BOOT pin, make it easy to debug without disassembling the enclosure
- PWR indicator, RGB LED, and passive buzzer outside the enclosure
Specifications
- Operating voltage: 5V
- Communication Protocol: USB
- Communication interface: Micro USB
- Relay channel: 8 ch
- Contact form: 1NO 1NC
Pinout
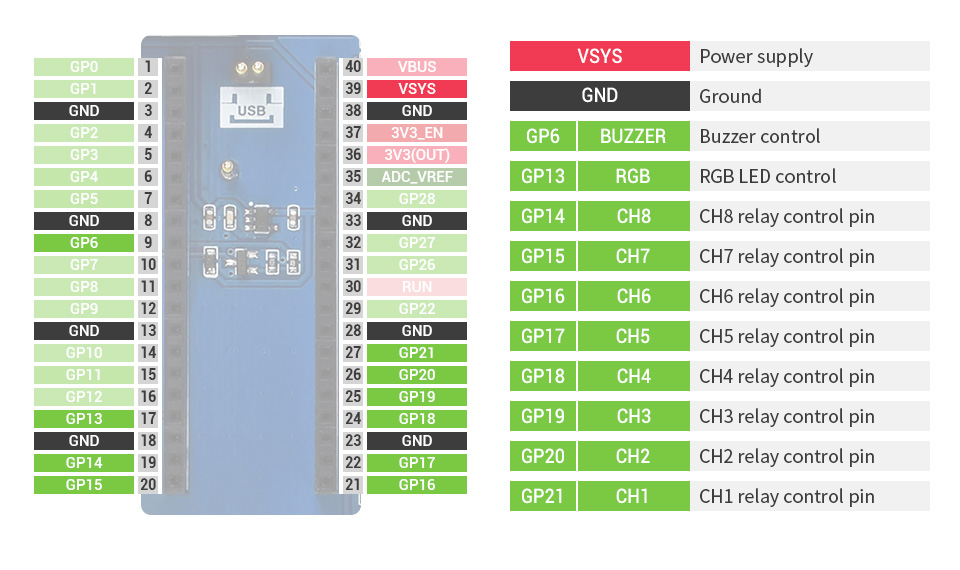
Hardware connection
| Relay B | Pico | Description |
| VCC | VSYS | Power input |
| GND | GND | Ground |
| CH1 | GP21 | Control pin of Channel 1 |
| CH2 | GP20 | Control pin of Channel 2 |
| CH3 | GP19 | Control pin of Channel 3 |
| CH4 | GP18 | Control pin of Channel 4 |
| CH5 | GP17 | Control pin of Channel 5 |
| CH6 | GP16 | Control pin of Channel 6 |
| CH7 | GP15 | Control pin of Channel7 |
| CH8 | GP14 | Control pin of Channel 8 |
| RGB | GP13 | Control pin of RGB LED |
| BUZZER | GP6 | Control pin of buzzer |
Connection
Setup environment
Please refer to Raspberry Pi's guide: https://www.raspberrypi.com/documentation/microcontrollers/
Raspberry Pi
1. Open a terminal of Raspberry Pi
2. Download and unzip the demo codes to directory Pico C/C++ SDK
sudo apt-get install p7zip-full
cd ~
sudo wget  https://www.waveshare.net/w/upload/a/a1/Pico-Relay-B_code.7z

7z x Pico-Relay-B_code.7z -o./Pico-Relay-B_code
cd ~/Pico-Relay-B_code
cd c/build/p
c
1. Hold the BOOTSEL button of Pico, and connect the USB interface of Pico to Raspberry Pi then release the button.
2. Go into the build directory and add the SDK path.
cd ~/Pico-Relay-B_code/c/
cd build
export PICO_SDK_PATH=../../pico-sdk
3. Run the command cmake to generate the Makefile file
cmake ..
4. Run the command make to build and generate the executable file.
make -j9
4. after building, a uf2 file is generated. Press and hold the button of the Pico board, connect it to Raspberry Pi by USB cable and then release the button. Copy the main.uf2 file generated to the recognized movable disk (RPI-RP2).
cp main.uf2 /media/pi/RPI-RP2/
python
1. Refer to Raspberry Pi's guides to setup Micropython firmware for Pico
2. Open the Thonny IDE, and drag the demo to IDE and run on Pico as below.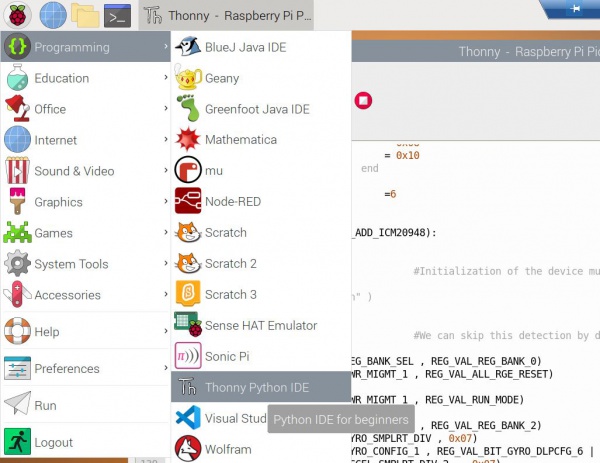
3. Choose File -> Open -> Pico-Relay-B_test.py file and run it
Windows
- Download and unzip the demo to your Windows desktop, refer to Raspberry Pi's guides to set up the Windows software environment settings.
- Press and hold the BOOTSEL button of Pico, connect the USB of Pico to the PC with a MicroUSB cable. Import c or python program into Pico to make it run.