- sales/support
Google Chat:---
- sales
+86-0755-88291180
- sales01
sales@spotpear.com
- sales02
dragon_manager@163.com
- support
tech-support@spotpear.com
- CEO-Complaints
zhoujie@spotpear.com
- sales/support
WhatsApp:13246739196
Sense HAT (B)
Introduction
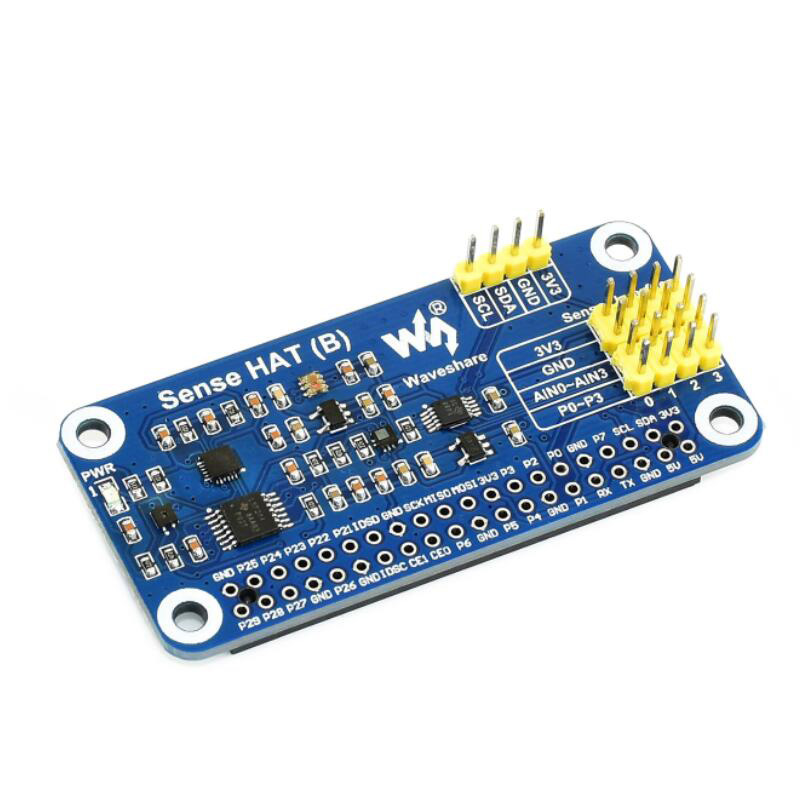
Sense HAT (B) for Raspberry Pi, Onboard Multi Powerful Sensors, Supports External Sensors. Can be plugged to Raspberry Pi directly.
Feature
- Standard Raspberry Pi 40PIN GPIO extension header, supports Raspberry Pi series boards
- Onboard ICM20948 (3-axis accelerometer, 3-axis gyroscope, and 3-axis magnetometer), detects movement, orientation, and magnetic
- Onboard SHTC3 digital temperature and humidity sensor, allows monitoring the environment
- Onboard LPS22HB barometric pressure sensor, allows monitoring the environment
- Onboard TCS34725 color sensor, identifies the color of nearby object
- Onboard ADS1015 ADC, 4-ch 12-bit precision, AD expansion to support more external sensors
- Brings I2C control pins, for connecting other host boards like STM32
- Comes with development resources and manual (examples for Raspberry Pi/STM32)
Specification
| Working voltage | 3.3V |
| Interface | I2C |
| Dimension | 65mm x 30.5mm |
| Accelerometer | Resolution: 16-bit |
| Ranging:±2/±4/±8/±16g | |
| Gyoscope | Resolution: 16-bits |
| Ranging:±250/±500/±1000/±2000°/sec | |
| Magnetometer | Resolution: 16-bits |
| Ranging:±4900µT | |
| Barometer | Resolution:24-bits (Pressure), 16-bits(Temperature) |
| Accuracy (ordinary temperature): ±0.025hPa | |
| Speed: 1 Hz - 75 Hz | |
| Temperature & Humidity | Accuracy (humidity):±2% rH |
| Ranging(humidity): 0% ~ 100% rH | |
| Accuracy(temperature): ±0.2°C | |
| Ranging(temperature): -30 ~ 100°C | |
| Color sensor | Resolution: 4-channels RGBC, 16-bits per channel |
| ADC | Resolution: 12-bits |
User Guides
Download examples
Download demo code from #Demo codes. Unzip it and get the codes as below:
- ADS1015: ADC examples (STM32, BCM2835(Pi), WiringPi(Pi) and Python(Pi) four examples) Device address:0x48
- ICM-20948: 9 axis sensor examples (STM32, BCM2835(Pi), WiringPi(Pi) and Python(Pi) four examples) Device address:0x68
- LPS22HB: Barometric pressure sensor examples (STM32, BCM2835(Pi), WiringPi(Pi) and Python(Pi) four examples) Device address:0x5C
- SHTC3: Temprature & Humidity sensor examples (STM32, BCM2835(Pi, WiringPi(Pi) and Python(Pi) four examples) Device address:0x70
- TC34725: Color sensor example (STM32, BCM2835(Pi), WiringPi(Pi) and Python(Pi) four examples Device address:0x29
Raspberry Pi examples
You should copy raspberrypi example to Raspberry Pi firstly. There are more than one examples, you can rename the folder and put them to one raspberrypi folder for easy using.
You need to copy the examples to /boot of Raspberry Pi and then copy them to /home/pi
- Libraries installation
Before you run examples, you should install related libraries.
- BCM2835 library:
wget http://www.airspayce.com/mikem/bcm2835/bcm2835-1.60.tar.gz
sudo tar zxvf bcm2835-1.60.tar.gz
cd bcm2835-1.xx
sudo ./configure
make
sudo make check
sudo make install
- Note: You can also go to http://www.airspayce.com/mikem/bcm2835/index.html for newest libraries.
- wiringPi libraries
sudo apt-get install git
sudo git clone git://git.drogon.net/wiringPi
cd wiringPi
sudo ./build
- Python libraries
sudo apt-get install python-pip
sudo pip install RPi.GPIO
sudo pip install spidev
sudo apt-get install python-imaging
sudo apt-get install python-smbus
- Enable I2C interface
- Before running examples, you also need to enable I2C.
- Open terminal, run command sudo raspi-config to enter configuration menu
- Choose Interfacing Options -> I2C -> Yes
- Hardware connection
To connect the Sense HAT (B) to Raspberry Pi, you can directly add it on the 40PIN GPIO or wire it pin by pin.
| Sense HAT (B) | Raspberry Pi | |
| Board | BCM2835 | |
| VCC | 3.3V | 3.3V |
| GND | GND | GND |
| SDA | 3 | P2 |
| SCL | 5 | P3 |
- 1. ICM20948 examples
- bcm2835 example
Open terminal of Raspbian, Compile codes and run example by command:
cd ~/Sense HAT (B)/ICM-20948/wiringPi/bcm2835
sudo make
sudo ./ICM20948_D
- WiringPi example
Open terminal of Raspbian, run example by command:
cd ~/Sense HAT (B)/ICM-20948/Raspberry Pi/wiringPi
sudo make
sudo ./ICM20948_D
- python example
Open terminal of Raspbian, Compile codes and run example by command:
cd ~/Sense HAT (B)/LPS22HB/Raspberry Pi/python
sudo python ICM20948.py
- Expected result:

To stop example, you can press Ctrl + C
- 2.LPS22HBTR example
Note: the temperature detection of air pressure sensor is only used as compensation. For accurate temperature detection, please observe the value of shtc3 temperature and humidity sensor.
- bcm2835 example
Open terminal of Raspbian, Compile codes and run example by command:
cd ~/Sense HAT (B)/LPS22HB/wiringPi/bcm2835
sudo make
sudo ./LPS22HB
- WiringPi example
Open terminal of Raspbian, run example by command:
cd ~/Sense HAT (B)/LPS22HB/Raspberry Pi/wiringPi
sudo make
sudo ./LPS22HB
- python example
Open terminal of Raspbian, Compile codes and run example by command:
cd ~/Sense HAT (B)/LPS22HB/Raspberry Pi/python
sudo python LPS22HB.py
- Expected result:
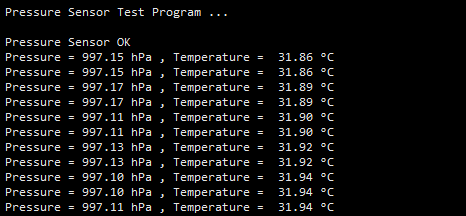
To stop example, you can press Ctrl + C
- 3.SHTC3 example
Note: the raspberry PI's own heat will affect the actual measured temperature. The board has an I2C interface. If accurate ambient temperature is needed, the raspberry PI can be connected to the module at a distance and then tested by wire.
- bcm2835 example
Open terminal of Raspbian, Compile codes and run example by command:
cd ~/Sense HAT (B)/SHTC3/wiringPi/bcm2835
sudo make
sudo ./SHTC3
- WiringPi example
Open terminal of Raspbian, run example by command:
cd ~/Sense HAT (B)/SHTC3/Raspberry Pi/wiringPi
sudo make
sudo ./SHTC3
- Expected result:
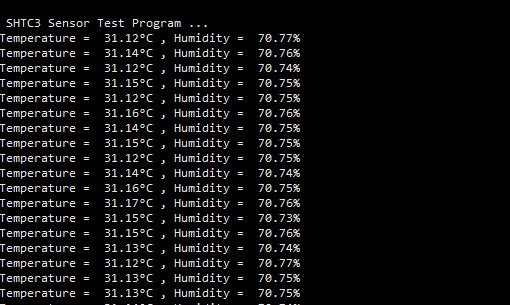
To stop example, you can press Ctrl + C
- 4. TC34725 example
- bcm2835 example
Open terminal of Raspbian, Compile codes and run example by command:
cd ~/Sense HAT (B)/TC34725/wiringPi/bcm2835
sudo make
sudo ./TC34725
- WiringPi example
Open terminal of Raspbian, run example by command:
cd ~/Sense HAT (B)/TC34725/Raspberry Pi/wiringPi
sudo make
sudo ./TC34725
- python example
Open terminal of Raspbian, Compile codes and run example by command:
cd ~/Sense HAT (B)/TC34725/Raspberry Pi/python
sudo python TC34725.py
- Expected result:
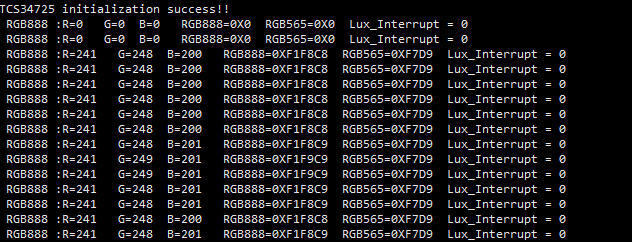
To stop example, you can press Ctrl + C
- 5. ADS1015 example
- bcm2835 example
Open terminal of Raspbian, Compile codes and run example by command:
cd ~/Sense HAT (B)/ADS1015/wiringPi/bcm2835
sudo make
sudo ./ADS1015
- WiringPi example
Open terminal of Raspbian, run example by command:
cd ~/Sense HAT (B)/ADS1015/Raspberry Pi/wiringPi
sudo make
sudo ./ADS1015
- python example
Open terminal of Raspbian, Compile codes and run example by command:
cd ~/Sense HAT (B)/ADS1015/Raspberry Pi/python
sudo python ADS1015.py
- Expected result:
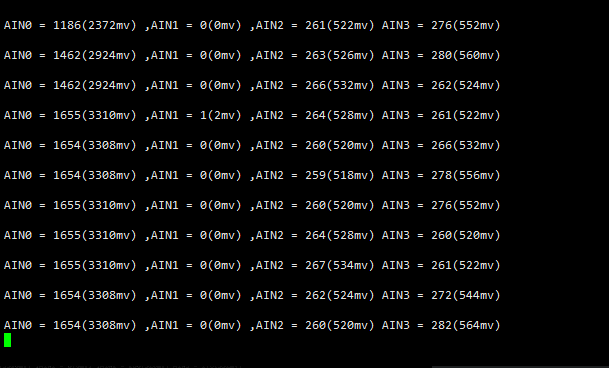
To stop example, you can press Ctrl + C
STM32 examples
The STM32 examples are written based on STM32F103RBT6, it will print measuring result to UART 1.
- Hardware connection
| Sense HAT (B) | STM32 |
| VCC | 5V/3.3V |
| GND | GND |
| SDA | PB11 |
| SCL | PB10 |
- 1. ICM20948 examples
1. Open the project
2. Compiling and download the project
3. Open serial SSCOM software, result are printed as below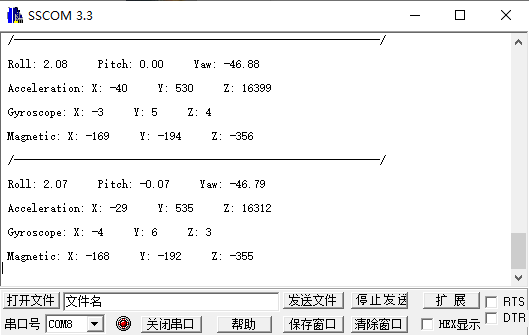
- 2. LPS22HBTR examples
1. Open the project
2. Compiling and download the project
3. Open serial SSCOM software, result are printed as below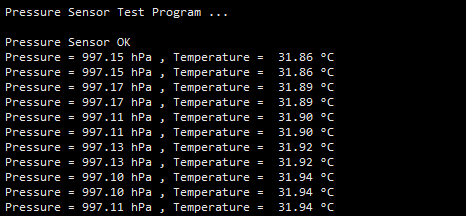
- 3. SHTC3 examples
1. Open the project
2. Compiling and download the project
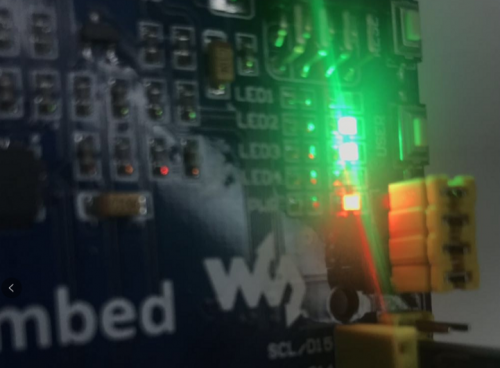
3. LED 2 lights on if sensor work normally and LED lights on when humidity is larger than 80%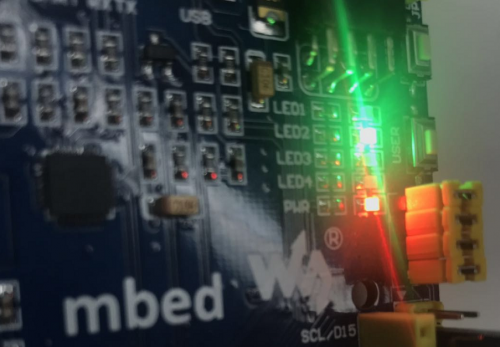
- 4. TC34725 examples
1. Open the project
2. Compiling and download the project
3. Open serial SSCOM software, result are printed as below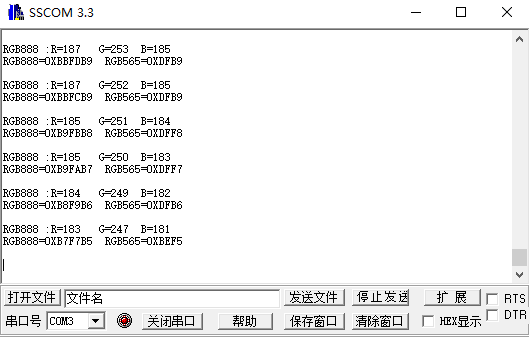
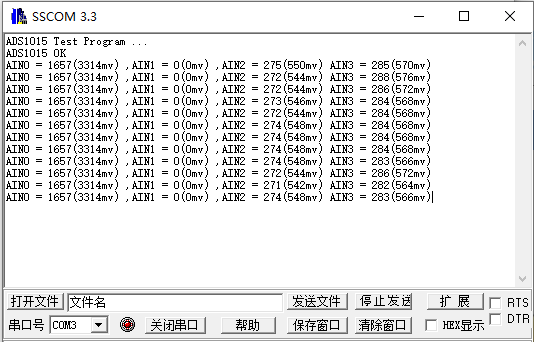
- 5. ADS1015 examples
1. Open the project
2. Compiling and download the project
3. Open serial SSCOM software, result are printed as below