


- sales/support
Google Chat:---
- sales
+86-0755-88291180
- sales01
sales@spotpear.com
- sales02
dragon_manager@163.com
- support
tech-support@spotpear.com
- CEO-Complaints
zhoujie@spotpear.com
- Only Tech-Support
WhatsApp:13246739196
- Purchase/Shipping/Refund
WhatsApp:13424403025
here User Guide
Compute Module Burn EMMC
Image Burning Steps
- Note: The EMMC version cannot use a TF card
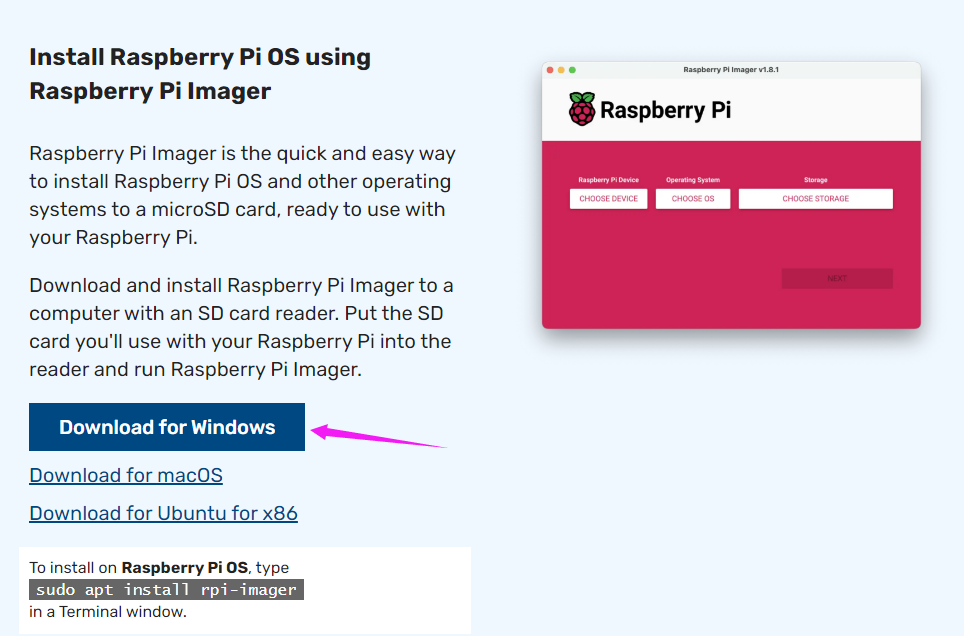
rpiboot (bootloader) download
- Download and open the rpiboot software with administrator privileges
Choose one of two to download
Install
- Close the antivirus software to install drivers and start tools. After successful installation, there is an application named rpiboot.exe in the installation directory

Burn the Software
- Click here to download
Enter Burning Mode
- Connect BOOT and GND, or turn the BOOT switch to ON. You can find the location of the BOOT pin in the on-board resources of the corresponding product's Wiki
- Connect to the computer through the Type C port (SLAVE port) to USB port first, and then connect the power supply, some boards need additional power supply
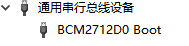
- At this point, when you connect the computer and power the motherboard, the computer's device manager will recognize a BCMxxx device
- Then run rpiboot
Select the corresponding executable program or script
For example, CM5 is connected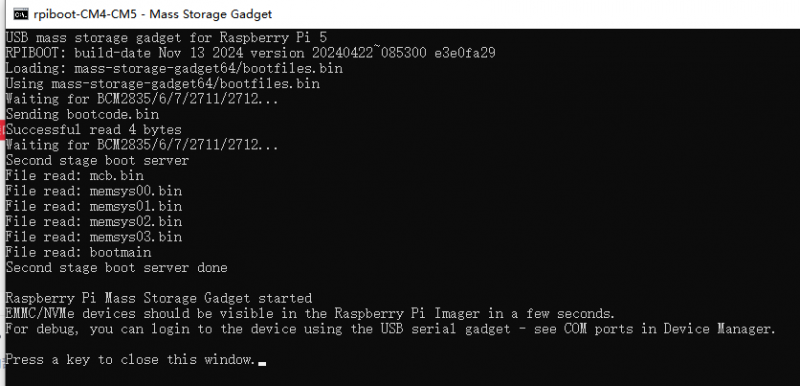
If the message 'Failed to write correct length, returned -9' appears and freezes, you can try updating rpiboot.exe - Wait for the run to end, and a USB drive icon will appear on my computer

- If you can't burn the program properly, try the following steps:
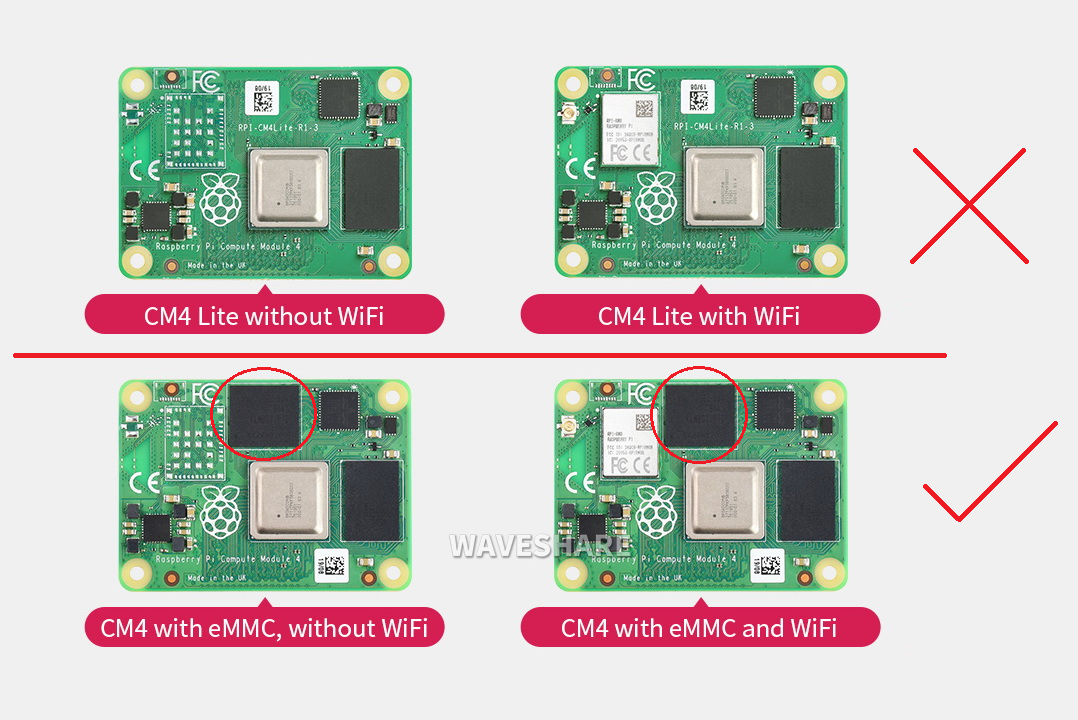
- Ensure that your Compute module version is correct, as the eMMC contains an additional IC. Only the programs of the eMMC version can be burned in the current way.
- Ensure that your Compute module version is correct, as the eMMC contains an additional IC. Only the programs of the eMMC version can be burned in the current way.
CM5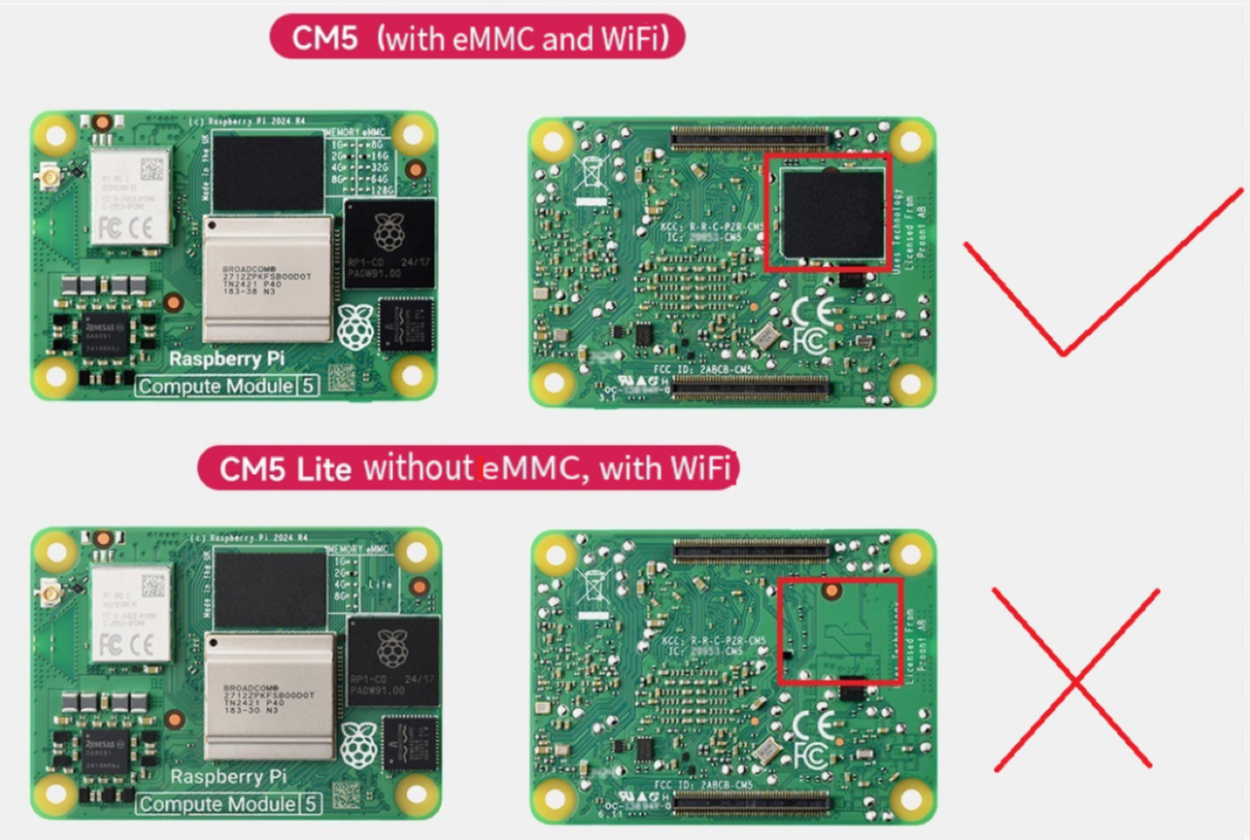
- Replace a USB data cable.
- Replace the USB port of the PC.
- Try restarting the PC.
- Try unplugging CM4 again.
- Try burning on another computer.
- If you can't burn the program properly, try the following steps:
Burning Image
Open Raspberry Pi Imager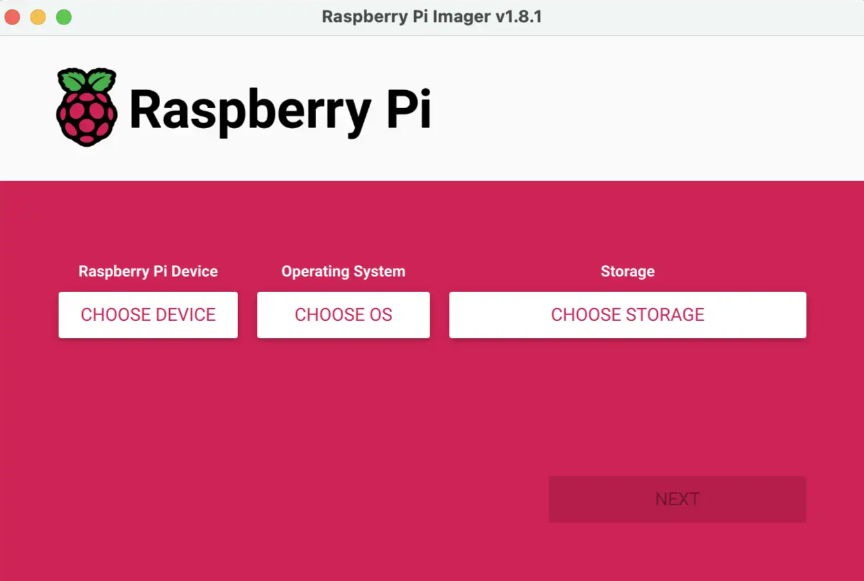
1. Choose the hardware (download from step 1) to be burned, select PI4 for CM4
2. Choose an image, select the appropriate system version among multiple options (you can also choose to format or select your backup system below)
3. Select the drive icon you want to burn, only mobile drive icons (USB extended drive icons) are supported
4. All options are selected, then click NEXT. If the selection is Raspberry Pi OS, then it will appear. If you don't need, click "No". If the previous configuration has been saved, you can directly click "Yes". The first time you use it, you need to click "Edit Settings" to set figuration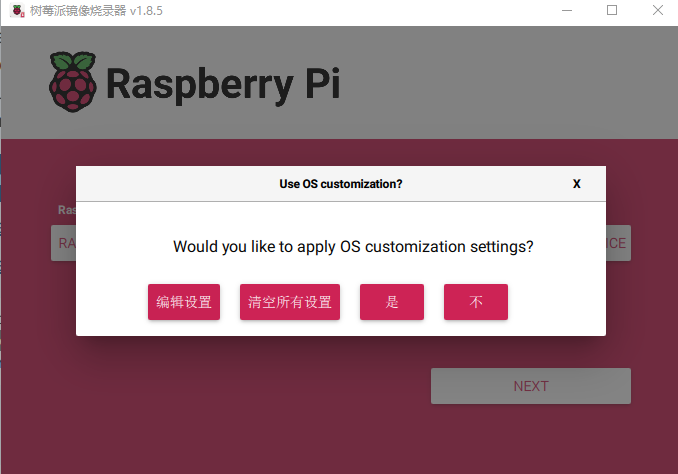
5. Use the new system, which is not pre-configured with a username and password. Users can directly configure the username and password in the setting interface. If not configured, the system will require the user to connect the keyboard and mouse after booting to set the username and password
- Note:
- CM4: If using the latest Raspberry Pi OS, USB2.0 is default in OTG mode. However, on some baseboards, an HUB chip is added. If you encounter an error with CM4:
config failed, hub doesn't have any ports! (err -19)
- However, USB can still be used. If you want to remove this error, remove otg_mode=1 in [cm4] of config.txt, and add dtoverlay=dwc2, dr_mode=host. Some systems do not prompt this error and can be ignored.
- CM4: If using the latest Raspberry Pi OS, USB2.0 is default in OTG mode. However, on some baseboards, an HUB chip is added. If you encounter an error with CM4:

Complete burning and reboot
- Disconnect the power supply after burning, disconnect the cable from the computer, disconnect the BOOT or turn the switch to OFF. Power it on again
