


- sales/support
Google Chat:---
- sales
+86-0755-88291180
- sales01
sales@spotpear.com
- sales02
dragon_manager@163.com
- support
tech-support@spotpear.com
- CEO-Complaints
zhoujie@spotpear.com
- Only Tech-Support
WhatsApp:13246739196
- Purchase/Shipping/Refund
WhatsApp:13424403025
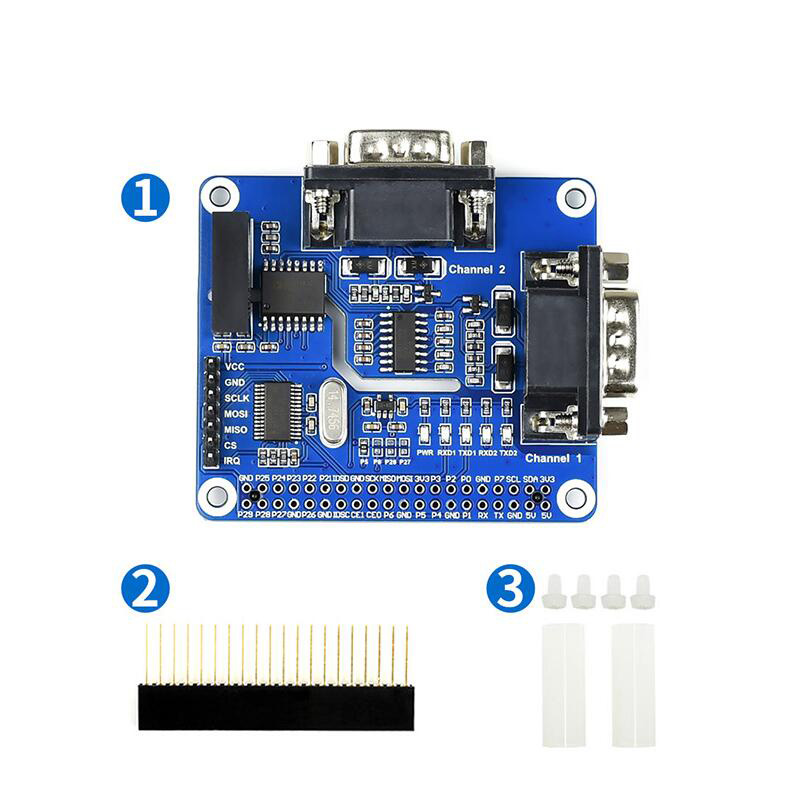
2-CH RS232 HAT
Introduction
This is a 2-channel isolated RS232 expansion HAT designed for Raspberry Pi, adopts the SC16IS752+SP3232 solution, with embedded protection circuits such as power supply isolation, ADI magnetical isolation, and TVS diode, etc.
It is easy to control the 2-channel RS232 via SPI interface. Due to its fast communication, stability, reliability, and safety, it is an ideal choice for fields like industrial automation.
Interfaces
| PIN | SYMBOL | Description |
|---|---|---|
| 1 | VCC | 3.3V/5V Power |
| 2 | GND | Ground |
| 3 | SCLK | SPI Clock input |
| 4 | MOSI | SPI Data input |
| 5 | MISO | SPI Data output |
| 6 | CS | SPI Chip Selection |
| 7 | IRQ | Interrupt output (Interrupt Request) |
Working principle
Introduction
This product adopts SC16IS752 as a controller. SC16IS752 is a dual-channel high-performance UART expansion chip that supports SPI and I2C interfaces communication. This module uses the SPI interface. Onboard power isolation, ADI magnetic coupler isolation, onboard TVS (transient voltage suppression tube), self-recovery fuses, protection diodes, and automatic transceiver switching circuit. It can effectively suppress the surge voltage and transient peak voltage in the circuit, prevent lightning and static electricity, prevent over-voltage, improve the anti-impact ability, can conduct signal isolation, with high dependence, strong anti-interference, low power consumption advantages, etc.
Communication protocol
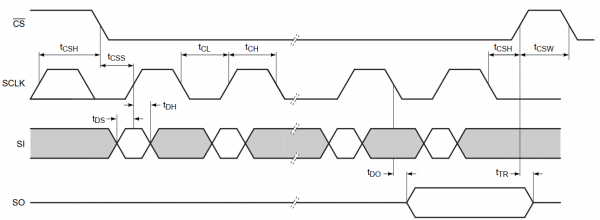
- CS:Slave chip selection, when CS is low, the slave chip is enabled.
- SCLK:SPI communication clock
- MOSI/SI:SPI Communication master sends, slave receives
- MOSI/SI:SPI Communication master receives, slave sends
- Timing Sequence:CPHL=0, CPOL=0 (SPI0)
How to use
We provide C and Python demo codes for Raspberry Pi. A quick testing example is provided in python.
Hardware Connection
To run examples, you should prepare an external RS232 to USB module, connect it to Channel 1 of 2-CH RS232 HAT.
If you test the 2-CH RS232 HAT with the text.py example, you need to wire Channel 1 and Channel 2 of 2-CH RS232 HAT.
| 232 PIN | Raspberry Pi(BCM) |
| VCC | 5V |
| GND | GND |
| SCK | P21 (SPI1 SCLK) |
| MOSI | P20 (SPI1 MOSI) |
| MISO | P19 (SPI1 MISO) |
| CS | P18 (SPI1 CS) |
| IRQ | P24 |
Software setup
- Open the terminal and modify config.txt file by commands:
sudo nano /boot/config.txt
- Add the line below to the file, the int_pin should be set according to the actual welding:
dtoverlay=sc16is752-spi1,int_pin=24
- Then restart Raspberry Pi
sudo reboot
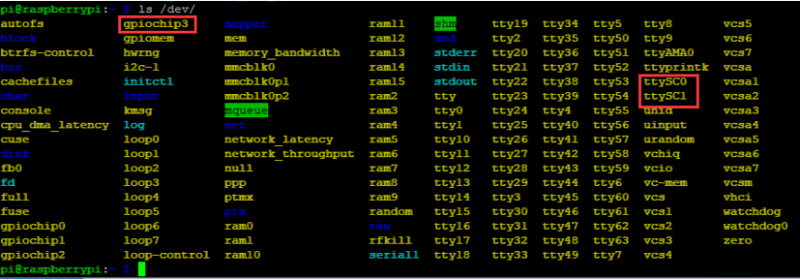
- After rebooting, the driver of SC16IS752 will be loaded into the system kernel. You can run command ls /dev to check the following devices:
Install Libraries
- Install wiringpi
sudo apt-get install wiringpi
# An upgrade may be required for raspberry PI 4B:
cd /tmp
wget https://project-downloads.drogon.net/wiringpi-latest.deb
sudo dpkg -i wiringpi-latest.deb
gpio -v
# Running gpio-v to check if the version is 2.52, If it is not, you need to check the installation again.
- Install the python2 library
sudo apt-get update
sudo apt-get install python-pip
sudo pip install RPi.GPIO
sudo apt-get install python-serial
- Install the python3 library
sudo apt-get update
sudo apt-get install python3-pip
sudo pip3 install RPi.GPIO
sudo apt-get install python3-serial
Test
- Download and run the examples:
sudo git clone https://github.com/waveshare/2-CH-RS232-HAT
cd 2-CH-RS232-HAT/
- C program
cd c
sudo make clean
sudo make
sudo ./main
- Python program
cd python
cd examples
sudo python main.py
Hardware connection: Channel 1 of the 2-CH RS232 HAT is connected to RS232 to USB:
Connect RS232 to USB to the computer, open the serial port assistant software, select the corresponding serial port, and set the baud rate to 115200.
- Run the C program, the data sent by computer will all be received by Raspberry Pi, as below:
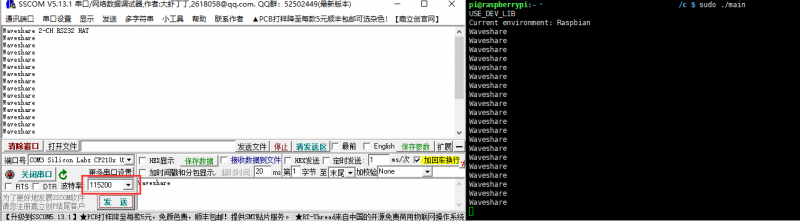
Note: The path of the samples is based on the actual directory;
- Run the main.py, the data sent by computer will all be received by Raspberry Pi, as below:
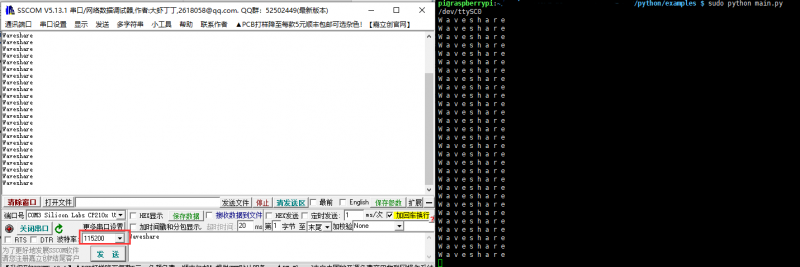
Note: The path of the samples is based on the actual directory;
If you don't have other RS232 devices, you can choose the test method as follow by connecting channel 1 with channel 2:
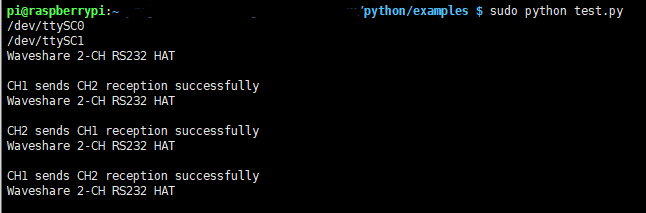
- Running result of test.py :