- sales/support
Google Chat:---
- sales
+86-0755-88291180
- sales01
sales@spotpear.com
- sales02
dragon_manager@163.com
- support
tech-support@spotpear.com
- CEO-Complaints
zhoujie@spotpear.com
- Only Tech-Support
WhatsApp:13246739196
- Purchase/Shipping/Refund
WhatsApp:13424403025
- HOME
- >
- ARTICLES
- >
- LuckFox
- >
- LuckFox Pico
Luckfox-Pico-Camera User Guide
Introduction
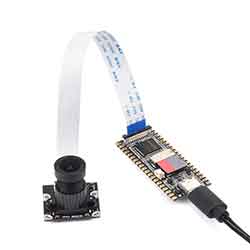
Adopts a SmartSens SC3336 sensor chip with 3MP resolution, features high sensitivity, high SNR, and low light performance, it is capable of a more delicate and vivid night vision imaging effect, and can better adapt to ambient light changes. Compatible with Luckfox Pico series boards.
Specification
- Sensor:
- Sensor: SC3336
- CMOS size: 1/2.8"
- Pixels: 3MP
- Static resolution: 2304×1296
- Maximum video frame rate: 30fps
- Shutter: Rolling shutter
- Lens:
- Focal length: 3.95mm
- Aperture: F2.0
- FOV: 98.3° (diagonal)
- Distortion: <33%
- Focusing: Manual focus
User Guide
This is a camera module designed for Luckfox Pico, only for Luckfox Pico series products, other boards are not supported.
The user guide here involves using the LuckFox Pico with the provided system to capture camera video streams and transmit them for display on a host computer.
Hardware Connection
- Place the metal side of the cable toward the white side of the connector holder, insert it into the board, and press the black buckle to lock it.
Configure Luckfox Pico Board
- After the board powers on and enters the system, input the following command to check the camera.
- If the camera is successfully recognized, the rkipc.ini folder will be automatically generated.
# ls /userdata/
ethaddr.txt lost+found image.bmp video0 video2 rkipc . ini video1
- Get the IP address of the board, the default IP of Luckfox Pico and Luckfox Pico Plus is 172.32.0.93.
# ifconfig
lo        Link encap:Local Loopback
          inet addr:127.0.0.1  Mask:255.0.0.0
          UP LOOPBACK RUNNING  MTU:65536  Metric:1
          RX packets:0 errors:0 dropped:0 overruns:0 frame:0
          TX packets:0 errors:0 dropped:0 overruns:0 carrier:0
          collisions:0 txqueuelen:1000
          RX bytes:0 (0.0 B)  TX bytes:0 (0.0 B)

usb0      Link encap:Ethernet  HWaddr 9E:49:D7:C8:F4:A3
          inet addr:172.32.0.93  Bcast:172.32.255.255  Mask:255.255.0.0
          UP BROADCAST RUNNING MULTICAST  MTU:1500  Metric:1
          RX packets:763 errors:0 dropped:116 overruns:0 frame:0
          TX packets:4 errors:0 dropped:0 overruns:0 carrier:0
          collisions:0 txqueuelen:1000
- If you use Luckfox Pico Plus and connect it with the wired cable, the IP address of the wired network port also can be checked:
# ifconfig
eth0      Link encap:Ethernet  HWaddr 82:D8:B7:D8:94:5A
          inet addr:192.168.10.86  Bcast:192.168.11.255  Mask:255.255.252.0
          UP BROADCAST RUNNING MULTICAST  MTU:1500  Metric:1
          RX packets:144 errors:0 dropped:0 overruns:0 frame:0
          TX packets:2 errors:0 dropped:0 overruns:0 carrier:0
          collisions:0 txqueuelen:1000
          RX bytes:11210 (10.9 KiB)  TX bytes:684 (684.0 B)
          Interrupt:51

lo        Link encap:Local Loopback
          inet addr:127.0.0.1  Mask:255.0.0.0
          UP LOOPBACK RUNNING  MTU:65536  Metric:1
          RX packets:0 errors:0 dropped:0 overruns:0 frame:0
          TX packets:0 errors:0 dropped:0 overruns:0 carrier:0
          collisions:0 txqueuelen:1000
          RX bytes:0 (0.0 B)  TX bytes:0 (0.0 B)

usb0      Link encap:Ethernet  HWaddr F2:84:8E:BA:A0:E8
          inet addr:172.32.0.93  Bcast:172.32.255.255  Mask:255.255.0.0
          UP BROADCAST RUNNING MULTICAST  MTU:1500  Metric:1
          RX packets:85 errors:0 dropped:39 overruns:0 frame:0
          TX packets:4 errors:0 dropped:0 overruns:0 carrier:0
          collisions:0 txqueuelen:1000
          RX bytes:13126 (12.8 KiB)  TX bytes:1544 (1.5 KiB)
Configure Host Computer
Here we mainly based on Windows computer configuration. Connect the board to the same LAN as the computer, Luckfox Pico can also be directly connected to the USB port of the computer via cable, using the RNDIS virtual network card to configure.
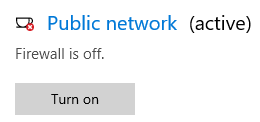
- Windows Security Center -> Firewall and Network Protection -> Disable Firewall.
- Open Settings -> Advanced Network Settings -> Change Adapter Options.
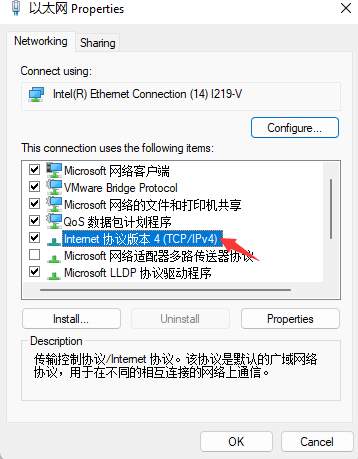
- Select the network adapter device recognized after inserting the board, usually with a similar name like "Remote NDIS based Internet Sharing Device," right-click and open Properties.
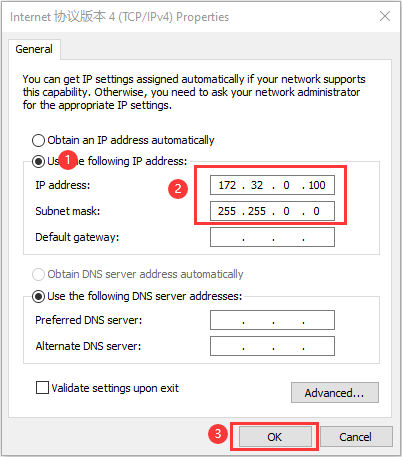
- Double click Internet Protocol version (TCP/IPv4), set the IPV4 address as 172.32.0.94 to avoid conflicts with devices.
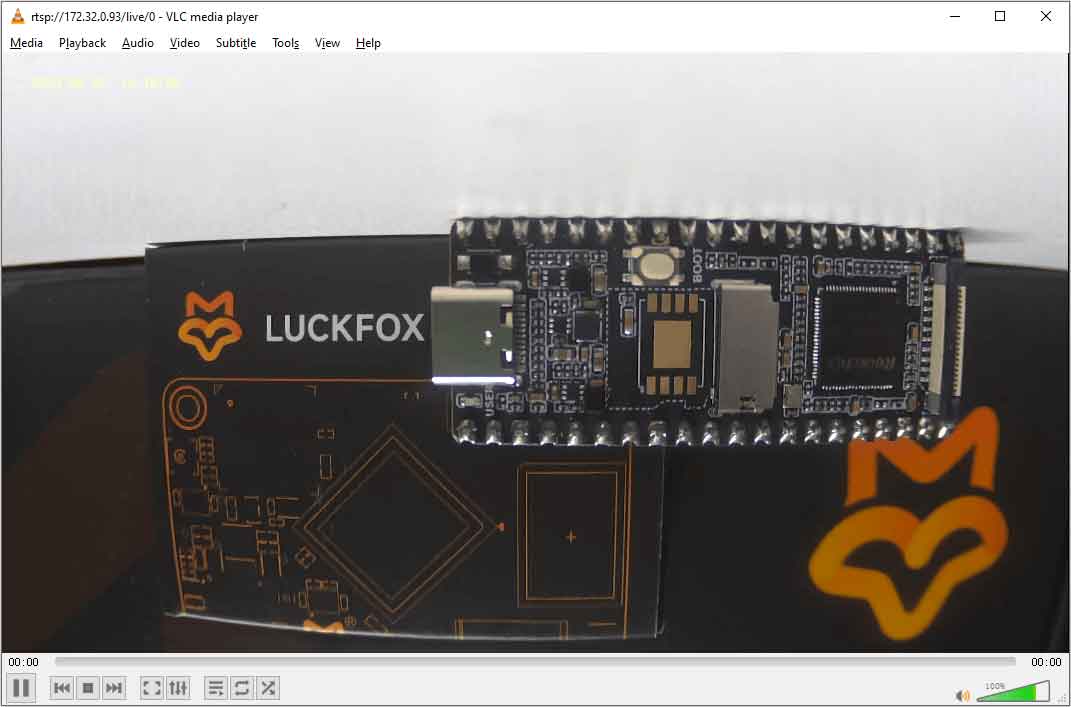
Streaming Using VLC Media Player Software
- Download and install VLC Media Player.
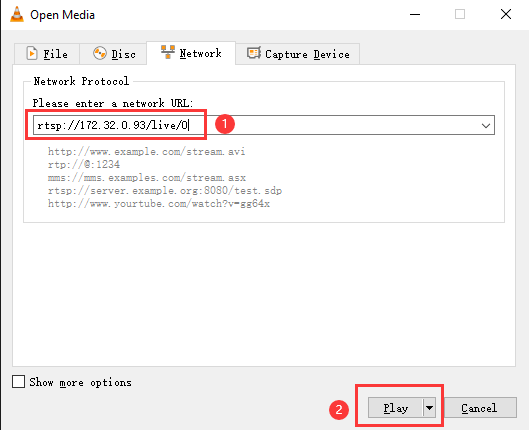
- Open VLC Media Player software, select Media -> Network Stream.
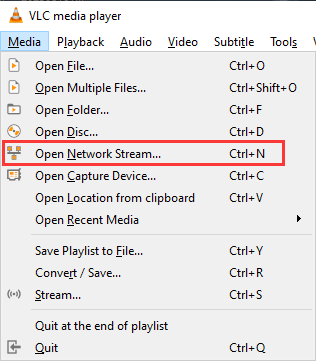
- Input the corresponding IP address: rtsp://172.32.0.93/live/0 (172.32.0.93 is the default IP of the board).
- If you use Luckfox Pico PLus and connect to the wired network, you also can stream using the IP address of eth0.
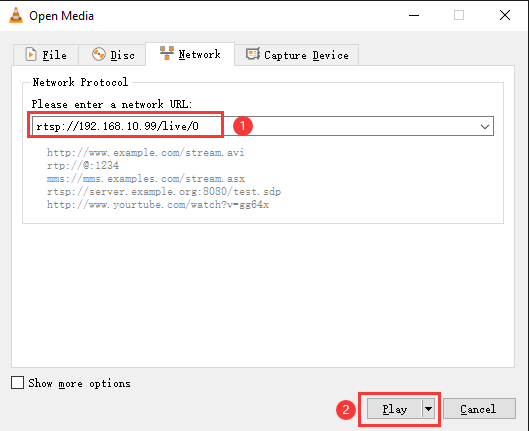
- Finally, click play, and you can see the camera screen. Also, the camera's lens can be adjusted, and the user can adjust the lens for focusing: