


- sales/support
Google Chat:---
- sales
+86-0755-88291180
- sales01
sales@spotpear.com
- sales02
dragon_manager@163.com
- support
tech-support@spotpear.com
- CEO-Complaints
zhoujie@spotpear.com
- Only Tech-Support
WhatsApp:13246739196
- Purchase/Shipping/Refund
WhatsApp:13424403025
- HOME
- >
- ARTICLES
- >
- Raspberry Pi
- >
- Raspberry Pi LCD
- >
- GPIO-SPI
3.5inch-RPi-LCD-F User Guide
Overview
Introduction
The 3.5-inch RPi LCD (F) is equipped with a capacitive touch screen with a resolution of 320 × 480, supporting two connection methods: Pigo pin communication and GH1.25 13PIN cable connection, and providing example materials for Raspberry Pi, ESP32, Pico, Arduino, etc.
Features
- 320×480 resolution, 262K RGB colors, clear and colorful displaying effect
- High touch screen transmittance, fast response and long lifetime
- Embedded with ST7796S driver chip and GT911 capacitive touch control chip, using SPI and I2C communication respectively, minimizes required IO pins
- Supports two connection methods: Pigo pin communication and GH1.25 13PIN cable connection
- Adopts Immersion Gold process, nice looking, with better durability
- Provides complete demos and development materials for Raspberry Pi, Raspberry Pi Pico, ESP32 and Arduino platforms
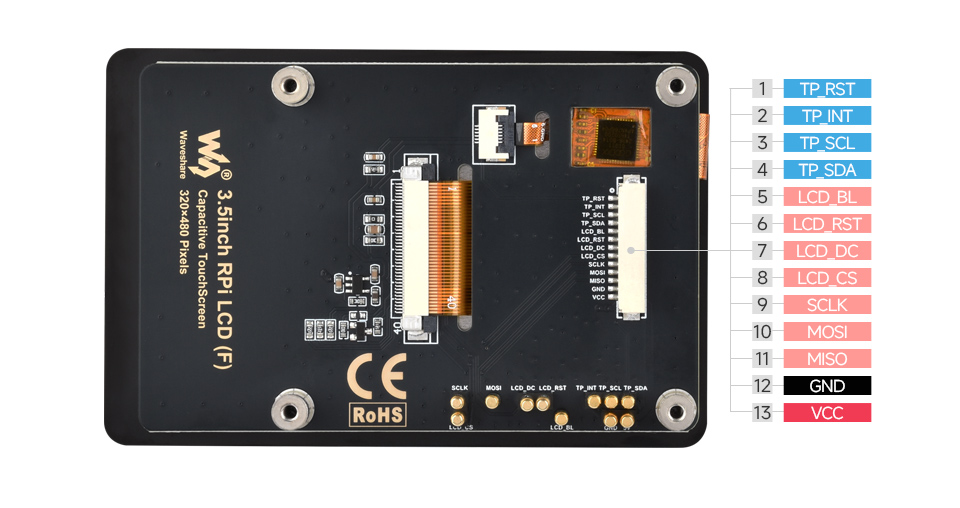
Interfaces
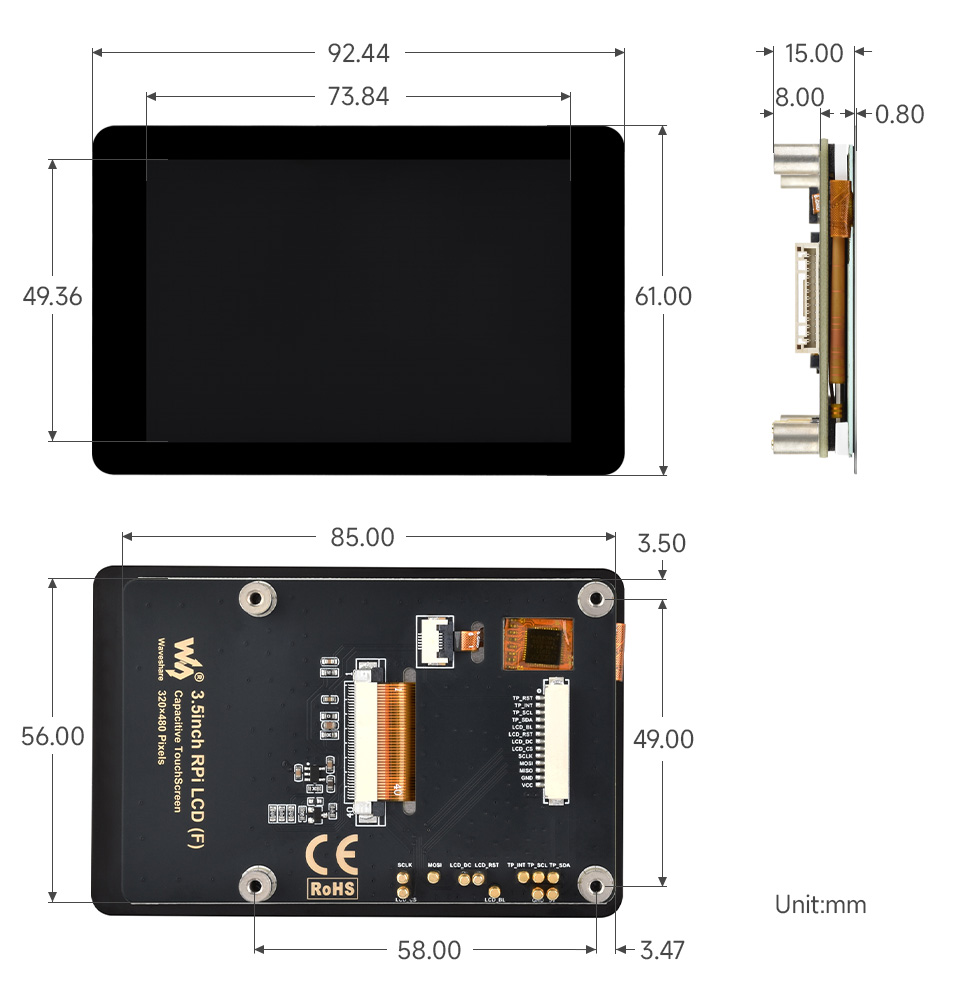
Dimensions
Specifications
| Parameter Name | Parameter |
| Supply Voltage | 5V |
| Logic Voltage | 3.3V |
| LCD type | IPS |
| Communication interface | Display: SPI |
| Touch: I2C | |
| Controller Chip | Display: ST7796S |
| Touch: GT911 | |
| Resolution | 320 (H) x 480 (V) |
| Display Size | 49.36 (H) x 73.84 (V) mm |
| Dimensions | 61.00 (H) x 92.44 (V) mm |
Raspberry Pi Tutorial
Hardware Connection
This product supports two connection methods to Raspberry Pi
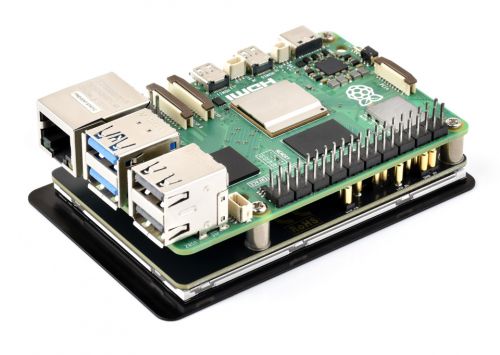
Method 1: Connect the Raspberry Pi through Pigo Pin
Method 2: Connect the Raspberry Pi through GH1.25 13PIN Cable
| Function pin | BCM encoding | Board physical pin number |
| TP_RST | 17 | 11 |
| TP_INT | 4 | 7 |
| TP_SCL | 3 | 5 |
| TP_SDA | 2 | 3 |
| LCD_BL | 18 | 12 |
| LCD_RST | 27 | 13 |
| LCD_DC | 22 | 15 |
| LCD_CS | 8 | 24 |
| SCLK | 11 | 23 |
| MOSI | 10 | 19 |
| MISO | 9 | 21 |
| GND | GND | 6 |
| VCC | 5V | 4 |
Enable SPI and I2C Interfaces
Enter the following command in the terminal:
sudo raspi-config nonint do_spi 0
sudo raspi-config nonint do_i2c 0
Python Environment
- Install libraries
sudo apt-get update
sudo apt-get install python3-pip
sudo apt-get install python3-pil
sudo apt-get install python3-numpy
sudo apt-get install python3-spidev
sudo apt-get pip install smbus2
- Download and run the demo
wget https://files.waveshare.com/wiki/3.5inch%20RPi%20LCD%20(F)/3inch5_RPI_LCD_F_RPI.zip
unzip 3inch5_RPI_LCD_F_RPI.zip
cd 3inch5_RPI_LCD_F_RPI
sudo python ./main.py
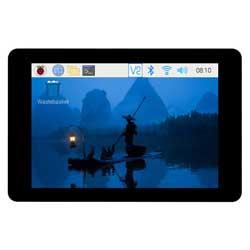
Bookworm System Desktop Display
Install Driver Module
- Determine the current kernel version
uname -a
This command will output the complete kernel version information. For example, executing this command on Raspberry Pi 5 may produce the following output:
Linux raspberrypi 6.6.51+rpt-rpi-2712 #1 SMP PREEMPT Debian 1:6.6.51-1+rpt3 (2024-10-08) aarch64 GNU/Linux
This indicates that the kernel version number of this system is 6.6.51+rpt-rpi-2712, and it uses 64-bit ARM (AArch64) architecture.
- Download and install the ST7796 driver module
# Step 1: Download and enter the Waveshare-st7796s driver folder wget https://files.waveshare.com/wiki/common/Waveshare-st7796s.zip unzip Waveshare-st7796s.zip cd Waveshare-st7796s
# Step 2: cd to the directory of the corresponding kernel version number # Run the following command as in the example above cd 6.6.51/64/rpi-2712-RPi5
# Copy the corresponding version of st7796s.ko to the current system sudo cp st7796s.ko /lib/modules/$(uname -r)/kernel/drivers
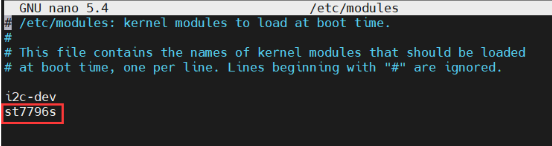
# Make sure the module is loaded at boot time, add the module name to the /etc/modules file: sudo nano /etc/modules
# Add at the end st7796s
Enter the following statement in the terminal to handle kernel module dependencies:
sudo depmod -a
- Configure driver device tree
cd
wget https://files.waveshare.com/wiki/common/Waveshare35f.dtbo
sudo cp Waveshare35f.dtbo /boot/overlays/
For Rpi4 & Rpi5
Configure Driver File
Refer to the steps here first #Install Driver Module
- Edit config.txt configuration file
sudo nano /boot/firmware/config.txt
Comment out the dual-screen configuration statements
Add the following statements at the end of [all]
dtparam=i2c_arm=on
dtparam=i2c_arm_baudrate=50000
dtparam=spi=on
dtoverlay=Waveshare35f,fps=60,speed=48000000,rotate=90,ts_rotate_90
hdmi_force_hotplug=1
max_usb_current=1
hdmi_group=2
hdmi_mode=87
hdmi_cvt 480 320 60 6 0 0 0
hdmi_drive=2
Create Screen Configuration File
Create 98-spi-screen.conf file
sudo nano /etc/X11/xorg.conf.d/98-spi-screen.conf
Add the following parameters to 98-spi-screen.conf file
Section "Device"
    Identifier "SPI Screen"
    Driver "fbdev"
    Option "fbdev" "/dev/fb0"
EndSection
Note: After the entire process operation is completed, if they are not displayed, modify "/dev/fb0" to "/dev/fb1" and then restart it
Switch to X11
sudo raspi-config nonint do_wayland W1
Restart to take effect
For All Raspberry Pi Versions
It must be operated based on the bookworm lite version, 64-bit lite or 32-bit lite
Configure Driver File
Refer to the steps here first #Install Driver Module
- Edit config.txt configuration file
sudo nano /boot/firmware/config.txt
Comment out the KMS and dual-screen configuration statements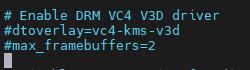
Add the following statements at the end of [all]
dtparam=i2c_arm=on
dtparam=i2c_arm_baudrate=50000
dtparam=spi=on
dtoverlay=Waveshare35f,fps=60,speed=48000000,rotate=90,ts_rotate_90
hdmi_force_hotplug=1
max_usb_current=1
hdmi_group=2
hdmi_mode=87
hdmi_cvt 480 320 60 6 0 0 0
hdmi_drive=2
Download Necessary Softwares
- Install the Xorg service
sudo apt-get install --no-install-recommends xserver-xorg -y
sudo apt-get install --no-install-recommends xinit -y
- Install desktop manager
sudo apt install lightdm -y
- Install official Raspberry Pi GUI
sudo apt install raspberrypi-ui-mods -y
- Install git
sudo apt install git -y
- Install a browser (optional)
sudo apt install chromium-browser -y
- Install a music player (optional)
sudo apt install vlc -y
Download and Run Driver
Open the Raspberry Pi terminal and execute:
sudo apt install libraspberrypi-dev -y
sudo apt-get install unzip -y
sudo apt-get install cmake -y
sudo wget https://files.waveshare.com/wiki/common/Rpi-fbcp.zip
sudo unzip ./Rpi-fbcp.zip
cd rpi-fbcp/
sudo rm -rf build
sudo mkdir -m 777 ./build
cd ./build
sudo cmake ..
sudo make -j4
sudo install fbcp /usr/local/bin/fbcp
Set Auto-start startx and fbcp
- Open the Bash shell file, or create one if it does not exist
sudo nano ~/.bashrc
Add the following code to the end of the file
if [ "$(cat /proc/device-tree/model | cut -d ' ' -f 3)" = "5" ]; then
    # rpi 5B configuration
    export FRAMEBUFFER=/dev/fb1
    startx  2> /tmp/xorg_errors
else
    # Non-pi5 configuration
    export FRAMEBUFFER=/dev/fb0
    startx  2> /tmp/xorg_errors
fi
- Create and edit a fbcp service file for autostart
sudo nano /etc/systemd/system/fbcp.service
Add service configuration in the file
[Unit]
Description=Framebuffer Copy for Raspberry Pi
After=network.target

[Service]
ExecStartPre=/bin/sleep 20
ExecStart=/usr/local/bin/fbcp
Restart=always
User=root
Group=root

[Install]
WantedBy=multi-user.target
Reload the systemd configuration
sudo systemctl daemon-reload
The service enables auto-start at boot
sudo systemctl enable fbcp.service
Test the startup service
sudo systemctl start fbcp.service
Set CLI Auto-login
sudo raspi-config nonint do_boot_behaviour B2
sudo raspi-config nonint do_wayland W1
sudo reboot
Note1: Make sure that the username of the Raspberry Pi is pi, otherwise it will not be able to log in automatically
Note2: After setting all the configurations above, the system takes longer to restart each time, and SSH also requires a moment to enter
Bullseye System Dektop Display
Install Driver Module
- Determine the current kernel version
uname -a
This command will output the complete kernel version information. For example, executing this command on Raspberry Pi 5 may produce the following output:
Linux raspberrypi 6.1.21-v8+ #1642 SMP PREEMPT Mon Apr 3 17:24:16 BST 2023 aarch64 GNU/Linux
This indicates that the kernel version number of this system is 6.1.21, and it uses 64-bit ARM (AArch64) architecture.
- Download and install the ST7796 driver module
# Step 1: Download and enter the Waveshare-st7796s driver folder
wget https://files.waveshare.com/wiki/common/Waveshare-st7796s.zip
unzip Waveshare-st7796s.zip
cd Waveshare-st7796s

# Step 2: cd to the directory of the corresponding kernel version number
# Run the following command as in the example above
cd 6.1.21/64/

# Copy the corresponding version of st7796s.ko to the current system
sudo cp st7796s.ko /lib/modules/$(uname -r)/kernel/drivers

# Make sure the module is loaded at boot time, add the module name to the /etc/modules file:
sudo nano /etc/modules

# Add at the end
st7796s

Enter the following statement in the terminal to handle kernel module dependencies:
sudo depmod -a
- Configure driver device tree
cd
wget https://files.waveshare.com/wiki/common/Waveshare35f.dtbo
sudo cp Waveshare35f.dtbo /boot/overlays/
Configure Driver File
Refer to the steps here first #Install Driver Module
- Edit config.txt configuration file
sudo nano /boot/config.txt
Comment out the KMS and dual-screen configuration statements
Add the following statements at the end of [all]
dtparam=i2c_arm=on
dtparam=i2c_arm_baudrate=50000
dtparam=spi=on
dtoverlay=Waveshare35f,fps=60,speed=48000000,rotate=90,ts_rotate_90
hdmi_force_hotplug=1
max_usb_current=1
hdmi_group=2
hdmi_mode=87
hdmi_cvt 480 320 60 6 0 0 0
hdmi_drive=2
Download and Run Driver
Open the Raspberry Pi terminal and execute:
sudo apt install libraspberrypi-dev -y
sudo apt-get install unzip -y
sudo apt-get install cmake -y
sudo wget https://files.waveshare.com/wiki/common/Rpi-fbcp.zip
sudo unzip ./Rpi-fbcp.zip
cd rpi-fbcp/
sudo rm -rf build
sudo mkdir -m 777 ./build
cd ./build
sudo cmake ..
sudo make -j4
sudo install fbcp /usr/local/bin/fbcp
Set Auto-start fbcp
- Open the rc.local file
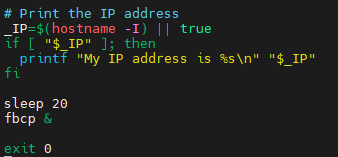
sudo nano /etc/rc.local
Before adding the following code to exit 0, be sure to add "&" to run in the background, otherwise the system may not start.
sleep 20
fbcp &
Restart to take effect
Resources
Schematic Diagram
Demo
Datasheets
Softwares
- Chinese Character Modulation Software
- Image2Lcd Image Modulation Software
- Image Modulation Tutorial
- Font Modulation Tutorial
- flash_download_tool_3.9.7
FAQ
Support
Monday-Friday (9:30-6:30) Saturday (9:30-5:30)
Email: services01@spotpear.com
[Tutorial Navigation]
- Overview
- Raspberry Pi Tutorial
- Hardware Connection
- Method 1: Connect the Raspberry Pi through Pigo Pin
- Method 2: Connect the Raspberry Pi through GH1.25 13PIN Cable
- Enable SPI and I2C Interfaces
- Python Environment
- Bookworm System Desktop Display
- Bullseye System Dektop Display
- Resources
- FAQ
- Support