- sales/support
Google Chat:---
- sales
+86-0755-88291180
- sales01
sales@spotpear.com
- sales02
dragon_manager@163.com
- support
tech-support@spotpear.com
- CEO-Complaints
zhoujie@spotpear.com
- Only Tech-Support
WhatsApp:13246739196
- Purchase/Shipping/Refund
WhatsApp:13424403025
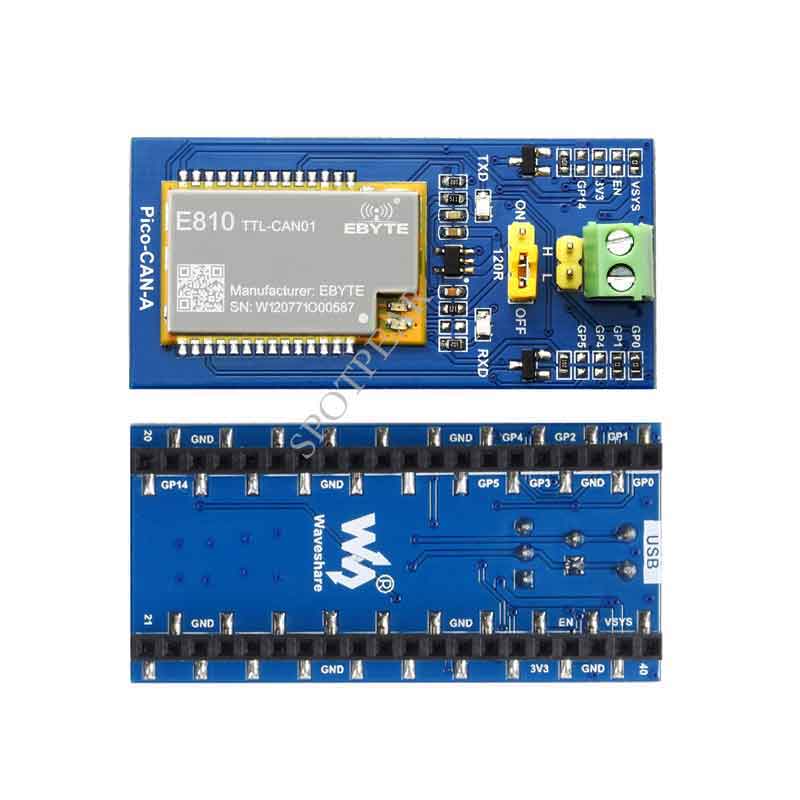
Raspberry Pi Pico-CAN-A User Guide
Overview
CAN Bus Module For Raspberry Pi Pico, Enabling Long-Range Communication Through UART.
Features
- Standard Raspberry Pi Pico header, supports Raspberry Pi Pico series.
- Incorporates E810-TTL-CAN01 module, UART to CAN bus conversion.
- Three conversion methods: transparent conversion, transparent conversion with identification, and protocol mode conversion.
- Provide a complete supporting manual (example programs such as Raspberry Pi Pico C/C++ and MicroPython).
Specifications
- Operating voltage: 3.3V
- CAN transceiver: E810-TTL-CAN01
- Communication: UART
- Baudrate: 300~921,600 bps
- Dimension: 58 × 25mm
Pinouts

Dimension

Pico Quick Start
Download Firmware
- MicroPython Firmware Download

- C_Blink Firmware Download

Hardware connection
Please take care of the direction when you connect Pico, an USB port is printed to indicate. You can also check the pin of Pico and the LCD board when connecting.
You can connect the display according to the table.
| CAN Board | Pico | Description |
| VCC | VSYS | 5V Power Input |
| GND | GND | GND |
| GP0 | TXD0 | UART TX (default) |
| GP1 | RXD 0 | UART RX (default) |
| GP2 | CFG | CAN mode switch |
| GP3 | RESET | CAN module reset |
| GP4 | TXD 0 | UART TX (optional) |
| G{5 | RXD 0 | UART RX (optional) |

Setup environment
Please refer to Raspberry Pi's guide:https://www.raspberrypi.org/documentation/pico/getting-started/
Download Demo codes
sudo apt-get install p7zip-full
cd ~
sudo wget  https://www.waveshare.com/w/upload/d/d8/Pico-CAN-A-Code.7z
7z x Pico_Pico-CAN-A-Code.7z -o./Pico-CAN-A-Code.7z
Run the Demo codes
This guide is based on Raspberry Pi.
C examples
...Waiting for update
Python codes
Use in Windows
- 1. Press and hold the BOOTSET button on the Pico board, connect the pico to the USB port of the computer through the Micro USB cable, and release the button after the computer recognizes a removable hard disk (RPI-RP2).
- 2. Copy the rp2-pico-20210418-v1.15.uf2 file in the python directory to the recognized removable disk (RPI-RP2).
- 3. Open Thonny IDE (Note: Use the latest version of Thonny, otherwise there is no Pico support package, the latest version under Windows is v3.3.3).
- 4. Click Tools->Settings->Interpreter, select Pico and the corresponding port as shown in the figure.

- 5. File -> Open -> the corresponding .py file, click to run, as shown in the following figure:

This demo provides a simple program...
Expected result
You need to connect the Pico-CAN-A to another CAN adapter (3.3V, A to A, and B to B), the demo codes will test to send data SENDTESTABCD1234 and print data received.