- sales/support
Google Chat: zj734465502@gmail.com
- sales
+86-0755-88291180
- sales01
sales@spotpear.com
- sales02
dragon_manager@163.com
- support
tech-support@spotpear.com
- CEO-Complaints
zhoujie@spotpear.com
- sales/support
WhatsApp:13246739196
Raspberry Pi 1.14inch 1.3inch LCD - Python Setup User Guide
- You can use this technique with any PiTFT, from the 240x135 mini PiTFT up to the 320x480. It isn't as fast as the kernel module support version but it'll work no matter what kernel/OS/version/etc and so is a lot less painful
Attaching
It's easy to use display breakouts with Python and the Adafruit CircuitPython RGB Display module. This module allows you to easily write Python code to control the display.
Since the PiTFT comes preassembled, all you need to do is place it onto the GPIO pins.
Since there's dozens of Linux computers/boards you can use we will show wiring for Raspberry Pi. For other platforms, please visit the guide for CircuitPython on Linux to see whether your platform is supported.
Connect the display as shown below to your Raspberry Pi.
- Note this is not a kernel driver that will let you have the console appear on the TFT. However, this is handy when you can't install an fbtft driver, and want to use the TFT purely from 'user Python' code!
- You can only use this technique with Linux/computer devices that have hardware SPI support, and not all single board computers have an SPI device so check before continuing
For the 1.14":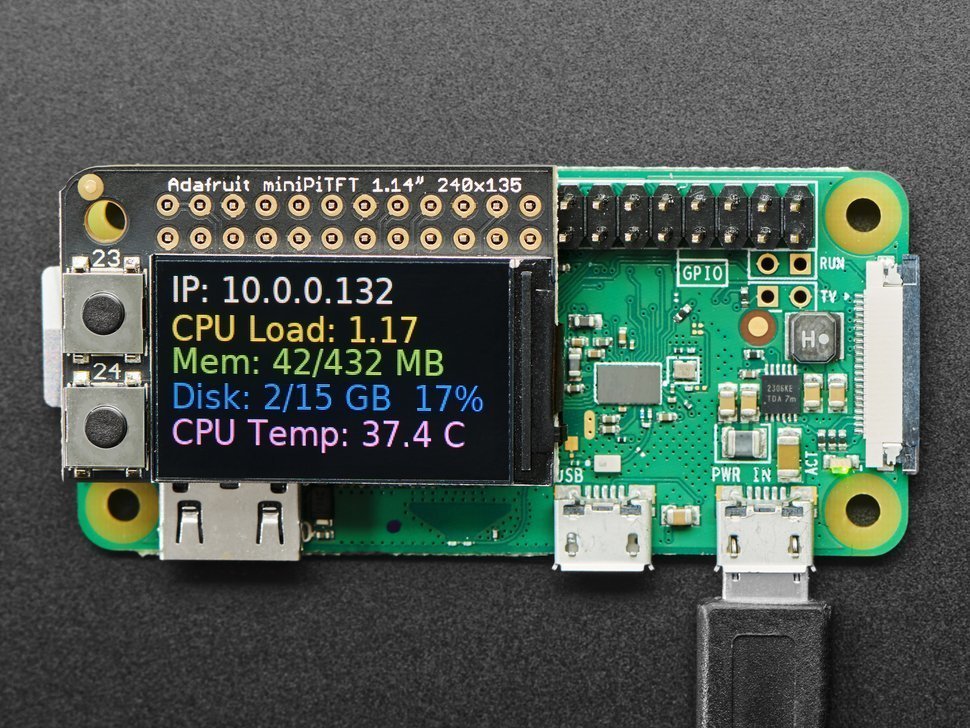
For the 1.3":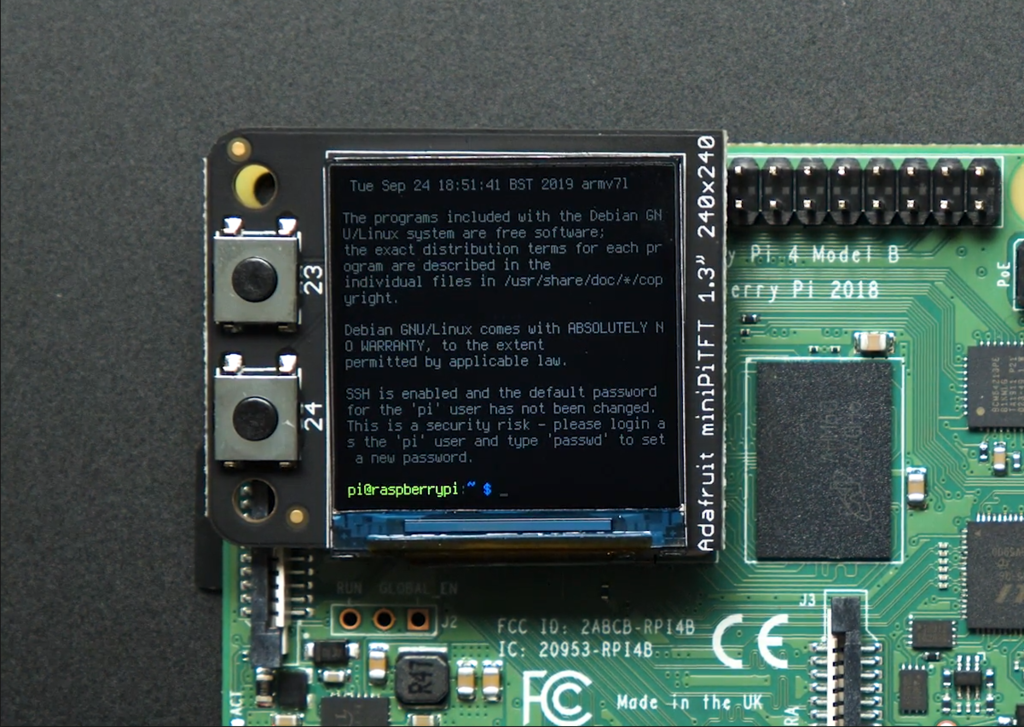
Setup
You'll need to install the Adafruit_Blinka library that provides the CircuitPython support in Python. This may also require enabling SPI on your platform and verifying you are running Python 3. Since each platform is a little different, and Linux changes often, please visit the CircuitPython on Linux guide to get your computer ready!
- If you have already installed the kernel module, you will need to remove it by editing your /boot/config.txt file before proceeding.
Python Installation of RGB Display Library
Once that's done, from your command line run the following commands:
sudo pip3 install adafruit-circuitpython-rgb-displaysudo pip3 install --upgrade --force-reinstall spidev
If your default Python is version 3 you may need to run 'pip' instead. Just make sure you aren't trying to use CircuitPython on Python 2.x, it isn't supported!
If that complains about pip3 not being installed, then run this first to install it:
sudo apt-get install python3-pip
DejaVu TTF Font
Raspberry Pi usually comes with the DejaVu font already installed, but in case it didn't, you can run the following to install it:
sudo apt-get install ttf-dejavu
Pillow Library
We also need PIL, the Python Imaging Library, to allow graphics and using text with custom fonts. There are several system libraries that PIL relies on, so installing via a package manager is the easiest way to bring in everything:
sudo apt-get install python3-pil
NumPy Library
A recent improvement of the RGB_Display library makes use of NumPy for some additional speed. This can be installed with the following command:
sudo apt-get install python3-numpy
That's it. You should be ready to go.
This button test demo will test to make sure you have everything setup correctly. Go ahead and save the file to your Raspberry Pi in your home directory as rgb_display_minipitfttest.py.
- import digitalio
- import board
- from adafruit_rgb_display.rgb import color565
- import adafruit_rgb_display.st7789 as st7789
- # Configuration for CS and DC pins for Raspberry Pi
- cs_pin = digitalio.DigitalInOut(board.CE0)
- dc_pin = digitalio.DigitalInOut(board.D25)
- reset_pin = None
- BAUDRATE = 64000000 # The pi can be very fast!
- # Create the ST7789 display:
- display = st7789.ST7789(
- board.SPI(),
- cs=cs_pin,
- dc=dc_pin,
- rst=reset_pin,
- baudrate=BAUDRATE,
- width=135,
- height=240,
- x_offset=53,
- y_offset=40,
- )
- backlight = digitalio.DigitalInOut(board.D22)
- backlight.switch_to_output()
- backlight.value = True
- buttonA = digitalio.DigitalInOut(board.D23)
- buttonB = digitalio.DigitalInOut(board.D24)
- buttonA.switch_to_input()
- buttonB.switch_to_input()
- # Main loop:
- while True:
- if buttonA.value and buttonB.value:
- backlight.value = False # turn off backlight
- else:
- backlight.value = True # turn on backlight
- if buttonB.value and not buttonA.value: # just button A pressed
- display.fill(color565(255, 0, 0)) # red
- if buttonA.value and not buttonB.value: # just button B pressed
- display.fill(color565(0, 0, 255)) # blue
- if not buttonA.value and not buttonB.value: # none pressed
- display.fill(color565(0, 255, 0)) # green
Go ahead and run it with this command:
sudo python3 rgb_display_minipitfttest.py
Once it is running, push the buttons. The top button should make the display light up Red, the bottom Blue, and pressing both at the same time should make it Green.