- sales/support
Google Chat:---
- sales
+86-0755-88291180
- sales01
sales@spotpear.com
- sales02
dragon_manager@163.com
- support
tech-support@spotpear.com
- CEO-Complaints
zhoujie@spotpear.com
- Only Tech-Support
WhatsApp:13246739196
- Purchase/Shipping/Refund
WhatsApp:13424403025
Raspberry Pi Installing CircuitPython Libraries on Raspberry Pi User Guide
- CircuitPython libraries and adafruit-blinka will work on any Raspberry Pi board except the compute module! That means the original 1, the Pi 2, Pi 3, Pi 4 or Pi Zero.
- Download the latest Raspbian or Raspbian Lite to your computer
- Burn the Raspbian image to your MicroSD card using your computer
- Re-plug the SD card into your computer (don't use your Pi yet!) and set up your wifi connection by editing supplicant.conf
- Activate SSH support
- Plug the SD card into the Pi
- If you have an HDMI monitor we recommend connecting it so you can see that the Pi is booting OK
- Plug in power to the Pi - you will see the green LED flicker a little. The Pi will reboot while it sets up so wait a good 10 minutes
- If you are running Windows on your computer, install Bonjour support so you can use .local names, you'll need to reboot Windows after installation
- You can then ssh into raspberrypi.local
The Pi Foundation has tons of guides as well
- We really really recommend the lastest Raspbian only. If you have an older Raspbian install, run "sudo apt-get update" and "sudo apt-get upgrade" to get the latest OS!
Update Your Pi and Python
Run the standard updates:
sudo apt-get update
sudo apt-get upgrade
and
sudo pip3 install --upgrade setuptools
If above doesn't work try
sudo apt-get install python3-pip
- Python2 support has been dropped, so you will need to either use pip3 and python3 as commands or set Python 3 as the default python install.
Set your Python install to Python 3 Default
There's a few ways to do this, we recommend something like this
sudo apt-get install -y python3 git python3-pipsudo update-alternatives --install /usr/bin/python python $(which python2) 1sudo update-alternatives --install /usr/bin/python python $(which python3) 2sudo update-alternatives --config python
Enable I2C and SPI
A vast number of our CircuitPython drivers use I2C and SPI for interfacing so you'll want to get those enabled.
You only have to do this once per Raspberry Pi but by default both interfaces are disabled!
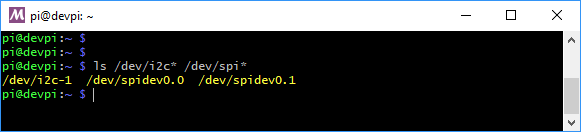
Once you're done with both and have rebooted, verify you have the I2C and SPI devices with the command
ls /dev/i2c* /dev/spi*
You should see the response
/dev/i2c-1 /dev/spidev0.0 /dev/spidev0.1
Enabling Second SPI
If you are using the main SPI port for a display or something and need another hardware SPI port, you can enable it by adding the line
dtoverlay=spi1-3cs
to the bottom of /boot/config.txt and rebooting. You'll then see the addition of some /dev/spidev1.x devices:

Make sure you're using Python 3!
The default python on your computer may not be python 3. Python 2 is officially discontinued and all our libraries are Python 3 only.
We'll be using python3 and pip3 in our commands, use those versions of python and pip to make sure you're using 3 and not 2
Install Python libraries
Now you're ready to install all the python support
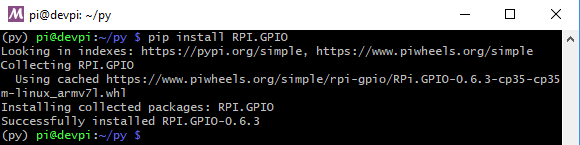
Run the following command to install the Raspberry PI GPIO library:
pip3 install RPI.GPIO
Run the following command to install adafruit_blinka
pip3 install adafruit-blinka
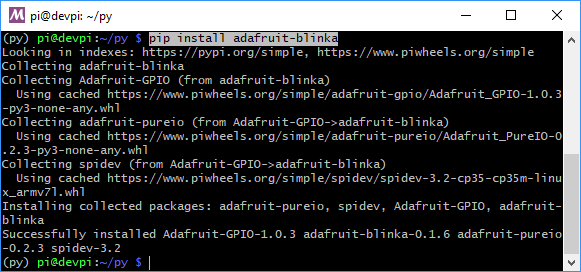
The computer will install a few different libraries such as adafruit-pureio (our ioctl-only i2c library), spidev (for SPI interfacing), Adafruit-GPIO (for detecting your board) and of course adafruit-blinka
That's pretty much it! You're now ready to test.
Blinka Test
Create a new file called blinkatest.py with nano or your favorite text editor and put the following in:
- import board
- import digitalio
- import busio
- print("Hello blinka!")
- # Try to great a Digital input
- pin = digitalio.DigitalInOut(board.D4)
- print("Digital IO ok!")
- # Try to create an I2C device
- i2c = busio.I2C(board.SCL, board.SDA)
- print("I2C ok!")
- # Try to create an SPI device
- spi = busio.SPI(board.SCLK, board.MOSI, board.MISO)
- print("SPI ok!")
- print("done!")
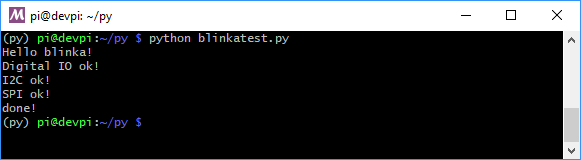
Save it and run at the command line with
python3 blinkatest.py
You should see the following, indicating digital i/o, I2C and SPI all worked