


- sales/support
Google Chat:---
- sales
+86-0755-88291180
- sales01
sales@spotpear.com
- sales02
dragon_manager@163.com
- support
tech-support@spotpear.com
- CEO-Complaints
zhoujie@spotpear.com
- Only Tech-Support
WhatsApp:13246739196
- Purchase/Shipping/Refund
WhatsApp:13424403025
Chapter 9 of KitiBot-Microbit: 2.4G Communication User Guide
2.4G Communication
You need at least two micro:bit for 2.4G testing
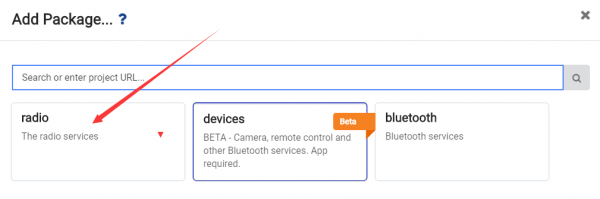
First we should add the package for 2.4G, note that its package could not be used with Bluetooth at the same time.
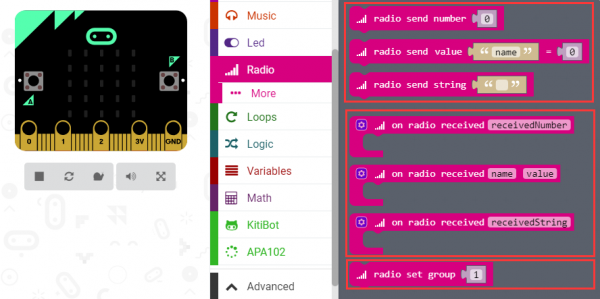
There are three types of radio blocks. Send, receive and initial
note: you should set the boards to the same wireless group for normal communication
Buttons
---
https://cdn.static.spotpear.com/uploads/picture/learn/micro-bit/micro-bit-kit/chapter-9-of-kitibot-microbit/chapter-9-of-kitibot-microbit-03.gif
Press button A or B of one micro:bit, and another will show characters A or B on LED matrix
Radio control KitiBot
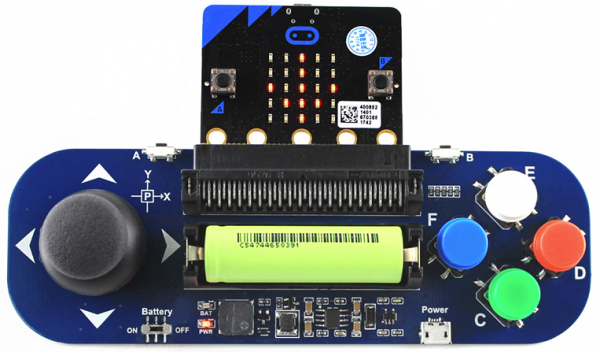
We have learned how to use radio above, here we learn to use radio to control KitiBot by the module Joystick for micro:bit.
To use the Joystick for micro:bit, you need to install WSJoyStick package.https://github.com/waveshare/JoyStick
https://cdn.static.spotpear.com/uploads/picture/learn/micro-bit/micro-bit-kit/chapter-9-of-kitibot-microbit/chapter-9-of-kitibot-microbit-06.gif
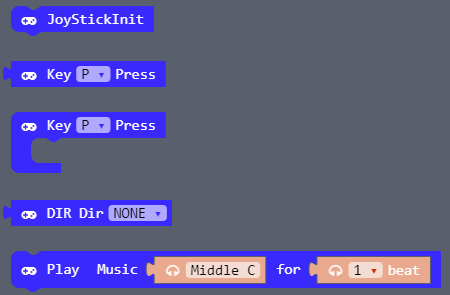
The block in WSJoyStick package are:
JoyStickInit: Should be used on start for initailization
Key P Press: This block is used to detect if buttons are pressed
DIR Dir None: Used to judge direction of joystick.
Let's go to write the sender code of Joystick by modifying the last project.
https://cdn.static.spotpear.com/uploads/picture/learn/micro-bit/micro-bit-kit/chapter-9-of-kitibot-microbit/chapter-9-of-kitibot-microbit-08.gif
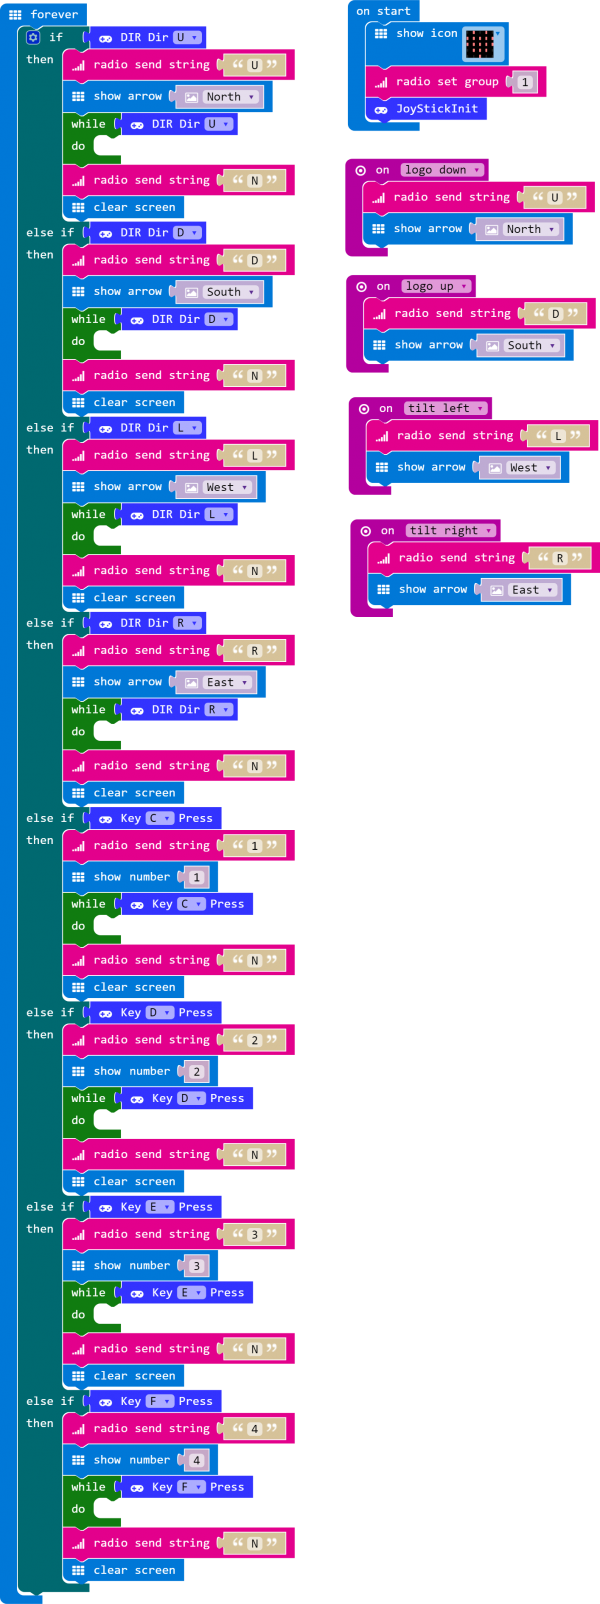
Add JoystickInit to on start, DIR block is used to detect if the joystick is pressed to up. If joystick is pressed to up, sending character "U" and display arrow North on matrix. Here we use if...then..., with this structure, micro:bit will sending "U" when button is pressed and "N" when released. We also put a loop block while to waiting for button being released,make sure micro:bit only send one message when pressing and one message when releasing.

Same settings for other buttons: Make micro:bit sending characters "U", "D", "L" and "R" when up, download, left and right joystick are pressed separately.
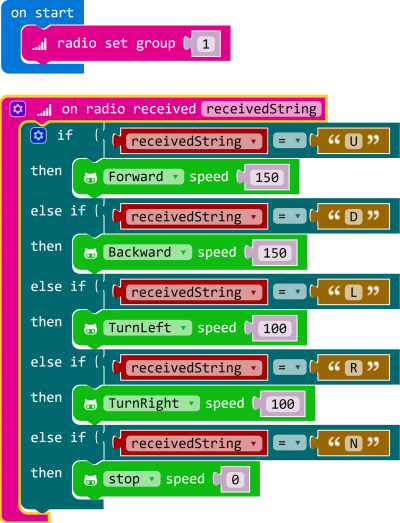
https://cdn.static.spotpear.com/uploads/picture/learn/micro-bit/micro-bit-kit/chapter-9-of-kitibot-microbit/chapter-9-of-kitibot-microbit-10.gif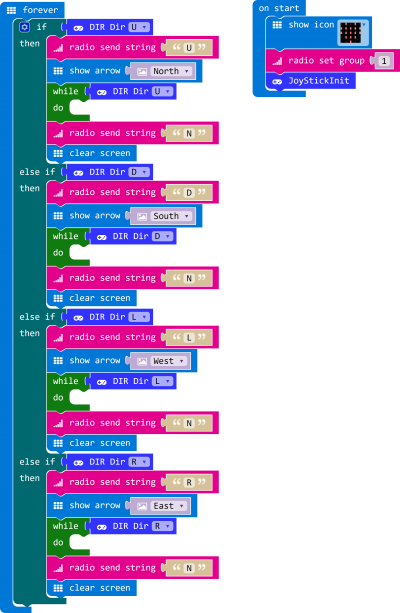
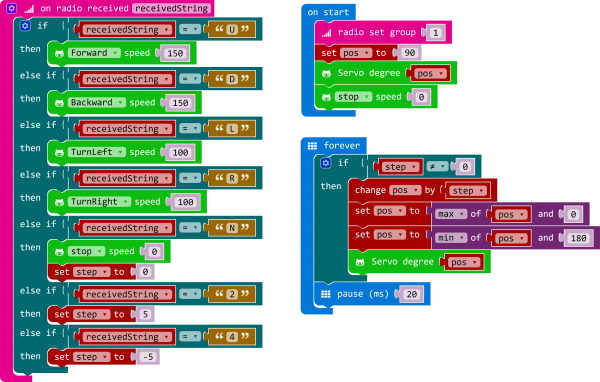
And the receiver code: Makes robot move according to the characters received."U" to upward, "D" to backward, "L" to turn left, "R" to turn right and "N" to stop.
Control steering gear
Sender code: Sending characters: "1", "2", "3" and "4" when four color buttons are pressed, and "N" when released.
https://cdn.static.spotpear.com/uploads/picture/learn/micro-bit/micro-bit-kit/chapter-9-of-kitibot-microbit/chapter-9-of-kitibot-microbit-14.gif.gif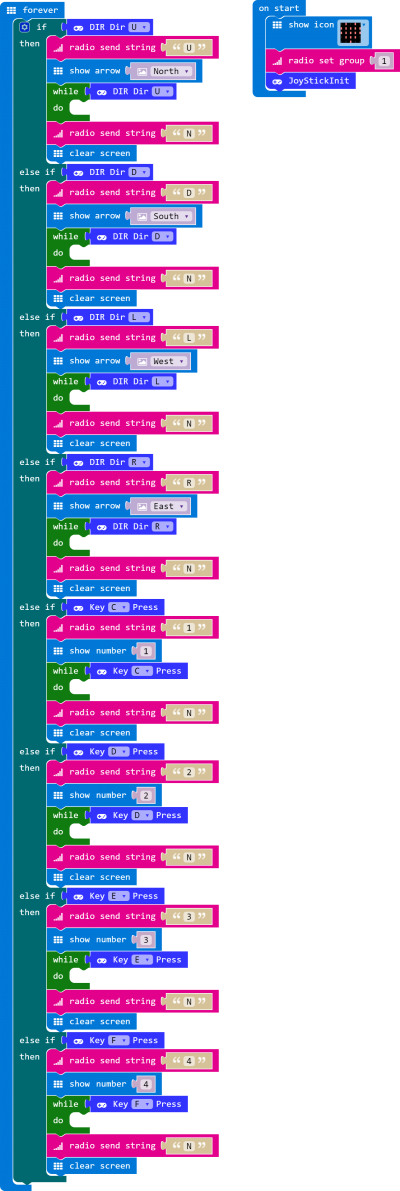
Receiver code: Similar to Bluetooth codes, use variable "step" for rotate angle, "pos" for current angle. If step isn't equal to 0, button is pressed, steering gear rotate for certain angle, stop when released.

Control RGB LED
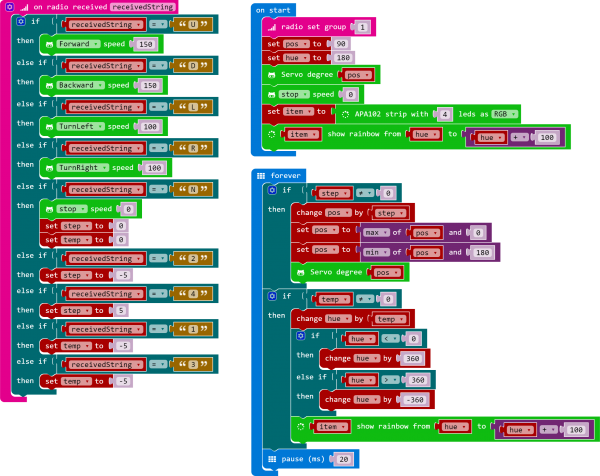
Sender code is same as last project. What we need to do is to add RGB LED controll to receiver code. Similar to Bluetooth code

Gestures
Projects we makes above are all use buttons to control, sending signal by 2.4G to control robot when button pressed. According to Chapter 3 Sensor, we know accelerometer has beed integrated on micro:bit. With the accelerometer, we can control robot via status of micro:bit instead of button.
We only need to addd gestures control to sender code.
Robot move when micro:bit (joystick for micro:bit) tilt, and stop when it keeps horizontally.