


- sales/support
Google Chat:---
- sales
+86-0755-88291180
- sales01
sales@spotpear.com
- sales02
dragon_manager@163.com
- support
tech-support@spotpear.com
- CEO-Complaints
zhoujie@spotpear.com
- Only Tech-Support
WhatsApp:13246739196
- Purchase/Shipping/Refund
WhatsApp:13424403025
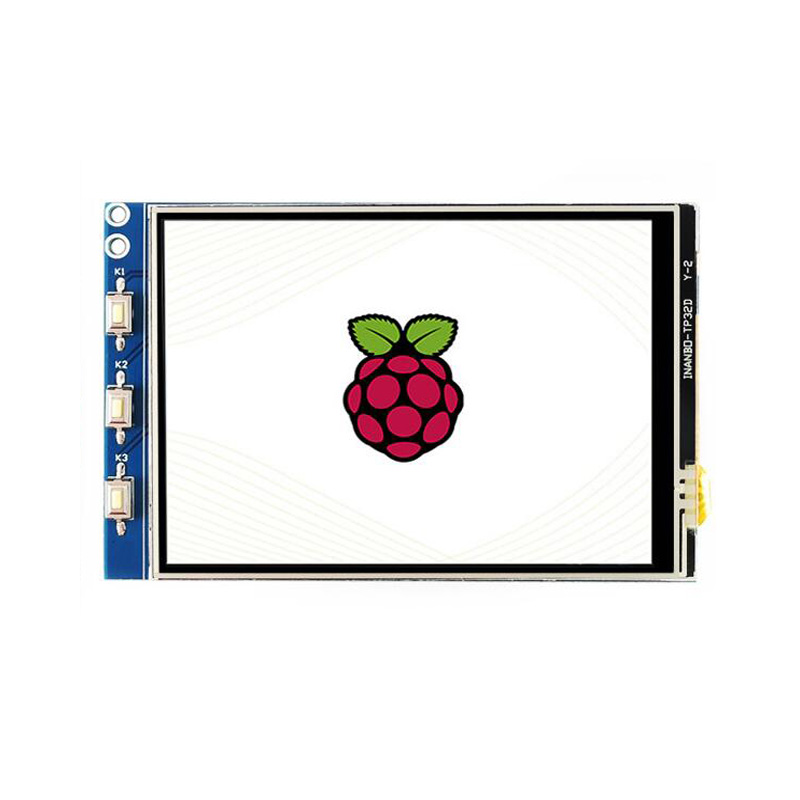
Raspberry Pi 3.2inch RPi LCD (B) User Guide
Features
- 320 x 240 hardware resolution
- Resistive touch control
- Compatible with any version of Raspberry Pi and can be plugged directly into it
- Provides drivers (supporting Raspbian\Ubuntu\Kali and Retropie systems)
- Supports FBCP software driver, can set software resolution and dual-screen display
- Same size as your Raspberry Pi 3 / 4 / 5
- Immersion gold process, finely crafted
Hardware Connection
It connects via the GPIO interface; the Raspberry Pi has 40 GPIO pins, while the screen has 26 pins. Pay attention to the corresponding screen pins and Raspberry Pi pins when connecting.
Pinout Definition
The pins labeled "NC" below mean that the LCD is not using these pins, and the user can use them for other applications.
| PIN NO. | SYMBOL | DESCRIPTION |
|---|---|---|
| 1 | 3.3V | Power positive (3.3V power input) |
| 2 | 5V | Power positive (5V power input) |
| 3 | NC | NC |
| 4 | 5V | Power positive (5V power input) |
| 5 | NC | NC |
| 6 | GND | Ground |
| 7 | NC | NC |
| 8 | NC | NC |
| 9 | GND | Ground |
| 10 | NC | NC |
| 11 | TP_IRQ | Touch panel interrupt, detected low level when the touch panel is pressed |
| 12 | KEY1 | Button |
| 13 | RST | Reset signal, low-level reset |
| 14 | GND | Ground |
| 15 | LCD_RS | Command / data register selection, low level for command, high level for data |
| 16 | KEY2 | Button |
| 17 | 3.3V | Power positive (3.3V power input) |
| 18 | KEY3 | Button |
| 19 | LCD_SI / TP_SI | LCD display / SPI data input of touch panel |
| 20 | GND | Ground |
| 21 | TP_SCL | SPI data output of touch panel |
| 22 | NC | NC |
| 23 | LCD_SCK / TP_SCK | LCD display / SPI clock signal of touch panel |
| 24 | LCD_CS | LCD chip select signal, low level selects LCD |
| 25 | GND | Ground |
| 26 | TP_CS | Touch panel chip selection signal, the low level selects the touch panel |
Software Settings
Working with Trixie and Bookworm
For Raspberry Pi 4 & Pi 5
1. Configure driver
Open the Raspberry Pi terminal and execute:
sudo apt-get install unzip -y
sudo apt-get install cmake -y
wget https://files.waveshare.com/wiki/common/Waveshare32b.zip
unzip ./Waveshare32b.zip
sudo cp waveshare32b.dtbo /boot/overlays/
Edit config.txt file
sudo nano /boot/firmware/config.txt
Block the statements in the figure below
Add the following code at the end of the config.txt
dtparam=spi=on
dtoverlay=waveshare32b
hdmi_force_hotplug=1
max_usb_current=1
hdmi_group=2
hdmi_mode=87
hdmi_cvt 640 480 60 6 0 0 0
hdmi_drive=2
display_rotate=0
2. Set auto-start on boot
- Open .bash_profile file and create one yourself if you don't have a .bash_profile file
sudo nano ~/.bash_profile
Add the following code to the bottom of the .bash_profile file
export FRAMEBUFFER=/dev/fb1
startx  2> /tmp/xorg_errors
- Open the 99-fbturbo.~ file, if the file already exists, you need to confirm that fb is fb0
sudo nano /usr/share/X11/xorg.conf.d/99-fbturbo.~
Add the following to the 99-fbturbo.~ configuration file
Section "Device"
        Identifier      "Allwinner A10/A13 FBDEV"
        Driver          "fbturbo"
        Option          "fbdev" "/dev/fb0"

        Option          "SwapbuffersWait" "true"
EndSection
3. Set CLI auto-login
sudo raspi-config nonint do_boot_behaviour B2
sudo raspi-config nonint do_wayland W1
sudo reboot
Note1: Make sure that the username of the Raspberry Pi is pi, otherwise it will not be able to log in automatically
Note2: After setting all the configurations above, the system takes longer to restart each time, and SSH also requires a moment to enter
4. Configure touch
- Install calibrator software
sudo apt-get install xserver-xorg-input-evdev
sudo cp -rf /usr/share/X11/xorg.conf.d/10-evdev.conf /usr/share/X11/xorg.conf.d/45-evdev.conf
sudo apt-get install xinput-calibrator
- Edit the 99-calibration.conf file
sudo nano /usr/share/X11/xorg.conf.d/99-calibration.conf
Add the following to the 99-calibration.conf file
Section "InputClass"
        Identifier      "calibration"
        MatchProduct    "ADS7846 Touchscreen"
        Option  "Calibration"   "3795 171 168 3913"
        Option  "SwapAxes"      "1"
EndSection
Reboot to take effect
sudo reboot
5. Configure camera
- Edit config.txt file
sudo nano /boot/firmware/config.txt
Add the following code at the end of the config.txt
dtoverlay=vc4-kms-v3d
max_framebuffers=2
- Edit the 98-spi-screen.conf configuration file
sudo nano /etc/X11/xorg.conf.d/98-spi-screen.conf
Add the following to the 98-spi-screen.conf configuration file And add:
Section "Device"
Identifier "SPI Screen"
Driver "fbdev"
Option          "fbdev" "/dev/fb0"
EndSection
Reboot to take effect
sudo reboot
- Turn on the camera:
libcamera-hello --qt-preview
For All Raspberry Pi Versions
You can use any of the following Lite system images (choose 64-bit or 32-bit as needed):
1. Download necessary software
- Update the system
sudo apt update && sudo apt upgrade && sudo apt full-upgrade -y
- Install the Xorg service
sudo apt-get install --no-install-recommends xserver-xorg -y
sudo apt-get install --no-install-recommends xinit -y
- Install desktop manager
sudo apt install lightdm -y
- Install official Raspberry Pi GUI
sudo apt install raspberrypi-ui-mods -y
- Install a browser (optional)
sudo apt install chromium-browser -y
2. Configure driver
Open the Raspberry Pi terminal and execute:
sudo apt-get install unzip -y
sudo apt-get install cmake -y
sudo wget https://files.waveshare.com/wiki/common/Waveshare32b.zip
sudo unzip ./Waveshare32b.zip
sudo cp waveshare32b.dtbo /boot/overlays/
Edit config.txt file
sudo nano /boot/firmware/config.txt
Block the statements in the figure below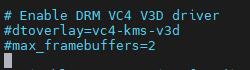
Add the following code at the end of the config.txt
dtparam=spi=on
dtoverlay=waveshare32b
hdmi_force_hotplug=1
max_usb_current=1
hdmi_group=2
hdmi_mode=1
hdmi_mode=87
hdmi_cvt 480 320 60 6 0 0 0
hdmi_drive=2
display_rotate=0
3. Set auto-start startx
- Open .bash_profile file and create one yourself if you don't have a .bash_profile file
sudo nano ~/.bash_profile
Add the following code to the bottom of the .bash_profile file
export FRAMEBUFFER=/dev/fb1
startx  2> /tmp/xorg_errors
- Open the 99-fbturbo.~ file, if the file already exists, you need to confirm that fb is fb0
sudo nano /usr/share/X11/xorg.conf.d/99-fbturbo.~
Add the following code to the 99-fbturbo.~ file
Section "Device"
        Identifier      "Allwinner A10/A13 FBDEV"
        Driver          "fbturbo"
        Option          "fbdev" "/dev/fb0"

        Option          "SwapbuffersWait" "true"
EndSection
4. Set CLI auto-login
sudo raspi-config nonint do_boot_behaviour B2
sudo raspi-config nonint do_wayland W1
sudo reboot
Note1: Make sure that the username of the Raspberry Pi is pi, otherwise it will not be able to log in automatically
Note2: After setting all the configurations above, the system takes longer to restart each time, and SSH also requires a moment to enter
5. Configure touch
- Install calibrator software
sudo apt-get install xserver-xorg-input-evdev
sudo cp -rf /usr/share/X11/xorg.conf.d/10-evdev.conf /usr/share/X11/xorg.conf.d/45-evdev.conf
sudo apt-get install xinput-calibrator
- Edit the 99-calibration.conf file
sudo nano /usr/share/X11/xorg.conf.d/99-calibration.conf
Add the following to the 99-calibration.conf file
Section "InputClass"
        Identifier      "calibration"
        MatchProduct    "ADS7846 Touchscreen"
        Option  "Calibration"   "3795 171 168 3913"
        Option  "SwapAxes"      "1"
EndSection
Reboot to take effect
sudo reboot
Working with Bullseye 64-bit System
Please download the 64-bit bullseye version image from the Raspberry Pi official website.
1. Configure driver
Open the config.txt file under the boot directory, comment out dtoverlay=vc4-kms-v3d, and add the following at the end of [all]
dtparam=spi=on
dtoverlay=waveshare32b

hdmi_force_hotplug=1
max_usb_current=1
hdmi_group=2
hdmi_mode=1
hdmi_mode=87
hdmi_cvt 480 320 60 6 0 0 0
hdmi_drive=2
display_rotate=0
2. Configure touch
Run the following statements on the terminal:
sudo apt-get install xserver-xorg-input-evdev
sudo cp -rf /usr/share/X11/xorg.conf.d/10-evdev.conf /usr/share/X11/xorg.conf.d/45-evdev.conf
sudo apt-get install xinput-calibrator
sudo nano /usr/share/X11/xorg.conf.d/99-calibration.conf
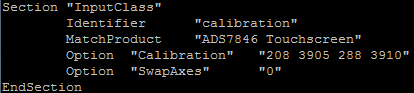
Add the following statements in the 99-calibration.conf file:
Section "InputClass"
        Identifier      "calibration"
        MatchProduct    "ADS7846 Touchscreen"
        Option  "Calibration"   "3932 300 294 3801"
        Option  "SwapAxes"      "1"
        Option "EmulateThirdButton" "1"
        Option "EmulateThirdButtonTimeout" "1000"
        Option "EmulateThirdButtonMoveThreshold" "300"
EndSection
3. Run FBCP porting
This process requires networking
sudo apt-get install cmake
wget https://files.waveshare.com/wiki/common/Rpi-fbcp.zip
unzip Rpi-fbcp.zip
cd rpi-fbcp/
mkdir build
cd build/
cmake ..
make
sudo install fbcp /usr/local/bin/fbcp
4. Set auto-start on boot
sudo nano /etc/rc.local
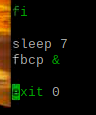
Add the following statement before exit 0 at the end:
sleep 7
fbcp &
After a restart, the screen will display normally
sudo reboot
For Bullseye 32-bit and Buster Systems
Method 1: Install Driver
Please download the latest version of the image (Raspbian/Ubuntu Mate/Kali or Retropie) at Raspberry Pi official website. For convenience, Raspbian images are provided here:
1) Download the image file to the PC, and extract it as .img file.
2) Connect the TF card to the computer, open the Win32DiskImager.exe software, select the .img file prepared in step 1, and click Write to flash the system image. After the image flashing is complete, safely eject the TF card.
3) Connect the TF card to the Raspberry Pi, start the Raspberry Pi, and log in to the terminal of the Raspberry Pi (you can connect the Raspberry Pi to the HDMI display or use ssh to log in remotely).
4) First download the relevant driver code through the network, then execute the corresponding installation command, ensuring you have a stable Internet connection throughout the process.
git clone https://github.com/waveshare/LCD-show.git
cd LCD-show/
sudo ./LCD32-show
It can be used after restarting (for convenience, the screen orientation can be adjusted, see #Set Screen Orientation).
Note 1: Executing apt get upgrade will cause the LCD to malfunction. At this point, you need to edit the config.txt file in the TF card and delete this line: dtoverlay=ads7846.
Note 2: Under Raspbian-lite, you need to run the sudo ./LCD32-show lite command to install the driver.
Method 2: Use Pre-installed Driver Image
Here is a pre-installed driver image, extract it and write it to the TF card (Open the Win32DiskImager.exe software, select the .img file, and click Write to flash the system image). Then insert the card into the Raspberry Pi to use it.
Set Screen Orientation
Once the touch driver is installed, you can modify the screen rotation direction by running the following commands.
cd LCD-show/
#X can be 0, 90, 180, and 270. They respectively represent LCD rotation of 0 degrees, 90 degrees, 180 degrees, and 270 degrees.
sudo ./LCD32-show X
The rotation command under Raspbian-lite is as follows:
cd LCD-show/
#X can be 0, 90, 180, and 270. They respectively represent LCD rotation of 0 degrees, 90 degrees, 180 degrees, and 270 degrees.
sudo ./LCD32-show lite X
Install Calibration Software for Calibration
- This LCD can be calibrated using the xinput-calibrator program.
- Run the following command to install:
sudo apt-get install xinput-calibrator
- Click the Menu key on the taskbar, select Preferences -> Calibrate Touchscreen.
- Follow the displayed prompts to perform touch calibration.
- If you want to save these touch values, you need to create a 99-calibration.conf file in the following path (if it already exists, you don't need to create it)
/etc/X11/xorg.conf.d/99-calibration.conf
- Save the touch parameters (data may vary for different LCDs, as shown in the figure below) to 99-calibration.conf
Install Virtual Keyboard
1. Run the following command to install the relevant software
sudo apt-get update
sudo apt-get install matchbox-keyboard
sudo nano /usr/bin/toggle-matchbox-keyboard.sh
2. Copy the following content to toggle-matchbox-keyboard.sh, save and exit
#!/bin/bash
#This script toggle the virtual keyboard
PID=`pidof matchbox-keyboard`
if [ ! -e $PID ]; then
killall matchbox-keyboard
else
matchbox-keyboard &
fi
3. Run the following commands
sudo chmod +x /usr/bin/toggle-matchbox-keyboard.sh
sudo mkdir /usr/local/share/applications
sudo nano /usr/local/share/applications/toggle-matchbox-keyboard.desktop
4. Copy the following content to toggle-matchbox-keyboard.desktop, save and exit
[Desktop Entry]
Name=Toggle Matchbox Keyboard
Comment=Toggle Matchbox Keyboard`
Exec=toggle-matchbox-keyboard.sh
Type=Application
Icon=matchbox-keyboard.png
Categories=Panel;Utility;MB
X-MB-INPUT-MECHANSIM=True
5. Execute the following command, noting that this step must be performed by the "pi" user; if using an administrator account, the file will not be found
sudo nano /etc/xdg/lxpanel/LXDE-pi/panels/panel
6. Find commands similar to the following (icons may vary slightly between versions)
Plugin {
type = launchbar
Config {
Button {
id=lxde-screenlock.desktop
}
Button {
id=lxde-logout.desktop
}
}
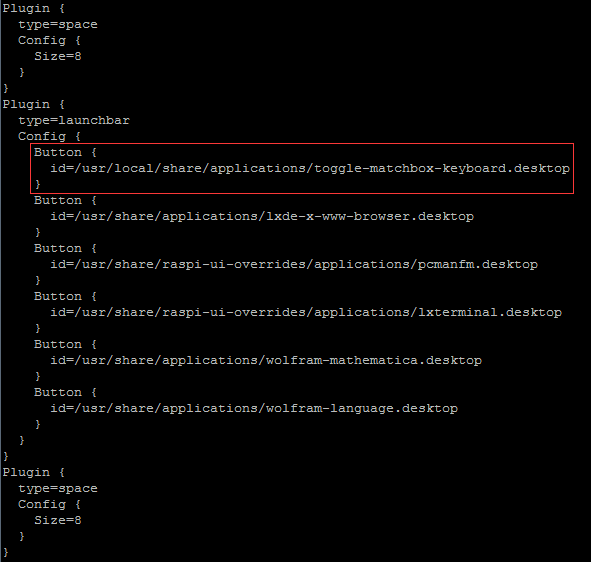
7. Add the following code to add a Button item, as shown in the figure
Button {
id=/usr/local/share/applications/toggle-matchbox-keyboard.desktop
}
8. Execute the following command to restart the system, and you can see an additional virtual keyboard icon in the upper left corner
sudo reboot
Resources
Development Resources
Raspberry Pi Image
Software
Raspberry Pi Related Tutorials
LCD Panel Dimension
FAQ
Question: Using the official Raspberry Pi image, the LCD cannot be used normally. What is the reason?
- This LCD must have drivers installed in order to function properly. For details, please refer to the user manual.
Question: Using the Raspberry Pi image provided by Waveshare, the LCD cannot be used normally. How to handle it?
- Since Raspberry Pi images and versions are frequently updated, if you encounter issues with normal LCD usage, please download the latest image provided by us or download the latest image from the Raspberry Pi official website and install the latest driver we provide for use.
- Ensure that the hardware is connected correctly and in good contact.
- Ensure the TF card can be written normally.
When the Raspberry Pi starts up normally, the PWR light is always on, and the ACT light blinks. If both lights are always on, it may be that the TF card image flashing was unsuccessful or the TF card is in poor contact with the Raspberry Pi.
It is recommended to use a 5V 2.5A power adapter to power the Raspberry Pi. If you use the USB port of your PC to power the Raspberry Pi, the Raspberry Pi may not start properly due to insufficient power supply.
Question: What is the normal operating current for the 3.2inch RPi LCD (B)?
Question: What is the operating temperature of 3.2inch RPi LCD (B)?
Commercial grade (0~70°C).
Support
Monday-Friday (9:30-6:30) Saturday (9:30-5:30)
Email: services01@spotpear.com
[Tutorial Navigation]
- Features
- Hardware Connection
- Software Settings
- Working with Trixie and Bookworm
- Working with Bullseye 64-bit System
- For Bullseye 32-bit and Buster Systems
- Install Calibration Software for Calibration
- Install Virtual Keyboard
- Resources
- FAQ
- Question: Using the official Raspberry Pi image, the LCD cannot be used normally. What is the reason?
- Question: Using the Raspberry Pi image provided by Waveshare, the LCD cannot be used normally. How to handle it?
- Question: What is the normal operating current for the 3.2inch RPi LCD (B)?
- Question: What is the operating temperature of 3.2inch RPi LCD (B)?
- Support