


- sales/support
Google Chat:---
- sales
+86-0755-88291180
- sales01
sales@spotpear.com
- sales02
dragon_manager@163.com
- support
tech-support@spotpear.com
- CEO-Complaints
zhoujie@spotpear.com
- Only Tech-Support
WhatsApp:13246739196
- Purchase/Shipping/Refund
WhatsApp:13424403025
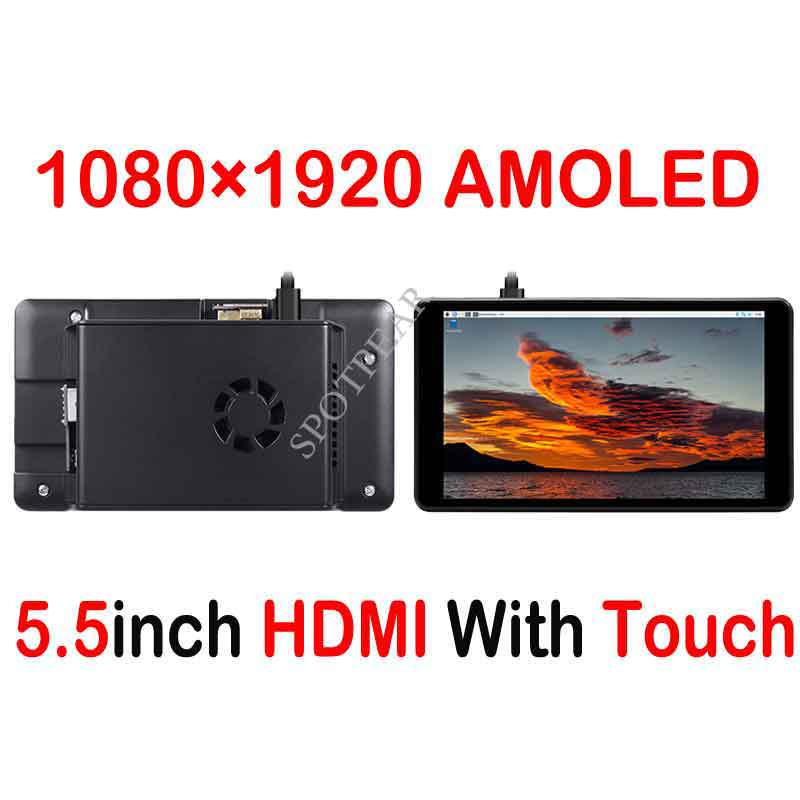
Raspberry Pi 5.5inch HDMI AMOLED User Guide
Notices
The glass panel of AMOLED is fragile without enclosure, please take care of it when using. You need to hold the PCBA when plugging the HDMI cable and USB cable to protect the glass panel from hard pressure.
Introduction
5.5inch AMOLED display, 1080x1920 resolition.
Features
- 5.5inch AMOLED, 1080x1920 resolution
- Toughened glass capacitive touch panel, 6H hardness
- Supports popular mini PCs such as Raspberry Pi, as well as general desktop computers
- When works with Raspberry Pi, supports Raspbian/Ubuntu/Kali/Retropie, driver free
- When works as a computer monitor, supports Windows 10/8.1/8/7, five-points touch, and driver free
- 3.5mm audio jack, supports HDMI audio output
- M2.5 screw holes for easy mounting
How to use
Working with Windows PC
When working with PC, 5.5inch HDMI AMOLED can supports Windows 7/ 8/ 8.1 /10 OS
1. Connect Touch interface of LCD to one USB port of PC
2. Connect HDMI Interface of LCD to HDMI port of PC
- You can connect 3.5mm earphone to LCD for audio output
【Note】
-The touch screen controls the main display by default, therefore, we recommend you to set the 5.5inch HDMI AMOLED as main displays.
-Sometimes, USB ports of PC has not enough power to power 5.5inch HDMI AMOLED, in this case, you can connect external 5V/2A power adapter to DC interface of LCD
-If the LCD cannot display normally after connecting, please restart your PC and check again.
Working with Raspberry Pi
When working with Raspberry Pi, 5.5inch HDMI AMOLED can support various systems like Raspbian, Ubuntu Mate and so on. Herein we take Raspbain as example.
Raspberry Pi cannot recognized and adapted to resolution of LCD plugged, therefore, we need to set the resolution of Raspbian manually
1. Download Raspbian image from Raspberry Pi website
2. Write the image to your TF card. (TF card need to be formatted)
3. Open config.txt file which located in root directory of SD card and add the statements below to end of the file
max_framebuffer_height=1920
max_usb_current=1
config_hdmi_boost=10
hdmi_group=2
hdmi_force_hotplug=1
hdmi_mode=87
hdmi_timings=1080 1 26 4 50 1920 1 8 2 6 0 0 0 60 0 135580000 3
If you use the LCD with Raspberry Pi 4B,you need to remove line dtoverlay=vc4-fkms-V3D from config.txt file.
4. Save and eject the SD card. Plug the card to your Raspberry Pi
5. Connect Touch interface of LCD to one USB port of Raspberry Pi
6. Connect HDMI interface of LCD to HDMI interface of Raspberry Pi
7. Power on Raspberry Pi
【Note】The LCD is vertically display by default. You can refer to #Orientation Setting to change the orientation.
Screen Saver
AMOLED screen has advantages of high contrast, wide color range, wide view angle and so on. However, it is easy to face burn-in problem if displaying same content for long time. As we test, the AMOLED cannot be restored if it display same static image for 168 hours because of burn-in problem. In this case, we recommend you to set screen saver and do not let the AMOLED display same static image for long time (cannot longer than 1h).
You can install screen saver with command below:
sudo apt-get install xscreensaver
Orientation Setting
1. To rotating the display, you can append this statement to the config file
display_rotate=1 #1: 90; 2: 180; 3: 270
2. Reboot the Raspberry Pi
sudo reboot
- Touch Rotating
With the operation above. The screen could rotate in display. However, the touch works improperly. To rotate the touch as display, you could do as below:
1. install libinput
sudo apt-get install xserver-xorg-input-libinput
- For Ubuntu-Mate OS, you need to install xserver-xorg-input-libinput-hwe-16.04 instead.
2. create an xorg.conf.d folder
sudo mkdir /etc/X11/xorg.conf.d
3. copy file 40-libinput-conf to the folder which we created
sudo cp /usr/share/X11/xorg.conf.d/40-libinput.conf /etc/X11/xorg.conf.d/
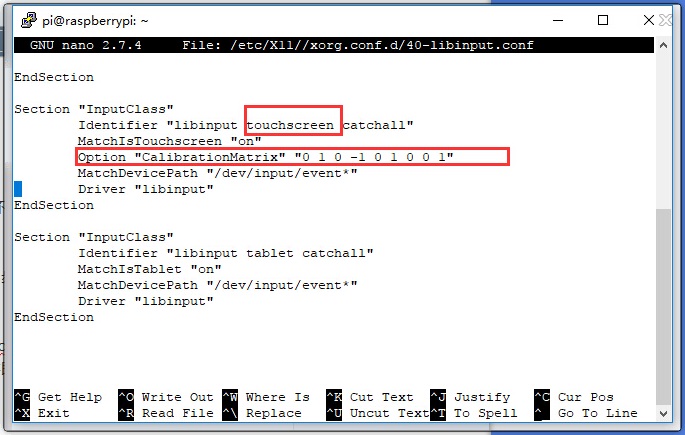
4. Append a statement to touchscreen part of the file as below:
sudo nano /etc/X11/xorg.conf.d/40-libinput.conf
5. save and reboot your Pi
sudo reboot
After completing these steps. The LCD could rotate 90 degree both display and touch.
Note:
90 degree: Option "CalibrationMatrix" "0 1 0 -1 0 1 0 0 1"
180 degree: Option "CalibrationMatrix" "-1 0 1 0 -1 1 0 0 1"
270 degree: Option "CalibrationMatrix" "0 -1 1 1 0 0 0 0 1"

