- sales/support
Google Chat:---
- sales
+86-0755-88291180
- sales01
sales@spotpear.com
- sales02
dragon_manager@163.com
- support
tech-support@spotpear.com
- CEO-Complaints
zhoujie@spotpear.com
- sales/support
WhatsApp:13246739196
21.5inch-FHD-LCD User Guide
Features
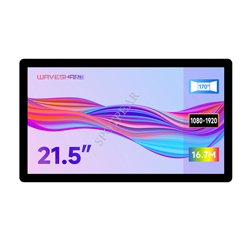
- 21.5-inch IPS screen, 1080 x 1920 hardware resolution.
- 10-point capacitive touch with toughened glass panel, hardness up to 6H.
- With the operating temperature of -5~60℃, can be widely applied.
- Adopting optical bonding technology for better display.
- When working with Raspberry Pi, it supports Raspberry Pi OS/Ubuntu/Kali and Retropie.
- When used as a PC monitor, it supports Windows 11/10/8.1/8/7.
- Supports Ubuntu when it working with Jetson Nano.
- Supports multilingual OSD menu (can be used for power control, brightness/contrast adjustment, etc.)
Parameters
| Item | Description | Unit |
|---|---|---|
| Model | 21.5inch FHD Monitor | / |
| Dimensions | 21.5 | Inch |
| Viewing Angle | 170 | Deg |
| Resolution | 1080 × 1920 | Pixels |
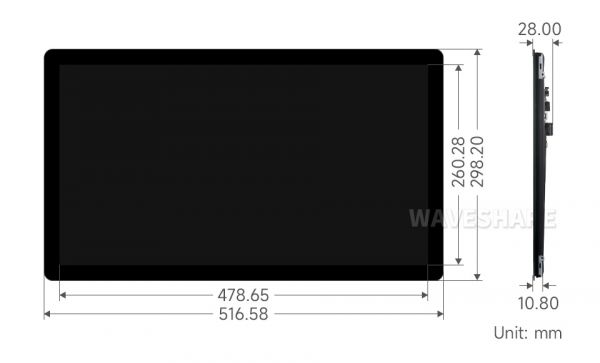
| Overall Dimensions | 519.38(H) × 301.00(V) × 18.00(D) | mm |
| Display Area | 478.65(H) × 260.28(V) | mm |
| Pixel Pitch | 0.1335(H) × 0.1335(V) | mm |
| Color Gamut | 72% | NTSC |
| Default Brightness | 350 | cd/m² |
| Maximum Brightness | 600 | cd/m² |
| Contrast | 1000:1 | / |
| Backlight Adjustment | OSD menu | / |
| Refresh Rate | 60 | Hz |
| Display Interface | Standard HDMI port | / |
| Power Port | 12V | / |
| Default Power Consumption | 24 | Watt |
Electrical Specification
| Parameter | Min. Value | Standard Value | Max. Value | Unit | Note |
|---|---|---|---|---|---|
| Input Voltage | 11.5 | 12.00 | 12.5 | V | Note 1 |
| Input Current | 2 | 2 | TBD | A | Note 2 |
| Operating Temperature | -5 | 25 | 60 | ℃ | Note 3 |
| Storage Temperature | -10 | 25 | 70 | ℃ | Note 3 |
- Note 1: Input voltage exceeding the maximum value or improper operation may cause permanent damage to the device.
- Note 2: The input current must be ≥2A, otherwise, it will cause startup failure or abnormal display, and it may cause permanent damage to the device if it is in an abnormal state for a long time.
- Note 3: Please do not store the display in a high-temperature and high-humidity storage environment for a long time. The display must work within the limited value range, otherwise, the display may be damaged.
Usage Guide
Working with PC
Support Windows 11/10/8.1/8/7 Systems
How to Use:
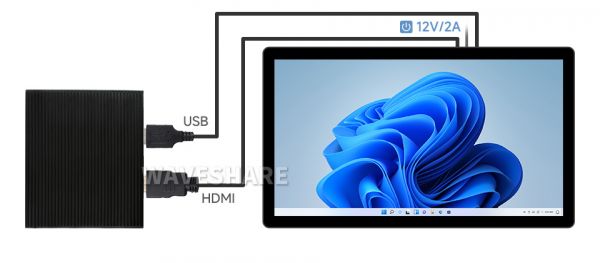
- Connect the 12V 2A power adapter to the DC power port of the LCD.
- Connect the Touch port of the LCD to the USB connector of the PC, Windows will automatically recognize the touch function.
- Connect the LCD and the PC via the HDMI interface, Windows will automatically recognize the display function.
- Note:
- Some PCs do not support the plug-and-play function of the HDMI device, but it can be used normally after restarting the system.
- If the power supply of the USB port is insufficient, the LCD will flicker. After connecting an external 5V 1A power adapter to the Power interface of the LCD, it can be operated normally.
Windows Touch Calibration
Take Windows 10 as an example:
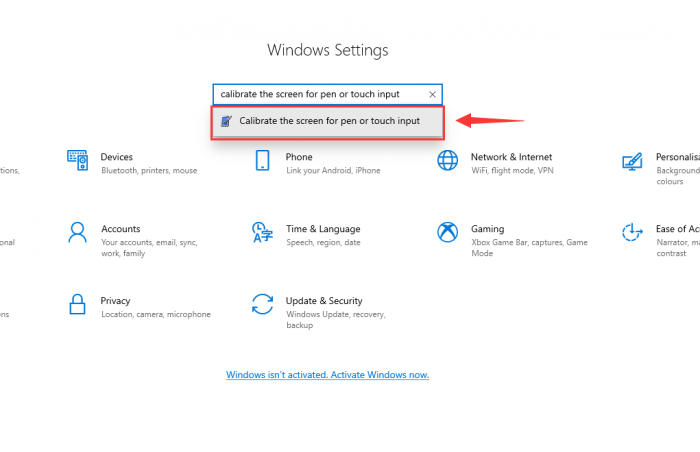
- 1. Enter the Windows settings of the system, type in the search bar, and click "Calibrate the screen for pen or touch input" (as shown in the picture below):
- 2. Click "Setup" in the pop-up "Tablet PC Settings" interface:
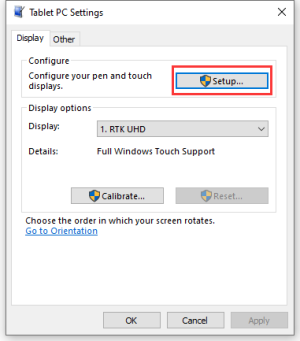
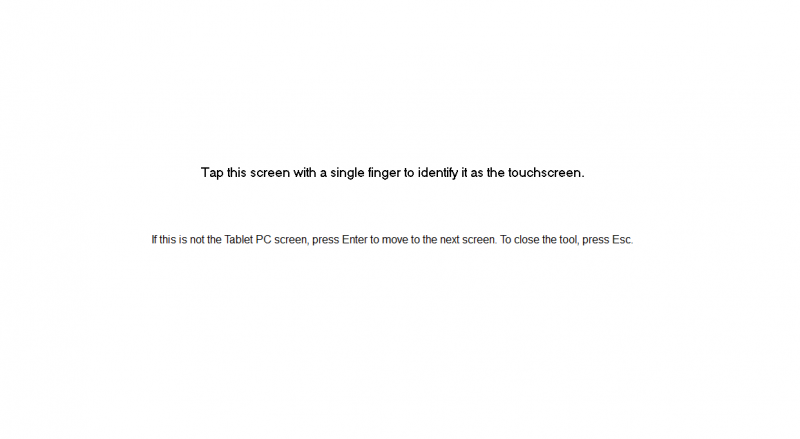
- 3. The following text prompt will appear on the screen. Please tap the touch screen with your finger, and the computer will recognize it as a touch screen.
Working with Raspberry Pi
Hardware Connection
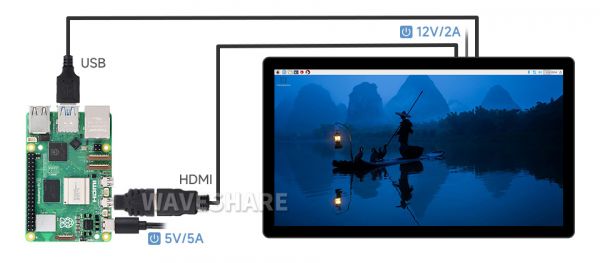
- Connect the 12V 2A power adapter to the power port of the LCD.
- Connect the Touch port to the USB interface of the Raspberry Pi.
- Connect the LCD and the Raspberry Pi via the HDMI interface.
Software Setting
This setting is used for Raspberry Pi OS/Ubuntu/Kali or Retropie system.
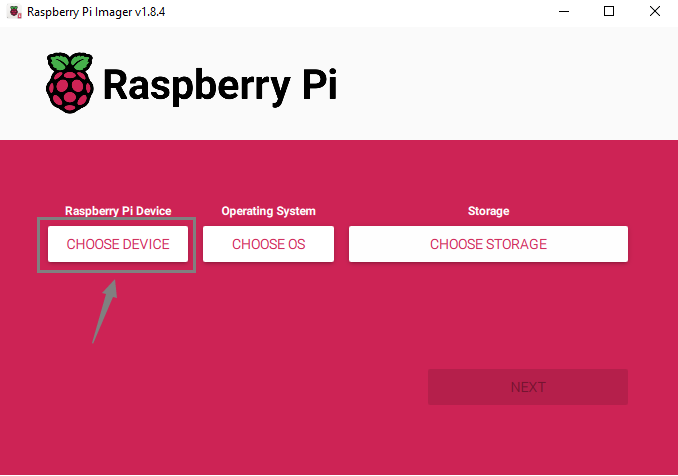
- 1. Insert the TF card into the PC, download and use Raspberry Pi Imager to program the corresponding image.
- 2. After programming the image, open the "config.txt" file located in the root directory of the TF card. Add the following code at the end of config.txt, save the file, and safely eject the TF card.
hdmi_force_hotplug=1
max_framebuffer_height=1920
hdmi_group=2
hdmi_mode=87
hdmi_timings=1080 0 40 20 60 1920 0 2 5 33 0 0 0 60 0 141120000 6
config_hdmi_boost=10- 3. Insert the TF card into the Raspberry Pi, power on the Raspberry Pi, and wait for a few seconds. After the system boots up, you should be able to enter the display interface and the LCD should touch normally.
Display Orientation
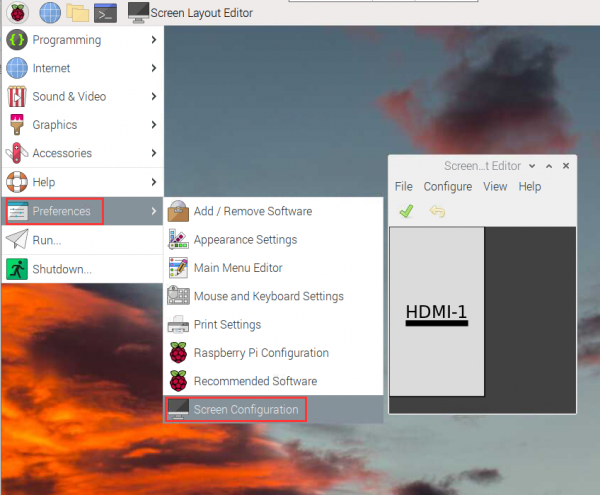
If you are using a Bullseye/Buster system, you can rotate it as follows:
- 1. Go to Screen Configuration.
- 2. Rotate as shown below:
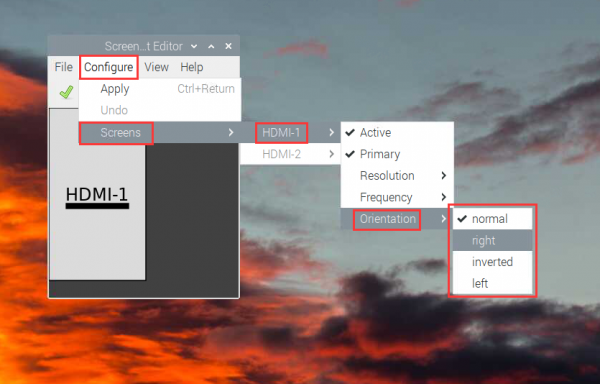
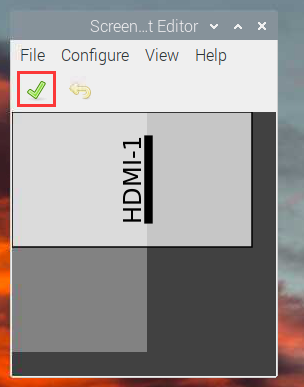
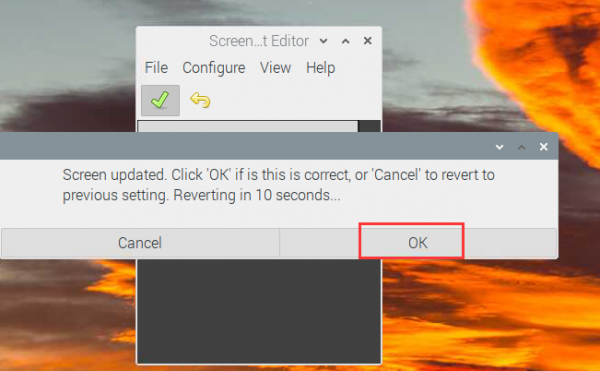
If you use other systems, you can rotate the display as shown below:
- 1. Add the following sentence in the config.txt file (the config file is located in the root directory of the TF card, or /boot):
display_rotate=1 #1:90;2: 180; 3: 270
- 2. Reboot the Raspberry Pi after saving.
sudo reboot
Touch Rotation
As the touch direction is different after rotating, you need to rotate the touch as shown below:
1. Install libinput
sudo apt-get install xserver-xorg-input-libinput
If the system you want to install is Ubuntu or Jetson Nano, the installation command is:
sudo apt install xserver-xorg-input-synaptics
2. Create xorg.conf.d directory in /etc/X11/. (If the directory exists, you can directly skip to Step 3.)
sudo mkdir /etc/X11/xorg.conf.d
3. Copy 40-libinput-conf file to the directory created just now.
sudo cp /usr/share/X11/xorg.conf.d/40-libinput.conf /etc/X11/xorg.conf.d/
4. Edit the file.
sudo nano /etc/X11/xorg.conf.d/40-libinput.conf
Find the touchscreen part, add the following sentence, and then save.
Option "CalibrationMatrix" "0 1 0 -1 0 1 0 0 1"
As shown below: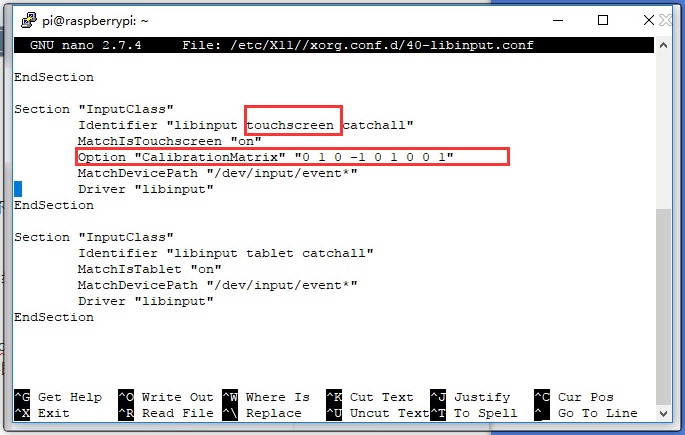
5. Reboot the Raspberry Pi.
sudo reboot
After finishing the above steps, the touch can be rotated 90 degrees.
Note:
90-degree rotation: Option "CalibrationMatrix" "0 1 0 -1 0 1 0 0 1"
180-degree rotation: Option "CalibrationMatrix" "-1 0 1 0 -1 1 0 0 1"
270-degree rotation: Option "CalibrationMatrix" "0 -1 1 1 0 0 0 0 1"
Set the Screen Always On
Some customers want to display without being affected by the screen saver function and can be set as follows. Turn off the screen saver.
Open lightdm.conf.
sudo nano /etc/lightdm/lightdm.conf
Change lightdm.conf to find "xserver-command" under the [SeatDefaults] section, uncomment it, and change it to read as follows:
#xserver-command=X
Modify to
xserver-command=X -s 0 -dpms
-s # –: Set the screen saver not to enable.
dpms: Disable power saving management.
Reboot:
sudo reboot
Set the Screen Off and On
Users can set the screen to turn off and on with the following commands.
vcgencmd display_power 0
vcgencmd display_power 1
EDID Timing Parameters
If the system on the control board can automatically identify the EDID for display, there is no need to set the relevant timing parameters.
Otherwise, refer to the following EDID settings:
| Pixel Clock | H Addressable | H Blanking | V Addressable | V Blanking | H Front Porch | H Sync Width | V Front Porch | V Sync Width | H Image Size | V Image Size | H Border | V Border |
|---|---|---|---|---|---|---|---|---|---|---|---|---|
| 141.12 | 1080 | 120 | 1920 | 40 | 40 | 20 | 2 | 5 | 1080 | 1920 | 0 | 0 |
Dimensions
FAQ
Question:How can I use PWM brightness adjustment for 21.5inch FHD LCD?
As shown below, removes the triode and the PWM signal is connected to the base of the triode.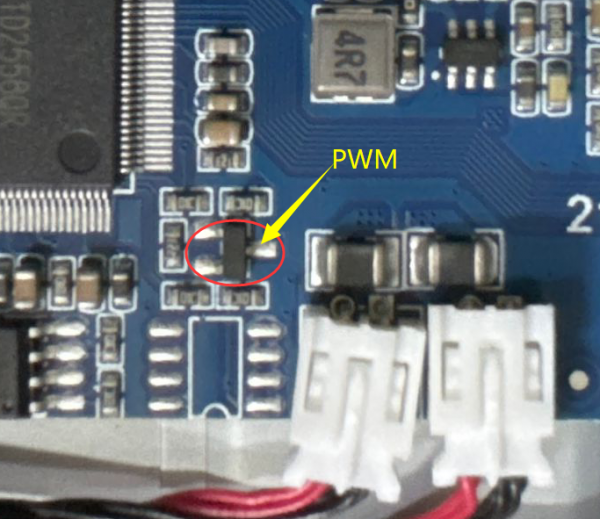
Support
Monday-Friday (9:30-6:30) Saturday (9:30-5:30)
Email: services01@spotpear.com


