




- sales/support
Google Chat:---
- sales
+86-0755-88291180
- sales01
sales@spotpear.com
- sales02
dragon_manager@163.com
- support
tech-support@spotpear.com
- CEO-Complaints
zhoujie@spotpear.com
- Only Tech-Support
WhatsApp:13246739196
- Purchase/Shipping/Refund
WhatsApp:13424403025
- HOME
- >
- ARTICLES
- >
- Common Moudle
- >
- Power
Waveshare Cloud Control
Create Device
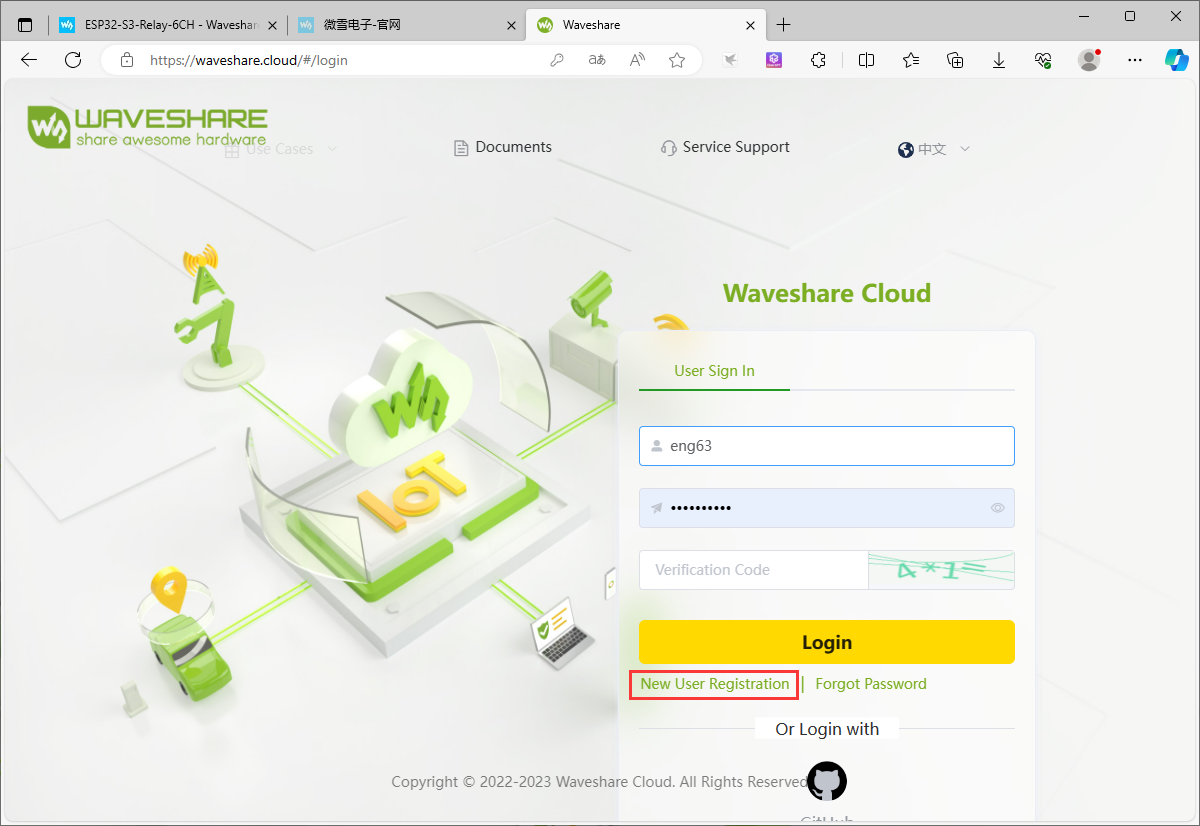
- Register user on Waveshare Cloud
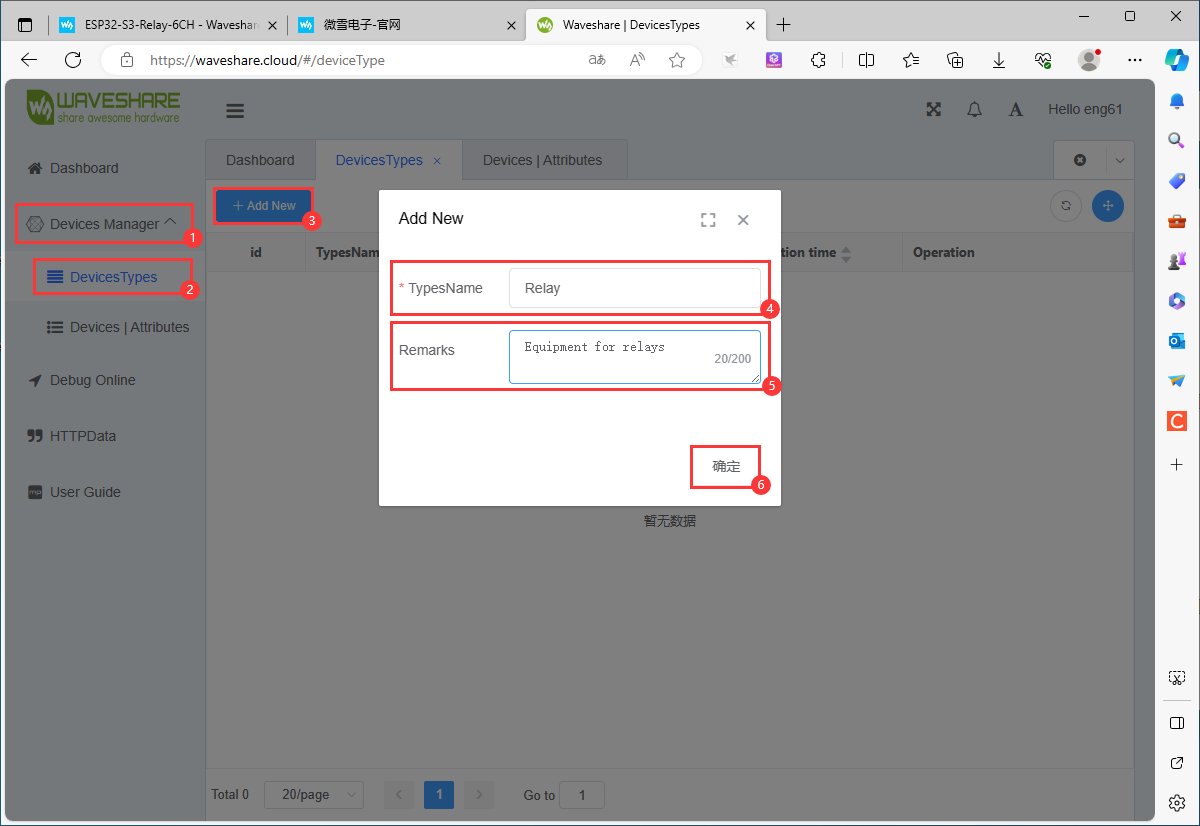
- After successful registration, go to the Devices Manager option to create a device class and fill in the name of the category
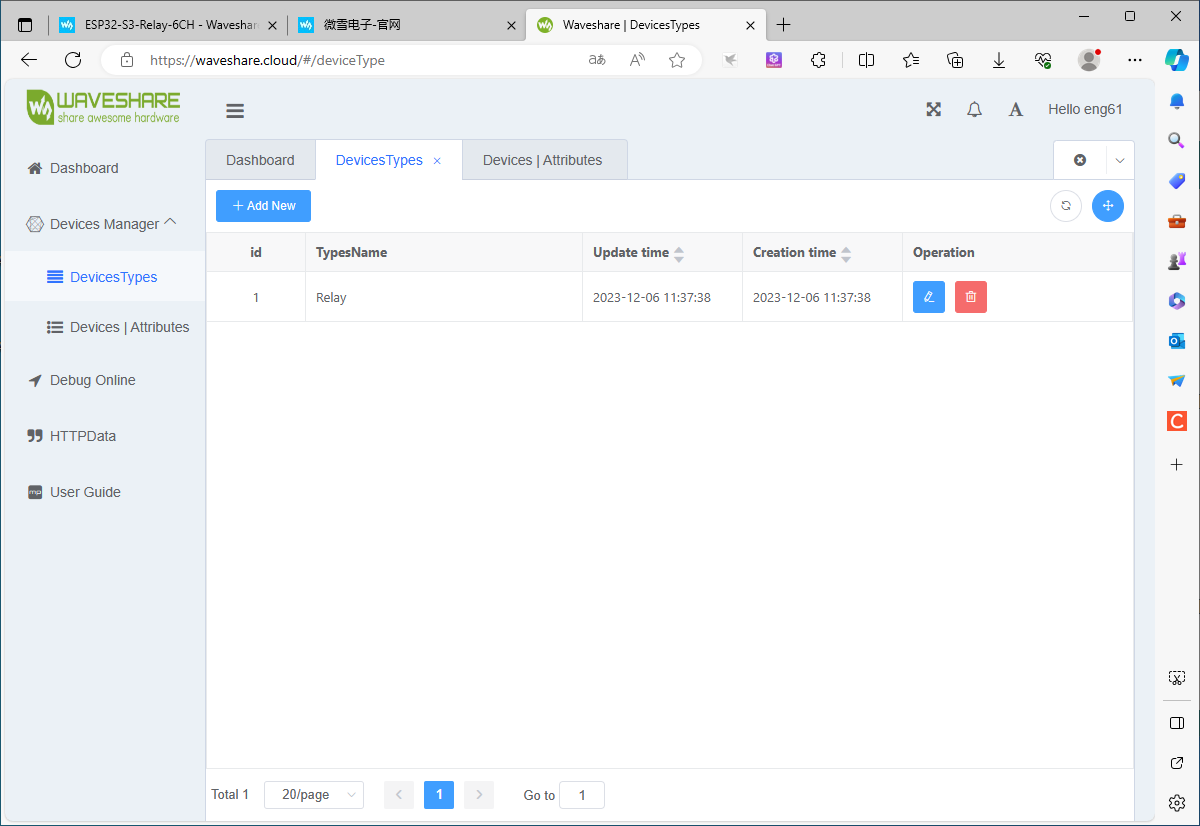
- Successfully created device class
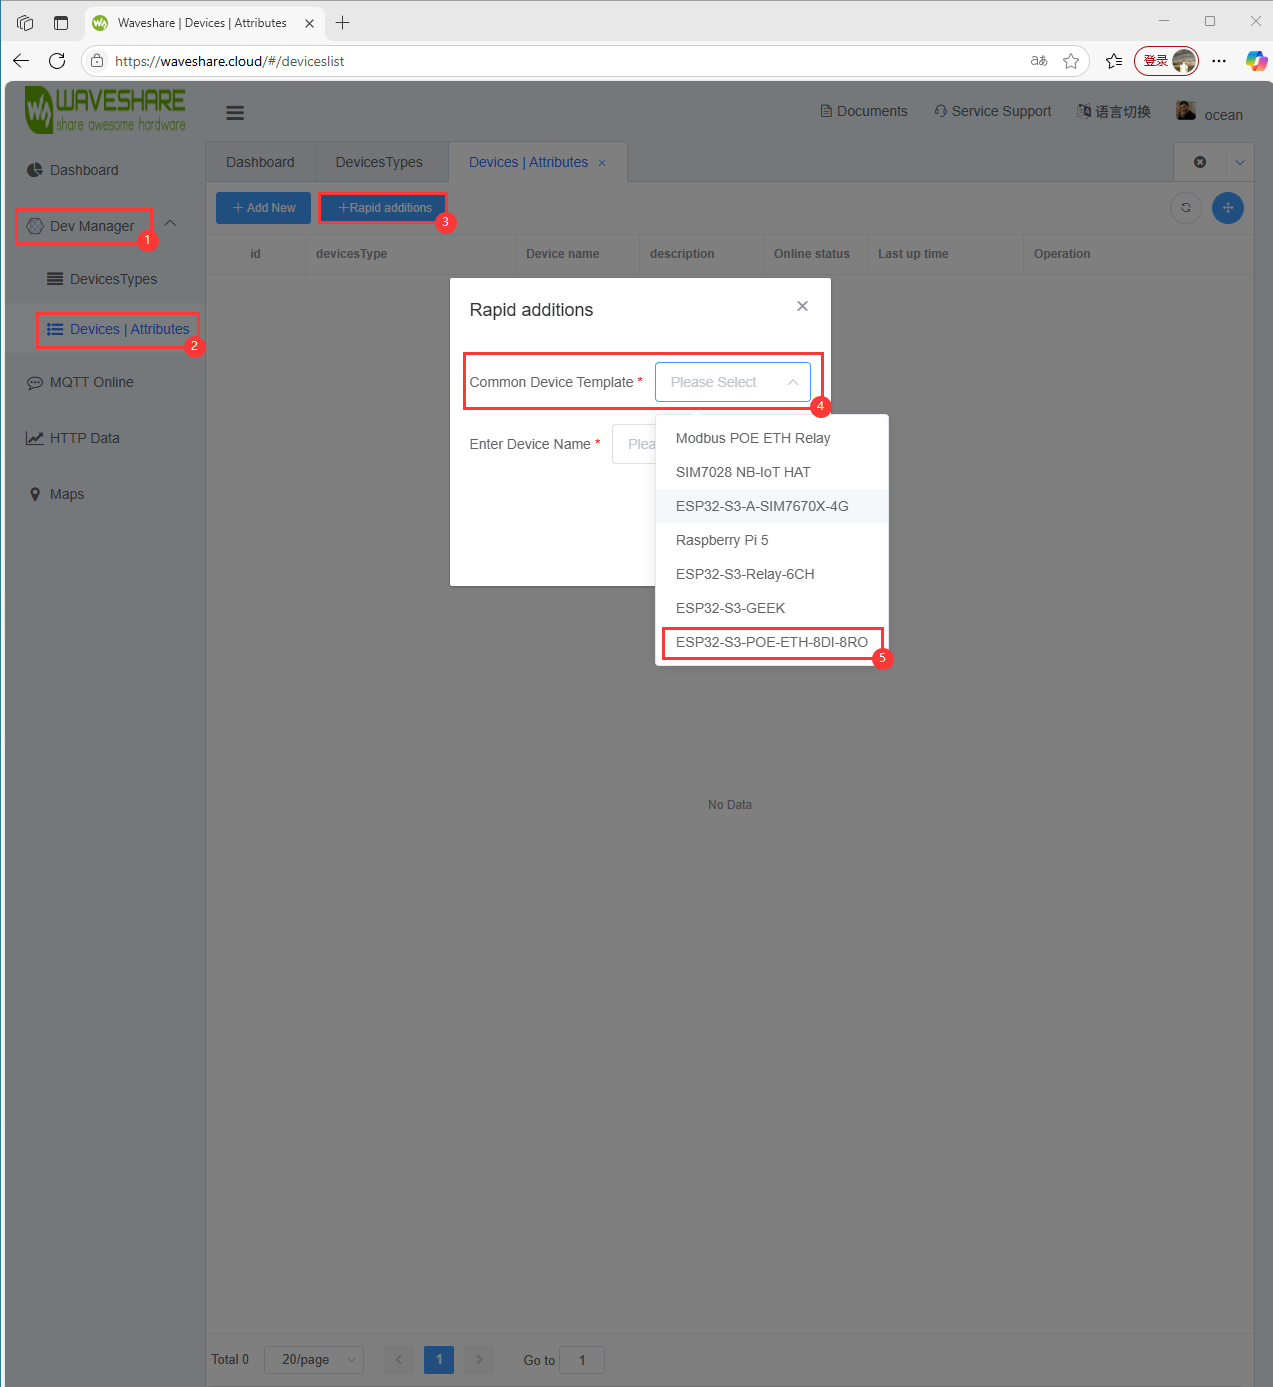
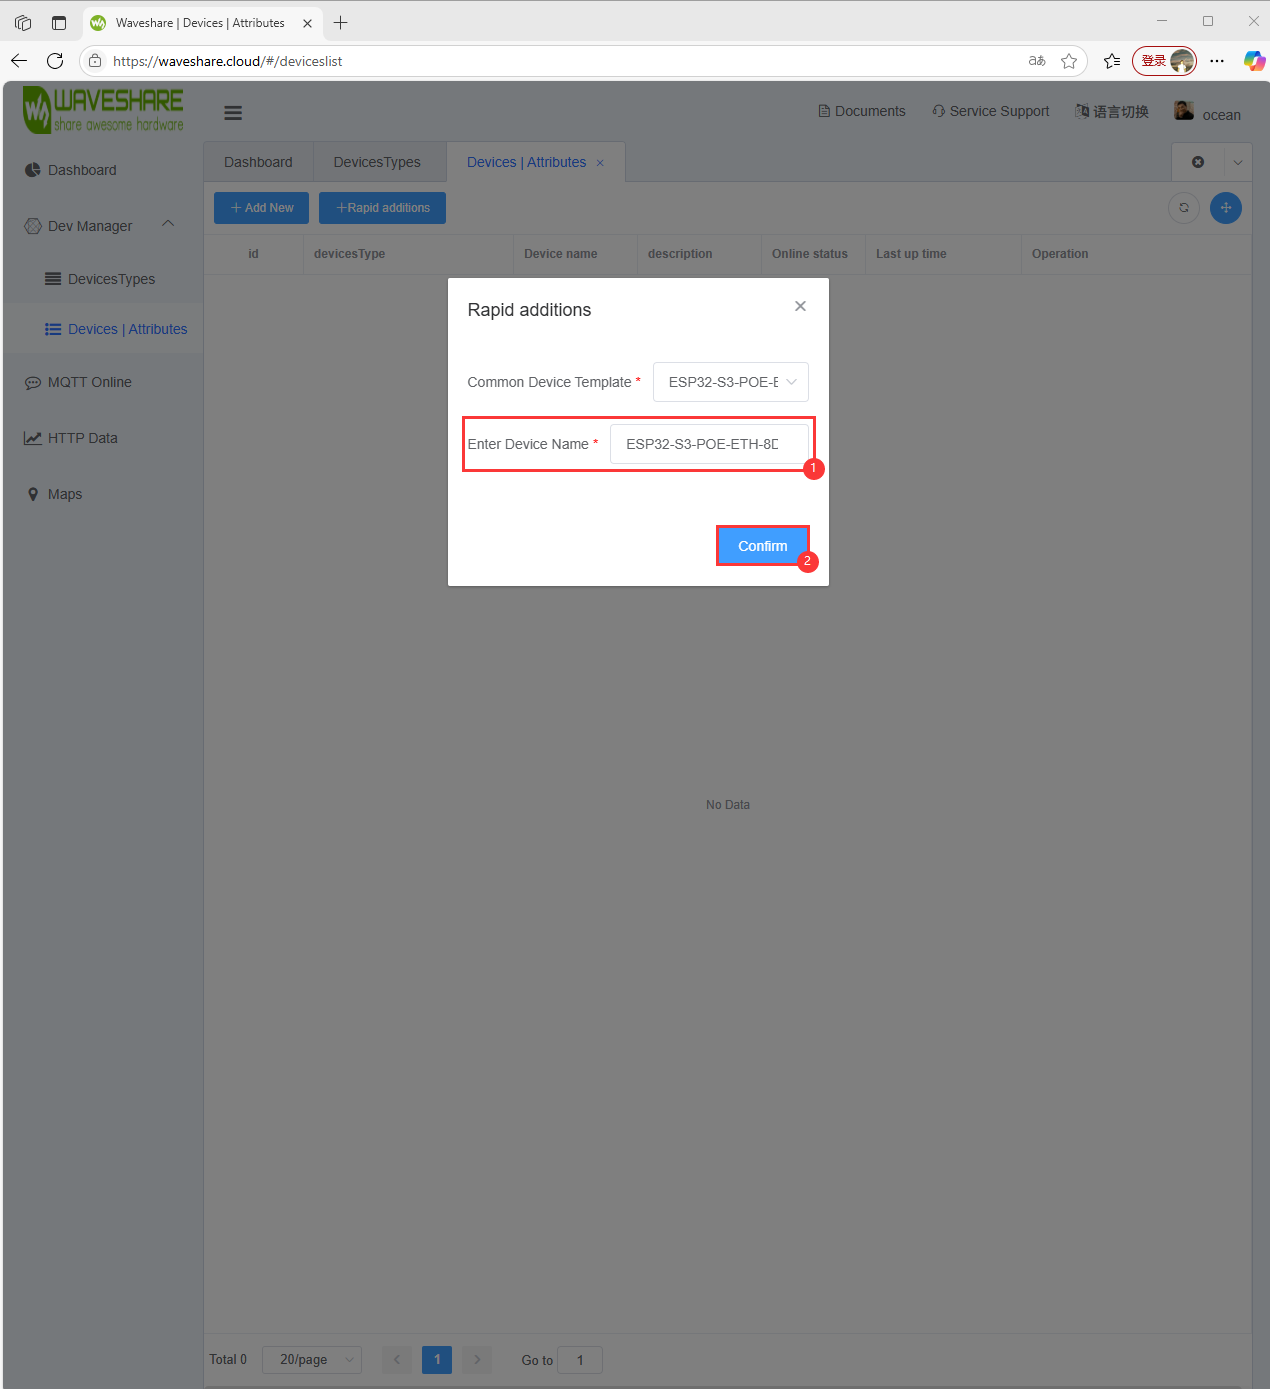
- Create a single device using a template
- Name the created device
- Associate devices to device categories
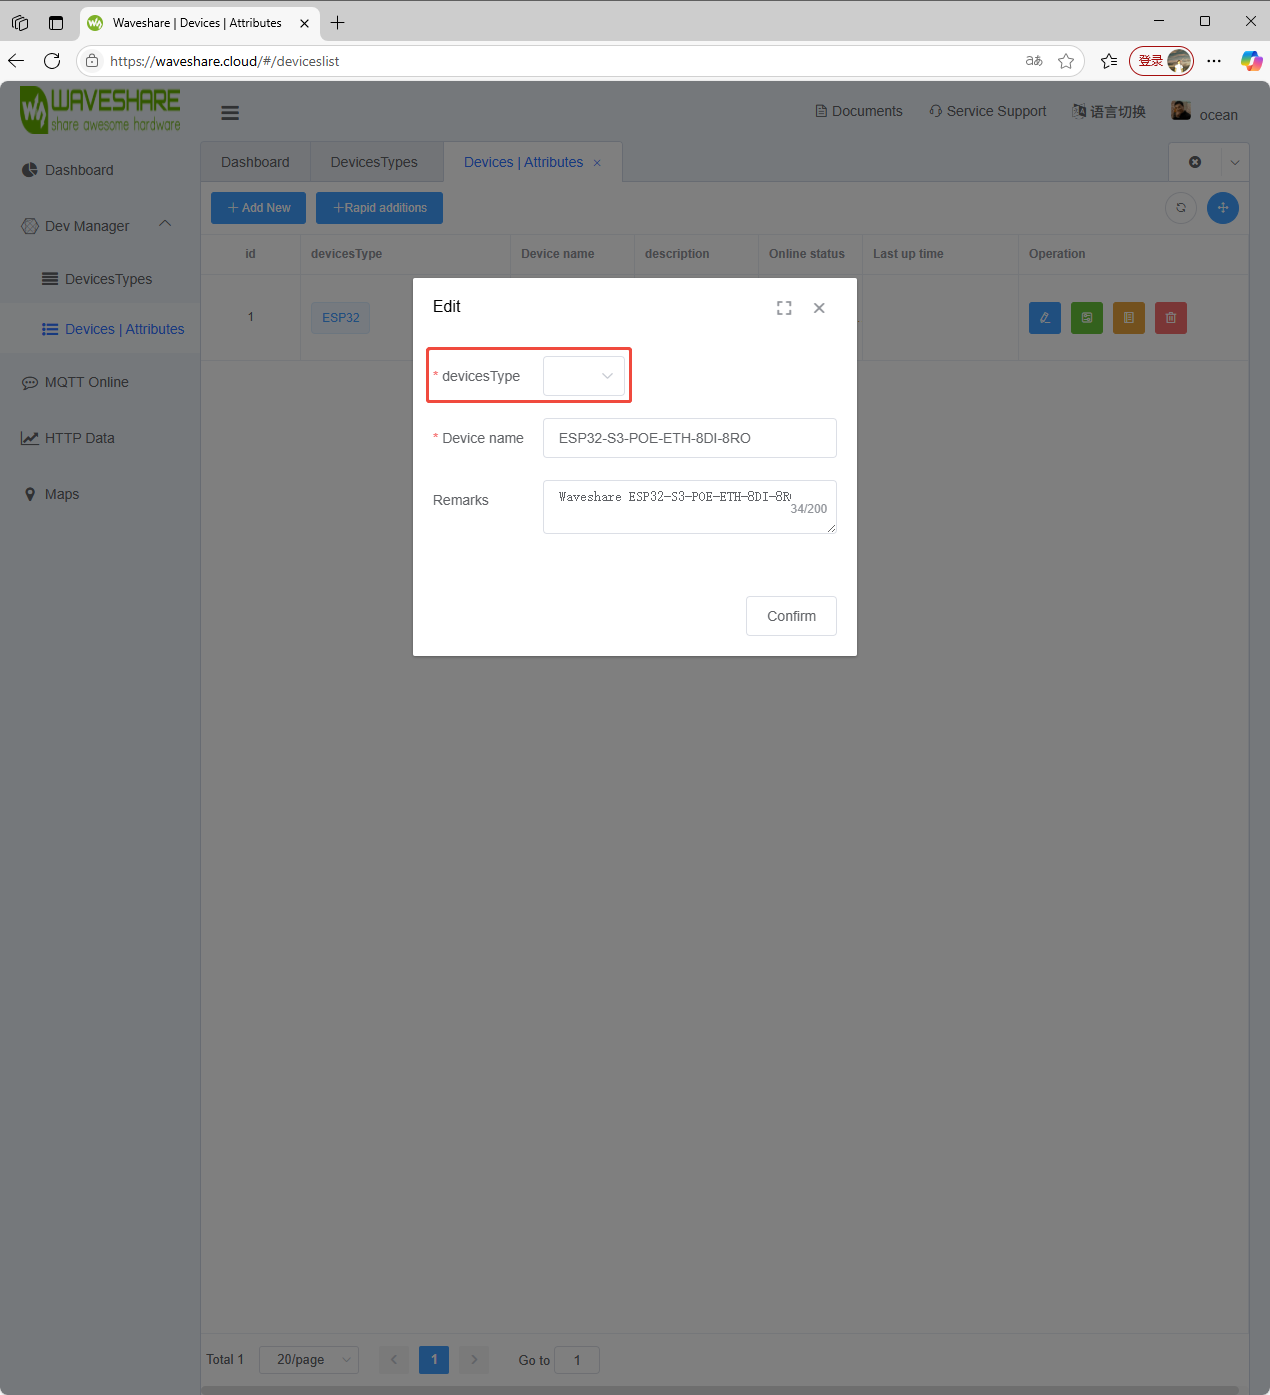
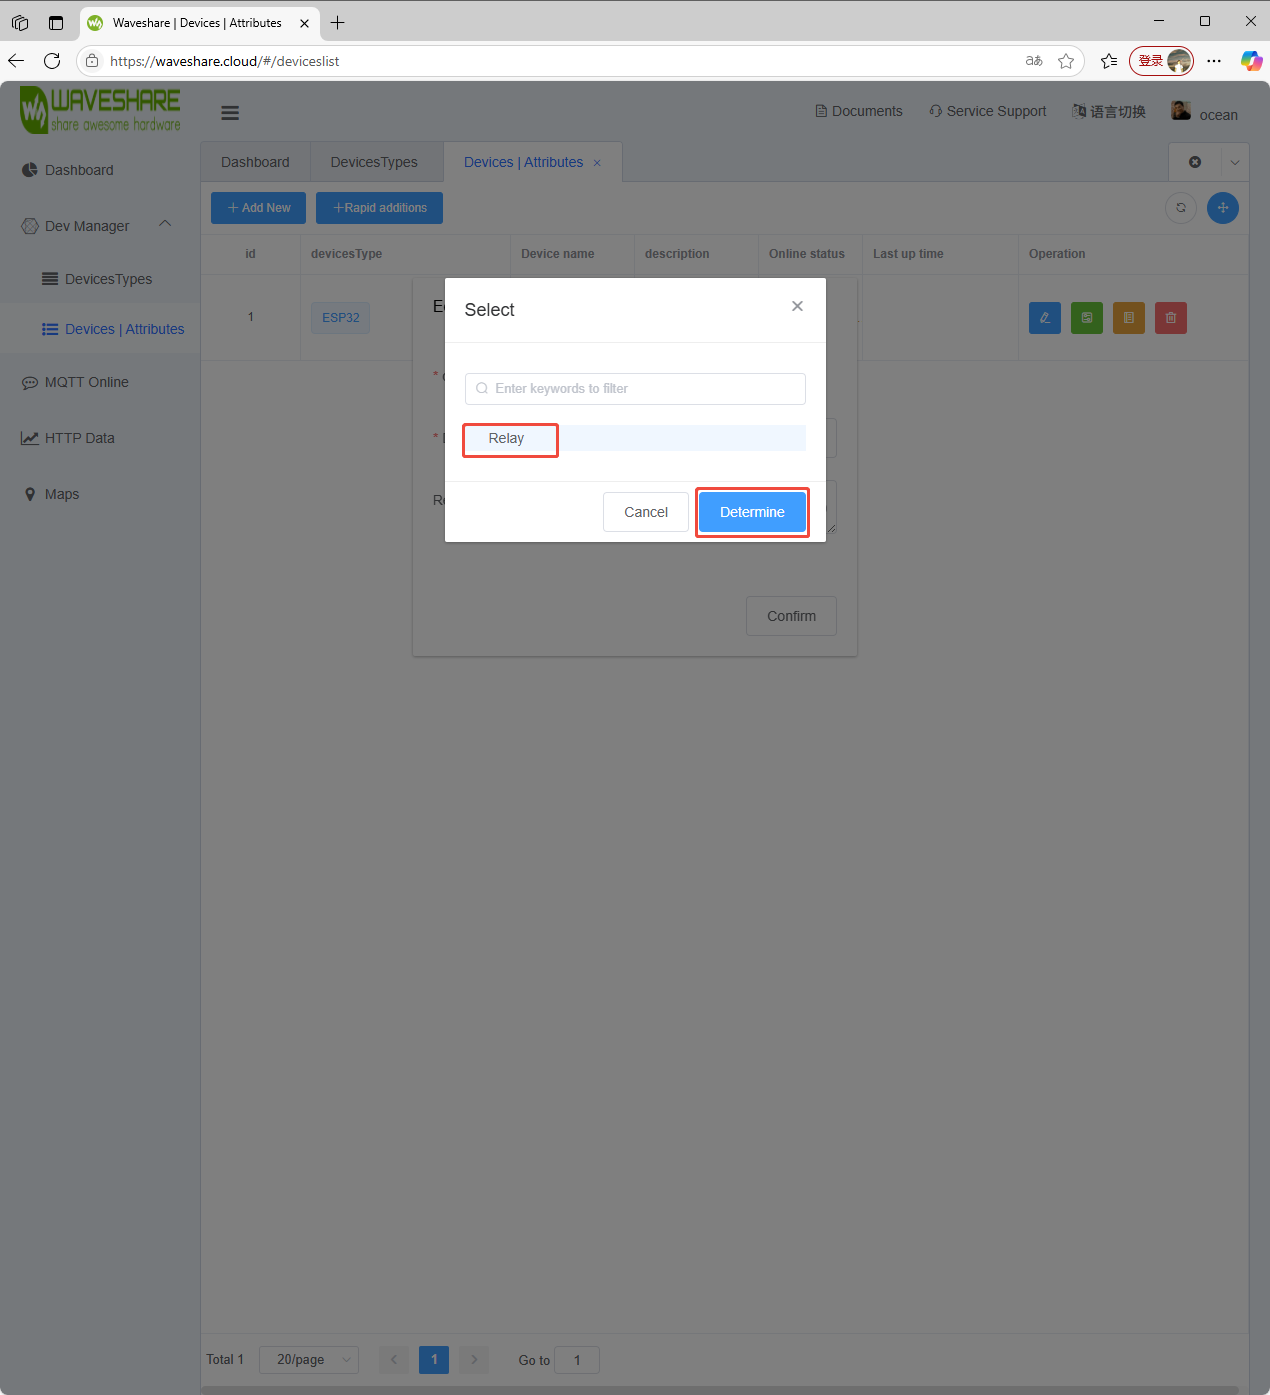
- Save operation
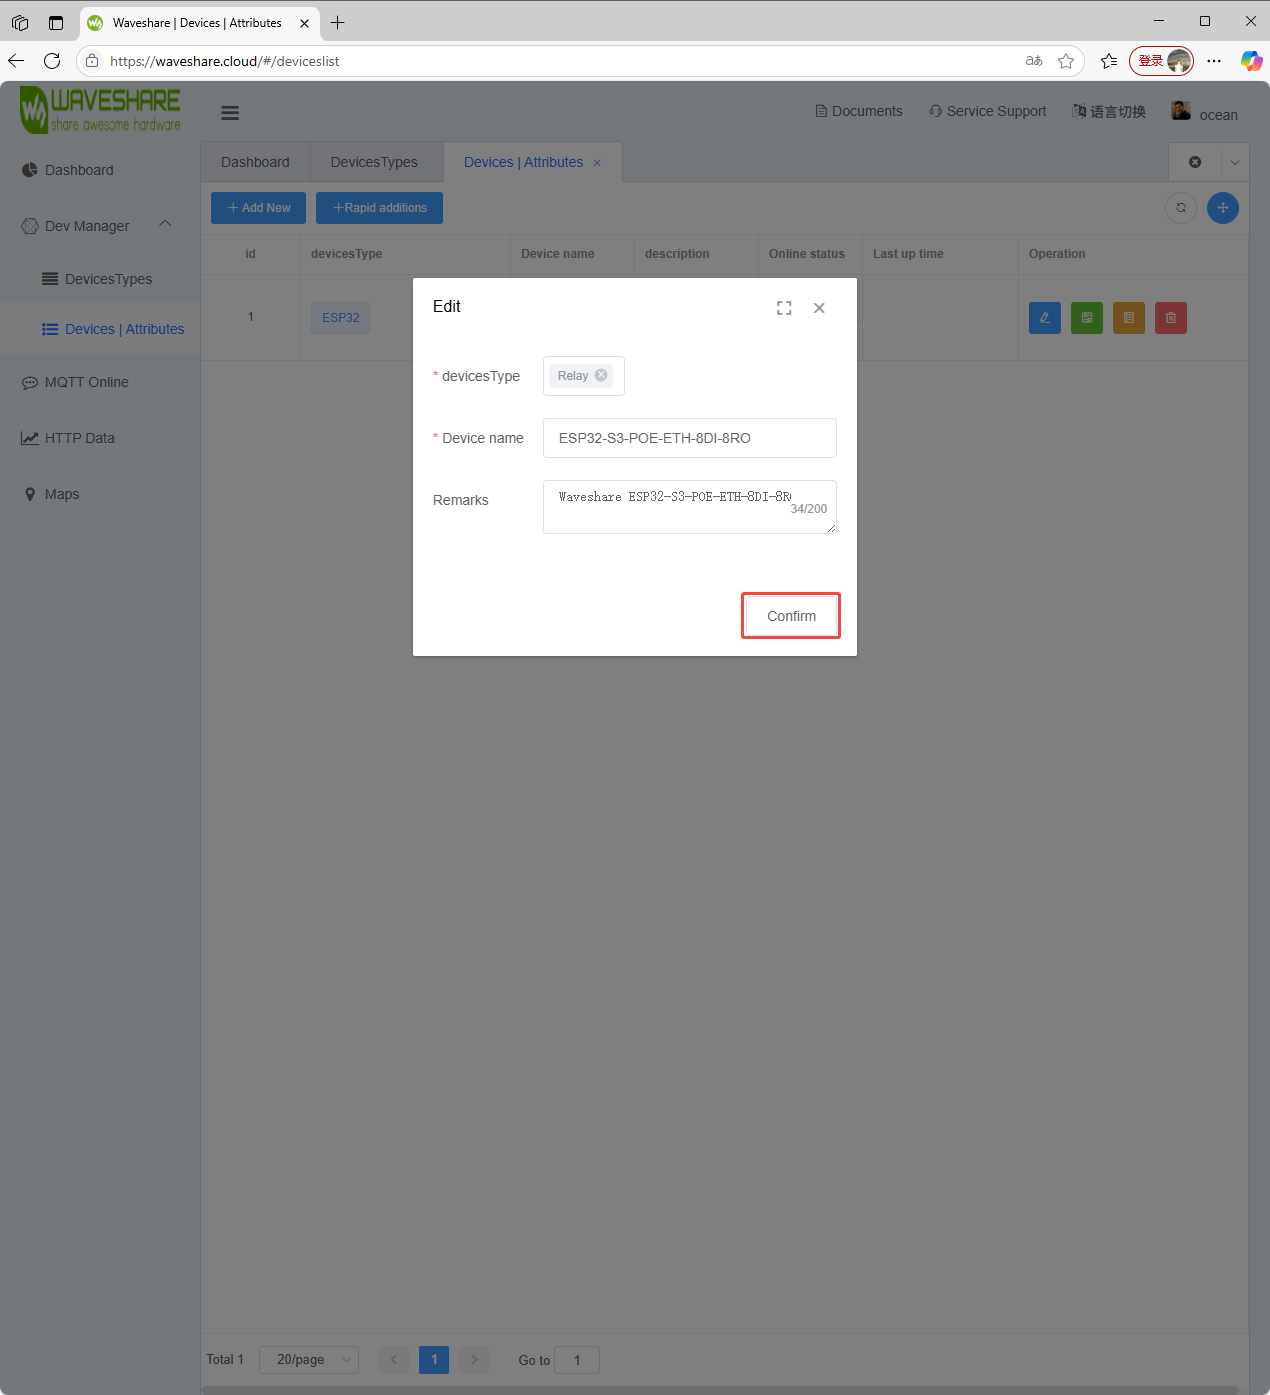
- Once created successfully, you can view the device details. Refer to this link to modify WS_Information.h file of the demo and then flash it to use the device
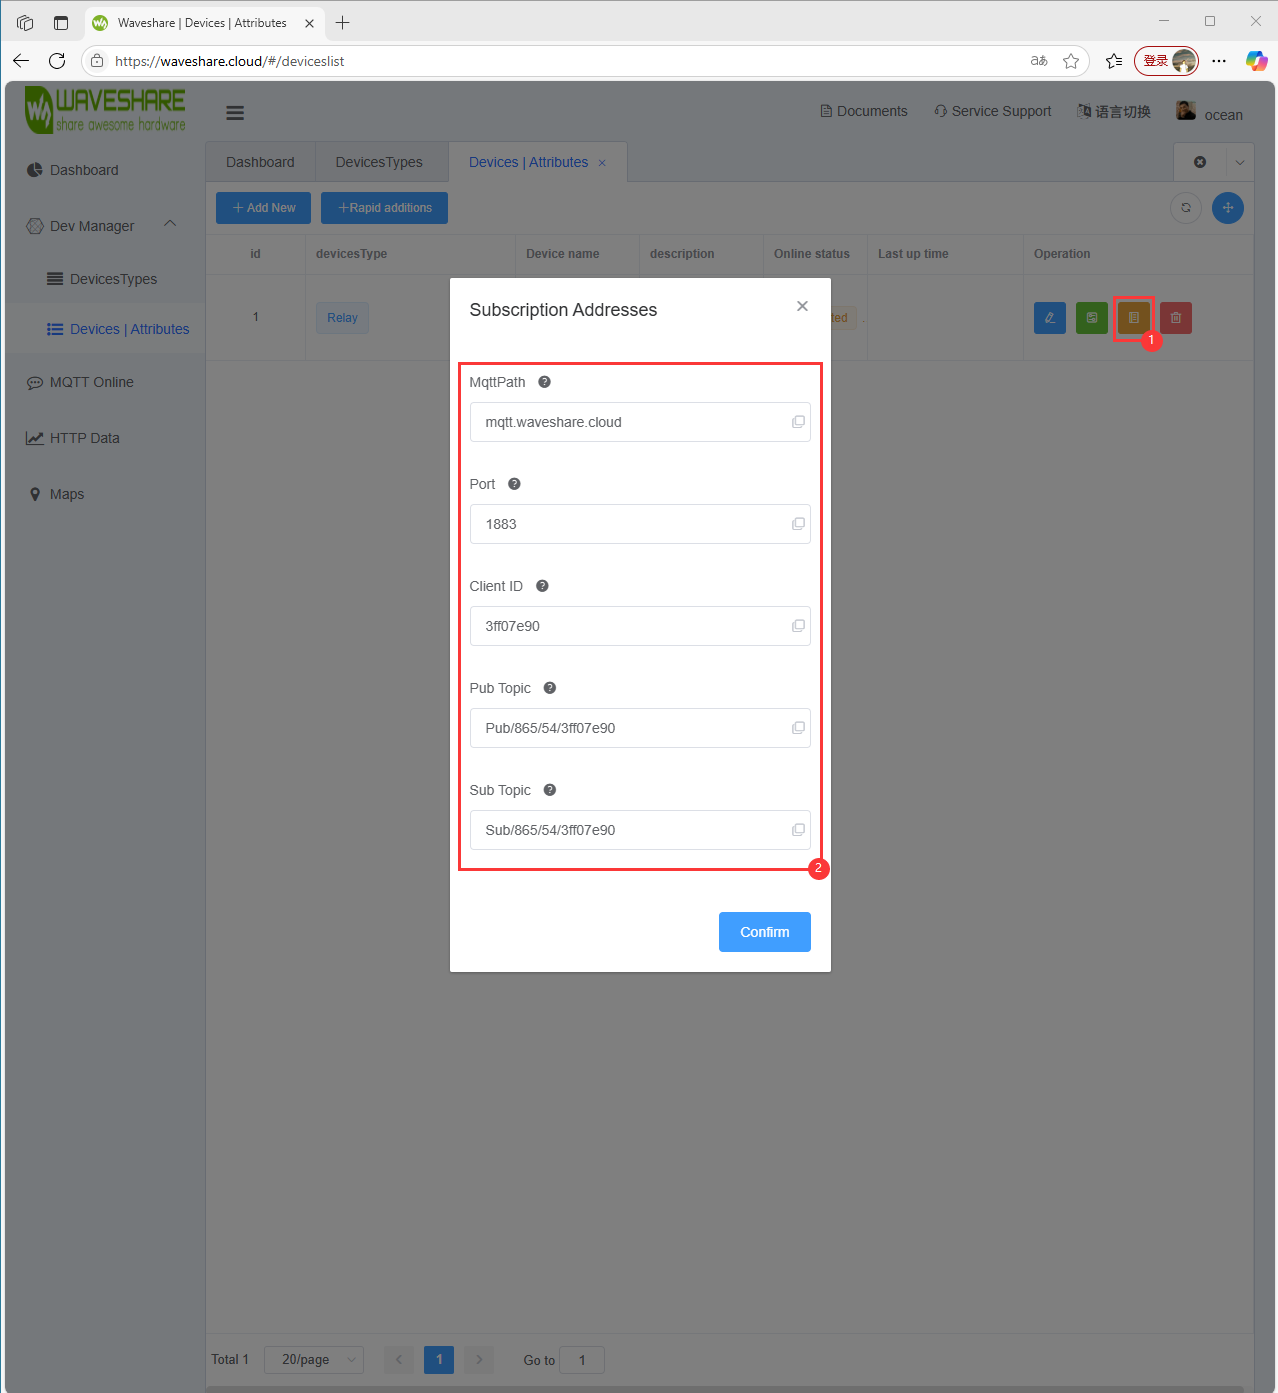
Software Operation
- Go to the official website of Waveshare and enter Waveshare Cloud
- Complete registration and Create Device
- Modify the MQTT and WIFI information corresponding to the demo
- Flash demo
- Enter the Dashboard in the Waveshare Cloud
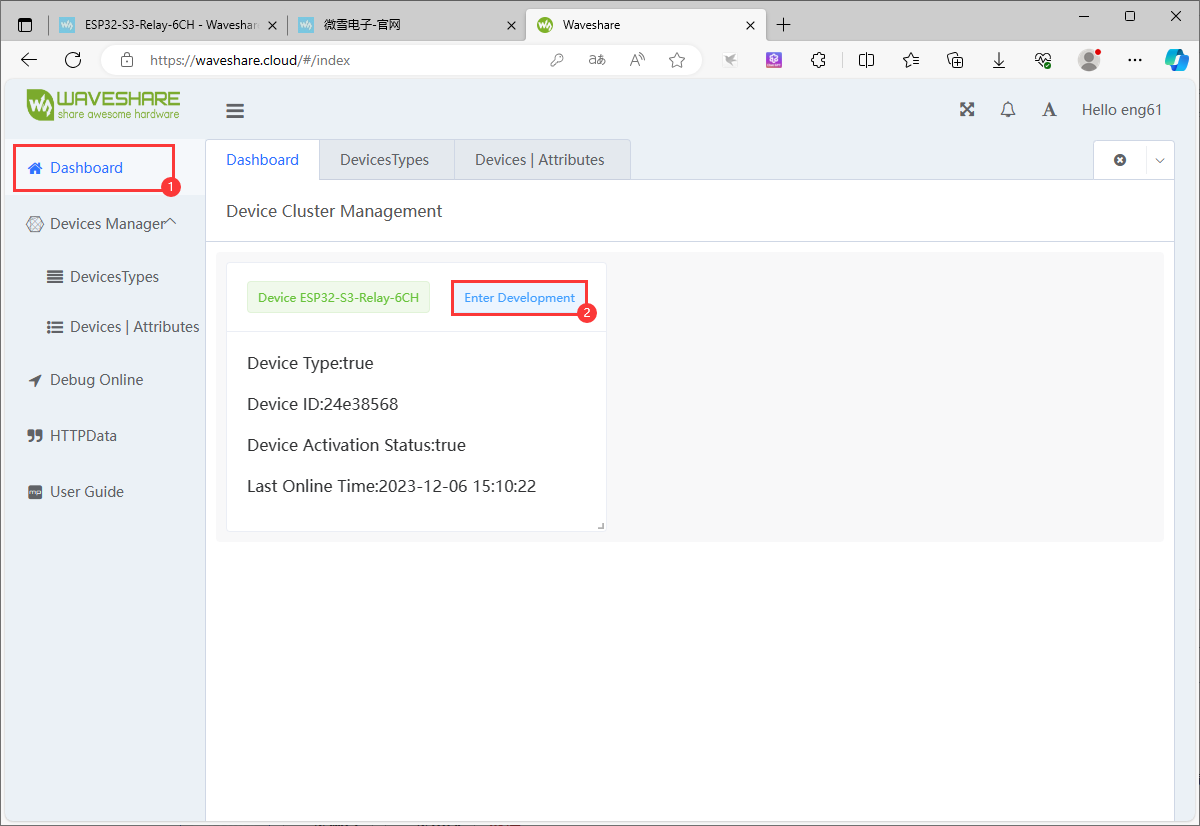
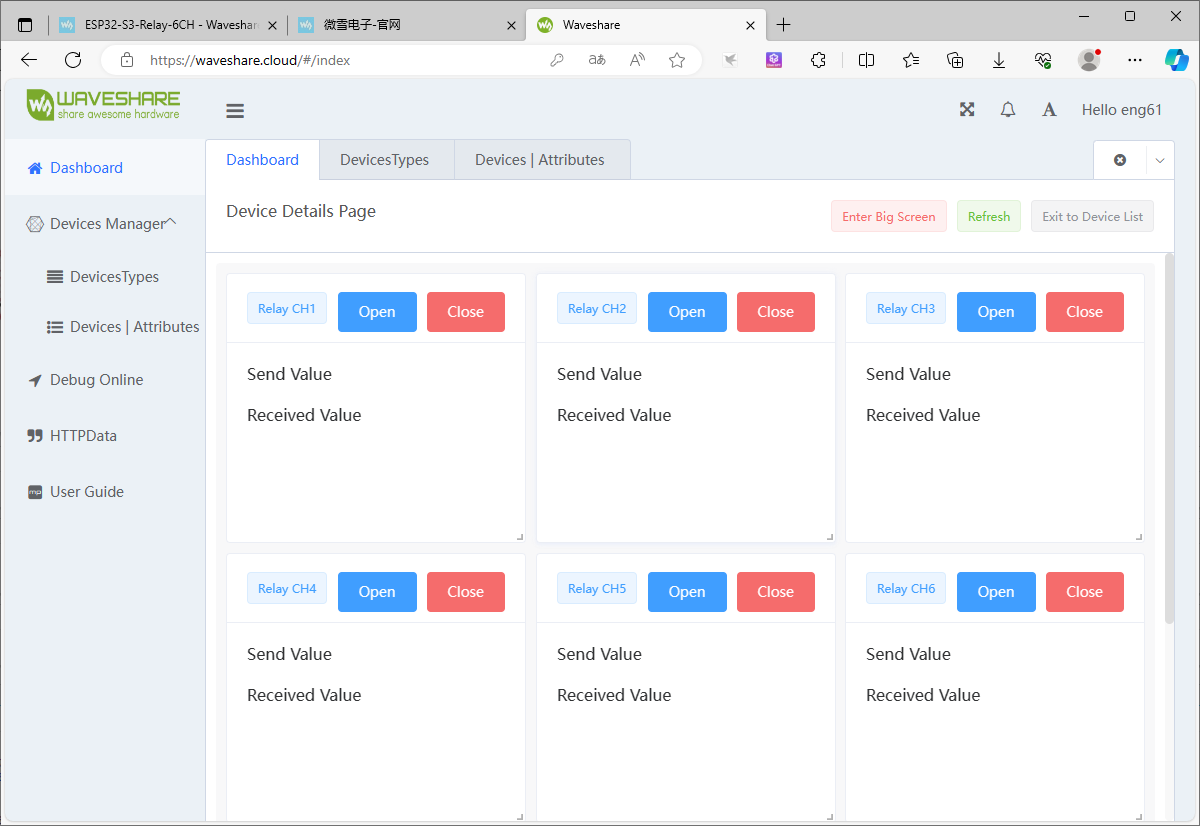
- Select the device option corresponding to this device and enter development
TAG:
Luckfox
Pi5 Active Cooler
Core3566104000
Raspberry Pi 4 Camera
Raspberry Pi LCD
Raspberry Pi Thermal imaging camera
1.83inch LCD TouchScreen Display 240×280 NV3030B Arduino Raspberry Pi ESP32S3 Pico STM32
Supports 6V~24V Solar Panel
Tang Nano FPGA Demo Code
RP204 0.85inch LCD
MiniPCIe Interface 2 CH CAN Card USB CAN Multiple Protection Circuits For Linux/Windows
RP2040 1.5inch LCD
7inch Monitor Display
SC09 Serial UART Bus Servo Motor Switchable 2.3kg 300Angle
NVIDIA
Raspberry Pi 5 Camera User Guide
Raspberry Pi Mini TV
7inch Monitor LCD
Intel 12th
Modbus-Series-BootLoader-Description User Guide
TAG:
Raspber Pi 5
FT4232HL USB TTL RS232 Industrial UART 4-Ch UART
ESP32-S3FH4R2 Tiny Mini WIFI Bluetooth Stamp Board
LuckFox Pico pro
Raspberry Pi 5 Active Cooler Silver
ESP32-C3FN4
ESP32 S3 LCD 1.3 inch Holographic Display Screen 3D Transparent Refractive Prism Mini TV
Luckfox Titan RK3576 IMX415 IR-CUT Camera
ESP32-S3 AI RGB Matrix Driver Board Dual Microphone DeepSeek
Raspberry Pi 3D Display
Raspberry Pi
Raspberry Pi 5 Camera Cable
Luckfox Pico Ultra B RV1106G2
Jetson Orin Nano SUPER 4GB/8GB 34TOPS/67TOPS Dual Ethernet AI Development Board
Raspberry Pi Pico 2 RP2350 0.85 inch LCD Display Development Board
Raspberry Pi 5 PCIe to M.2
Raspberry Pi 5 PCIe USB HUB 3.2 Gen1 HAT+ High Speed Pi5
Industrial USB 8CH TTL Converter UART Multi Protection Circuits Multi Systems
CV1800B
Raspberry Pi 3 LCD HAT