- sales/support
Google Chat:---
- sales
+86-0755-88291180
- sales01
sales@spotpear.com
- sales02
dragon_manager@163.com
- support
tech-support@spotpear.com
- CEO-Complaints
zhoujie@spotpear.com
- Only Tech-Support
WhatsApp:13246739196
- Purchase/Shipping/Refund
WhatsApp:13424403025
PI5-HMI-080C-ACCE User Guide
Feature
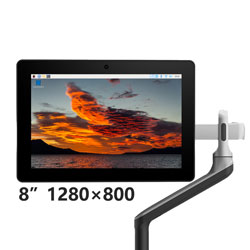
- 8/10.1-inch DSI touch screen with capacitive 10-point touch control.
- IPS display panel, hardware resolution of 1280 x 800.
- Optical bonding process, clearer picture quality.
- Toughened glass touch cover, hardness up to 6H.
- Integrated 5-megapixel front camera.
- Supports Raspberry Pi 5 all-in-one installation.
- Directly drive LCD through Raspberry Pi's DSI interface, refresh rate up to 60Hz.
- Supports Bookworm system without driver when used with Raspberry Pi 5.
- Supports software control of backlight brightness.
- Aluminum alloy case with passive cooling design.
Electrical Parameters
| Parameter | Min. Value | Standard Value | Max. Value | Unit | Note |
|---|---|---|---|---|---|
| Input Voltage | 4.75 | 5.00 | 5.25 | V | Note 1 |
| Input Current | 5 | 5 | TBD | A | Note 2 |
| Operating Temperature | 0 | 25 | 60 | ℃ | Note 3 |
| Storage Temperature | -10 | 25 | 70 | ℃ | Note 3 |
•Note 1: Input voltage exceeding the maximum value or improper operation may cause permanent damage to the device.
•Note 2: The input current should be ≥5A, otherwise, it will lead to start-up failure or abnormal display, and a long time in an abnormal state may cause permanent damage to the device.
•Note 3: Please do not put the display in a high-temperature and high-humidity storage environment for a long time, the display needs to work within the limit value, otherwise it will be possible to damage the display.
Onboard Interface
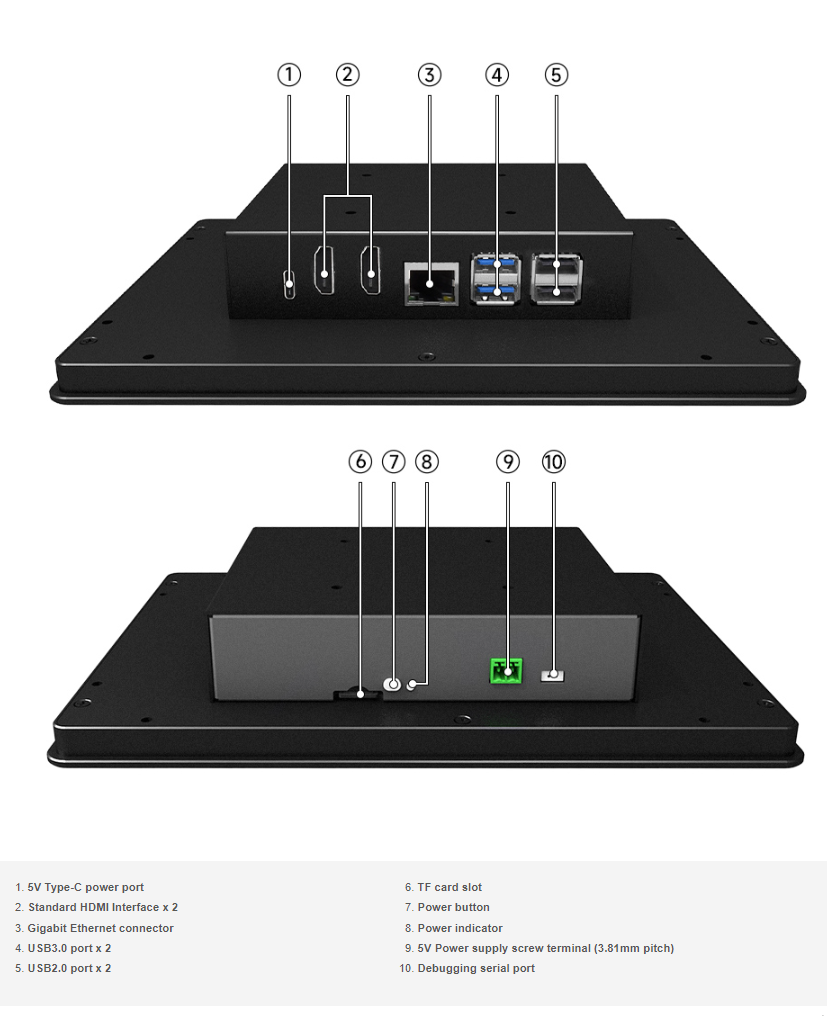
Assembly Guide
If you have purchased the PI5-HMI-080C or PI5-HMI-101C all-in-one model, you can ignore the hardware assembly steps and power up the unit directly.
Please prepare the following accessories: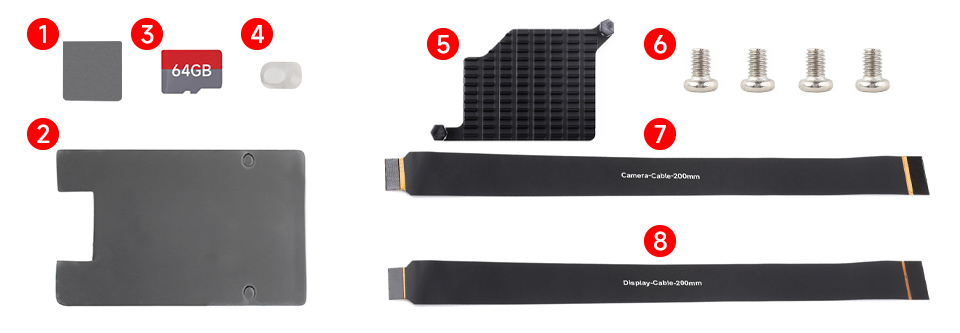
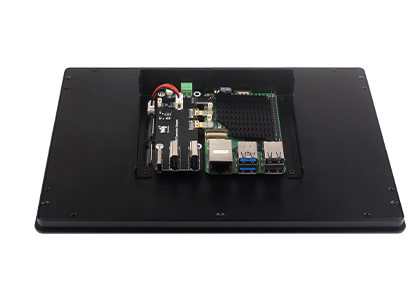
1. First unscrew the four screws on the metal back cover and remove cover;
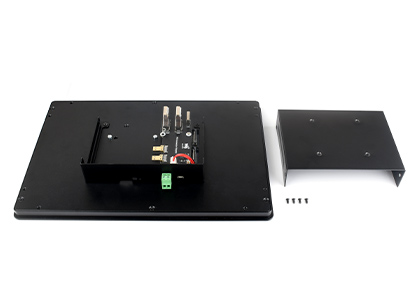
2. Respectively install the thermal tapes (① and ②) and heatsink (⑤) on the front and back panels of Raspberry Pi 5. Fix the silicon key (④) inside the case. Connect the Raspberry Pi 5 and the HAT, and fix them with M2.5*4mm silver metal screws.
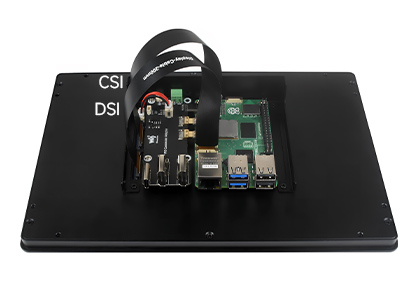
3. Use Pi5-Camera-Cable-200mm cable to connect the CSI interface to the CAM/DISP 1 interface of the Raspberry Pi.
Use Pi5-Camera-Cable-200mm cable to connect the DSI interface to the CAM/DISP 0 interface of Raspberry Pi.
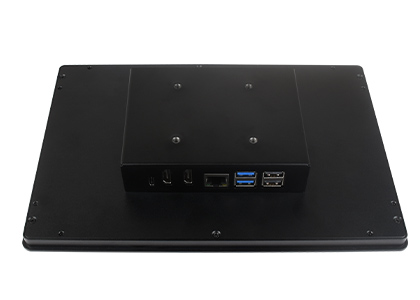
4. Insert the matching 64GB system card (③) into the Raspberry Pi 5's TF card slot, reinstall the metal back cover, and hardware assembly is complete.
Software Setting
Please use the matched 64GB card, and you can ignore the software setting step, power on it to use.
For Bookworm and Bullseye System
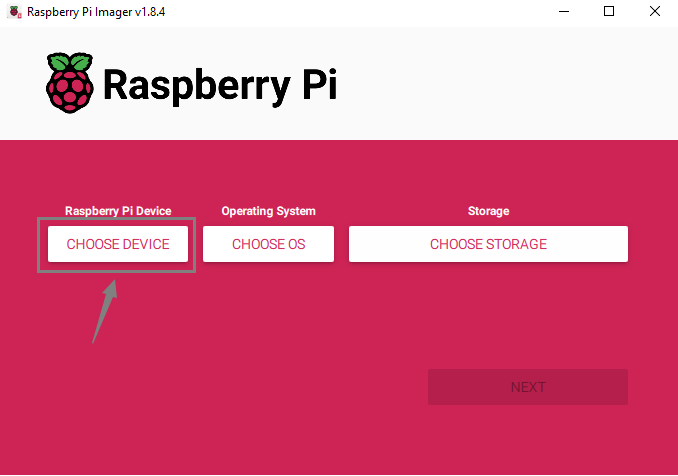
- 1. Insert the TF card into the PC, download and use Raspberry Pi Imager to program the corresponding image.
- 2. After programming the image, open the "config.txt" file located in the root directory of the TF card. Add the following code at the end of config.txt, save the file, and safely eject the TF card.
dtoverlay=vc4-kms-v3d
dtoverlay=ov5647
dtoverlay=vc4-kms-dsi-waveshare-panel,10_1_inch,dsi0- 3. Insert the TF card into the Raspberry Pi, power on the Raspberry Pi, and wait for a few seconds. After the system boots up, you should be able to enter the display interface and the LCD should touch normally.
Backlight Control
WaveShare provides the corresponding demo for the application (only supports Bookworm and Bullseye systems). Users can install it by the following commands:
wget https://files.waveshare.com/upload/f/f4/Brightness.zip
unzip Brightness.zip
cd Brightness
sudo chmod +x install.sh
./install.sh
After installation, you can open it: Menu -》Accessories -》Brightness:
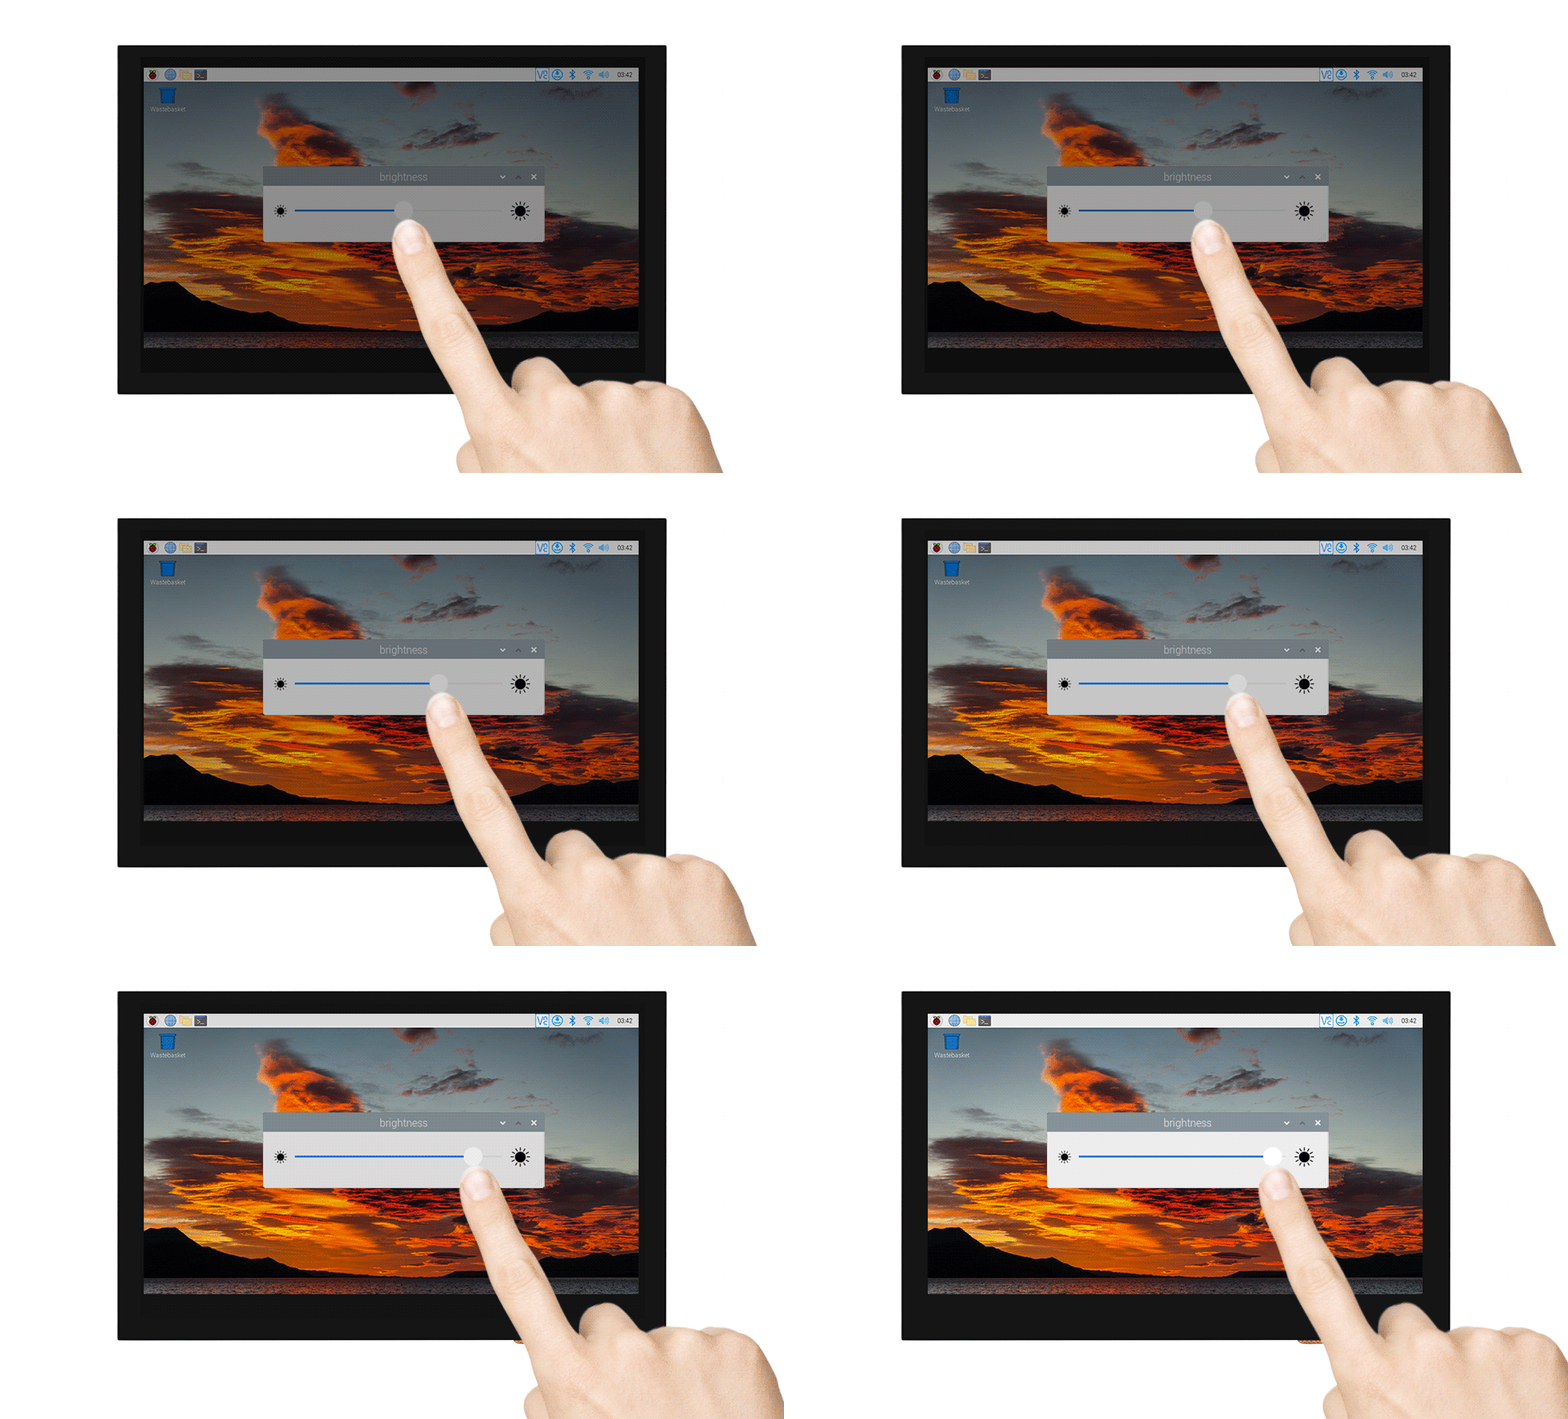
In addition, you can also input the following commands to control the backlight brightness in the terminal:
echo X | sudo tee /sys/class/backlight/*/brightness
X indicates any number from 0 to 255. 0 means the backlight is the darkest, and 255 means the backlight is the brightest. For example:
echo 100 | sudo tee /sys/class/backlight/*/brightness
echo 0 | sudo tee /sys/class/backlight/*/brightness
echo 255 | sudo tee /sys/class/backlight/*/brightness
Bookworm Display Rotation
GUI interface rotation
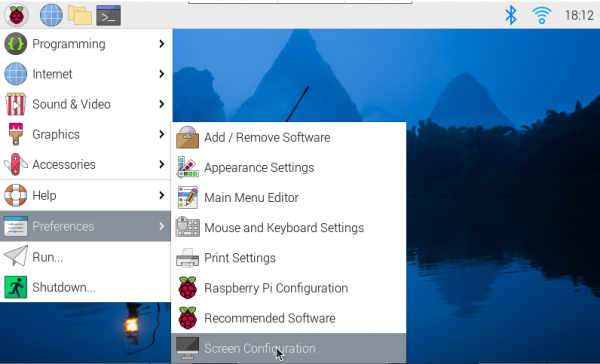
- 1. Open the "Screen Configuration" application;
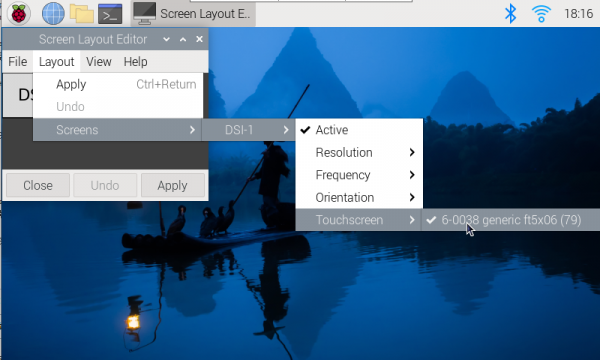
- 2. Go to "Screen" - > "DSI-1" - > "Touchscreen" and check "6-0038 generic ft5x06(79)"
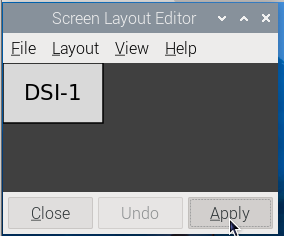
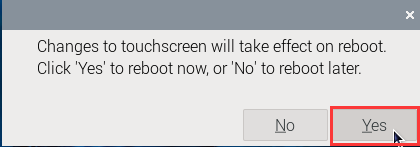
- 3. Click "Apply" and close the current window. Restart according to the pop-up prompt, and then touch screen select Done.
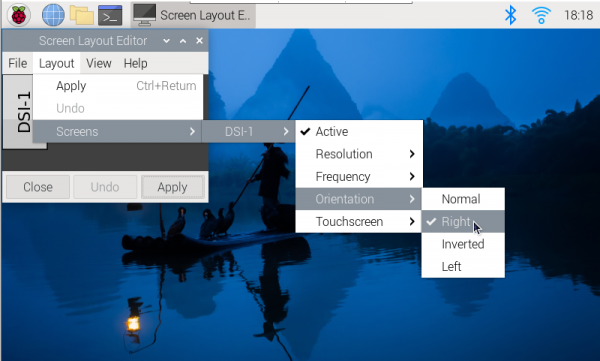
- 4.Go to "Screen" -> "DSI-1" -> "Orientation", check the direction you need to rotate, and finally click "Apply" to complete the display and touch synchronous rotation.
 -->
-->
Note: Only the Bookworm system supports the above synchronization rotation method. For the Bullseye and Butser systems, manual separate settings for touch rotation are required after displaying the rotation.
lite version display rotation
- 1. Need to modify the /boot/cmdline.txt file:
sudo nano /boot/cmdline.txt
- 2. At the beginning of the cmdline.txt file, add the command for displaying the rotation angle: (Please note, this command needs to be on the same line, with each command separated by a space.)
video=DSI-1:800x480M@60,rotate=90
Change the display rotation angle by modifying the rotate value to 90, 180, or 270.
- 3. Save and restart
sudo reboot
Resource
Assembly tutorial
FAQ
Question:How can I replace the booting logo picture for Raspberry Pi?
You can use your images to replace pictures on this path: /usr/share/plymouth/themes/pix/splash.png
Support
Monday-Friday (9:30-6:30) Saturday (9:30-5:30)
Email: services01@spotpear.com