- sales/support
Google Chat:---
- sales
+86-0755-88291180
- sales01
sales@spotpear.com
- sales02
dragon_manager@163.com
- support
tech-support@spotpear.com
- CEO-Complaints
zhoujie@spotpear.com
- Only Tech-Support
WhatsApp:13246739196
- Purchase/Shipping/Refund
WhatsApp:13424403025
- HOME
- >
- ARTICLES
- >
- Common Moudle
- >
- LCD
RGB-Matrix User Guide
This product is a bare screen and needs to be displayed with the main control board such as Raspberry Pi, ESP32, and Arduino. For details, please refer to the list.
Overview
Introduction
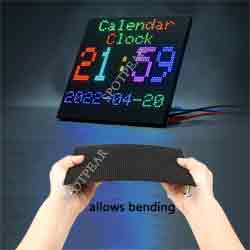
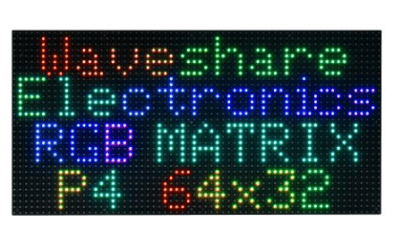
This product is a 64 × 32 RGB LED matrix panel, with 2048 RGB LEDs onboard, 4mm pitch, supports Raspberry Pi and Arduino, etc. It provides supporting open-source demos and tutorials, suitable for makers or electronics Enthusiasts to start learning, or DIY secondary development into other desktop or wall-mounted display applications.
Features
- 2048 individual RGB LEDs, full-color display, adjustable brightness.
- 64 × 32 pixels, 4mm pitch, allows displaying text, colorful images, or animation.
- The dimension is 256 × 128mm, which is moderate and suitable for DIY desktop display or wall mount display.
- Onboard two HUB75 headers, one for controller data input, one for output, and chain support.
- Provides open-source development resources and tutorials, for use with Raspberry Pi, Arduino, and so on.
Specifications
| DIMENSIONS | 256mm × 128mm |
|---|---|
| PIXELS | 64 × 32=2048 DOTS |
| PITCH | 4mm |
| PIXEL FORM | 1R1G1B |
| VIEWING ANGLE | ≥160° |
| CONTROL TYPE | synchronization |
| DRIVING | 1/16 scan |
| HEADER | HUB75 |
| POWER SUPPLY | 5V / 4A(VH4 header input) |
| POWER | ≤20W |
Header Definition

| PIN | DESCRIPTION | PIN | DESCRIPTION | |
|---|---|---|---|---|
| VCC | 5V power input | GND | Ground | |
| R1 | R higher bit data | R2 | R lower bit data | |
| G1 | G higher bit data | G2 | G lower bit data | |
| B1 | B higher bit data | B2 | B lower bit data | |
| A | A line selection | B | B line selection | |
| C | C line selection | D | D line selection | |
| E | E line selection | CLK | clock input | |
| LAT/STB | latch pin | OE | output enable |
Note: The power supply ports (VCC and GND) of the display screen are 5V power supply, do not connect to other power supply voltages, so as not to burn the display screen.
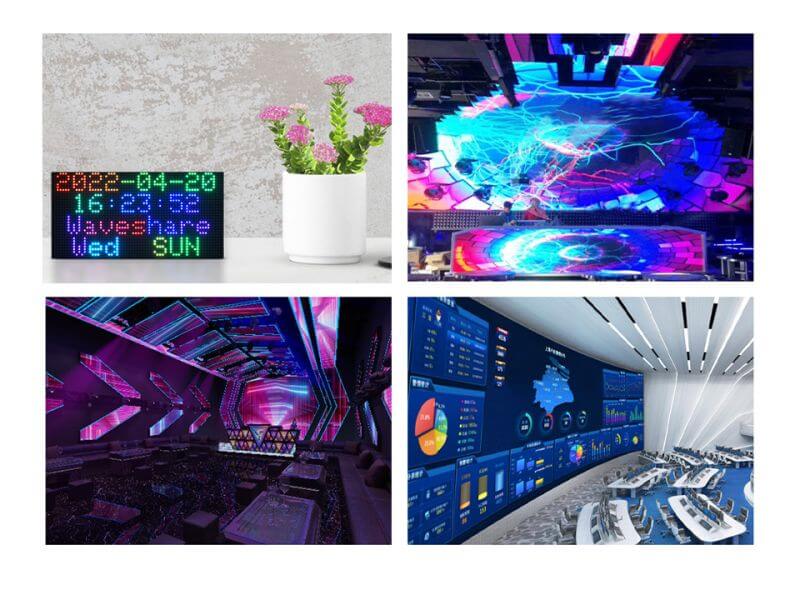
Usage Scenarios
DIY Maker Desktop Or Wall Mount Display, Signboard, Environment Monitor...
Raspberry Pi Instructions
Please refer to the github information: Demo, wiring reference
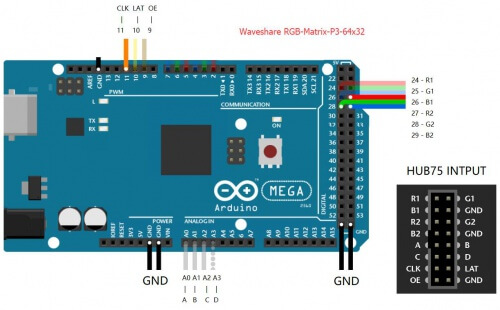
User Guides for Arduino Mega
Hardware Connection
Prepare materials
- RGB-Matrix-P3-64x32
- Arduino Mega (please purchase it separately)
Hardware Connection Diagram
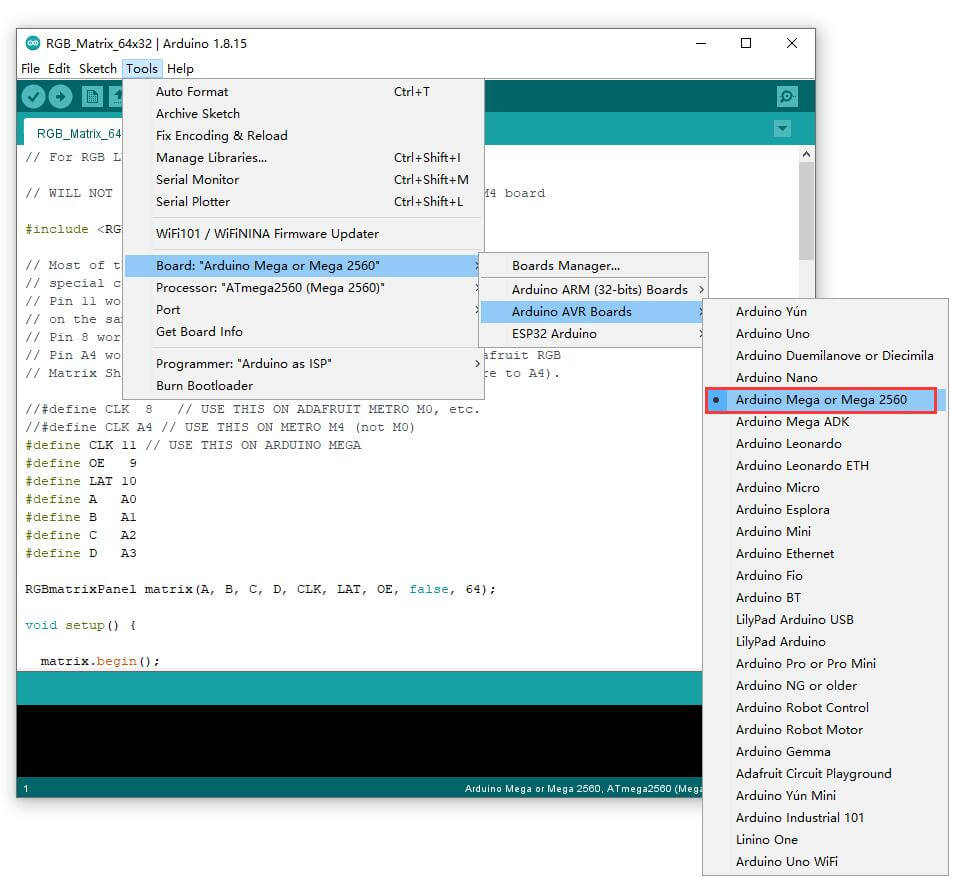
Software Settings
- Download example
- After connecting the wires according to the hardware connection diagram, the software settings are as follows:
RGB text display
The effect of running the instance is shown in the following figure:
【Function Description】
- UI:
- Can display icons
- Can display text content such as text and numbers
Working with ESP32
Preparation
- RGB-Matrix-P4-64x32
- NodeMCU-32S (not included)
Hardware Connection
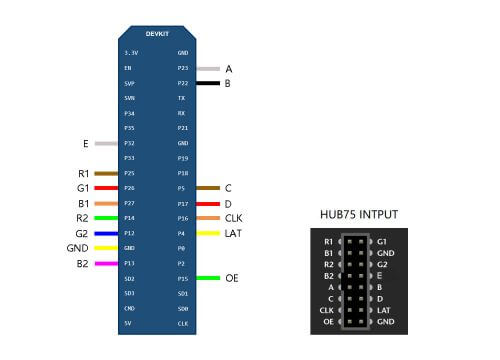
Software Setting
- Download the demo.
- Copy the folder under libraries in AuroraDemo to the libraries in the installation directory of the Arduino IDE
- After connecting the wires according to the hardware connection diagram, the software settings are as follows:
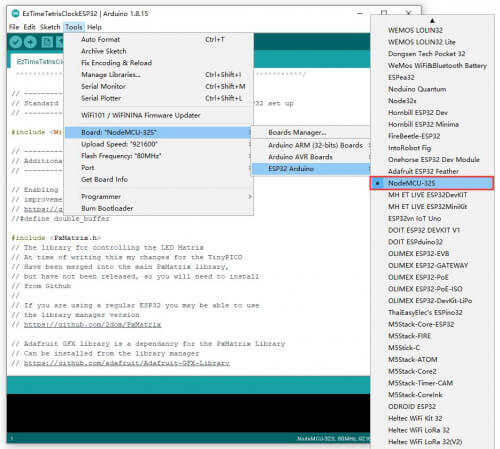
- Note: if you don't have the corresponding board, you can operate as below:
Click on file -> add board manager address -> enter: https://raw.githubusercontent.com/espressif/arduino-esp32/gh-pages/package_esp32_index.json -> OK
Perform
SimpleTestShapes: Display basic shapes
PatternPlasma: Displays cool plasma patterns
BouncingSquares: Show bouncing squares
AuroraDemo: Simple example showing various animation effects
#There is an open source project on GitHub: ESP32-HUB75-MatrixPanel-I2S-DMA, which has a more detailed introduction.
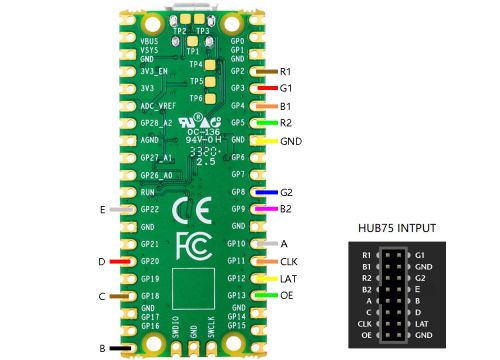
Working with Pico
Hardware Connection
Preparation
- RGB-Matrix-P4-64x32
- Raspberry Pi Pico (It must be purchased separately. If not, it is recommended to buy one with soldered pin headers, which is convenient for wiring.)
Diagram
Software Setting
- Download the demo
- After connecting the wire according to the diagram, you can set the software:
Performance
- After setting up the CircuitPython environment, you can copy all the contents of the CircuitPython directory in the downloaded Pico example to the recognized U flash drive, and you can run the example (there are 16 demos in this code).
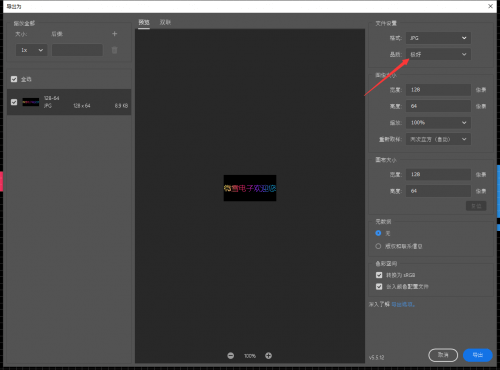
- The PSD folder is a file in ".psd" format, which can be used to modify the text image that needs to be moved. The modified image needs to be saved as "Excellent" and the format needs to be converted to "BMP" format.
【Function】
- Display text
- Set scrolling effect