- sales/support
Google Chat:---
- sales
+86-0755-88291180
- sales01
sales@spotpear.com
- sales02
dragon_manager@163.com
- support
tech-support@spotpear.com
- CEO-Complaints
zhoujie@spotpear.com
- sales/support
WhatsApp:13246739196
Raspberry Pi GamePi43 User Guide
Notice
Please take care of the direction of poles when mounting the batteries. It may damage the charge circuit if you reverse the batteries. And please use the same types of batteries, different types/brands of batteries may cause charging issue.
Overview
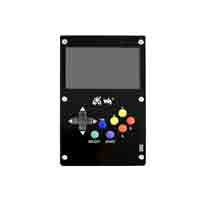
The GamePi43 is a portable retro video game console based on Raspberry Pi 3B+ with a 4.3inch IPS display, 800x480 pixels.
Features
- Raspberry Pi controller, available options:
- PI3B+, 64-bit 1.4G frequency quad-core CPU, 1G RAM
- PI4B-2GB, 64-bit 1.5G frequency quad-core CPU, 2G RAM
- 60 fps smooth gaming experience
- Compatible with Raspberry Pi A+/B+/2B/3B/3B+4B (external HDMI adapter is required for Pi Zero/Zero W/Zerao WH)
- Integrates battery charge circuitry, powered from 18650 lithium batteries (NOT included), plays anywhere anytime
- Battery life indicator
- Onboard speaker and earphone jack, listen to the familiar BGM from the old days
- Volume and backlight adjustment keys, adjust the device status according to a specific game, better experience
- PI3B+, 64-bit 1.4G frequency quad-core CPU, 1G RAM
- PI4B-2GB, 64-bit 1.5G frequency quad-core CPU, 2G RAM
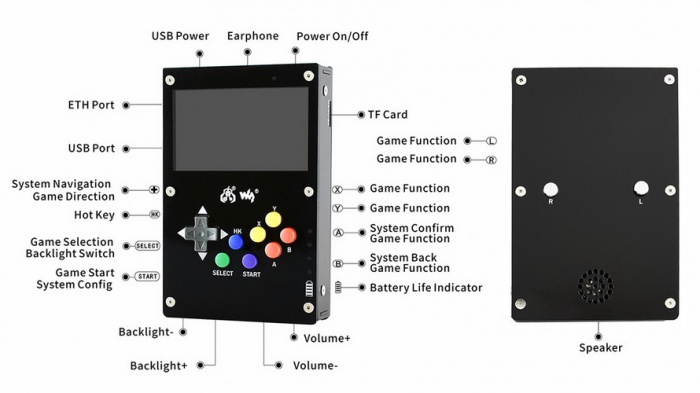
Layout
User Guides
【Note】Please make sure you mount the batteries in correct direction, otherwise it may damage charging circuity
Hardware connection
- Insert GPIo of Raspberry Pi to GamePi43
- Connect HDMI interface of GamePi43 to Raspberry Pi by HDMI connector
- If you use Raspberry Pi Zero/Raspberry Pi Zero W, you should use HDMI cable
- Turn power switch into OFF and mount 18650 batteries
- If you use Raspberry Pi Zero/Raspberry Pi Zero W, you should use HDMI cable
To use GamePi43, you can install the driver manually or directly use pre-configured image
Method 1: Use pre-configured Image
Note: If you use Raspberry Pi 4B, please install the driver with the original Retripie image manually.
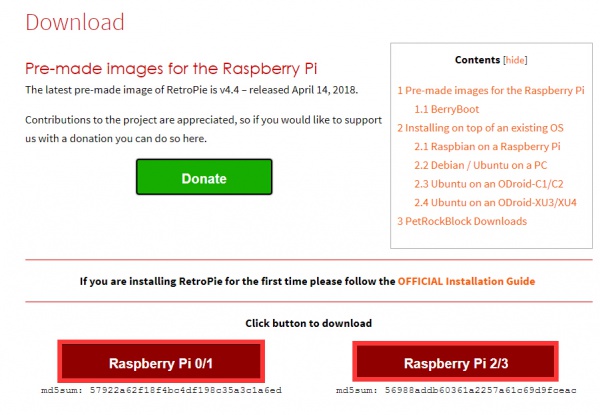
1) Pre-configured images
| OS | Revision | Raspberry Pi | User name/Password | Link |
|---|---|---|---|---|
| Retropie | V4.6 | Raspberry Pi 4B | Pi / raspberry | |
| Retropie | v4.4 | Raspberry Pi 2/3/3B+ | Pi / raspberry | |
| Retropie | v4.4 | Raspberry Pi 1/Zero/Zero W | Pi / raspberry | |
| Recalbox | 6.0-DragonBlaze | Raspberry Pi 2/3/3B+ | root / recalboxroot | |
| Recalbox | 6.0-DragonBlaze | Raspberry Pi 1/Zero/Zero W | Pi / recalboxroot | |
| Recalbox | 7.1-DragonBlaze | Raspberry Pi Pi 2/3/Pi 3B+ | Pi / recalboxroot |
2) Write the image to the Micro SD card. Then insert the SD card to Raspberry Pi. Turning Power switch into ON to start Raspberry Pi
- If batteries are low, Raspberry Pi is failed to booting. In this case, you can connect a 5V 3A power adapter to the Power interface for charging. Indicators are flashing when charging. (You can play when charging, however, Raspberry Pi will reboot when inserting/disconnecting power adapter)
- If batteries are enough, Raspberry Pi is started and indicators are on
3)After booting, you can select emulators. In Retropie, button "A" is OK, and "B" is the return. In Recalbox, button "B" is OK and "A" is the return
4)You can press "Start" to start games
5)If you want to exit games, press "HK" and "Select" or "Select" and "Start" at the same time
6) To adjust volume and backlight of LCD, you can use buttons on the bottom of GamePi43
Method 2: Install driver manually
- Download driver of GamePi43: GamePi43-190717 Driver-Supports Retropie-v4.4 and Recalbox6.0-DragonBlaze
- Download driver of GamePi43 for Raspberry Pi 4B: GamePi43-200730 Driver-Support Retropie-v4.6
The driver cannot support Retropie-v4.7, please wait for updating
Install driver on retropie
Download Retropie image from Retropie website
- Write the image to SD card
- Copy the driver (Do not unzip it) to the root directory of the SD card (BOOT directory of the Raspbian)
- Then open the config.txt file in the root directory of the TF card, add the following code at the end of config.txt, then save and quit the TF card safely.
max_usb_current=1
hdmi_force_hotplug=1
hdmi_group=2
hdmi_mode=87
hdmi_cvt 800 480 60 6 0 0 0
- Connect SD card, keyboard, and an HDMI display to Raspberry Pi, Turn the switch into ON side to power on Raspberry Pi. Press F4 (Keyboard) after booting
- Install driver with commands below:
tar xzvf /boot/GamePi43-*.tar.gz
cd GamePi43/
./GamePi43
- Long-press "A" button (GamePi43) to enter the configuration page, configure by pressing related buttons (GamePi43), you can also long-press to skip any button
After configuring, you can press "A" (GamePi43) to save configured and exit, or press "B" or "Start" (GamePi43) to exit without saving.
【Note】
The HK is disabled in Driver (GamePi43-200730) because of compatibility problems. If you want to enable the HK function, you can just modify /boot/retrogame.cfg file, remove # character from the below link:
#ESC 2 # Hotkey
You should change the line to
ESC 2 # Hotkey
Save and reboot.
Maybe the default games in the test image are not those you want, you can also add games as you like.
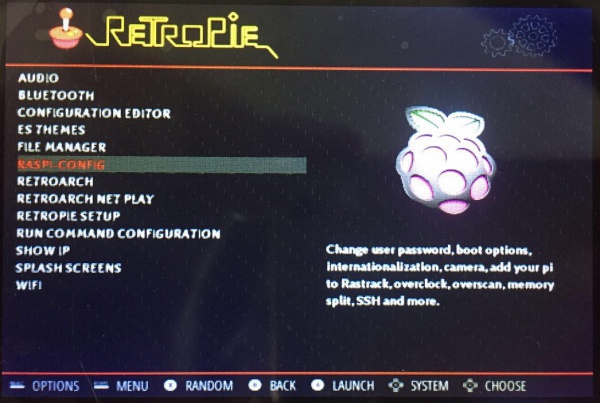
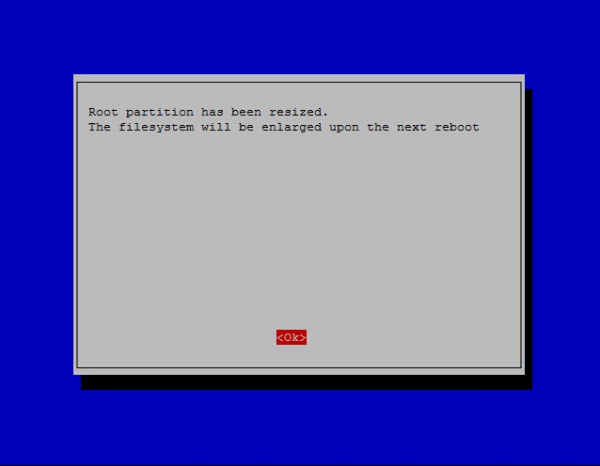
- Size of most games are always large, so we need to expand the filesystem fist. Choose RASPI-CONFIG on configure page and press enter
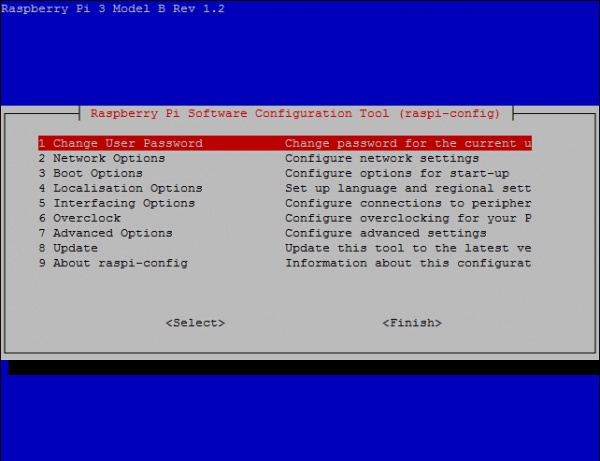
- Choose 7 Advanced Options -> A1 Expand Filesystem, Enter->Finish, (physical keyboard is required)
- Choose OK, and reboot.
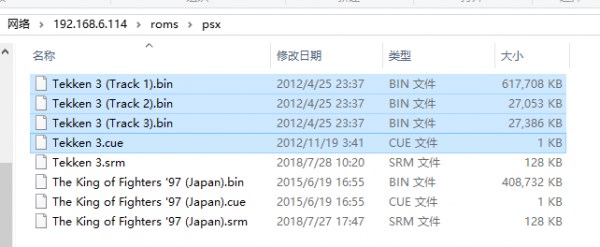
- Download ROMS of games you like
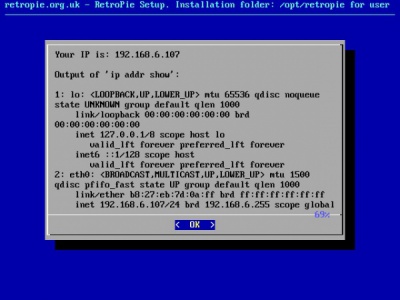
- Connect your Raspberry Pi to the network (Make sure the network you connect is in the same LAN as your PC). Find SHOW IP in Retropie list, press “A” to query the current IP address of your Raspberry Pi.
- Open it with the IP address on your PC
- Then on the emulator choose the page, you can press “Start”->QUIT->RESTART EMULATIONSTAION, press “A” to confirm. Then restart the emulator, you can find the game added.
For more operations, you can read https://retropie.org.uk/docs/
Install driver on Recalbox
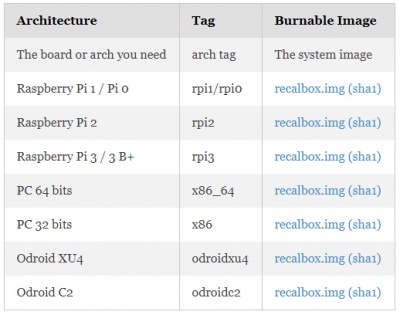
Download the latest image from https://archive.recalbox.com/
- Unzip the files download to get the .img file
- Write the .img file to SD card
- Copy the GamePi43 driver to the root directory of SD card
- Then open the config.txt file in the root directory of the TF card, add the following code at the end of config.txt, then save and quit the TF card safely.
max_usb_current=1
hdmi_force_hotplug=1
hdmi_group=2
hdmi_mode=87
hdmi_cvt 800 480 60 6 0 0 0
Note: If you are using recalbox 7.0.1-Reloaded version image, the configuration code of config.txt needs to be as follows, add the following code at the end of config.txt, save and eject the TF card safely.
hdmi_force_hotplug=1
hdmi_group=2
hdmi_mode=1
hdmi_mode=87
hdmi_cvt 800 600 60 6 0 0 0
hdmi_drive=2
display_rotate=0
avoid_warnings=1
- Connect SD card, keyboard, and an HDMI display to Raspberry Pi, Turn the switch into ON side to power on Raspberry Pi. Press F4 then Alt+F2(Keyboard),then enter the terminal(user: root; password: recalboxroot)
- Install driver with following commands in the terminal:
tar xzvf /boot/GamePi43-*.tar.gz
cd GamePi43/
./GamePi43
And then reboot the system.
Note: If you are using the recalbox 7.0.1-Reloaded version image, you need to enter the following commands in the terminal to configure the gamepad
mount -o remount,rw /
mount -o remount,rw /boot
Edit the recalbox.conf file
nano /recalbox/share/system/recalbox.conf
Modify the line controllers.gpio.enabled=0 in the file to
controllers.gpio.enabled=1
After modification, save the file and exit the editing. After entering reboot to restart the system, you can use the buttons normally.
Interface
【Note】 NC: not connected
| PIN | Symbol | Description |
|---|---|---|
| 1 | 3.3V | 3.3V power input |
| 2 | 5V | 5V Power input |
| 3 | HOTKEY | BCM=2, WPI=8 |
| 4 | 5V | 5V Power input |
| 5 | NC | NC |
| 6 | GND | Ground |
| 7 | UP | BCM=4,WPI=7 |
| 8 | TL | BCM=14, WPI=15 |
| 9 | GND | Ground |
| 10 | X | BCM=15, WPI=16 |
| 11 | DOWN | BCM=17, WPI=0 |
| 12 | Y | BCM=18, WPI=1 |
| 13 | LEFT | BCM=27, WPI=2 |
| 14 | GND | Ground |
| 15 | RIGHT | BCM=22, WPI=3 |
| 16 | TR | BCM=23, WPI=4 |
| 17 | 3.3V Power input | |
| 18 | B | BCM=24, WPI=5 |
| 19 | START | BCM=10, WPI=12 |
| 20 | GND | Ground |
| 21 | SELECT | BCM=9, WPI=13 |
| 22 | A | BCM=25, WPI=6 |
| 23 | NC | NC |
| 24 | NC | NC |
| 25 | GND | Ground |
| 26 | NC | NC |
| 27 | NC | NC |
| 28 | NC | NC |
| 29 | NC | NC |
| 30 | GND | Ground |
| 31 | NC | NC |
| 32 | NC | NC |
| 33 | NC | NC |
| 34 | GND | Ground |
| 35 | NC | NC |
| 36 | NC | NC |
| 37 | NC | NC |
| 38 | NC | NC |
| 39 | GND | Ground |
| 40 | NC | NC |


