


- sales/support
Google Chat:---
- sales
+86-0755-88291180
- sales01
sales@spotpear.com
- sales02
dragon_manager@163.com
- support
tech-support@spotpear.com
- CEO-Complaints
zhoujie@spotpear.com
- Only Tech-Support
WhatsApp:13246739196
- Purchase/Shipping/Refund
WhatsApp:13424403025
Raspberry Pi OpenWrt Tutorial 1
Soft Routing & OpenWrt
Similar to our usual home router, soft routing refers to a routing solution formed by using desktop computers or servers and other equipment with software. It mainly relies on software settings to achieve the function of routers; while the hard router is a unique hardware device, including the processor, power supply, and embedded software, to provide the set router function.
OpenWrt is a very popular member of the soft routing system. It is a highly modular and highly automated embedded Linux system with powerful network components and scalability. It is often used in equipment such as industrial control devices, routers,and so on.
OpenWrt Function
Thanks to its high degree of customizability and expandability, OpenWrt can not only complete the functions of general home routers but also realize: port forwarding, intranet penetration, 4G networking, FTP server, and more powerful functions.
For example, using Waveshare SIM7600 CE 4G module, Raspberry Pi 4B (2GB RAM), and 5-port Gigabit switch module as hardware; using OpenWrt as system to build a soft router, in which data transmission is completed by controlling 4G module networking; By configuring port forwarding, device intercommunication under local multi-level routing is realized; through Frp intranet penetration client and cloud server-side Frp intranet penetration service to achieve remote networking and remote development, debugging, deployment of projects, remote Access device terminals, etc.
OpenWrt Compilation & Customization
- For users who have a certain basic Linux usage, the compilation of OpenWrt is very convenient. This compilation uses Lean's Github project source code. The project source code link is: https://github.com/coolsnowwolf/lede
- The compilation process is roughly divided into:
- Configure the building environment
- Get the source code
- Update and install components
- Check configuration information
- Compile and other steps
Configure the Compile Environment
First of all, it is recommended to choose the Ubuntu 1804 operating system for the compilation environment. At the same time, it must have a global scientific Internet environment. You can choose Google Cloud, Github Action, Vmware virtual machine, etc. On this basis, log in to the terminal as a non-Root user and enter the following commands:
sudo apt-get -y update to get the latest software list
sudo apt-get -y upgrade upgrade software to the latest version
sudo apt-get -y install build-essential asciidoc binutils bzip2 gawk gettext git libncurses5-dev libz-dev patch python3.5 python2.7 unzip zlib1g-dev lib32gcc1 libc6-dev-i386 subversion flex uglifyjs git-core gcc-multilib p7zip p7zip -full msmtp libssl-dev texinfo libglib2.0-dev xmlto qemu-utils upx libelf-dev autoconf automake libtool autopoint device-tree-compiler g++-multilib antlr3 gperf wget swig rsync installation and compilation environment dependencies
git clone https://github.com/coolsnowwolf/lede Pull the project source code to the local
cd lede/ into the project folder
./scripts/feeds update -a update components
./scripts/feeds install -a download components
Check the Configuration Information
make menuconfig Check the basic information of the system and configure the required functionsIn this step, you only need to press Space or Enter to check the corresponding options in the following graphical interface to complete the configuration.
Graphical configuration information check interface after Make menuconfig command.
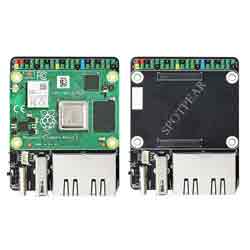
Taking the system compiled this time as an example, first select the CPU model and other information corresponding to the Raspberry Pi 4B:
Match the structure suitable for the Raspberry Pi 4B.
After that, after checking the corresponding CPU model, a part of the default configuration will be loaded into the configuration file. This part of the configuration already includes the most basic router functions, such as DHCP, firewall, WIFI, etc., so we only need to check on this basis. You can select the functions we need additionally.
Add support for 3G, 4G and other USB external devices
This article uses Waveshare SIM7600CE 4G module whose appearance is shown in the figure below. For details, please refer to the official website https://www.waveshare.com/wiki/SIM7600X_4G_%26_LTE_Cat-1_HAT
The official OpenWrt documentation is clearly explained how to build a system image that supports 3G and 4G, but due to the official documentation is old, the paths of some options have become invalid. This article has rearranged the paths of all software packages. Users only need to double-click the spaces in the following paths to check them.
Kernel Modules
USB Support
<*>     kmod-usb2
<*>     kmod-usb-ohci
<*>     kmod-usb-uhci
<*>     kmod-usb-acm # For ACM based modem, such as Nokia Phones

<*> kmod-usb-net # For tethering and rndis support
(The following are the officially designated parts, it is recommended to check all of them directly.)
  <*>   kmod-usb-net-asix...... Kernel module for USB-to-Ethernet Asix convertors
  <*>   kmod-usb-net-cdc-eem..................... Support for CDC EEM connections
  -*-    kmod-usb-net-cdc-ether.............. Support for cdc ethernet connections
  <*>   kmod-usb-net-cdc-mbim..................... Kernel module for MBIM Devices
  -*-    kmod-usb-net-cdc-ncm..................... Support for CDC NCM connections
  <*>   kmod-usb-net-cdc-subset...... Support for CDC Ethernet subset connections
  <*>   kmod-usb-net-dm9601-ether........ Support for DM9601 ethernet connections
  <*>   kmod-usb-net-hso.. Kernel module for Option USB High Speed Mobile Devices
  <*>   kmod-usb-net-ipheth..................... Apple iPhone USB Ethernet driver
  <*>   kmod-usb-net-kalmia................... Samsung Kalmia based LTE USB modem
  <*>   kmod-usb-net-kaweth.. Kernel module for USB-to-Ethernet Kaweth convertors
  <*>   kmod-usb-net-mcs7830
  <*>   kmod-usb-net-pegasus
  <*>   kmod-usb-net-qmi-wwan.................................... QMI WWAN driver
  <*>   kmod-usb-net-rndis......................... Support for RNDIS connections
  <*>   kmod-usb-net-sierrawireless.......... Support for Sierra Wireless devices
  <*>   kmod-usb-net-smsc95xx. SMSC LAN95XX based USB 2.0 10/100 ethernet devices

<*> kmod-usb-serial..................... Support for USB-to-Serial converters
(The following are the officially designated parts, it is recommended to check all of them directly.)
<*>   kmod-usb-serial-ark3116........ Support for ArkMicroChips ARK3116 devices
  <*>   kmod-usb-serial-belkin........................ Support for Belkin devices
  <*>   kmod-usb-serial-ch341.......................... Support for CH341 devices
  <*>   kmod-usb-serial-cp210x........... Support for Silicon Labs cp210x devices
  <*>   kmod-usb-serial-cypress-m8.............. Support for CypressM8 USB-Serial
  <*>   kmod-usb-serial-ftdi............................ Support for FTDI devices
  <*>     kmod-usb-serial-ipw.................... Support for IPWireless 3G devices
  <*>    kmod-usb-serial-keyspan........ Support for Keyspan USB-to-Serial devices
  <*>     kmod-usb-serial-mct.............. Support for Magic Control Tech. devices
  <*>     kmod-usb-serial-mos7720.............. Support for Moschip MOS7720 devices
  <*>     kmod-usb-serial-motorola-phone............ Support for Motorola usb phone
  <*>     kmod-usb-serial-option................... Support for Option HSDPA modems
  <*>     kmod-usb-serial-oti6858...... Support for Ours Technology OTI6858 devices
  <*>     kmod-usb-serial-pl2303............... Support for Prolific PL2303 devices
  <*>     kmod-usb-serial-qualcomm................. Support for Qualcomm USB serial
  <*>     kmod-usb-serial-sierrawireless....... Support for Sierra Wireless devices
  <*>     kmod-usb-serial-ti-usb...................... Support for TI USB 3410/5052
  <*>     kmod-usb-serial-visor............... Support for Handspring Visor devices
  -*-     kmod-usb-serial-wwan..................... Support for GSM and CDMA modems

Network
  <*>chat
  <*>ppp

Network
 WWAN
  <*>uqmi
  <*>umbim
  <*>comgt

Utilities
  <*>usb-modeswitch

Luci
 Collections
  <*> luci
 Applications
  <*> luci-app-mwan3
  <*> luci-app-qos
 Protocols
  <*> luci-proto-3g
  -*- luci-proto-ppp
<*> luci-proto-qmi
Add USB3.0 to Gigabit Ethernet port wired network card support
(The specific model depends on the wired network card model in hand. This time, the model shown below is used.)
Kernel Modules
USB Support
<*>     kmod-usb-usb3
<*>     kmod-usb-net-asix
<*>     kmod-usb-net-asix-ax88179
Add Frp client
Luci
 Applications
  <*> luci-app-frpc
After selecting the required functions, save the configuration file and exit. At this time, a configuration file named ".comfig" will be generated in the lede/ directory. This file contains the declared configuration parameters in the above steps, which can be downloaded and saved. When you need to compile the system image with the same configuration again in the future or add new functions on this basis, you can directly put the old ".config" file in the lede/ directory to save the time of reconfiguring the old parameters.
Use screen to prevent unexpected terminal session disconnection during compilation
Before starting the compilation, considering that the initial compilation time will cost several hours, in order to avoid the occurrence of terminal connection disconnection during compilation, it is strongly recommended to use the "screen" to open a new session, so that even if the session is disconnected, the compilation will continue. It runs in the background to ensure that the compilation will not be interrupted in the middle. Of course, you can also choose to perform the whole process under the session created by the "screen", which is more secure.
To install and use the "screen", enter the command in the terminal:
sudo apt-get install screen -y install screen
sudo screen -S compile create a new session named compile
sudo screen -d compile disconnects a connected session (unexpectedly exited
The session is locked, use this command to release it to reconnect)
sudo screen -r compile to reconnect the session
Compile the OpenWrt system image
After creating a session with screen, enter the lede/ directory and enter the command:
make -j8 download V=s && make -j1 V=s Download dl library and enable threaded compilationGet Image
The successfully compiled image is located in the lede/bin/target... directory. For example, the image directory of Raspberry Pi 4B is lede/bin/target/bcm27xx/bcm2711, you can choose the corresponding directory according to the model to find the image and download it locally.
Program the Image
Install the tool balenaEtcher on the computer, then select the downloaded image in .img format and the SD card (8G is enough), and click Program.
[Tutorial Navigation]
- Soft Routing & OpenWrt
- OpenWrt Function
- OpenWrt Compilation & Customization
- Configure the Compile Environment
- Check the Configuration Information
- Add support for 3G, 4G and other USB external devices
- Add USB3.0 to Gigabit Ethernet port wired network card support
- Add Frp client
- Use screen to prevent unexpected terminal session disconnection during compilation
- Compile the OpenWrt system image
- Get Image
- Program the Image