


- sales/support
Google Chat:---
- sales
+86-0755-88291180
- sales01
sales@spotpear.com
- sales02
dragon_manager@163.com
- support
tech-support@spotpear.com
- CEO-Complaints
zhoujie@spotpear.com
- Only Tech-Support
WhatsApp:13246739196
- Purchase/Shipping/Refund
WhatsApp:13424403025
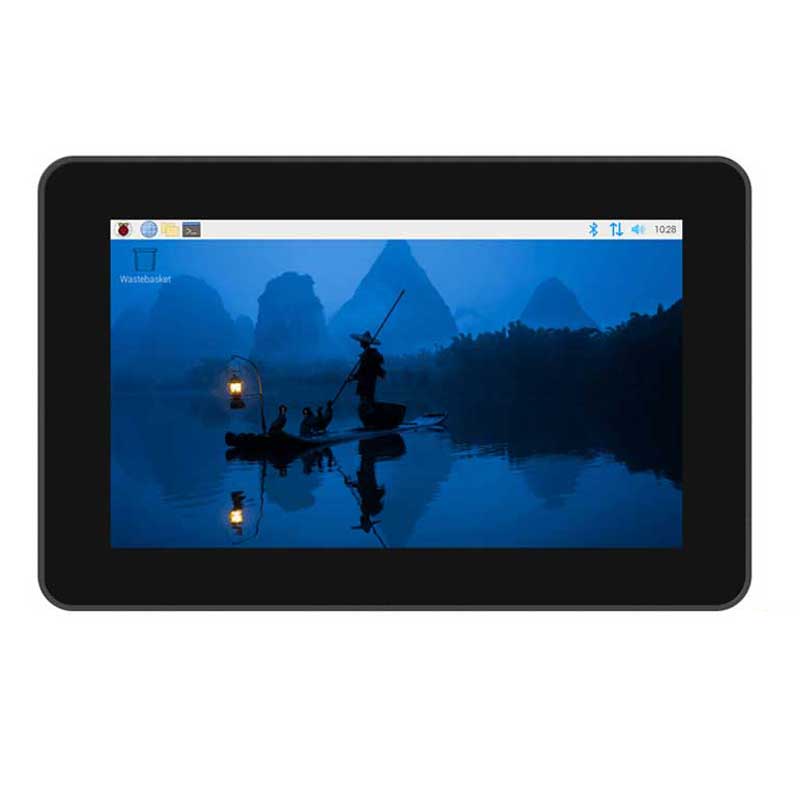
RPI-HMI-7A User Guide
Features
- 7inch DSI touch screen, ten-point capacitive touch control
- IPS display panel with hardware resolution of 720×1280
- Using optical bonding process to ensure clearer pictures and reduce light reflection
- Toughened glass capacitive touch panel, hardness up to 6H
- Using AF anti-fingerprint process, not easy to get fingerprints and easy to clean
- Dual 4Kp60 HDMI display output
- Supports Raspberry Pi 5/4 all-in-one installation.
- Directly drive the LCD by the DSI interface on the Raspberry Pi, with up to 60Hz refreshing rate
- Supports Bookworm system without driver when used with Raspberry Pi
- Supports software control of backlight brightness
- Aluminum alloy case with passive cooling design
- Embedded installation, compatible with VESA standard bracket installation
Parameters
| Parameter | Description |
|---|---|
| CPU | Broadcom BCM2712, quad-core Cortex-A76 (ARM v8) 64-bit SoC, clocked at 2.4GHz |
| GPU | OpenGL ES 3.1 & Vulkan 1.0 |
| USB | 2 USB 2.0 ports, dual-layer Type A connector, each channel supporting up to 480Mbps 2 USB 3.0 ports, dual-layer Type A connector, each channel supports up to 5Gbps |
| ETH | Gigabit Ethernet |
| Wi-Fi | Dual-band 802.11ac Wi-Fi |
| BLE | Bluetooth 5.0/Bluetooth Low Energy (BLE) |
| HDMI | 2 standard HDMI ports, supporting 4K 60Hz |
| Memory | 64GB |
| Size | 7.0" |
| Resolution | 720 x 1280 |
| Refresh rate | 60Hz |
| Viewing angle | 178° |
| Max brightness | 450cd/㎡ |
| Color gamut | 70%NTSC |
| Backlight adjustment | Software dimming |
Electrical Specifications
| Parameters | Minimum Value | Standard Value | Maximum Value | Unit | Note |
|---|---|---|---|---|---|
| Input voltage | 4.75 | 5.00 | 5.25 | V | Note 1 |
| Input current | 3 | 5 | TBD | A | Note 2 |
| Operating temperature | 0 | 25 | 60 | ℃ | Note 3 |
| Storage temperature | -10 | 25 | 70 | ℃ | Note 3 |
•Note 1: Input voltages exceeding the maximum or improper operation may cause permanent damage to the device.
•Note 2: The input current needs to be ≥ 3A, otherwise it will cause the startup failure or display abnormality, and staying in an abnormal state for a long time may cause permanent damage to the device.
•Note 3: Please do not store the display panel in a high-temperature and high-humidity environment for a long time. The display panel should operate within its limits, otherwise it may be damaged.
Interfaces

1. 5V Type-C power port 6. TF card slot
2. Standard HDMI interface x 2 7. POWER button
3. USB 2.0 interface x 2 8. Power indicator
4. USB 3.0 interface x 2 9. 5V power terminal block (3.81mm pitch)
5. Gigabit Ethernet port 10. Debugging serial port
Assembly Guide
If you purchase the all-in-one version (PI4-HMI-7A, PI5-HMI-7A), then there is no need to perform hardware assembly; you can use it directly after powering on.
The following are the hardware assembly steps for the PI5-HMI-7A:
Please prepare the following accessories:
1. Remove the HDMI expansion board and connect the 22Pin DSI cable (⑨) and 2Pin cable to the screen. (Note the direction of the gold finger of the DSI cable)

2. Re-secure the HDMI extension board with the screws.

3. Respectively install the thermal tapes (① and ②) and heatsink (⑤) on the front and back sides of Raspberry Pi 5, and insert the system card (③).

4. Connect the Raspberry Pi 5 motherboard to the HAT, make sure the mounting holes of the Raspberry Pi are aligned with the four screw holes on the back of the screen, and fix them with M2.5*4mm silver metal screws.

Use DSI cable (⑨) to connect DSI interface to CAM/DIPS 1 interface of Raspberry Pi.

6. Install the metal front panel (⑧), fix the silicon key (④) inside the case, and fix them with KM2.5*5mm black metal screws. And use M2.5*5mm black metal screws to fix the side cover.
(PI4 and PI5 front cover hole positions are inconsistent, please distinguish them.)

7. Finally, install the green terminal on the rear cover and complete the hardware assembly.

Software Settings
If you are using a pre-installed system card, you do not need to perform any software configuration. Insert the card and start the device. The default username is pi and the password is raspberry, which will allow you to directly enter the desktop environment.
Method 1: Flash Official Image
- 1. Connect the TF card to the PC, download and use Raspberry Pi Imager to flash the corresponding system image.

- 2. After the flashing is completed, find the config.txt file in the root directory of the TF card, open it and add the following code at the end of the file, save and eject the TF card safely.
Note: Since Pi5/CM5/CM4 has two mipi DSI interfaces, please note that the correct DSI interfaces and commands are used, DSI1 is recommended by default.
dtoverlay=vc4-kms-v3d
# DSI1 Use
dtoverlay=vc4-kms-dsi-waveshare-panel-v2,7_0_inch_a
# DSI0 Use
# dtoverlay=vc4-kms-dsi-waveshare-panel-v2,7_0_inch_a,dsi0- 3. Insert the TF card into the Raspberry Pi, the device will automatically recognize the display and touch screen after powering on, and you can use it normally.
Method 2: Flash Pre-installed Image
1. Download and unzip the Raspberry Pi pre-installed image as an .img file
7-DSI-TOUCH-A pre-installed image
2. Connect the TF card to the PC, format the TF card with SDFormatter software.
3. Open the Win32DiskImager software, select the system image prepared in step 1, and click Write to flash the system image.
4. After the image flashing is completed, connect the TF card to the Raspberry Pi, start the Raspberry Pi, and wait for about 30 seconds for it to be displayed and touched normally.
Bookworm Display Rotation
GUI interface rotation
- 1. Open the "Screen Configuration" application;

- 2. Go to "Screen" - > "DSI-1" - > "Touchscreen" and check "6-0038 generic ft5x06(79)"

- 3. Click "Apply" and close the current window. Restart according to the pop-up prompt, and then touch screen select Done.


- 4. Go to "Screen" -> "DSI-1" -> "Orientation", check the direction you need to rotate, and finally click "Apply" to complete the screen and touch synchronous rotation.

lite version display rotation
- 1. Need to modify the /boot/firmware/cmdline.txt file:
sudo nano /boot/firmware/cmdline.txt
- 2. At the beginning of the cmdline.txt file, add the command for displaying the rotation angle: (Please note, this command needs to be on the same line, with each command separated by a space.)
video=DSI-1:720x1280M@60,rotate=90
Change the display rotation angle by modifying the rotate value to 90, 180, or 270.
- 3. Save and restart
sudo reboot
Install Reference Instructions
1. Ensure the opening size of the cabinet according to the size of the HMI.
2. Drill holes in the cabinet according to the hole size in step 1.
3. Embed the HMI in the cabinet from the outside.
4. Align the screw holes (no threaded holes) of the matching snap with the snap mounting holes on the HMI.
5. Tighten with 4 M2.5*8 screws through the buckle to fix the buckle to the HMI; Then use 4 M3 screws to pass through the screw hole (threaded hole) of the buckle, and tighten it clockwise through the buckle to the end.
Remote Login Raspberry Pi
Configure Wi-Fi
- On Raspberry Pi devices that support the 5GHz band (e.g. Pi 3B+, Pi 4, CM4, Pi 400), you need to set the country code before you can use the Wi-Fi network normally.
1. Open the terminal, input sudo raspi-config, select Localisation Options > WLAN Country (set the country code), press Enter.
2. Choose your country from the list (e.g., China would be CN), confirm by clicking OK. (If you don't know your country code, you can find it at wikipedia)
3. Go back to the main interface, press Finish, the system will prompt to restart, select Yes, and wait for the Raspberry Pi to restart.
4. After completion, you'll be able to connect to the Wi-Fi network on your Raspberry Pi and enter the password to complete the connection.
Find Device IP
Obtaining the IP address of the Raspberry Pi is a prerequisite for remote login, please refer to the following steps after configuring the WIFI or connecting the network cable.
View IP Address on Desktop
If you use a desktop operating system, hovering the mouse over the network icon in the upper right corner will display the name of the current network and the IP address.
Login Router View
- By logging in to the router's management interface, you can view the devices connected to the network and their IP addresses.


Use Mobile Applications to Obtain Addresses (Apple devices only)
- Search for the Fing application in the app store. It is a free network scanner for smartphones that scans the current network and lists all devices with their IP addresses.
- Note: Your phone and Raspberry Pi must be on the same network, so please connect your phone to the correct wireless network.
- When opening the Fing application, touch the device scan in the upper left corner of the screen.

- In a few seconds, you will get a list of device connections, which includes all devices connected to the network.

- At this point, we have successfully obtained the Raspberry Pi's IP address: 192.168.0.105.
Use Advanced IP Scanner
- You can use some LAN IP scanning tools, here Advanced IP Scanner is used as an example
- Run Advanced IP Scanner
- Click the Scan button to scan the IP address in the current LAN

- Find all IP addresses in Manufacturer that contain the phrase "Raspberry Pi" and record it

- Power on the device and ensure it is connected to the network
- Click the Scan button again to scan the IP address in the current LAN
- Excluding all previously recorded IP addresses with the word Raspberry Pi in the Manufacturer, all that is left is your Raspberry Pi IP address


Use nmap Command to Obtain
- Download and install nmap, otherwise the computer will not recognize the command.
- Press and hold the keyboard WIN+R, type cmd, and open the terminal.
- Before using the nmap command, we need to know the IP address of our computer. Only through the IP address of the computer can we know the IP network segment, and then use nmap to scan the devices under this network segment.
ipconfig

- If your IP address is 192.168.1.5, then the addresses of other devices will be within this 192.168.1.0/24 subnet range (which covers 192.168.1.0 to 192.168.1.255).
- My computer is 192.168.0.104. Now use the nmap -sn command with flag (ping scan) on the entire subnet range. -This might take a few seconds:
nmap -sn 192.168.0.0/24

- At this point, we have successfully obtained the Raspberry Pi's IP address: 192.168.0.105.
Enable SSH and VNC
- Open the Raspberry Pi terminal, input raspi-config to enter the settings interface, and select Interface Options.
- Go to the Interfaces tab.
- Select Enable next to SSH.
- Click OK.
- Restart the Raspberry Pi.


VNC is the same, refer to the above steps for configuration.
- Create a new file named ssh under the boot drive letter, without any extension. You can create a new file named ssh.txt, make sure the folder options display the extension, and then delete the .txt file. This way, you will have a file named ssh without any extension.


Remote Login
VNC Login
Please make sure that the Raspberry Pi and your computer are under the same router or network segment and follow the steps above to enable the VNC login function.
- Download and open the remote login software VNC-Viewer
- Open VNC and enter the IP address of the Raspberry Pi:

- Select Continue:

- Username: pi; Password: raspberry:

- Here the login is successful:


SSH Login
Use MobaXterm Software
Please make sure that the Raspberry Pi and your computer are under the same router or network segment and follow the steps above to enable the SSH login function.
- Open remote login software MobaXterm:

- Click session, click ssh, and enter the IP address of the Raspberry Pi in Remote host:

- The login name is pi and the password is raspberry:

- Here the login is successful:


Use Windows SSH Login Command
- Press the Win key and R key at the same time, input cmd, then press Enter to open the command line
- Assume the obtained address is 192.168.10.36, the command should be:
ssh pi@192.168.10.36

- Enter Yes to confirm:

- Enter the default password for the Raspberry Pi: raspberry:
 Note: It is normal for the screen to remain unchanged when entering the password. After entering the password, press Enter to access the Raspberry Pi:
 - Here the SSH login is successful:


PUTTY Login
- Open the corresponding flashing tool putty, click on session, and enter the Raspberry Pi's IP address in the IP address field:

- Select Accept:

- The login name is pi and the password is raspberry:

- Here the login is successful:


Raspberry Pi Connect Login
This feature requires the Wayland window server. Raspberry Pi OS Bookworm and later versions use Wayland by default. Screen sharing is not compatible with Raspberry Pi OS Lite or systems using X Window Server.
Install Connect
If you don't have Connect installed on your Raspberry Pi OS version, open a terminal window. Run the following command to update your system and software packages:
sudo apt update
sudo apt full-upgrade
Run the following command on Raspberry Pi to install Connect:
sudo apt install rpi-connect
Start Connect
Once installed, use the rpi-connect command line interface to start Connect for the current user:
rpi-connect on
Alternatively, click the "Connect" icon in the menu bar to open the drop-down menu and select "Open Raspberry Pi Connection": 
To stop Connect, run the following command:
rpi-connect off
Associate Raspberry Pi Device with Connect Account
Now you have installed and started Connect on your Raspberry Pi device, you must associate your device with a Connect account.
If you use the Connect plugin in the menu bar, the first time you click "Open Raspberry Pi Connect" to open the browser, it will prompt you to log in using your Raspberry Pi ID:
Or, select "Log in..." from the drop-down menu:
If you don't have a Raspberry Pi ID yet, please click here to create one for free.
Complete the Connection of Raspberry Pi
After verification, assign a name to your device. Select a name that uniquely identifies the device. Click the "Create Device and Login" button to continue.
You can now connect to your device remotely. The Connect icon in the menu bar will turn blue to indicate that your device is now logged into the Connect service. You should receive an email notification indicating that a new device has been linked to your Connect account.
Access Your Raspberry Pi Device
Now your device is displayed on the Connect interface, and you can access your device from anywhere using a browser. Connect provides multiple ways to remotely interact with your devices.
- Access connect.raspberrypi.com on any computer.
- Connect redirects you to the Raspberry Pi ID service to log in. After logging in, Connect will display a list of connected devices. Devices that can be used for screen sharing will display a gray screen sharing badge below the device name.
- Click the "Connect via" button to the right of the device you would like to access. Select the "Screen sharing" option from the menu. This opens a browser window that displays your device's desktop.

- You can now use your device as you would locally. For more information about the connection, hover your mouse over the padlock icon immediately to the right of the "Disconnect" button.

For more information, please refer to Introduction to Raspberry Pi's official website。
Resources
Related Link
Softwares
- Putty
- Panasonic SDFormatter-TF card formatting software
- Win32DiskImager-Image flashing software
- Nmap
- MobaXterm
- VNC-Viewer
- Tigervnc
- Advanced_IP_Scanner
- Raspberry Pi Imager
Drawing
FAQ
Replace the image in the directory (/usr/share/plymouth/themes/pix/splash.png) with your customized image
Support
Monday-Friday (9:30-6:30) Saturday (9:30-5:30)
Email: services01@spotpear.com
[Tutorial Navigation]
- Features
- Parameters
- Electrical Specifications
- Interfaces
- Assembly Guide
- Software Settings
- Install Reference Instructions
- Remote Login Raspberry Pi
- Configure Wi-Fi
- Find Device IP
- View IP Address on Desktop
- Login Router View
- Use Mobile Applications to Obtain Addresses (Apple devices only)
- Use Advanced IP Scanner
- Use nmap Command to Obtain
- Enable SSH and VNC
- Remote Login
- Resources
- FAQ
- Support