- sales/support
Google Chat:---
- sales
+86-0755-88291180
- sales01
sales@spotpear.com
- sales02
dragon_manager@163.com
- support
tech-support@spotpear.com
- CEO-Complaints
zhoujie@spotpear.com
- Only Tech-Support
WhatsApp:13246739196
- Purchase/Shipping/Refund
WhatsApp:13424403025
NanoKVM-USB Development
1. Local deployment
If only access through the local machine (localhost), certificates can be omitted.
Examples are provided here for Node.js and Python.
1.1. Node.js Service
- Open the terminal and enter the
NanoKVM-USBdirectory in the previous step. - Execute
npm install -g http-serverto installhttp-server. - Execute
http-server -p 8080 -a localhostto run the service.
1.2. Python Service
- Open the terminal and enter the
NanoKVM-USBdirectory in the previous step. - Execute
python -m http.server 8080to run the service.
1.3. Visit on browser
After the service is started, open the browser and visit http://localhost:8080.
Note that you can only use the http protocol, not the https protocol.
2. Local network deployment
If access is needed within the local area network, a certificate is required.
Examples are provided here for Node.js and Python. The difference from the above is that a certificate is required.
2.1. Generate Certificate
Make sure you have
opensslinstalled.
- Open the terminal and enter the
NanoKVM-USBdirectory in the previous step. - Execute
openssl req -newkey rsa:2048 -new -nodes -x509 -days 3650 -keyout key.pem -out cert.pem. - The terminal ask you to enter information. You can pressing the Enter key to skip it, or you can enter information as needed.
After completion, two files key.pem and cert.pem will be generated in the current directory.
2.2. Node.js Service
- Execute
npm install -g http-serverto installhttp-server. - Execute
http-server -p 8080 -S -C cert.pem -K key.pemto run the service.
2.3. Python Service
Create a file server.py in the NanoKVM-USB directory, and save it with the following code:
Execute python server.py to run the service。
2.4. Visit on browser
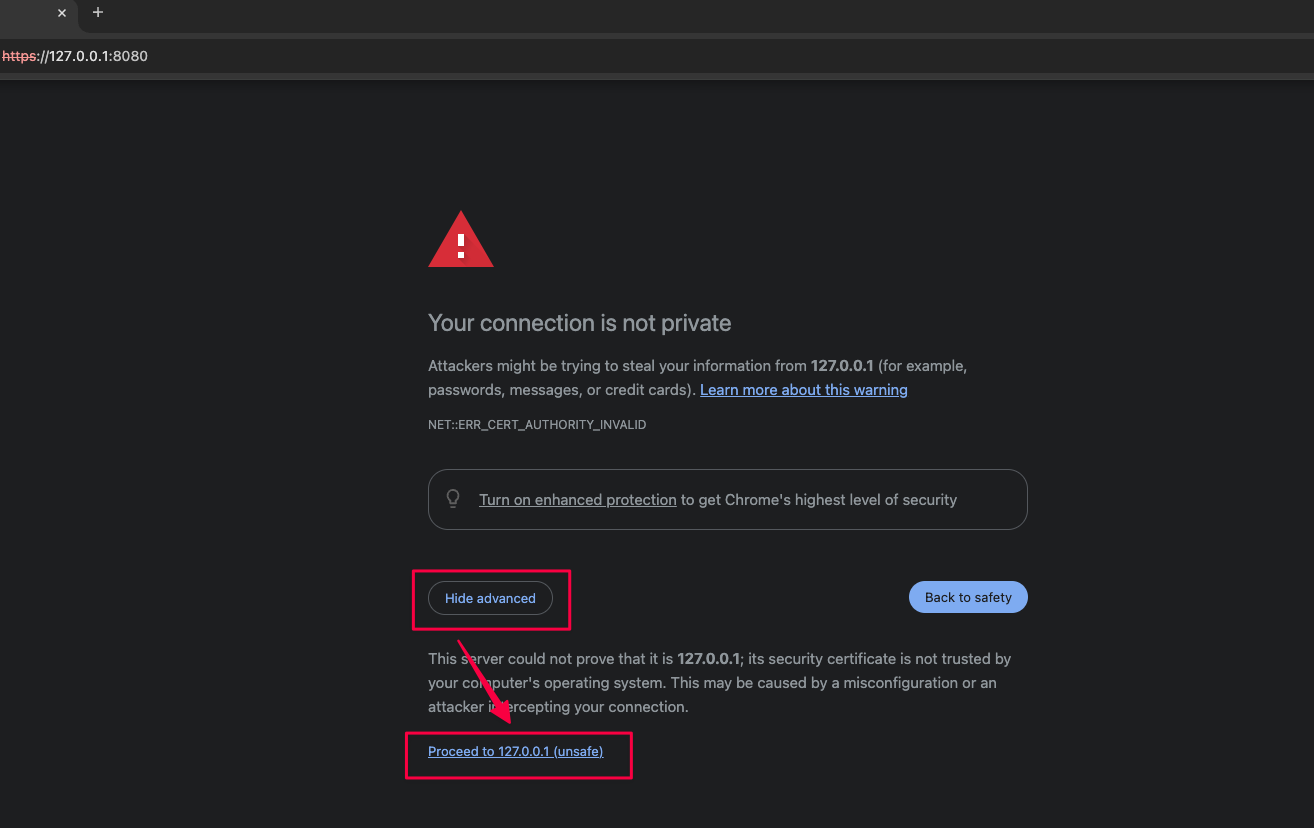
Open the browser and enter the service address, such as https://127.0.0.1:8080.
After opening the URL, you may be prompted with a "Privacy Error" and need to click to access manually:
3. Public network deployment
If you need to access it on the public network, it is recommended to use
Nginx.
Here is a simple configuration example. For detailed configuration methods, please refer to the Nginx documentation.