- sales/support
Google Chat:---
- sales
+86-0755-88291180
- sales01
sales@spotpear.com
- sales02
dragon_manager@163.com
- support
tech-support@spotpear.com
- CEO-Complaints
zhoujie@spotpear.com
- Only Tech-Support
WhatsApp:13246739196
- Purchase/Shipping/Refund
WhatsApp:13424403025
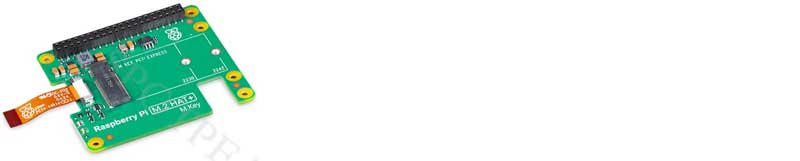
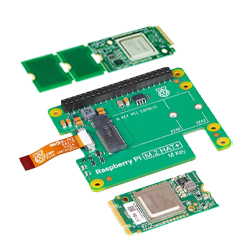
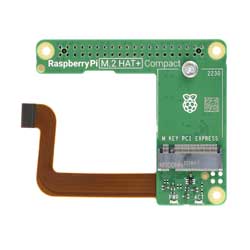
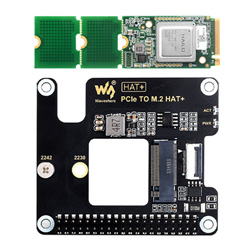
Raspberry Pi 5 Official Original AI Kit Hailo8l 13Tops/26Tops PCIe M.2 HAT+ Board For Pi5
$109
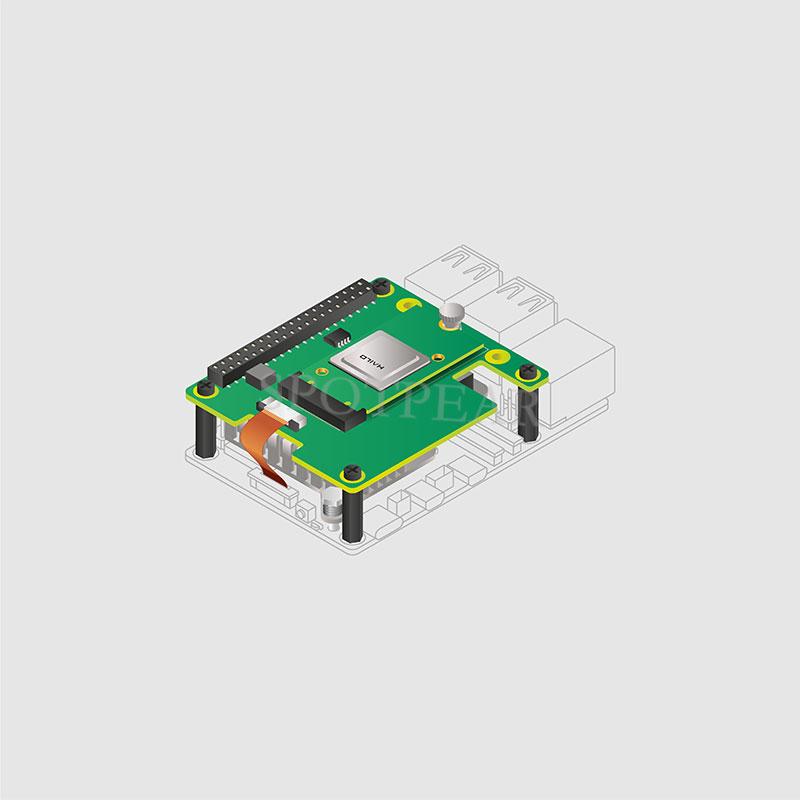
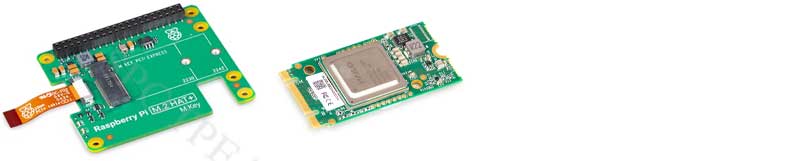
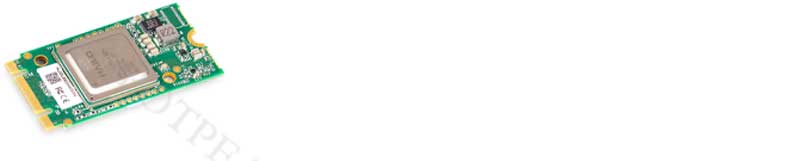
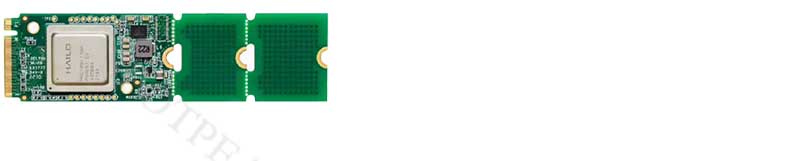
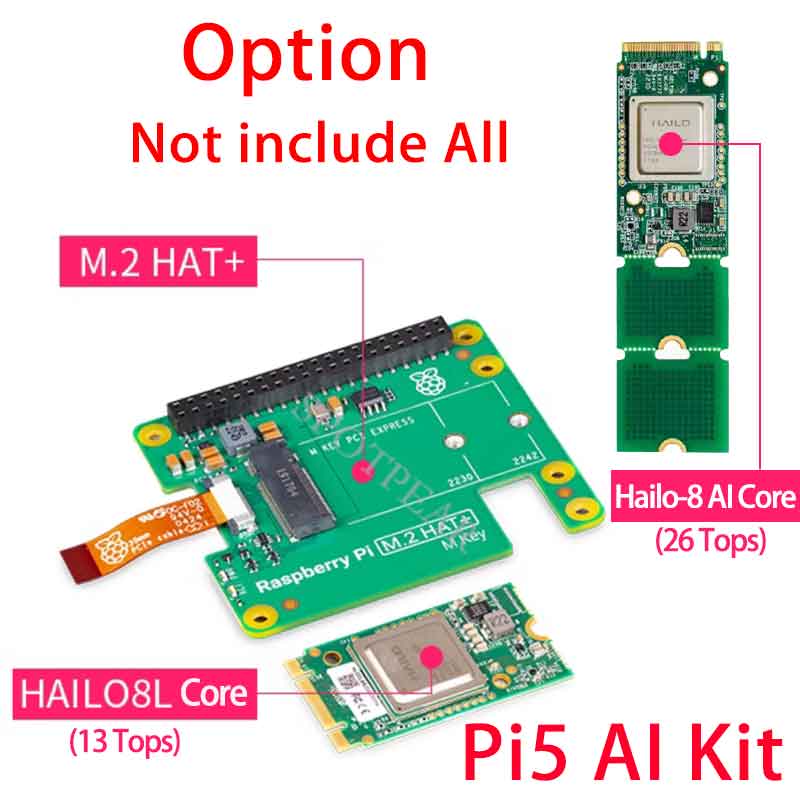
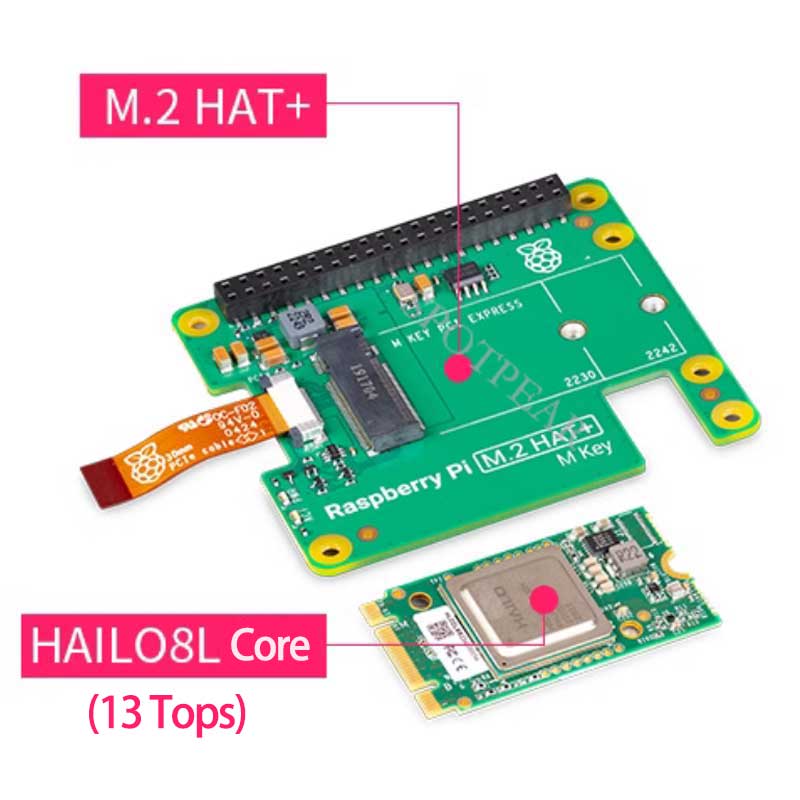
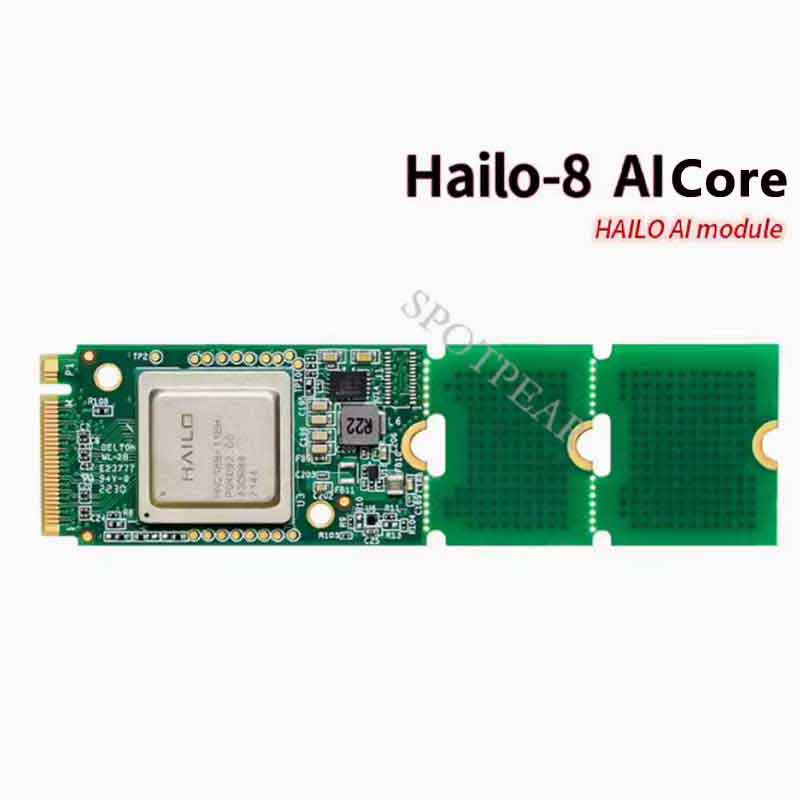
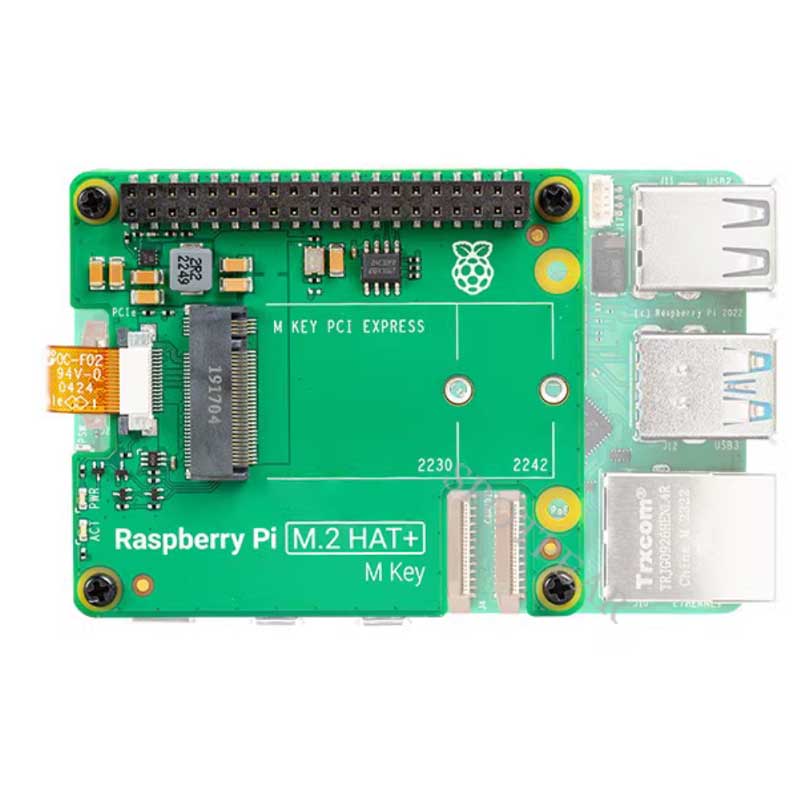
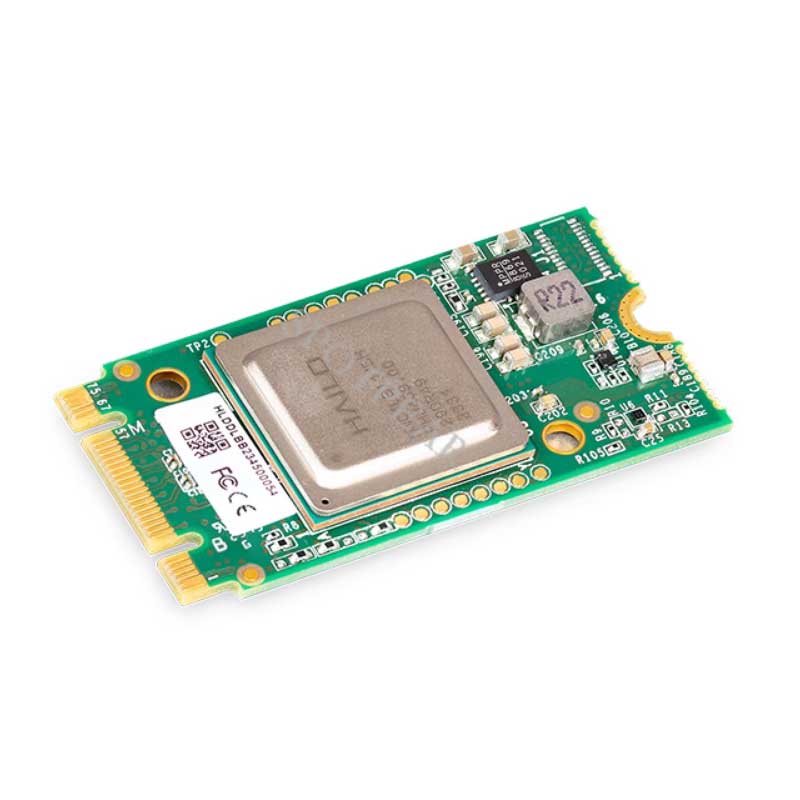
The AI module is a 13 tera-operations per second (TOPS) neural network inference accelerator built around the Hailo-8L chip. The module uses the M.2 2242 form factor, and comes pre-installed in the M.2 HAT+, to which it connects through an M key edge connector. The M.2 HAT+ communicates between the AI module’s M.2 interface and the Raspberry Pi 5’s PCIe 2.0 interface.
Raspberry Pi Official Original Product Recommend


Raspberry Pi 5 AI Recommend
【Overview】
The AI module is a 13 tera-operations per second (TOPS) neural network inference accelerator built around the Hailo-8L chip. The module uses the M.2 2242 form factor, and comes pre-installed in the M.2 HAT+, to which it connects through an M key edge connector. The M.2 HAT+ communicates between the AI module’s M.2 interface and the Raspberry Pi 5’s PCIe 2.0 interface.
When the host Raspberry Pi 5 is running an up-to-date Raspberry Pi OS image, it automatically detects the Hailo module and makes the NPU available for AI computing tasks. The built-in rpicam-apps camera applications in Raspberry Pi OS natively support the AI module, automatically using the NPU to run compatible post-processing tasks.
【About】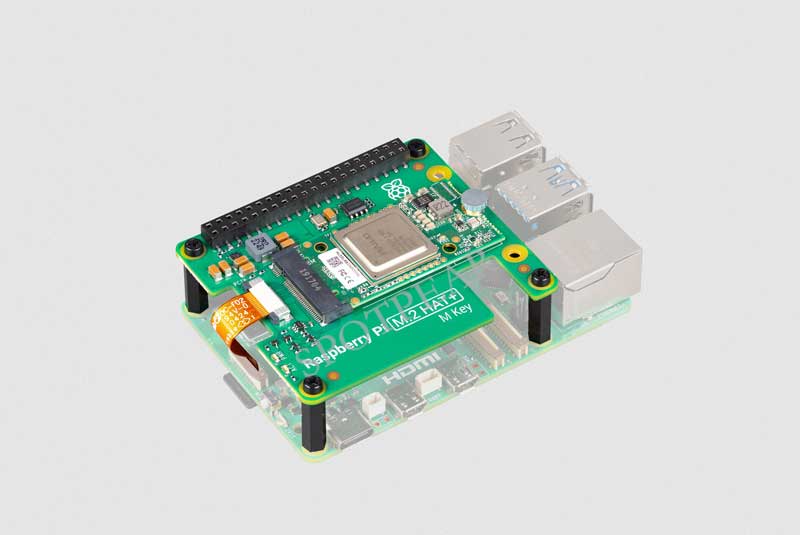
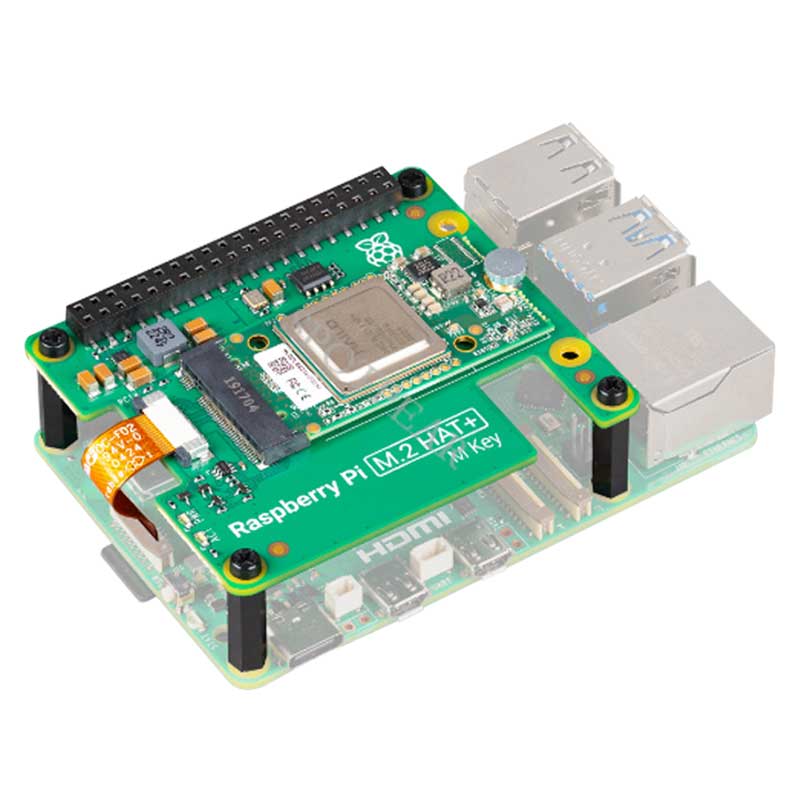
The Raspberry Pi AI Kit bundles the Raspberry Pi M.2 HAT+ with a Hailo AI acceleration module for use with Raspberry Pi 5. The kit contains the following:
[] Hailo AI module containing a Neural Processing Unit (NPU)
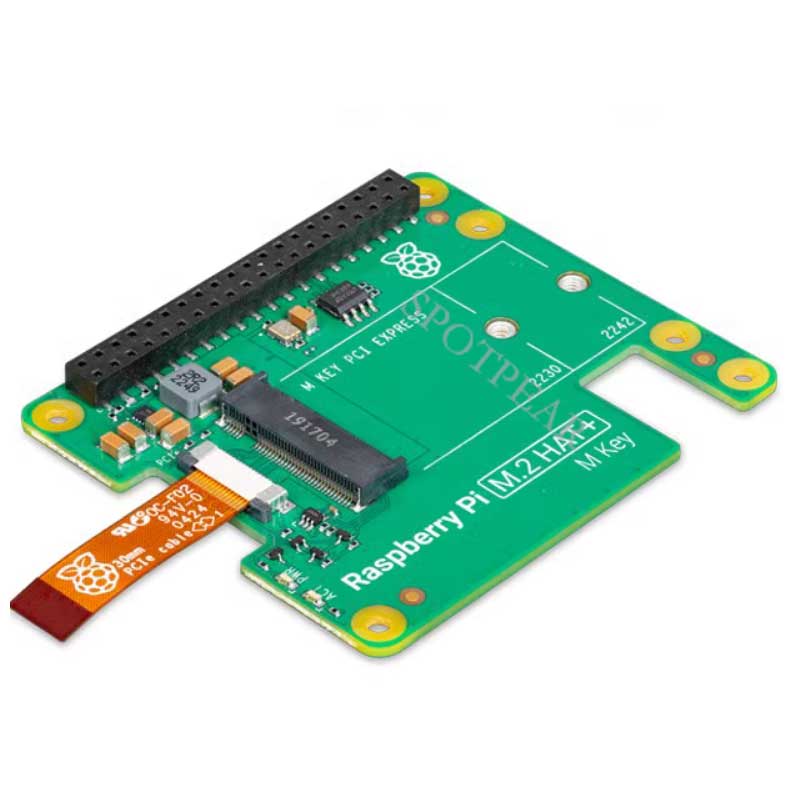
[] Raspberry Pi M.2 HAT+, to connect the AI module to your Raspberry Pi 5
[] thermal pad pre-fitted between the module and the M.2 HAT+
[] mounting hardware kit
[] 16mm stacking GPIO header
【AI module features】
[] 13 tera-operations per second (TOPS) neural network inference accelerator built around the Hailo-8L chip.
[] M.2 2242 form factor
【Installation】
[] Disconnect the Raspberry Pi from power before beginning installation.
[]For the best performance, we recommend using the AI Kit with the Raspberry Pi Active Cooler. If you have an Active Cooler, install it before installing the AI Kit.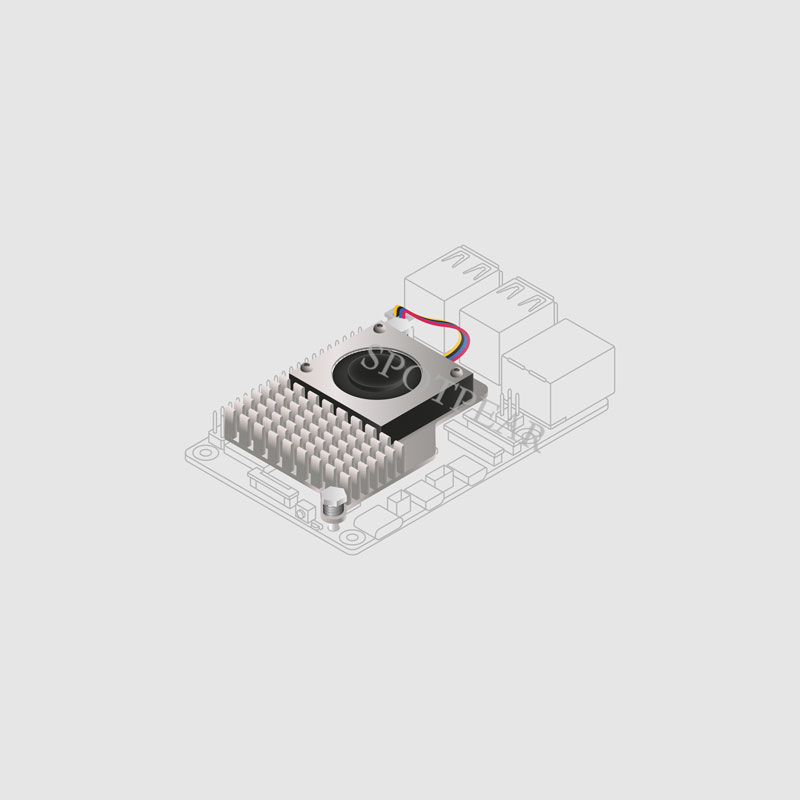
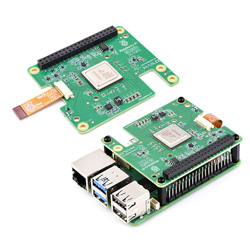
[] Install the spacers using four of the provided screws. Firmly press the GPIO stacking header on top of the Raspberry Pi GPIO pins; orientation does not matter as long as all pins fit into place. Disconnect the ribbon cable from the AI Kit, and insert the other end into the PCIe port of your Raspberry Pi. Lift the ribbon cable holder from both sides, then insert the cable with the copper contact points facing inward, towards the USB ports. With the ribbon cable fully and evenly inserted into the PCIe port, push the cable holder down from both sides to secure the ribbon cable firmly in place.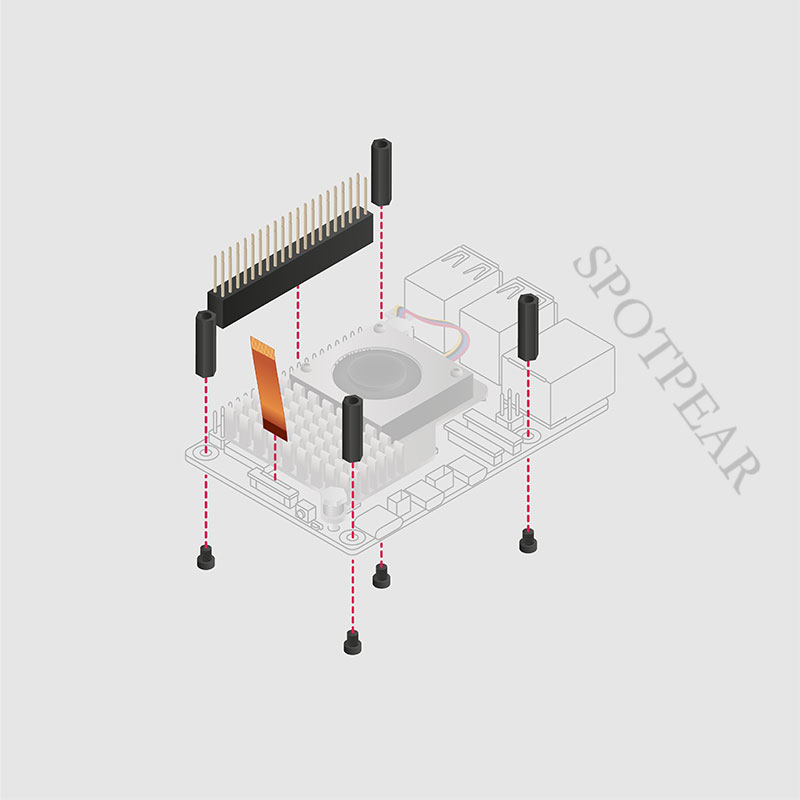
[] Set the AI Kit on top of the spacers, and use the four remaining screws to secure it in place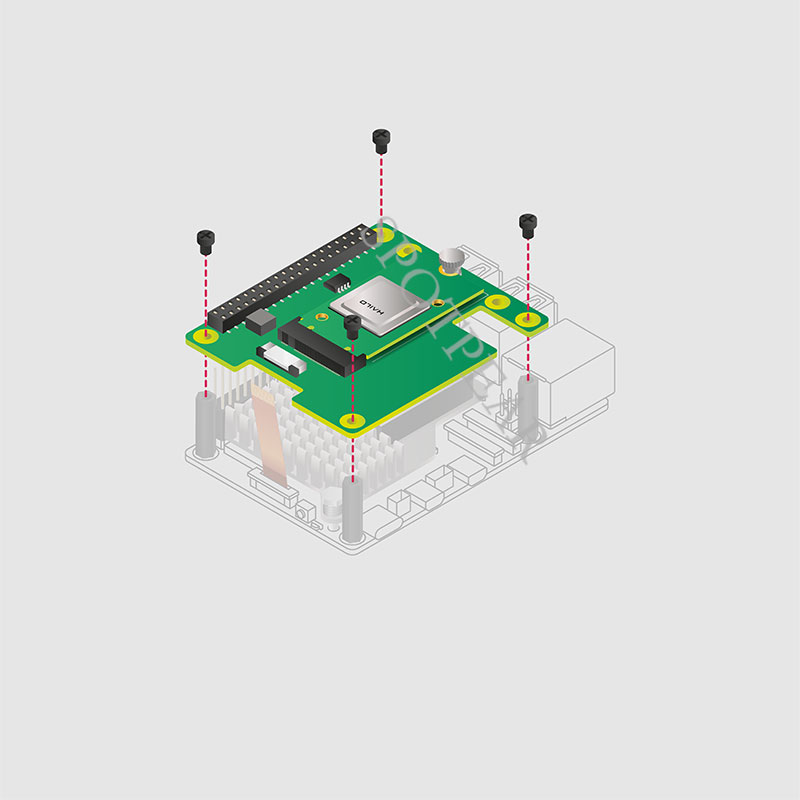
[] Insert the ribbon cable into the slot on the AI Kit. Lift the ribbon cable holder from both sides, then insert the cable with the copper contact points facing up. With the ribbon cable fully and evenly inserted into the port, push the cable holder down from both sides to secure the ribbon cable firmly in place.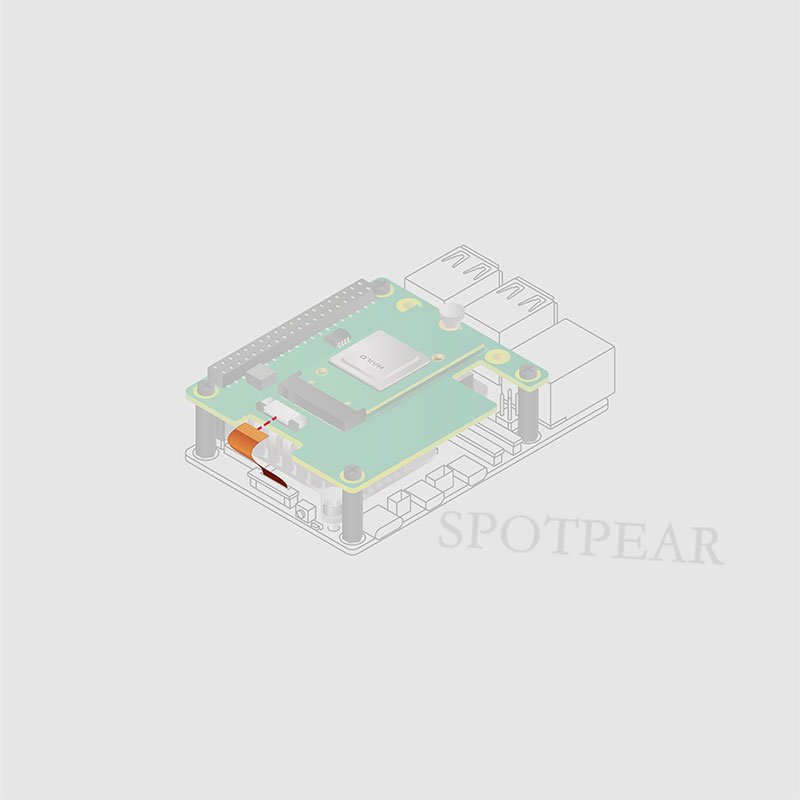
[] Congratulations, you have successfully installed the AI Kit. Connect your Raspberry Pi to power; Raspberry Pi OS will automatically detect the AI Kit.