- sales/support
Google Chat:---
- sales
+86-0755-88291180
- sales01
sales@spotpear.com
- sales02
dragon_manager@163.com
- support
tech-support@spotpear.com
- CEO-Complaints
zhoujie@spotpear.com
- Only Tech-Support
WhatsApp:13246739196
- Purchase/Shipping/Refund
WhatsApp:13424403025
- HOME
- >
- ARTICLES
- >
- Jetson Series
- >
- Jetson Kits
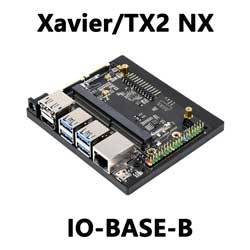
JETSON-IO-BASE-B User Guide
Notice
If you buy the DEV KIT from Waveshare, we have flashed a OS to the SSD.
You can just power and complete the configuration and use it.
Overview
JETSON-XAVIER-NX-DEV-KIT is designed by Waveshare based on the Jetson Xavier NX core board, whose peripheral interface, size, and thickness are almost the same as Jetson Xavier NX Developer Kit, and the core board is easier to be upgraded. With the core board, you can easily realize more functions in AI projects such as image classification, target detection, segmentation, speech processing, and so on.
Jetson Nano Module Specification
| GPU | NVIDIA Maxwell™ Architecture with 384 NVIDIA CUDA® Cores 48 TFLOPS Cores |
|---|---|
| CPU | 6-core NVIDIA Carmel ARM® v8.2 64-bit CPU 6 MB L2 + 4 MB L3 |
| Memory | 8GB/16GB 128-bit LPDDR4 x 59.7GB/s |
| Store | 16 GB eMMC 5.1 Flash / M.2 M KEY NVME Solid State Interface |
| Video encoding | 2 x 4K @ 60 4 x 4K @ 30 (HEVC) |
| Video decoding | 2 x 8K @ 30 6 x 4K @ 60 (HEVC) |
| Camera | Up to 6 cameras (24 via virtual channels) 14 channels (3 x 4 or 6 x 2 or 3 x 4 + 1 x 2 or 5 x 2 + 1 x 4) |
| Network | Wi-Fi requires an external chip 10/100/1000 BASE-T Ethernet |
| Display | 2 Multimode DP 1.4/eDP 1.4/HDMI 2.0 |
| UPHY | 1 x 1 (PCIe Gen3) + 1 x 4 (PCIe Gen4), 1 x USB 3.0, 2 x USB 2.0 |
| IO | 3 UART, 2 SPI, 2 I2S, 4 I2C, multiple GPIOs |
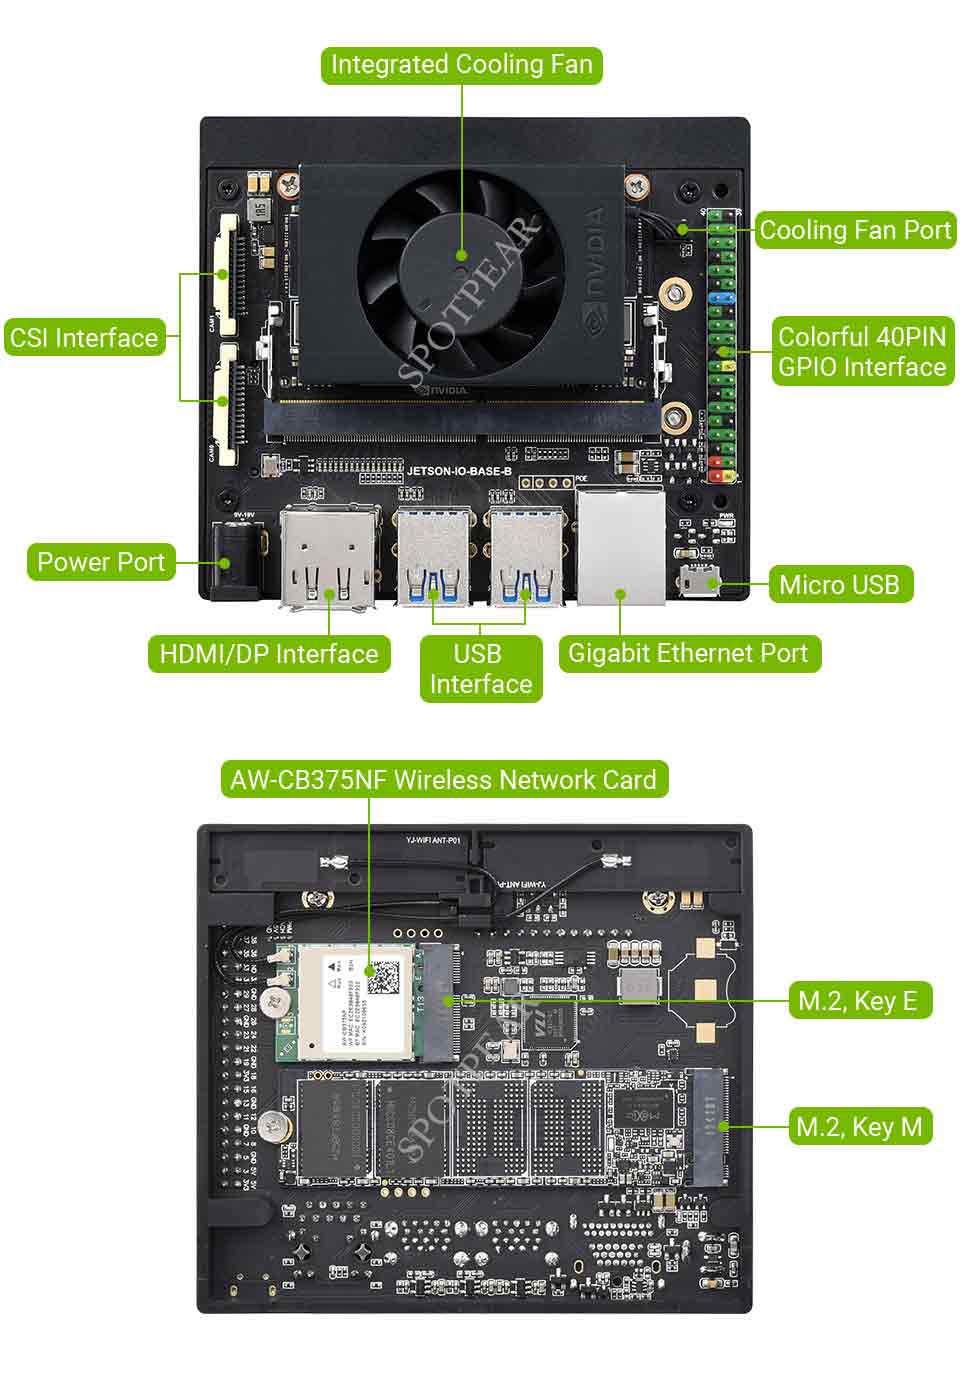
JETSON NANO DEV KIT Onboard Resource
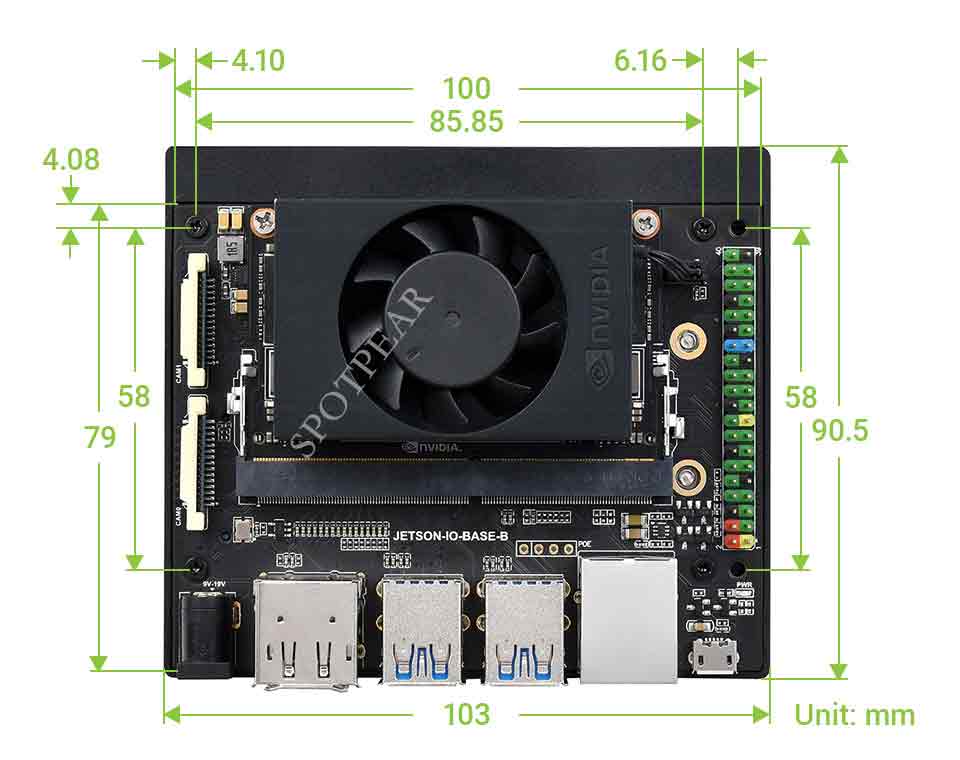
JETSON NANO DEV KIT Dimension
System Programming
Note: The JETSON Xavier NX DEV KIT is equipped with the official 16eMMC version of the Jetson Xavier NX 16GB/8GB core board without SD card slot. Therefore, the system programming requires the host Ubuntu 18.04 and SDK Manager.
Host Environment Debbuging
- Environment programming: Ubuntu18.04 host (virtual machine also works).
In order to download resources, the ubuntu18.04 host used for programming needs to reserve about 100G of memory space.
In order to download resources and program the system normally, please click JOIN in the upper right corner of the NVIDIA DEVELOPER website to register an account first.
- Download the "deb" file to Ubuntu and then copy it to the user directory.
- Open the terminal and run the following program to install sdk manager.
sudo apt install ./sdkmanager_[version]-[build#]_amd64.deb
Note that the [version]-[build#] in the instruction should be changed to the actual downloaded file name.
Hardware Configuration (enter recovery mode)
- Use jumper caps or Dupont wires to short-circuit the FC REC and GND pins, as shown in the figure above, at the bottom of the core board.
- Connect the DC power supply to the circular power supply port and wait for a while.
- Connect the Micro USB port of the Jetson Nano to the Ubuntu host with a USB cable (note that it is a data cable).
System Programming
- Open the Ubuntu computer terminal and run sdkmanager to open the software.
- Log in.
- If Jetson Nano is recognized normally, the SDK manager will detect and prompt for options.
- Development board chooses Jetson Xavier NX.
- In the JetPack option, select the latest JetPack5.0 system, do not check other SDKs, and then click "Continue".
- Select Jetson OS, and remove the option of Jetson SDK Components. Check the first agreement at the bottom.
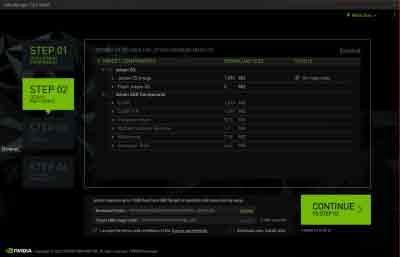
- Finally, click "Continue" and wait for the programming to complete.
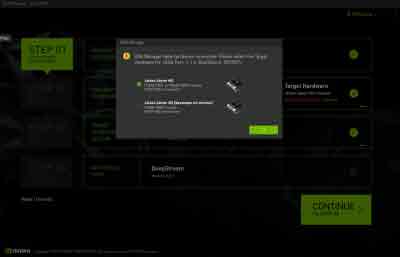
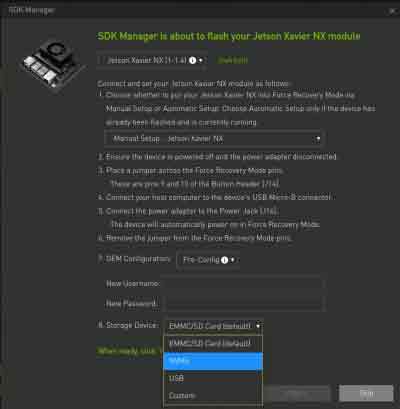
- Starting from JetPack 4.6.1, the "preconfig" window will pop up when using SDK Manager to program the system.
- Here, the development board type is selected by default. Be careful not to make a mistake when selecting the type of development board earlier.
- Here select Manual Setup-Jetson Xavier NX.
- Here you can choose runtime or preconfig. If you choose runtime, you need to manually configure the system (username, password, language, etc.) later. If you choose preconfig, you can fill in the username and password (you can define it yourself), and nano will be automatically configured during the startup process.
- After the programming is completed, remove the jumper cap of the baseboard, connect to the monitor, power on again, and follow the prompts to configure the boot (if it is pre-config set, it will directly enter the system after power on).
Camera
- Check the first connected camera screen:
nvgstcapture-1.0
- Check the second connected camera screen:
nvgstcapture-1.0 --sensor-id=1
- The default camera model is IMX219. If you need to change the camera models, please execute:
sudo /opt/nvidia/jetson-io/jetson-io.py
- Select Configure Jetson Nano CSI Connector -->> Configure for compatible hardware.
Select the corresponding camera model:
|                         Camera IMX219 Dual                         |

|                     Je  Camera IMX477 Dual or:                     |

|                    Camera IMX477-A and IMX219-B                    |

|                 ConfigurCamera IMX219 Dualardware                  |
After selecting Save pin changes -->> Save and reboot to reconfigure pins.
Just wait for a restart.
FAN
Fan speed adjustment requires 4 wires.
sudo sh -c 'echo 255 > /sys/devices/pwm-fan/target_pwm'
#Where 255 is the maximum speed, 0 is stop, modify the value to modify the speed
cat /sys/class/thermal/thermal_zone0/temp
#Get the CPU temperature, you can intelligently control the fan through the program
#The system comes with a temperature control system, and manual control is not required in unnecessary situations
WIFI
- As the module has no WiFi function, it needs to connect to another WiFi module.
- Just connect to the M.2 E KEY socket at the bottom.