- sales/support
Google Chat:---
- sales
+86-0755-88291180
- sales01
sales@spotpear.com
- sales02
dragon_manager@163.com
- support
tech-support@spotpear.com
- CEO-Complaints
zhoujie@spotpear.com
- Only Tech-Support
WhatsApp:13246739196
- Purchase/Shipping/Refund
WhatsApp:13424403025
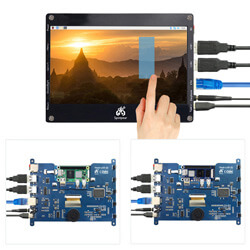
Raspberry Pi 7inch LCD (Z) User Guide
Working with Raspberry Pi
Supports Raspberry Pi OS / Ubuntu / Kali / Retropie system.
When working with Raspberry Pi, you should set the resolution of the LCD by yourself, otherwise, the LCD screen will not work. For more detailed information, please read the following section.
Please download the latest version of the image on the Raspberry Pi official website.
1) Download the compressed file to the PC, and unzip it to get the .img file.
2) Connect the TF card to the PC, use SDFormatter software to format the TF card.
3) Open the Win32DiskImager software, select the system image downloaded in step 1, and click ‘Write’ to write the system image.
4) After the image has finished writing, open the config.txt file in the root directory of the TF card. 5) Add the following lines to the end of config.txt, then save and eject the TF card safely.
hdmi_force_hotplug=1
config_hdmi_boost=10
hdmi_group=2
hdmi_mode=87
hdmi_cvt 1024 600 60 6 0 0 0
6) Save and connect the TF card to your Pi then power up.
7) Connect the Touch interface of LCD to the USB port of Raspberry Pi.
8) Connect the HDMI interface of LCD to the HDMI port of Raspberry Pi.
Note:
- On December 2, 2021, the Raspberry Pi OS was divided into two branches, the Buster branch, and the Bullseye branch. The Buster branch is a continuation of the old system and is more stable. The Bullseye branch added some new features, using open source libraries and new interfaces. Since the current Bullseye branch has just been released shortly, it is not stable yet. If you are an industrial user, it is strongly recommended to use the Buster branch.
- If you use the Buster branch system, you can use it according to the above configuration. But if you are using the Bullseye branch system, you need to modify the default KMS driver to FKMS driver to display the system desktop normally
Modification method: Open the config.txt file in the root directory of the TF card, find the following line:
dtoverlay=vc4-kms-v3d
change into
dtoverlay=vc4-fkms-v3d
- If you need to use the CSI camera under the Bullseye branch system. Since this branch uses the libcamera camera library by default, the library doesn't support FKMS drivers.
So in addition to the above modification, you also need to install the Raspicam camera library.
The installation method is as follows:
cd ~
sudo apt install cmake
git clone https://github.com/raspberrypi/userland
cd userland
./buildme
sudo cp build/bin/* /bin/
Then execute the following command to shut down the system:
poweroff
Connect the Raspberry Pi camera to the CSI interface of the Raspberry Pi, power on the Raspberry Pi again, and after the system boots, execute the following command:
Take a picture:
raspistill -o image.jpg
Take a video:
raspivid -o video.h264 -t 100008) Connect the HDMI interface of LCD to the HDMI port of Raspberry Pi.
【Product drawings】