


- sales/support
Google Chat:---
- sales
+86-0755-88291180
- sales01
sales@spotpear.com
- sales02
dragon_manager@163.com
- support
tech-support@spotpear.com
- CEO-Complaints
zhoujie@spotpear.com
- Only Tech-Support
WhatsApp:13246739196
- Purchase/Shipping/Refund
WhatsApp:13424403025
- HOME
- >
- ARTICLES
- >
- Common Moudle
- >
- ESP
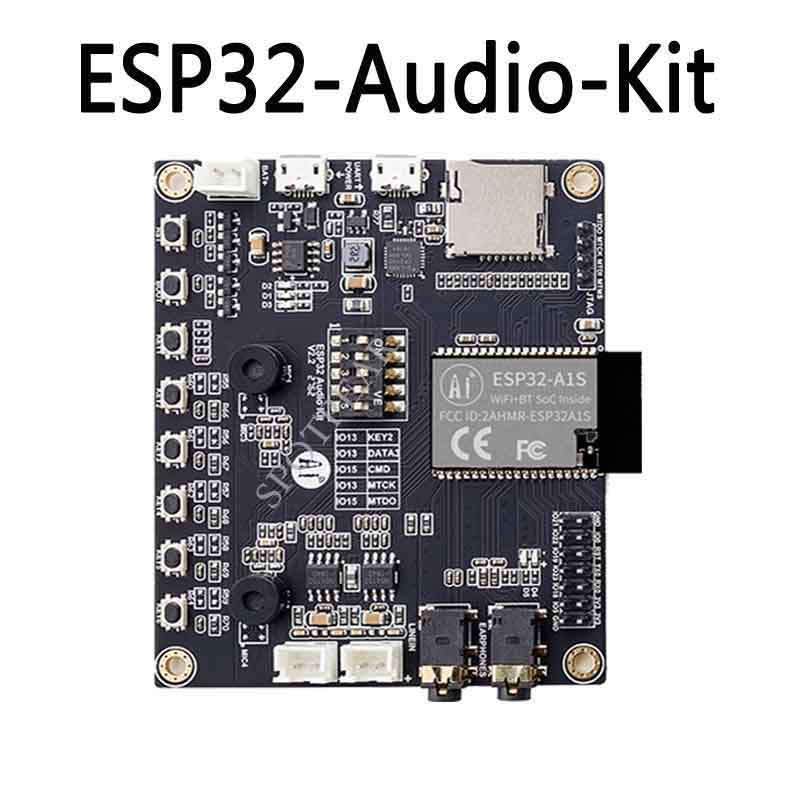
ESP32-Audio-Kit User Guide
ESP8266 & ESP32 User Guide
Note: This page mainly uses AT commands to develop wifi modules.
一. STM32 project example of ESP8266
AT command project: STM32AT command project of ESP8266
Instructions for use document: unzip the project compression package to obtain
Tencent Cloud AT Command Control Light Project: stm32 docking with Tencent Cloud Control Light.zip
Ali Feiyan AT command light control project: STM32 Ali Feiyan AT command light control project of ESP8266
二. Smart configuration example (Smartconfig)
Description: Use two methods for network distribution, Espressif ESP-Touch and WeChat Airkiss.
Preparation: 1 NodeMCU or ESP8266 wifi module, ESP-Touch APP Android IOS
手机APP源码:https://github.com/EspressifApp/EsptouchForAndroid.git & https://github.com/EspressifApp/EsptouchForIOS.git
Method 1:ESP-Touch
1,AT+CWMODE=1 !!Configure the WiFi module to work in single STA mode, and save the configuration in flash
2,AT+CWAUTOCONN=1 !!Enable automatic connection to AP after power-on
3,AT+CWSTARTSMART=3 !!Support ESP-Touch and Airkiss intelligent distribution network
4,Connect the mobile phone to the AP that needs network configuration, open the mobile APP ESP-Touch, enter the password, click OK, and wait for the network configuration to succeed, as shown in Figure 1.
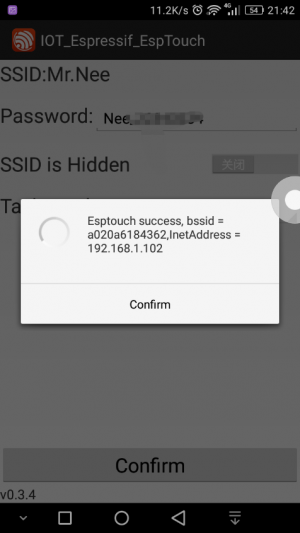
Figure 1
5,AT+CWSTOPSMART !!Regardless of whether the network configuration is successful or not, it is necessary to release the memory occupied by the quick connect, as shown in Figure 2
6,AT+CIPSTATUS !!Query network connection status
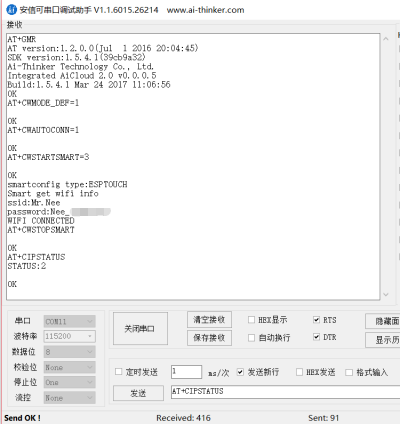
Figure 2
Method 2:Airkiss
1,AT+CWMODE=1 !!Configure the WiFi module to work in single STA mode, and save the configuration in flash
2,AT+CWAUTOCONN=1 !!Enable automatic connection to AP after power-on
3,AT+CWSTARTSMART=3 !!Support ESP-Touch and Airkiss intelligent distribution network
4,Open WeChat, follow the WeChat public account "Anxinke Technology", click wifi configuration, click start configuration, enter the password, click connect, see Figure 3
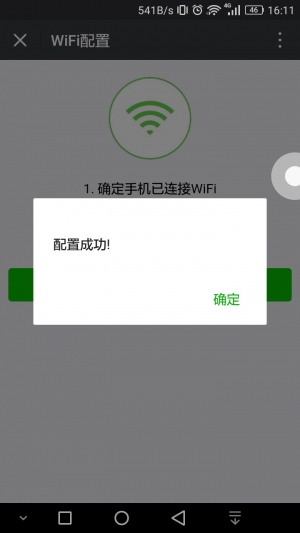
Figure 3
5,AT+CWSTOPSMART !!Regardless of whether the network configuration is successful or not, it is necessary to release the memory occupied by the quick connect
6,AT+CIPSTATUS !!Query the network connection status, as shown in Figure 4
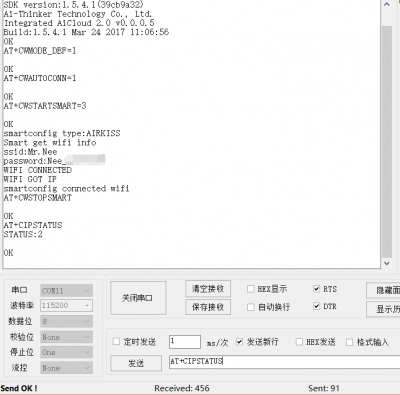
Figure 4
三. HTTP
1,AT+GMR !!Start querying version information
AT version:1.2.0.0(Jul 1 2016 20:04:45)
SDK version:1.5.4.1(39cb9a32)
Ai-Thinker Technology Co., Ltd.
Integrated AiCloud 2.0 v0.0.0.5
Build:1.5.4.1 Mar 24 2017 11:06:56
OK
2,AT+CWMODE_DEF=1 !!Configure the WiFi module to work in single STA mode, and save the configuration in flash
OK
3,AT+CWJAP_DEF=“newifi_F8A0”,“anxinke123” !!Connect Network
WIFI CONNECTED
WIFI GOT IP
OK
4,AT+CWAUTOCONN=1 !!Enable automatic connection to AP after power-on
OK
5,AT+CIPSTART=“TCP”,“183.230.40.33”,80 !!connect to the server
CONNECT
OK
6,AT+CIPMODE=1 !!Set up transparent transmission
OK
7,AT+CIPSEND !!Start sending
OK
8,> GET
GET /devices/5835707 HTTP/1.1
api-key: xUrvOCDB=iRuS5noq9FsKrvoW=s=
Host:api.heclouds.com
\r\n\r\n(END)
Respond to :
HTTP/1.1 200 OK
Date: Tue, 09 May 2017 01:21:06 GMT
Content-Type: application/json
Content-Length: 213
Connection: keep-alive
Server: Apache-Coyote/1.1
Pragma: no-cache
{“errno”:0,“data”:{“private”:false,“protocol”:“EDP”,“create_time”:“2017-05-06 12:51:52”,“online”:false,“location”:{“lon”:0,“lat”:0},“id”:“5835707”,“auth_info”:“Light001”,“title”:“SLight”,“tags”:[]},“error”:“succ”}
9,>POST
POST /devices/5835707/datapoints HTTP/1.1
api-key: xUrvOCDB=iRuS5noq9FsKrvoW=s=
Host:api.heclouds.com
Content-Length:60
\r\n
{“datastreams”:[{“id”:“switch”,“datapoints”:[{“value”:1}]}]}|(END)
Respond to:
HTTP/1.1 200 OK
Date: Tue, 09 May 2017 01:28:42 GMT
Content-Type: application/json
Content-Length: 26
Connection: keep-alive
Server: Apache-Coyote/1.1
Pragma: no-cache
{“errno”:0,“error”:“succ”}
10, +++ !!Exit transparent transmission, do not check the new line (\r\n)
三.STA+connect TCP Server
1,AT+CWMODE_DEF=1 !!Work in a single station module, save the setting parameters to the flash
2,AT+CWJAP_DEF=“newifi_F8A0”,“anxinke123” !!Connect to the router and save to flash
3,AT+CIPSTART=“TCP”,“192.168.99.217”,6001 !!Connect to the TCP server, this experiment uses the network debugging assistant to test
4,AT+CIPSEND=5 !!Method一:Send data of the specified data length (Data: test1), see Figure 1
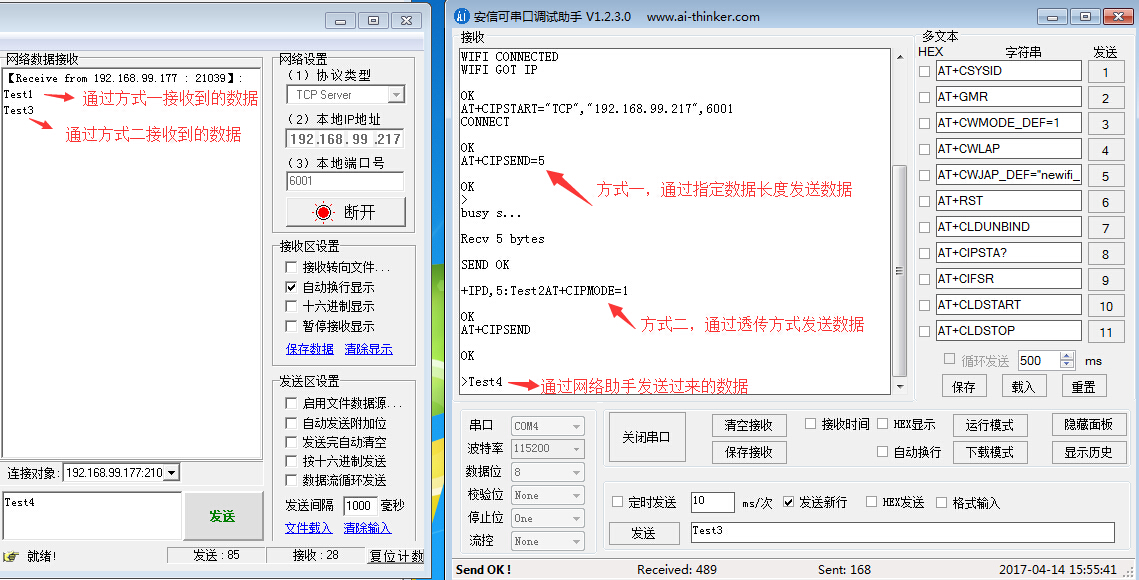
Figure 1
5,AT+CIPMODE=1 !!Method二:Use transparent transmission mode to send data
6,AT+CIPSEND !!send data(Data:Test2),Figure 1:
7,Sent:+++ !!Exit transparent transmission and send three consecutive +++, do not check the new line (\r\n), as shown in the figure below:
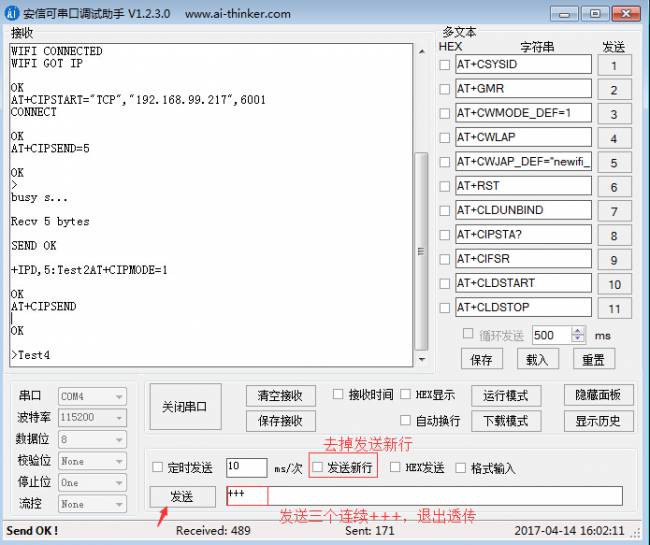
8,After exiting successfully, you can send AT command !!See below :
