- sales/support
Google Chat:---
- sales
+86-0755-88291180
- sales01
sales@spotpear.com
- sales02
dragon_manager@163.com
- support
tech-support@spotpear.com
- CEO-Complaints
zhoujie@spotpear.com
- Only Tech-Support
WhatsApp:13246739196
- Purchase/Shipping/Refund
WhatsApp:13424403025
- HOME
- >
- ARTICLES
- >
- Common Moudle
- >
- ESP
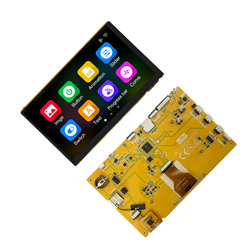
ESP32-P4-7inch-JC1060P470C_I_W User Guide
Product Description
This LCD module uses ESP32-P4 module as the main control, which is a dual-core MCU with integrated WI-FI and Bluetooth functions. The main frequency can reach 400MHz, 768KB HP L2MEM, 32KB LP SRAM, 128KB HP ROM, 32M PSRAM, Flash size is 16MB, display resolution is 1024*600, non-touch or capacitive touch. The module contains LCD display, backlight control circuit, touch screen control circuit. TF card interface and IO port interface are reserved. This module supports development in arduino IDE, ESP IDE, Micropython and Guition.
Features
●7.0-inch color screen, supports 24 BIT RGB 16.7M color display, rich display colors
●1024X600 resolution
●The sample program has been burned in the factory and is pluggable
●With TF card slot, convenient for expanding storage
●Provide Arduino library functions and sample programs to facilitate rapid secondary development
●Support one-click download program
●Lithium battery interface circuit
●Military-grade process standards, long-term stable operation
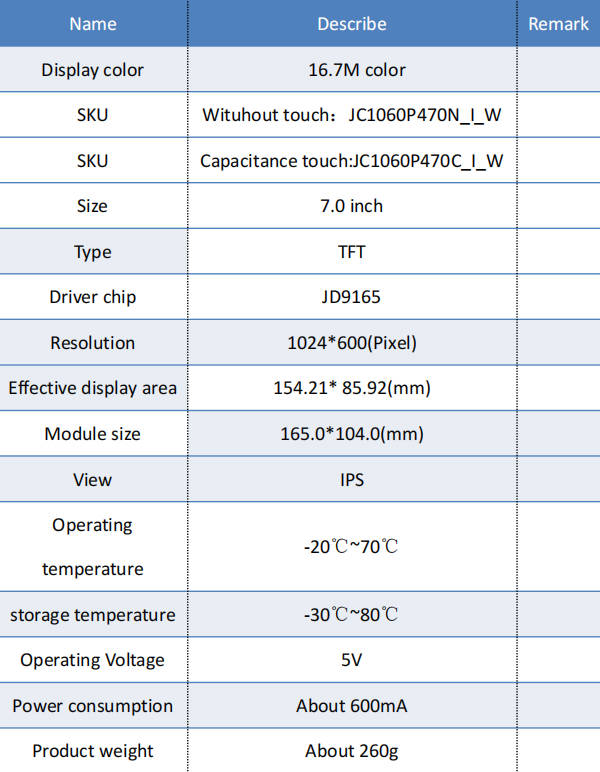
Product Parameters
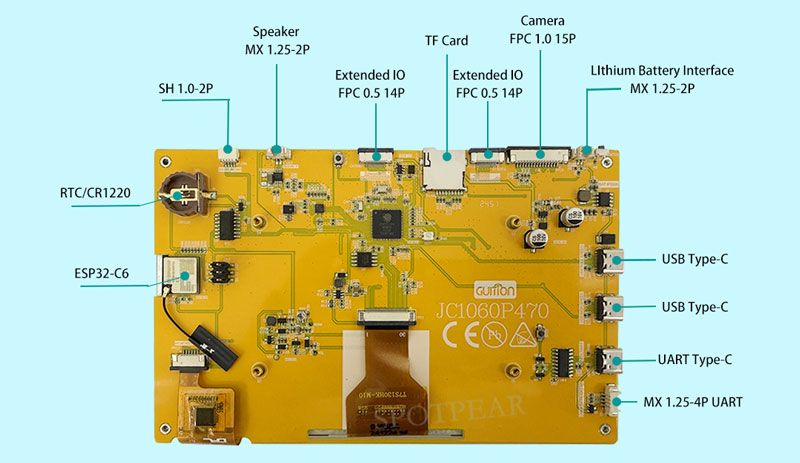
Interface Description
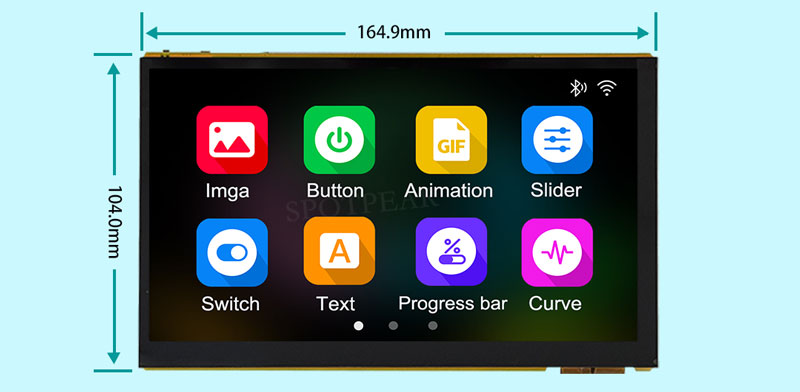
Product size
Introduction
ESP32-P4 is equipped with a dual-core RISC-V CPU with AI instruction extensions, advanced
memory subsystem and integrated high-speed peripherals.
ESP32-P4 is equipped with a dual-core RISC-V CPU that runs at up to 400 MHz and also supports single-precision FPU and AI extensions, providing the necessary
ESP32-P4 itself does not have WiFi and Bluetooth capabilities. Use ESP-Hosted to connect to the SDIO/SPI/UART interface
ESP32-C6 wireless SoC.
Installing and programming the ESP32 using the Arduino IDE
An easy way to get started is to use the familiar Arduino IDE. While this is not necessarily the best environment for working with the ESP32, it has the advantage of being familiar with the application, so the learning curve is flatter.
We will use the Arduino IDE to conduct our experiments.
1. Install using Arduino IDE
We first need to install Arduino IDE version 2.3.4 (or higher), for example, the Arduino installation is located in "C/Programs(x86)/Arduino".
Download version link: https://www.arduino.cc/en/software
2,Installing Arduino-ESP32 directly from the Arduino IDE
Add a Board Manager Entry
Here is what you need to do to install the ESP32 board into the Arduino IDE:
(1) Open the Arduino IDE.
(2)Click the File menu on the top menu bar.
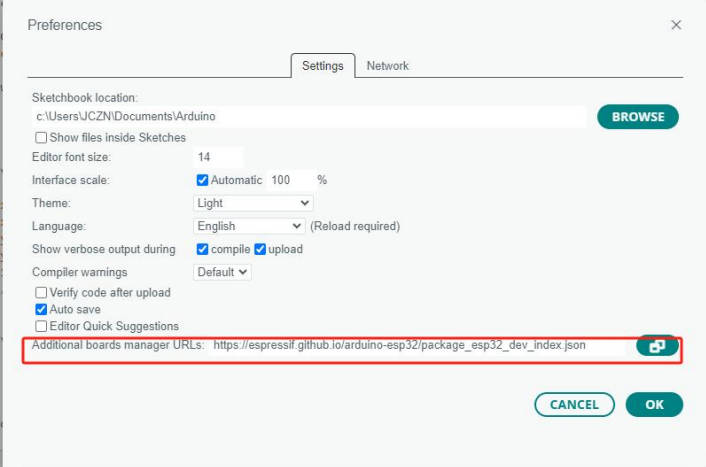
(3)Click the Preferences menu item. This will open the Preferences dialog box.
(4)By default, you should be on the Settings tab in the Preferences dialog box.
(5)Look for a text box labeled "Additional Board Manager URLs."
(6)If there is already text in this box, add a comma at the end of it and follow the next step.
(7)Paste the following link into the text box:
Stable version link:
https://espressif.github.io/arduino-esp32/package_esp32_dev_index.json
(8)Click the OK button to save the settings。
The text box with the JSON link looks like this:
(9) In the Arduino IDE, click the Tools menu on the top menu bar。
(10) Scroll down to the "Board:" entry
(11) When the "Board:" entry is highlighted, a submenu will open.
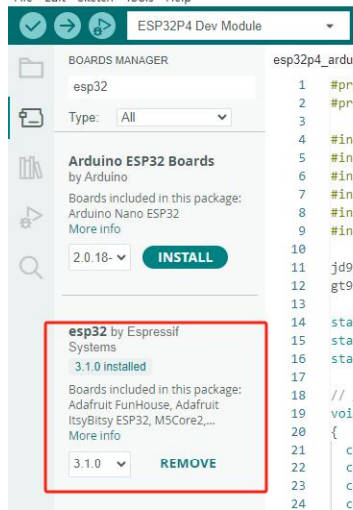
(12) At the top of the submenu is "Boards Manager." Click it to open the "Boards Manager" dialog box.
(13) Type "esp32" into the search box of "Boards Manager".
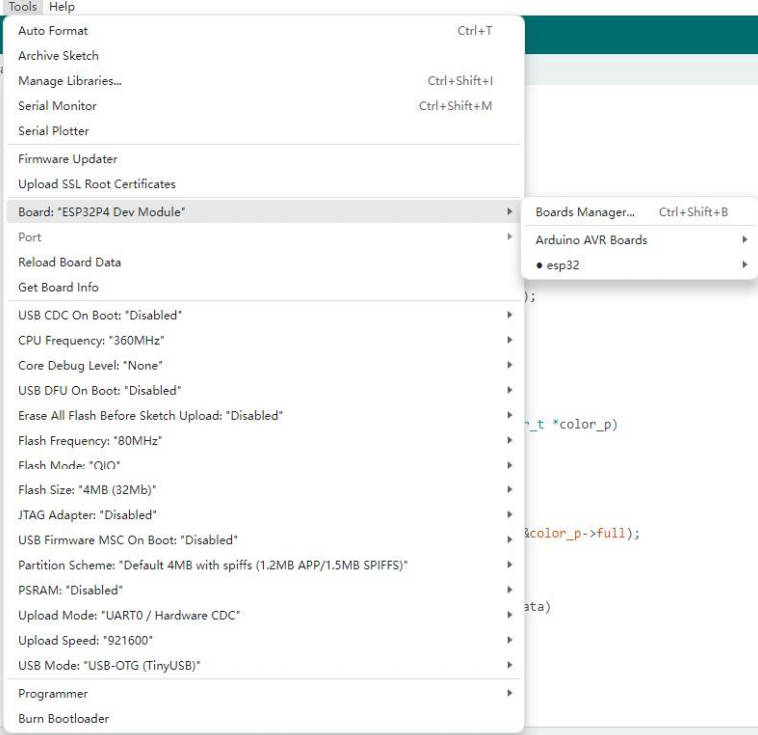
(14)You should see an entry for "esp32 by Espressif Systems". Highlight this entry and click
Install button.
This will install the ESP32 board into your Arduino IDE
Once installed, we need to select the correct board option for the "ESP32 Arduino" board. In the board type, in the tools tab, we select "ESP32P4 Dev Module".
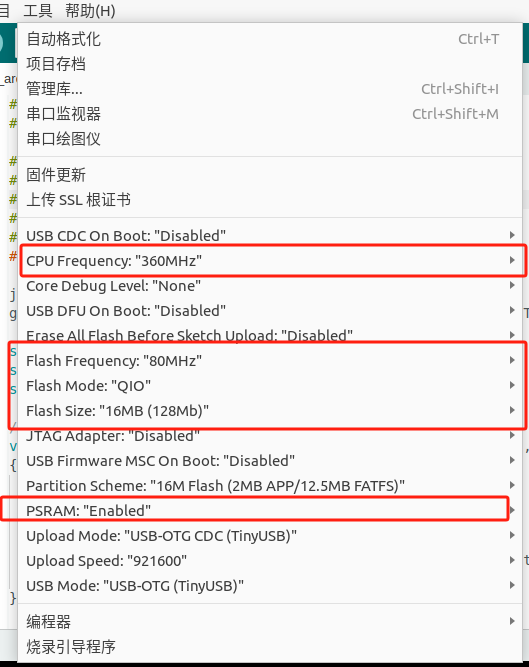
Settings and in the programmer's portal in the same tab, we select "esptool".
It should be noted that once the code is uploaded, the device will start running. So if we want to upload a new program, we need to reset the device power to ensure that it enters the flashing mode again.
Sample code usage
Currently, we only provide a preliminary explanation and introduction to the examples displayed on the screen. You can find the corresponding examples in the data center, as shown in the figure:
Open the library manager in Arduino, search for lvgl, and click install.
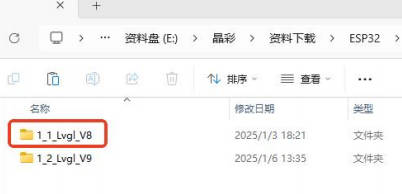
Found data center 1_1_Lvgl_v8
As shown in the figure:
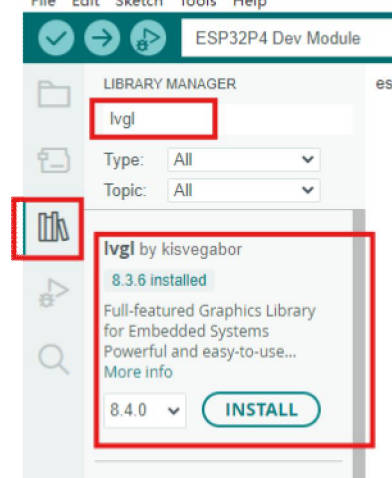
Download a library file.
Lvgl,> v8.3.0
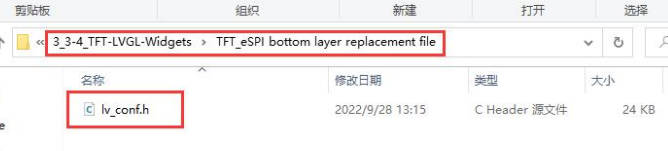
Copy the lv_conf.h of the data center.
As shown in the figure:
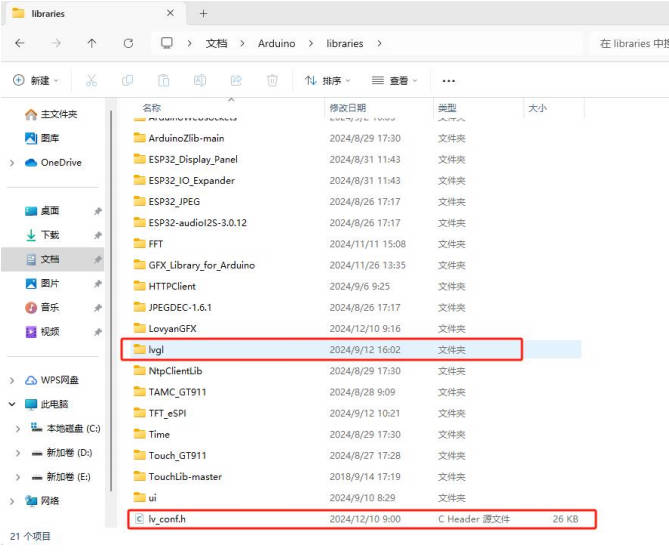
Put this file under the Arduino library file, it must be in the same root directory as the library lvgl.
As shown in the figure:
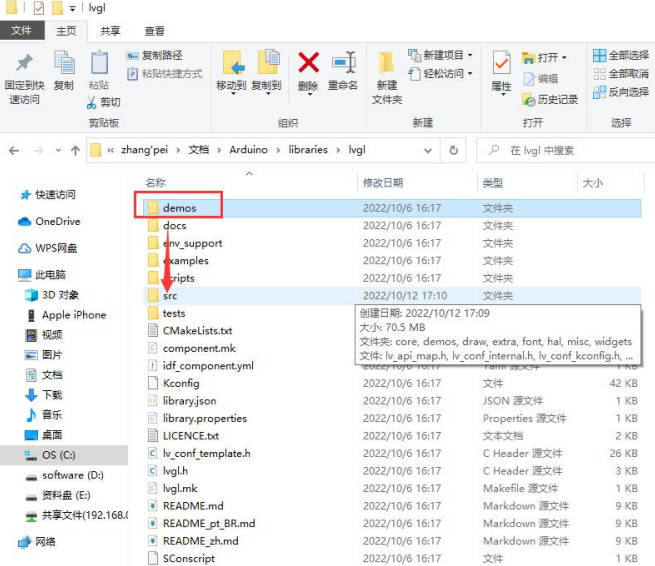
三、Copy the Lvgl demos file to the src folder
As shown in the figure:
After compiling, you can run LVGL and touch normally.
material
Schematic
Sample Program
Data Sheet
ESP32-P4
Software Tools
Arduino
VScode
Debugging Tools
1、电脑需要安装CH340驱动程序:The computer needs to install the CH340 driver program
2、保证供电充足,开发板电流600ma以上:Ensure sufficient power supply, with a development board current of over 600mA
3、烧录选择USB1口:Choose USB1 port for burning