


- sales/support
Google Chat:---
- sales
+86-0755-88291180
- sales01
sales@spotpear.com
- sales02
dragon_manager@163.com
- support
tech-support@spotpear.com
- CEO-Complaints
zhoujie@spotpear.com
- Only Tech-Support
WhatsApp:13246739196
- Purchase/Shipping/Refund
WhatsApp:13424403025
- HOME
- >
- ARTICLES
- >
- Common Moudle
- >
- Camera
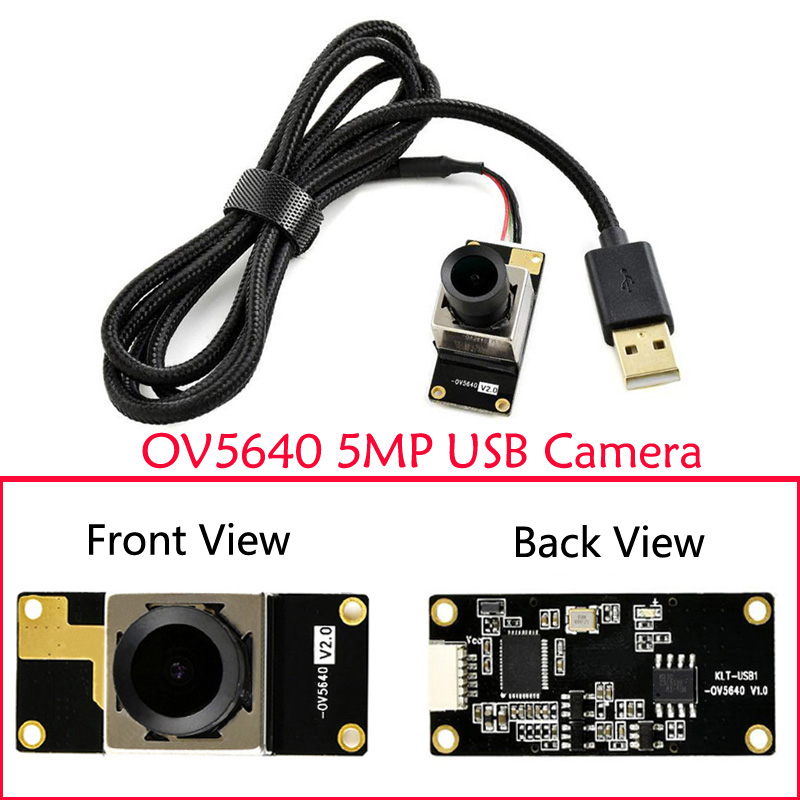
OV5640 5MP USB Camera (A) User Guide
Introduction
USB Camera, OV5640 sensor. 5 megapixel. Supports UVC protocol.
Specification
- Pixel: 5MP
- Resolution: 2592 × 1944
- Sensor: OV5640
- DSP: Automatic white balance(AWB)\Automatic exposure(AEC)\Automatic gain control(AGC)
- Camera Specification:
- CCD Size: 1/4 inch
- Aperture (F): 2.1
- Focus Length (EFL): 2.5 mm
- Field of View (FOV): 135°(D) 95°(H) 70°(V)
- Focus Type: AF
- Interface: USB1.0
- Image:
- Image Format: MJPG, YVY2
- Image Resolution: 2592 × 1944
- Video:
- 5 FPS 2592 × 1944 (FULL)
- 15 FPS 1920 × 1080 (HD)
- 15 FPS 1280 × 720 (720P)
- Working voltage: 5V ± 5%
- Working Temperature: 0°C ~ 50°C
- Lens Size: 18.00 × 18.00 × 19.39 mm
- Dimension: 18.00 × 36.00 mm
- Support OS: Windows, Linux, MacOS
Working with Windows PC
Test Software
Most of the Windows 10 PC has pre-install Camera software, you can use it to test the USB camera.
If your PC doesn't have Camera software, you can also download the AMCap test software from Resouce->Software and test.
Testing
- Use Camera software of Windows
- Search "Camera" and open the software.
- Click the setting icon of the top-left to configure the image/video.
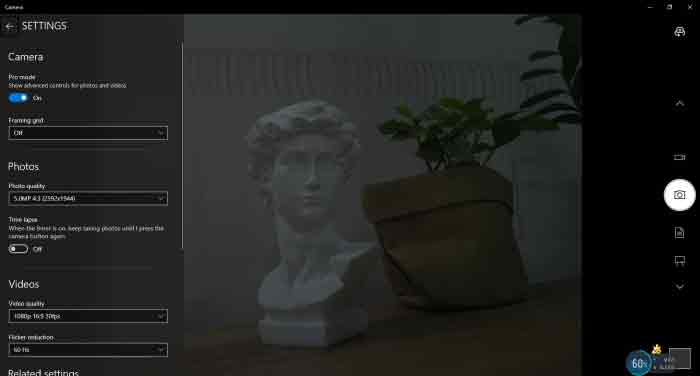
- You can click the icons on the right to switch between Image Capture or Video Recording.
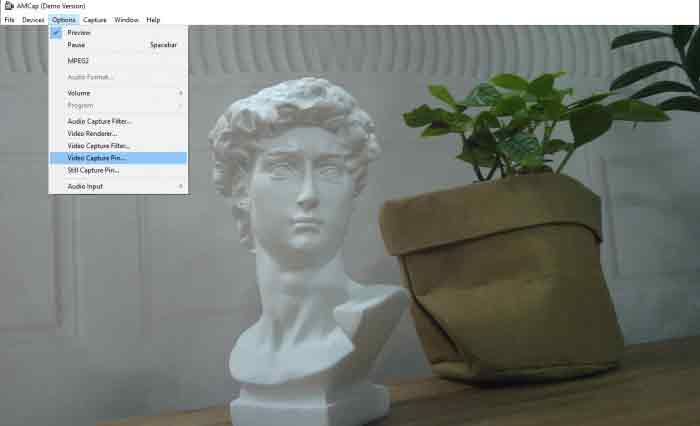
- AMCap Software
- Download and install the AMCap software.
- You can click the Options option, choose Video Capture Pin... or Still Capture Pin... to configure image/video.
Working with Raspberry Pi
- Open a terminal of Raspberry Pi (You can use Ctrl+Alt+T shortcut)
- Edit the modules file:
sudo nano /etc/modules
- Add the following command in the document and save:
bcm2835-v4l2
- Ues command sudo raspi-config to open the configuration
- Choose Interface Option -> Camera -> Yes to enable camera and reboot.
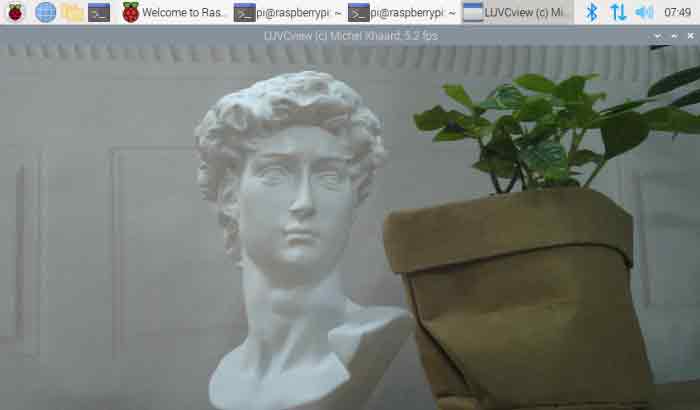
- Open a Terminal of Pi and install luvcview tool with the following command
- sudo apt-get install luvcview -y
- After installing, use the following command to test the USB camera.
- sudo luvcview -s 1920 x 1080
Working with Jetson Nano Developer Kit
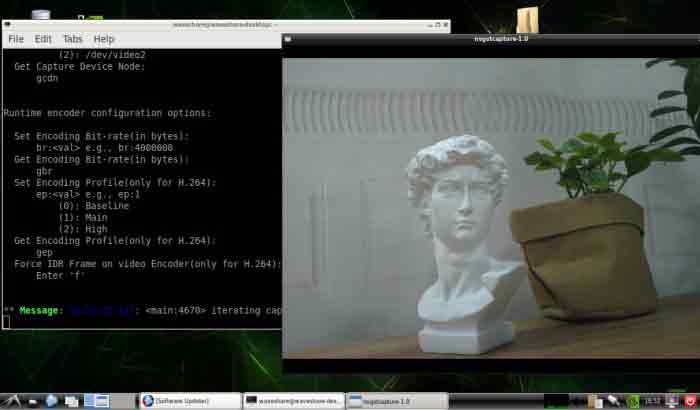
- Open a terminal of Jetson Nano Developer Kit (You can use the Ctrl+Alt+T shortcut or open it by Mouse)
- Use the following command for previewing:
- nvgstcapture-1.0 --camsrc=0
- With the command, a preview window is opened
【Notice】You may need to use the camera by script/codes, in this case, you can refer to tools/libraries like Opencv yourself.
TAG:
Raspberry Pi Pico 2 RP2350A 1.54inch TouchScreen 1.54 inch LCD Display Development Board 240×240
LCD1602 I2C Module PWM Adjustable backlight 3.3V/5V For Arduino/ Raspberry Pi/ Pico/ Jetson Nano/ ESP32
Raspberry Pi CM5 Mini Base IO Board NANO B Development For Compute Module 5
Raspberry Pi Pico 2 RP2350B 2.41 inch AMOLED Development Board QSPI Display TouchScreen 450x600 RM690BO FT6336 QMI8658
Raspberry Pi 5 Audio
Raspberry Pi 5 PCIe to USB3.2 Gen1 Hub 5Gbps For Raspberry Pi OS Drive free
7inch Monitor Display
Raspberry Pi Refractive Prism
1.69inch LCD TouchScreen Display 240×280 ST7789 Arduino Raspberry Pi ESP32S3 Pico STM32
0.96inch RGB OLED
7inch LCD 1024×600 Computer PC Monitor Display Secondary Screen TypeC USB CPU RAM Only For Windows
Milk-V Duo
Raspberry Pi Secondary Screen
ESP32-S3FH4R2 Matrix 8x8 RGB-LED-WiFi Bluetooth QST Attitude Gyro Sensor QMI8658C Arduino Python
2.13 inch Passive NFC e-Paper ink (G) RYBW Display Screen No Need Battery Wireless Power & Data Transfer
Spotpear
Raspberry Pi WatchDog
Raspberry Pi 0.96inch OLED
Raspberry Pi 10.1 inch DSI LCD TouchScreen Display 800x1280 Also For RK3576/RK3506/ESP32-P4
Raspberry Pi DSI
TAG:
SIM8202G M2 3G 4G 5G GNSS Sub-6G PCIe USB3.1 GPIO M.2 LTE-A NSA SA DFOTA VoLTE SIMCOM
2.66inch e-Paper e-link Module 360x184 4-Color Red Yellow Black White For Arduino Raspberry Pi STM32 Jetson SpotPear
PC USB Monitor Screen
ESP32 1.51inch transparent OLED display Screen Car Desktop trinket Mini TV LVGL
Sipeed Lichee Tang Nano1K FPGA GW1NZ-1
CAM-GC2083
Raspberry Pi 5 PCIe M.2 5G 4G 3G SIM8262E-M2
Milk V Duo
Orange Pi Zero 2W Development Board with Allwinner H618 for TV Box IoT Supports WiFi and Bluetooth
MINI linux board
Raspberry Pi Official Original Capacitive TouchScreen Display 2 7 inch LCD 720x1280
USB to nRF24L01
RP2040-PiZero
Arduino Thermal imaging
USB camera 5MP IMX335 No Distortion
Raspberry Pi MLX90640
R7FA4 PLUS B Development Board Based on R7FA4M1AB3CFM Compatible with Arduino UNO R4 WiFi
Raspberry Pi 5 Fan
Raspberry Pi Pico 1.28inch
2.13Inch E-Paper