- sales/support
Google Chat:---
- sales
+86-0755-88291180
- sales01
sales@spotpear.com
- sales02
dragon_manager@163.com
- support
tech-support@spotpear.com
- CEO-Complaints
zhoujie@spotpear.com
- sales/support
WhatsApp:13246739196
Raspberry Pi PILAPTOP CM3+ Package A User Guide
Overview
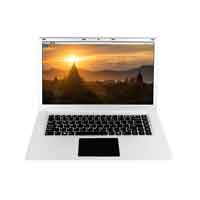
This is a 15.6inch Pi-Laptop, Slim Laptop Based On Raspberry Pi Compute Module, Specialized For Programming Learning。PILAPTOP extends three USB interfaces, one RJ45 port, a 3.5mm earphone jack, Micro SD card slot,etc.
Hardware Resources
Control Module
PILAPTOP uses the Compute Module 3+ Lite as controller, come with the 32GB Micro SD.
- BCM2837B0
- Cortex-A53 (ARMv8) 64-bit SoC @ 1.2GHz
- 1GB RAM
Interfaces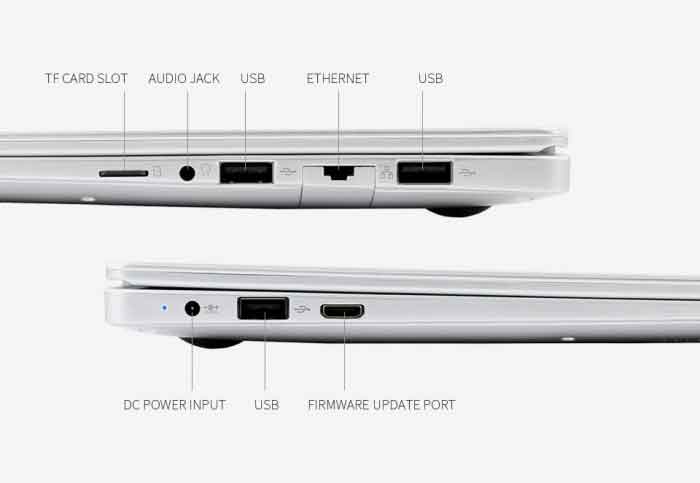
- TF card slot: Support Micro SD card.
- HP interface: Support 3.5mm earphone jack.
- USB interface: PILAPTOP has three USB3.0 interface, can be used for USB devices like Mouse and so on.
- RJ45 port: For connecting wired network.
- DC interface: 12V power input, can be used for powering PILAPTOP and charge the battery.
- Firmware update port: Used for firmware update (user will not use it generatlly)
Keyboard and indicators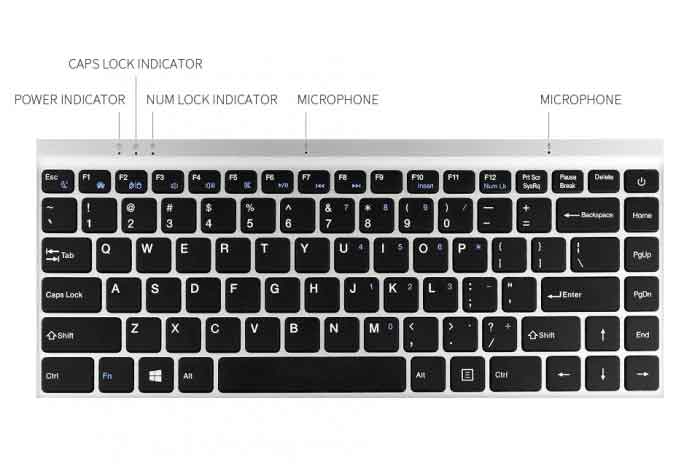
- Keyboard
- Microphone
- Power indicator: Red
- Capslock indicator: Green
- NUM indicator: Blue
LED Matrix and button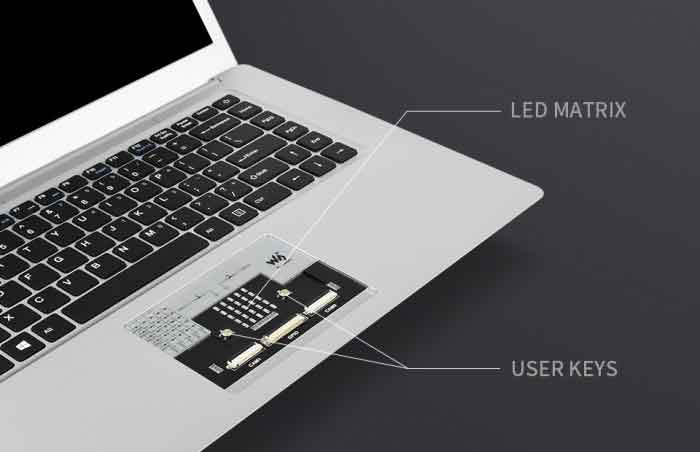
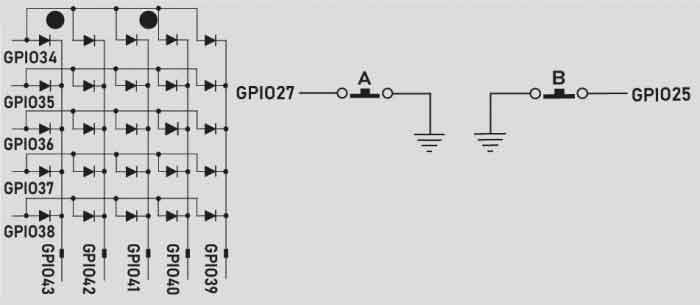
- 5x5 LED Matrix, programmable.
- 2 user buttons
- Two CSI interfaces for CSI cameras.
- 40PIN GPIO for Raspberry Pi HAT.
40PIN GPIO extension board
- The 40PIN GPIO extension board is provided for extending common 40PIN GPIO
If you use the pre-built image, you can skip the configure steps.
Writing Image
Donwload the Raspberry Pi OS from Raspberry Pi website:https://www.raspberrypi.org/software/
PILAPTOP can only support Kali OS
We recomend you use our pre-built image
- 1) Download the image to your PC, unzip it to get the .img file.
- 2) Insert the Micro SD card to PC by card reader, use
- software to format the Micro SD card.
- 3) Open the Win32DiskImager.exe software, write the image downloaded to your Micro SD card.
- 4) After writting the Micro SD card, and modify the config.txt file, append the following lines to the file:
hdmi_force_hotplug=1
max_usb_current=1
hdmi_group=2
hdmi_mode=87
hdmi_timings=1920 0 40 10 80 1080 0 13 3 32 0 0 0 60 0 124000000 6
hdmi_drive=2
display_rotate=0
config_hdmi_boost=10
Save and eject the micro SD card, insert the Micro SD card to PILAPTOP and press the power button to start the PILAPTOP.
Driver of battery
This driver is used for capacity display.
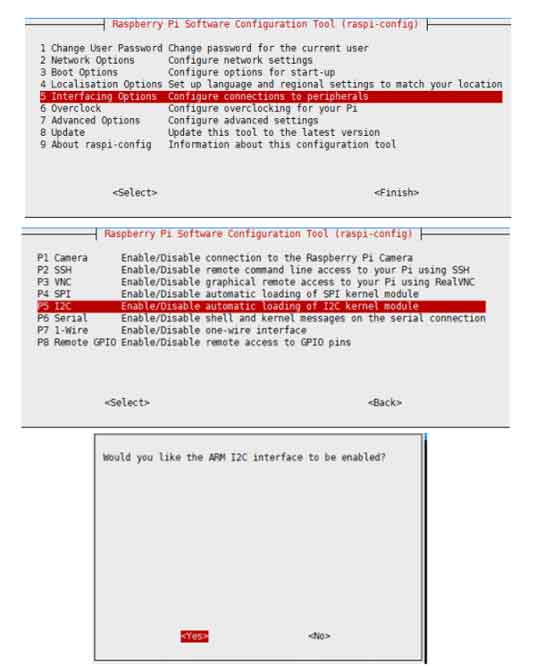
Enable I2C
- Open a terminal and run the following command:
sudo raspi-config
#Choose Interfacing Options -> I2C ->yes to enable I2C interface.
- Reboot Raspberry Pi
sudo reboot
Install libraries
sudo apt-get update
sudo apt-get install python-pip
sudo apt-get install python-smbus
Download and install the driver
Open a terminal and run the following commands:
sudo apt-get install p7zip-full
wget https://www.waveshare.net/w/upload/6/6f/PILAPTOP_battery.7z
7z x PILAPTOP_battery.7z -O./battery
sudo chmod 777 -R battery
cd battery
./main.sh   #Do not use sudo permision
sudo reboot
Expected result: A battery icon is shown in the right-top of menu bar. You can also check the codes by the following commands:
cd battery
sudo ./battery.sh
If the battery icon is not appear, please check if error information are listed when installation, check if you have enabled the I2C interface and install libraries.
Codes of LED Matrix
Download the codes
sudo apt-get install p7zip-full
wget https://www.waveshare.net/w/upload/3/33/LED_matrix.7z
7z x LED_matrix.7z -O./LED_matrix
sudo chmod 777 -R LED_matrix
cd LED_matrix/
C
cd c/
sudo make clean
sudo make
sudo ./main
#Exptect result: The LED matrix will display characters A to Z.
python
cd python/examples/
sudo python main.py
sudo python3 main.py
#Extected result: The LED will dislay character X, press buttons, the LED matrix will display arrows.
PINPUT of the LED
Power
The PILAPTOP come with a 12V/3A power adapter, with a 10000mAh battery inside.
You can use the inside battery to power the PILAPTOP or plugging the 12V/3A adapter.
If the voltage of battery is low, you can plug the 11112V/3A adapter to chrage the battery.
The power indicator turn on when the PILAPTOP is powered on.
Capacity indicator
The LED beside the power interface turns on while the power adapter is plugged.
The capacity indicator is shown in the GUI.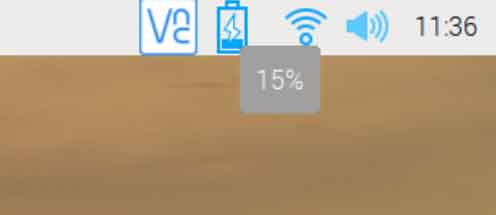
The PILAPTOP will shows a warnning if capacity of battery is less than 15% for 3s.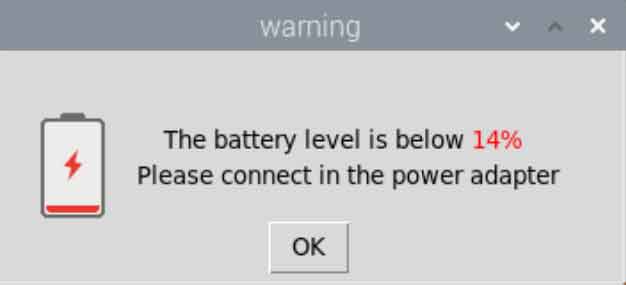
The low volatage warnning is shown if the capacity is less 5%, and the PILAPTOP auto shutdown after 60s.
Power on/off
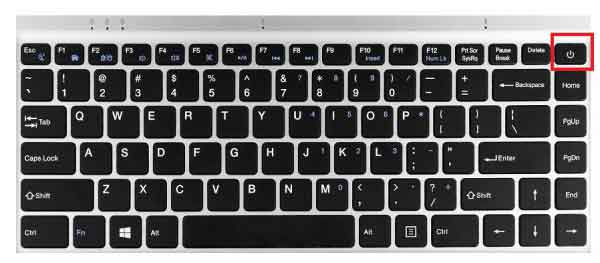
- Power on:Press the Power button on the keyboard to turn on the PILAPTOP.
- Power off:
- Soft shutdown: You can power off the PILAPTOP by the Menu or the shutdown command.The PILAPTOP will turn off after 5s.
- Force shutdown: You can long-press the Power button for 6s to force shutdown the PILAPTOP.
Keyboard
The PILAPTOP keyboard is US layout, if you want to use other layout you can think about adding a keyboard stickers.
Indicators
- Capslock indicator: The green led turns on if the Caps is locked.
- Num indicator: You can use Fn+NUM keys to enable the number keypad. Once the number keypad is enablem the blue indicator turns on.
Shortcut
| Shorcut | Function |
| Fn+Esc | Turn off/on display |
| Fn+F3 | Reduce volume |
| Fn+F4 | Increase Volume |
| Fn+F5 | Enable/Disable mute |
| Fn+F9 | Reduce brightness |
| Fn+F11 | Increase brightness |
| Fn+F12 | Enable the num keypad |
| Alt+Tab | Switch windows |
| Clt+Tab | Switch the tab |


