


- sales/support
Google Chat:---
- sales
+86-0755-88291180
- sales01
sales@spotpear.com
- sales02
dragon_manager@163.com
- support
tech-support@spotpear.com
- CEO-Complaints
zhoujie@spotpear.com
- Only Tech-Support
WhatsApp:13246739196
- Purchase/Shipping/Refund
WhatsApp:13424403025
- HOME
- >
- ARTICLES
- >
- Common Moudle
- >
- Camera
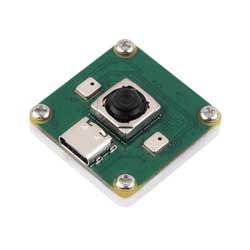
IMX378-12MP-USB-Camera-A User Guide
Overview
Specifications
- Pixels: 12 million
- Resolution: 3840 × 3032
- Photosensitive chip: IMX378
- DSP: Auto gain/exposure/white balance
- Camera:
- CCD size: 1/2.3 inch
- Aperture (F): 1.79
- Focal length (EFL): 4.7 mm
- Field of View (FOV): 79.8° (D)
- Distortion: < 0.39%
- Focus mode: Fixed focus
- Interface type: USB2.0
- Image:
- Supported image formats: MJPG, YVY2
- Static image resolution: 3840 × 3032
- Video recording support:
- 30 FPS 3840 × 3032
- 30 FPS 3840 × 2160
- 30 FPS 2592 × 1944
- Audio: Onboard microphone
- Operating voltage: 5V ± 5%
- Operating temperature: 0°C ~ 50°C
- Lens size: 10.80 × 10.80 × 5.9 (mm)
- Outline dimensions: 30.00 × 30.00 (mm)
- Supported systems: Windows, Linux
Working with Windows PC
Test Software
Currently, a camera software is generally pre-installed with Windows 10 systems. You can test it by opening the camera software that comes with your Windows computer.
If you are using the Windows 7 system, or if the camera software cannot be found in the system, you can download and install the AMCAP test software provided by us from Resources->Softwares.
Test Steps
- Window camera software
- Search for "Camera" to open the software
- Click the gear icon in the upper left corner to open the settings interface, where you can set the resolution for taking pictures or videos
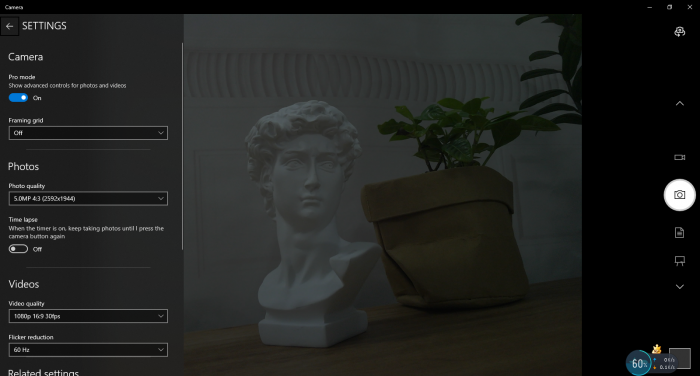
- Click the video or capture icon on the right to switch between recording and shooting
- AMCap software
- Download and install AMCap software
- You can click on the Option option and select Video Capture Pin... or Still Capture Pin... to set the parameters of the image and video

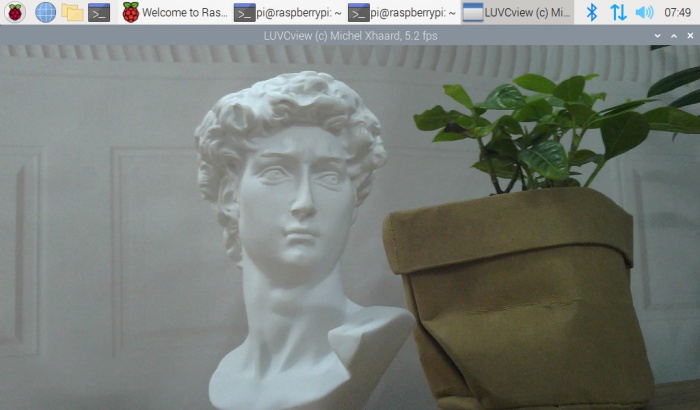
Working with Raspberry Pi
- Open the Raspberry Pi terminal, enter the command to install the Luvcview software
- sudo apt-get install luvcview -y
- After installation, enter the command on the terminal to open the software for USB camera testing
- sudo luvcview -s 1920x1080
Working with Jetson Nano Developer Kit
- Open the Jetson Nano Developer Kit terminal (open with Ctrl+Alt+T or mouse click)
- Input the following command to preview:
- nvgstcapture-1.0 --camsrc=0
- After inputting, a preview window will open
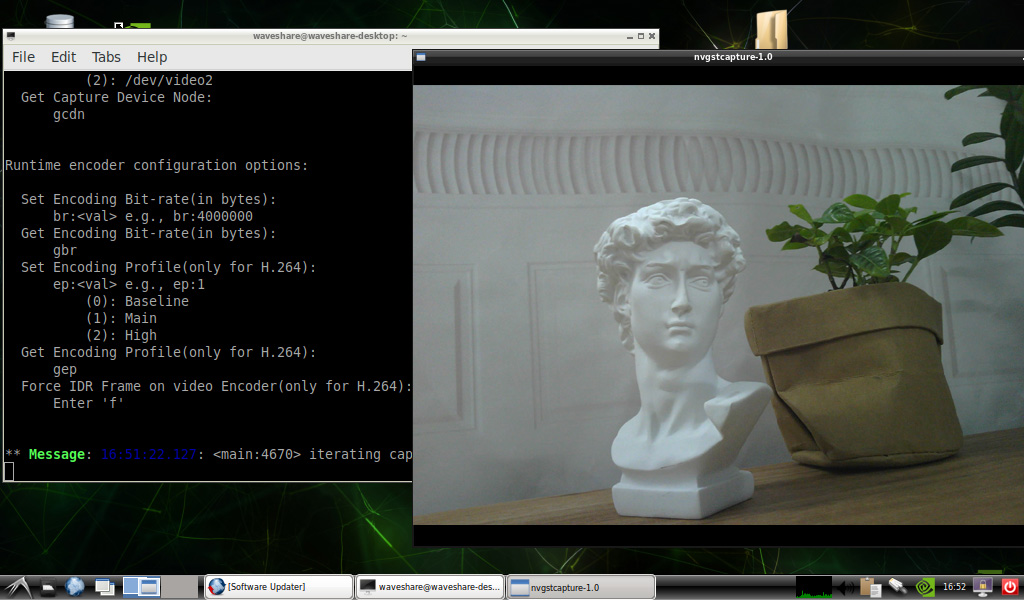
Note: In practical application, you may need to call with a program, and you can refer to Opencv and other related image processing library materials by yourself
FAQ
Question: If the hand touches the back of the PCB, will the camera display abnormalities?
- Do not touch the components on the back of the PCB with your hands to avoid affecting the electrical characteristics
Question: Does the module get hot during use?
- During use, the module heats up significantly and may feel hot, which is normal.
Question: Why can't I control parameters like brightness, contrast, etc.?
- If you are using Mac and Opencv, some parameter settings cannot be used, it is recommended to use Linux and V4L2 drivers.
Support
Monday-Friday (9:30-6:30) Saturday (9:30-5:30)
Email: services01@spotpear.com
[Tutorial Navigation]
- Overview
- Specifications
- Working with Windows PC
- Working with Raspberry Pi
- Working with Jetson Nano Developer Kit
- Resources
- FAQ
- Question: If the hand touches the back of the PCB, will the camera display abnormalities?
- Question: Does the module get hot during use?
- Question: Why can't I control parameters like brightness, contrast, etc.?
- Support