


- sales/support
Google Chat:---
- sales
+86-0755-88291180
- sales01
sales@spotpear.com
- sales02
dragon_manager@163.com
- support
tech-support@spotpear.com
- CEO-Complaints
zhoujie@spotpear.com
- Only Tech-Support
WhatsApp:13246739196
- Purchase/Shipping/Refund
WhatsApp:13424403025
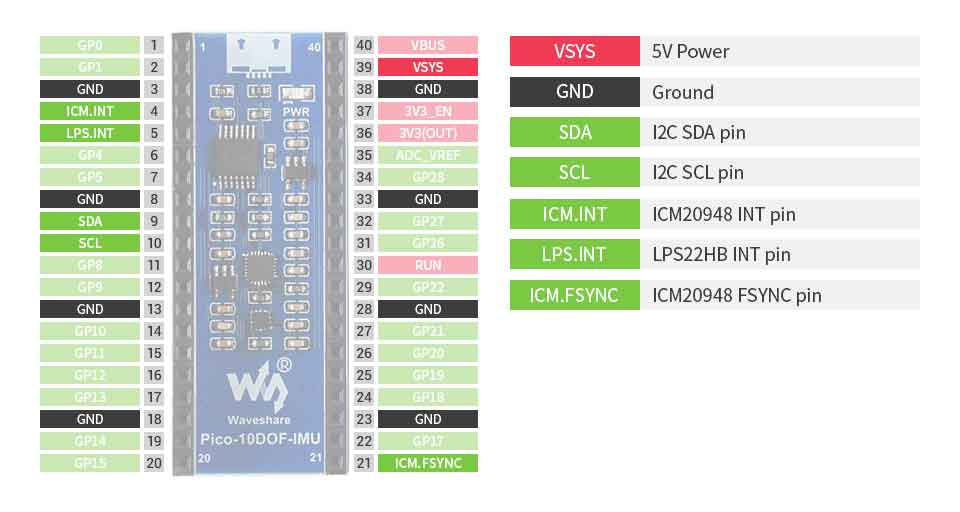
Raspberry Pi Pico-10DOF-IMU User Guide
Overview
The Pico-10DOF-IMU is an IMU sensor expansion module specialized for Raspberry Pi Pico. It incorporates sensors including gyroscope, accelerometer, magnetometer, baroceptor, and uses I2C bus for communication.
Combined with the Raspberry Pi Pico, it can be used to collect environment sensing data like temperature and barometric pressure or to easily DIY a robot that detects motion gestures and orientations.
Feature
- Standard Raspberry Pi Pico header supports Raspberry Pi Pico series
- Onboard ICM20948 (3-axis gyroscope, 3-axis accelerometer, and 3-axis magnetometer) for detecting motion gesture, orientation, and magnetic field
- Onboard LPS22HB barometric pressure sensor, for sensing the atmospheric pressure of the environment
Specifications
- Operating voltage: 5V
- Accelerometer:
- resolution: 16-bit
- measuring range (configurable): ±2, ±4, ±8, ±16g
- operating current: 68.9uA
- Gyroscope:
- resolution: 16-bit
- measuring range (configurable): ±250, ±500, ±1000, ±2000°/sec
- operating current: 1.23mA
- Magnetometer:
- resolution: 16-bit
- measuring range: ±4900µT
- operating current: 90uA
- Baroceptor
- measuring range: 260 ~ 1260hPa
- measuring accuracy (ordinary temperature): ±0.025hPa
- measuring speed: 1Hz - 75Hz
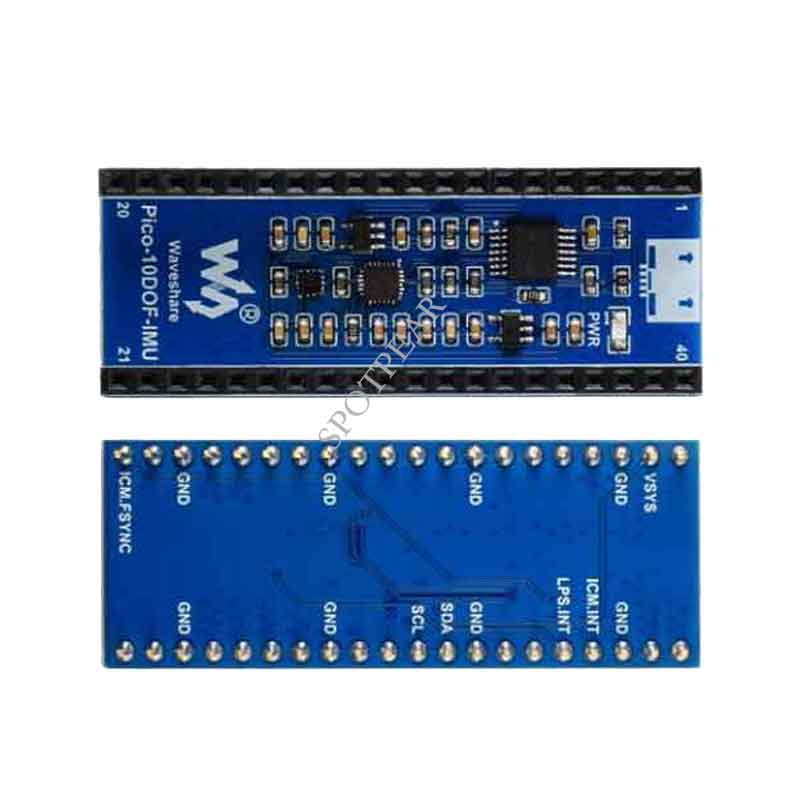
Pinout
Outline Dimension

Setup environment
Please refer to Raspberry Pi's guide: https://www.raspberrypi.org/documentation/pico/getting-started/
Raspberry Pi
1. Open a terminal of Raspberry Pi
2. Download and unzip the demo codes to directory Pico C/C++ SDK
#Note that the directory of SDK may be different for different users, you need to check the actual directory. Generally, it should be ~/pico/.
wget -P ~/pico/ https://www.waveshare.com/w/upload/3/3d/Pico-10dof-imu.zip
cd ~/pico
unzip Pico-10dof-imu.zip
c
1. Hold the BOOTSEL button of Pico, and connect the USB interface of Pico to Raspberry Pi then release the button.
2. Compile and run the pico-10dof-imu examples
cd ~/pico/pico-10dof-imu/c/build/
cmake ..
make
sudo mount /dev/sda1 /mnt/pico && sudo cp imu.uf2 /mnt/pico/ && sudo sync && sudo umount /mnt/pico && sleep 2 && sudo minicom -b 115200 -o -D /dev/ttyACM0
3. Open a terminal and user minicom to check the sensor's information.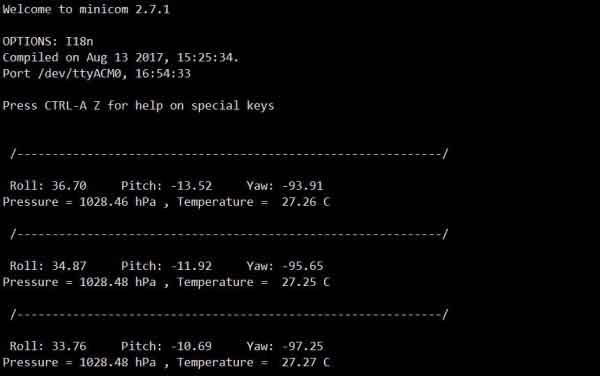
python
1. Refer to Raspberry Pi's guides to setup Micropython firmware for Pico
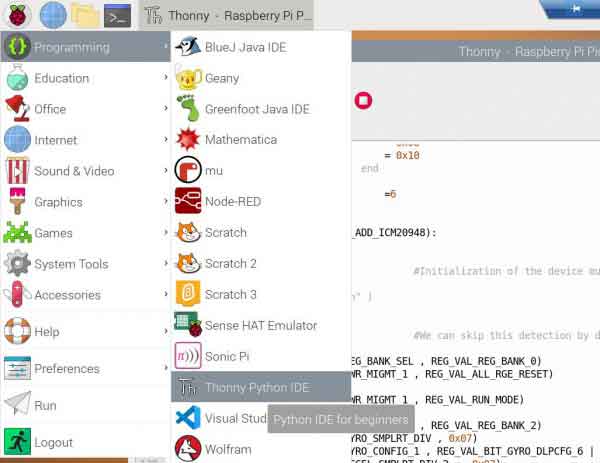
2. Open the Thonny IDE, and drag the demo to IDE and run on Pico as below.
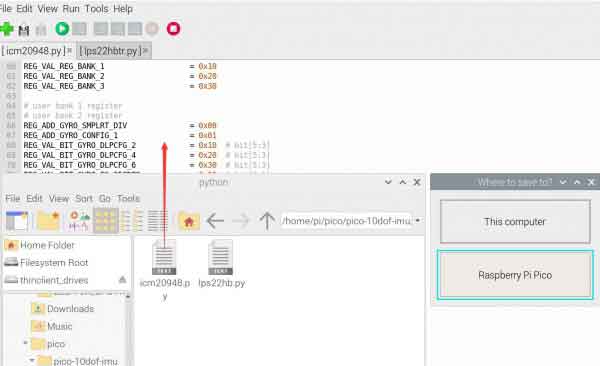
3. Click the "run" icon to run the MicroPython demo codes.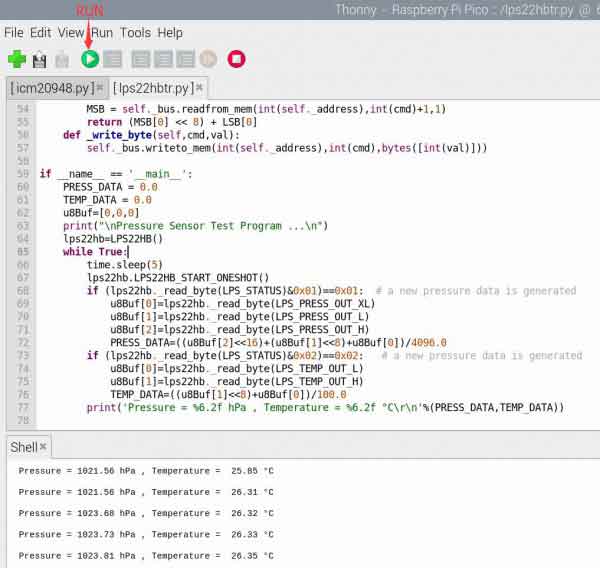
Windows
- Download and unzip the demo to your Windows desktop, refer to Raspberry Pi's guides to set up the Windows software environment settings.
- Press and hold the BOOTSEL button of Pico, connect the USB of Pico to the PC with a MicroUSB cable. Import c or python program into Pico to make it run.
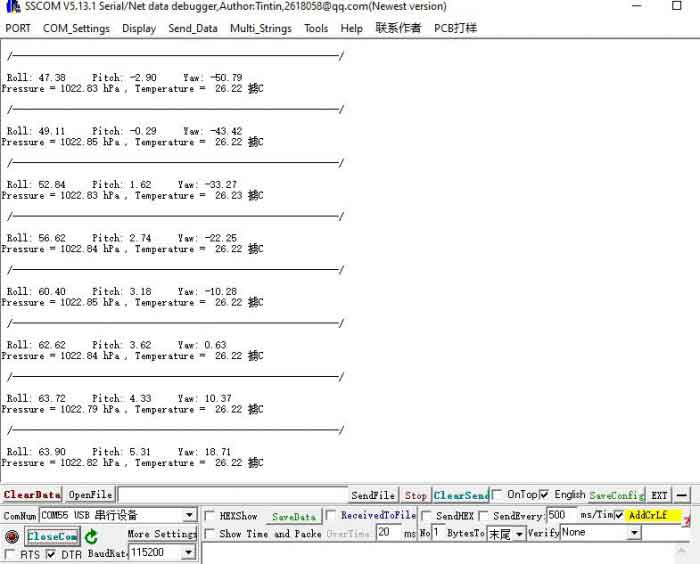
- Use the serial tool to view the virtual serial port of Pico's USB enumeration to check the print information, the DTR needs to be opened, the baud rate is 115200, as shown in the picture below:
Others
- The Pico-10DOF-IMU uses the VSYS of the Pico for power supply by default. Use 0R resistor to connect R15 position and then you can use GP14 to turn off the 10DOF power supply. Click to view the schematic.
- If you want to use 3.3V for power supply of Pico, please remove the 0R resistance of R13, and solder the 0R resistance at R12. Click to view the schematic