


- sales/support
Google Chat:---
- sales
+86-0755-88291180
- sales01
sales@spotpear.com
- sales02
dragon_manager@163.com
- support
tech-support@spotpear.com
- CEO-Complaints
zhoujie@spotpear.com
- Only Tech-Support
WhatsApp:13246739196
- Purchase/Shipping/Refund
WhatsApp:13424403025
Jetson Nano IMX219-160 IR-CUT Camera User Guide
Introduction
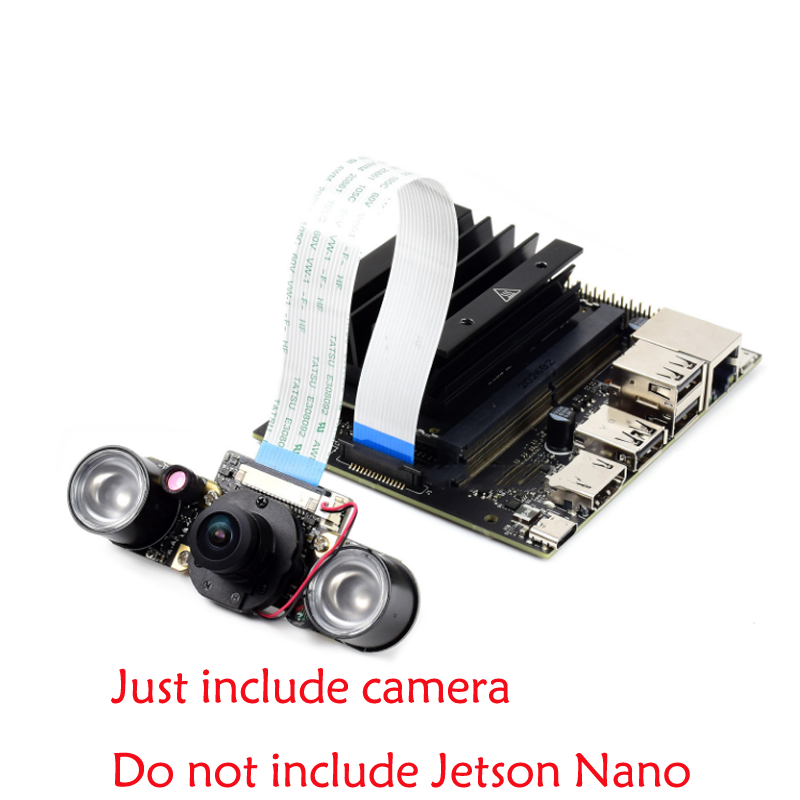
IMX219 Camera, 800 megapixels, and 160 FOV. have IR CUT Compatible with Jetson nano. You can also use it with CM3/CM3+ expansion boards like Raspberry Pi Compute Module IO board, Compute Module IO Board Plus, Compute Module POE Board of Waveshare, and the StereoPi board.
Test with Jetson Nano
Hardware connection
- Connect the camera to CSI interface of Jetson Nano.Set the metal side of FFC into Heat-sink
- Connect an HDMI LCD to Jetson Nano
Software setting
- Power on Jetson Nano and open the Terminal (Ctrl+ALT+T)
- Test camera with command:
DISPLAY=:0.0 gst-launch-1.0 nvarguscamerasrc ! 'video/x-raw(memory:NVMM), width=3280, height=2464, format=(string)NV12, framerate=(fraction)20/1' ! nvoverlaysink -e
- Test dual-camera
- IF you want to test dual cameras with B01 Developer Kit.You can just add sensor-id=x to the pipeline. x can be 0 or 1.
#test video0
DISPLAY=:0.0 gst-launch-1.0 nvarguscamerasrc sensor-id=0 ! 'video/x-raw(memory:NVMM), width=3280, height=2464, format=(string)NV12, framerate=(fraction)20/1' ! nvoverlaysink -e
#test video1
DISPLAY=:0.0 gst-launch-1.0 nvarguscamerasrc sensor-id=1 ! 'video/x-raw(memory:NVMM), width=3280, height=2464, format=(string)NV12, framerate=(fraction)20/1' ! nvoverlaysink -e
- If you find that the image captured is reddish. You can try to download .isp file and installed:
wget https://www.waveshare.com/w/upload/e/eb/Camera_overrides.tar.gz
tar zxvf Camera_overrides.tar.gz
sudo cp camera_overrides.isp /var/nvidia/nvcam/settings/
sudo chmod 664 /var/nvidia/nvcam/settings/camera_overrides.isp
sudo chown root:root /var/nvidia/nvcam/settings/camera_overrides.isp
Test with Compute Module
The IMX219 series can be used with Compute Module series of Raspberry Pi with carriers. And the usage are same as other Raspberry Pi cameras
Becuase of the encropytoin, the IMX219 series cameras cannot be used with Raspberry Pi board like the Raspberry Pi 4B, please note it.
- Connect the camera to Compute Module Carrier board (like Compute Module 4 PoE Board), please take care of the direction.
- Open a terminal and configure the camera
sudo raspi-config
- Select Interfacing Options -> Camera -> Yes
- Reboot
- Test the camera with command:
sudo raspistill -t 0
- For more information about commands for camera, please refer to this guides:Application guides of Raspberry Pi camera
Selection Guide
| Product | Pixels | Sensor | Dual Len | Infrared | Angle of View (Diagonal)(degree) | Afterture (F) | Focal Length (MM) | PCBA | Suit for |
|---|---|---|---|---|---|---|---|---|---|
| RPi Camera | 8 Mega | IMX219 | × | × | 62.2 | 2.0 | 3.04 | √ | Raspberry Pi, Jetson Nano |
| RPi NoIR Camera V2 | √ | 62.2 | 2.0 | 3.04 | √ | Raspberry Pi, Jetson Nano | |||
| IMX219-77 Camera | × | 77 | 2.0 | 2.96 | √ | Jetson Nano, CM3/3+ | |||
| IMX219-77IR | √ | 77 | 2.0 | 2.96 | √ | Jetson Nano, CM3/3+ | |||
| IMX219-120 Camera | × | 120 | 2.2 | 1.88 | √ | Jetson Nano, CM3/3+ | |||
| IMX219-160 Camera | × | 160 | 2.35 | 3.15 | √ | Jetson Nano, CM3/3+ | |||
| IMX219-160IR Camera | √ | 160 | 2.35 | 3.15 | √ | Jetson Nano, CM3/3+ | |||
| IMX219-160 IR-CUT Camera | √ | 160 | 2.7 | 3.62 | √ | Jetson Nano, CM3/3+ | |||
| IMX219-170 Camera | × | 170 | 2.0 | 0.87 | √ | Jetson Nano, CM3/3+ | |||
| IMX219-200 Camera | × | 200 | 2.0 | 3.15 | √ | Jetson Nano, CM3/3+ | |||
| IMX219-D160 | × | 160 | 2.35 | 3.15 | × | Raspberry Pi, Jetson Nano | |||
| IMX219-83 Stereo Camera | √ | × | 83 | NA | 2.6 | √ | Jetson Nano, CM3/3+ |
TAG:
RV1103
ESP32-S3-Zero
X1012 Raspberry Pi 5 POE And PCIe to M.2 NVMe SSD Board Pi5 2280 Power over Ethernet
树莓派Pico 2 RP2350B-Plus-W开发板WIFI官方Radio Module 2
Pan-Tilt Kit
EVAL-ADXL354CZ EVAL BOARD
2.8inch Capacitive TouchScreen LCD Display ST7789 CST328 240x320 For Arduino/Raspberry Pi/ESP32/Pico
Raspberry Pi 5 PCIe to M.2 NVMe SSD Adapter Board (D) HAT Pi5-2280-2242-2230
RM520N GL 5G/4G/3G M.2 Moudle IoT EMBB For LTE-A/NSA/SA And GNSS For DFOTA /VoLTE For Quectel
RS232 to RJ45
Raspberry Pi Pico 2 RP2350A PoE ETH Ethernet Module W6300
DeepSeek AI Voice Chat ESP32 C6 Development Board 2.06-inch AMOLED Display 410×502 2.06inch TouchScreen Programmable Watch
Raspberry Pi 5 Fan
8inch LCD 1280x800 Computer PC Monitor Display Secondary Screen TypeC USB CPU RAM
SpotPear
Multi Protection
Raspberry Pi 5 PCIe TO Gigabit RJ45 ETH Adapter Board (C) Driver-Free RTL8111H For Pi5
DeepSeek XiaoZhi AI Chat Robot ESP32-S3 1.54 inch LCD N16R8 MUMA Development Board Display Screen Wifi Weather Station TimeClock
Arducam
Raspberry Pi IR Ther
TAG:
Raspberry Pi 1.3inch LCD
Milk-V Duo S 512MB SG2000 RISC-V
Industrial
Sipeed RISCV LicheeRV Nano Super-Mini SG2002 AI RAM-256MB
ESP32 S3 2.8 inch Round LCD Display 480x480 QMI8658 Gyro Sensor Micro SD MP3 Speaker audio Battery LVGL HMI Arduino
STLINK
Weather ornaments
Jetson Orin 4G/3G/2G expansion board GNSS GPS SIM7600G-H-M.2
RP2040 1.5inch LCD
ESP32 S3 LCD Development Board 1.3 inch Display
RV1103
USB camera 5MP IMX335 No Distortion
Raspberry Pi 5 PCIe to 4-CH PCIe FFC HAT Board Pi5 4 Channels
Sipeed NanoKVM-Pro 4K IP-KVM Remote Control Operation and Maintenance Server
Servo Motor RS485 RSBL35-24-HS
SC3336-3MP-Camera-B
Spotpear
RP2040 Camera
WIFI-Kit-32
W5500 Ethernet Module