


- sales/support
Google Chat:---
- sales
+86-0755-88291180
- sales01
sales@spotpear.com
- sales02
dragon_manager@163.com
- support
tech-support@spotpear.com
- CEO-Complaints
zhoujie@spotpear.com
- Only Tech-Support
WhatsApp:13246739196
- Purchase/Shipping/Refund
WhatsApp:13424403025
Chapter 8 of KitiBot-Microbit: Bluetooth Control User Guide
Bluetooth Control
nRF51822 is the main control chip of micro:bit, this is a BLE chip, which features Bluetooth function for micrro:bit. We could use our phone to control KitiBot by Bluetooth.
Bluetooth connection
To communicate KitiBot with phone, you need to install a APP first. (The APP could only support Android phone)
Except the APP, you also need to add bluetooth package to makecode.
https://cdn.static.spotpear.com/uploads/picture/learn/micro-bit/micro-bit-kit/chapter-8-of-kitibot-microbit/chapter-8-of-kitibot-microbit-01.gif
Add Bluetooth package, it will prompts that the package is conflict with radio, neopixel and so on. You can detect those package and add it. After adding, a Bluetooth class can be used in blocks area.
Now, we can being our first Bluetooth code
Open Bluetooth accelerometer service, button service, led service, temperature service at begin. If there is Bluetooth device, a character "C" will be displayed, "D" is displayed if there is not Bluetooth connected.
We download this code to micro:bit and access with our phone, try to control it.
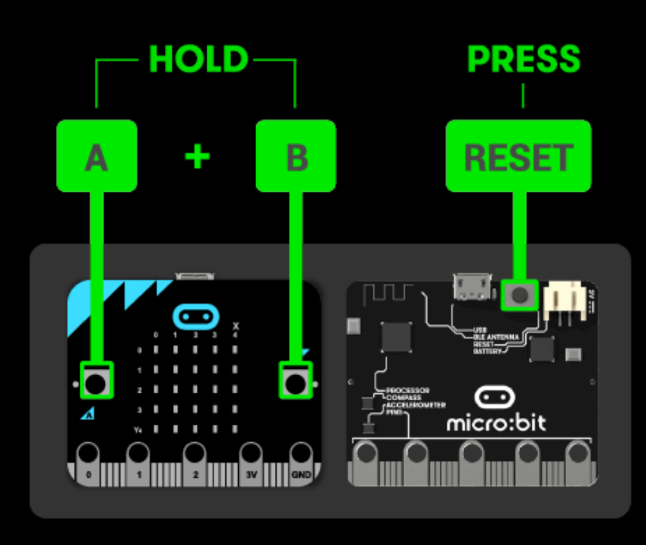
Holding A and B buttons, press reset button, LED matrix wil display "PAIRING MODE!" and enter pairing mode.
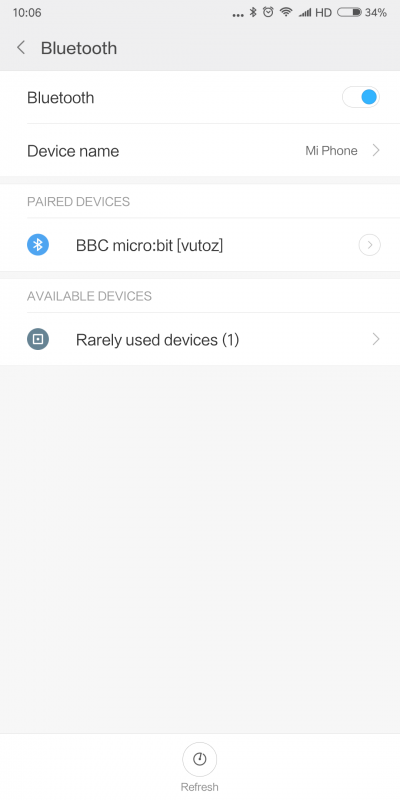
Open Bluetooth service of your phone, search BBC micro:bit and connect it. (The strings in the end are different from different micro:bit)
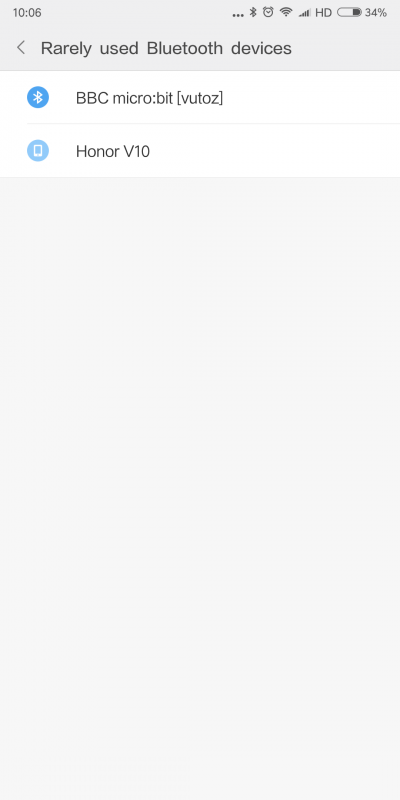
【Note】 Every time you restart micro:bit you need to pair again, and before re-pairing, you need to delete the paired micro:bit devices on your phone
"√" will be displayed in LED matrix if pairing successfully.
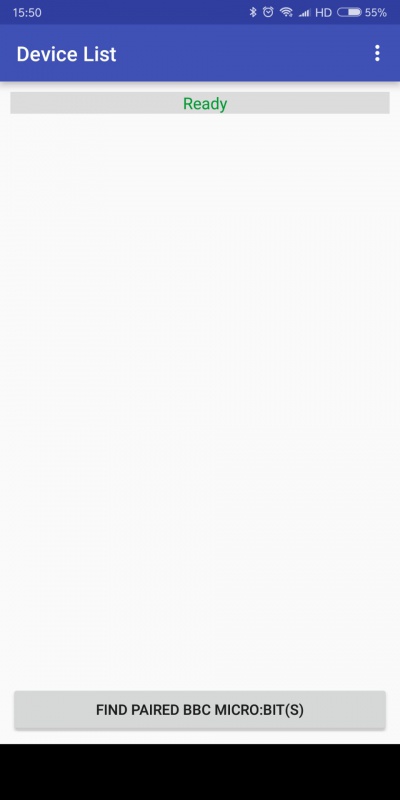
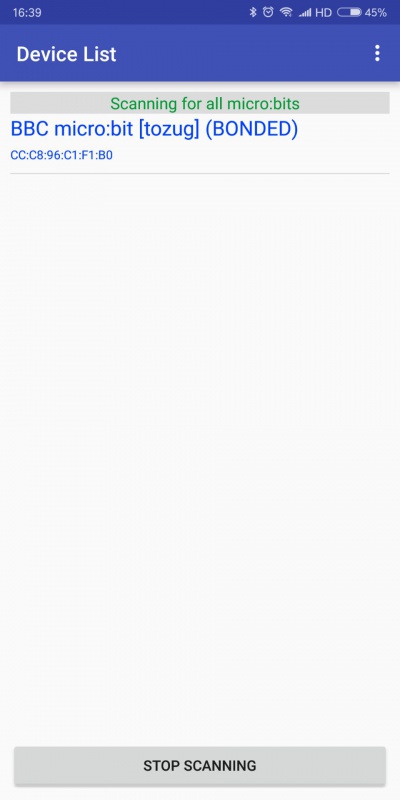
Open the APP we installed before, choose "FIND FAIRED BBC MICRO:BIT(S)" to search the paired micro:bit
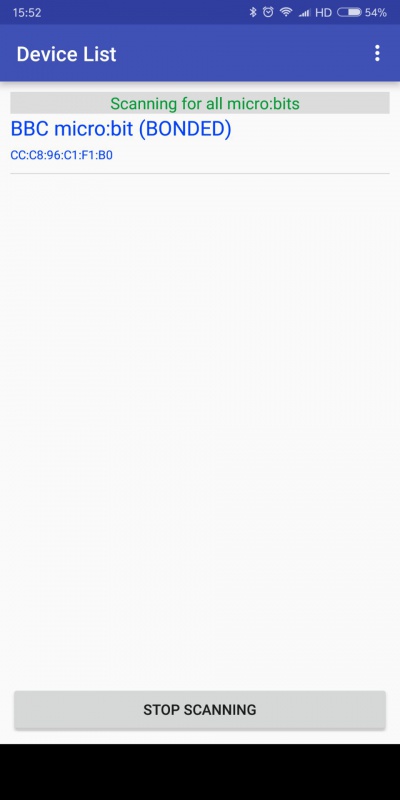
Note that the micro:bit could only be connected when "BBC micro:bit(BONDED)" is showed in app instead of "BBC micro:bit[tozug](BONDED)", otherwise, it will failed. If you find your connect micro:bit failed, please search again after "√" icon disappears.
If Bluetooth connecting successfully, control icons will be showed in app and character "C" displayed on LED matrix of micro:bit.
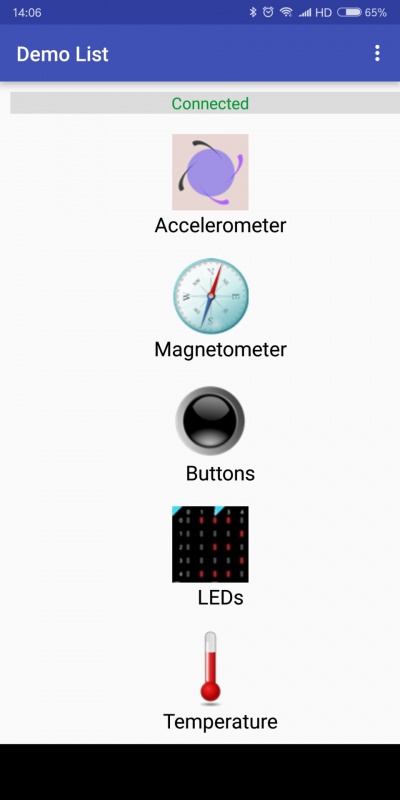
Now we could control micro:bit with the app. Open Accelerometer, roll your micro:bit, then you can find the micro:bit icon on app will roll as well.

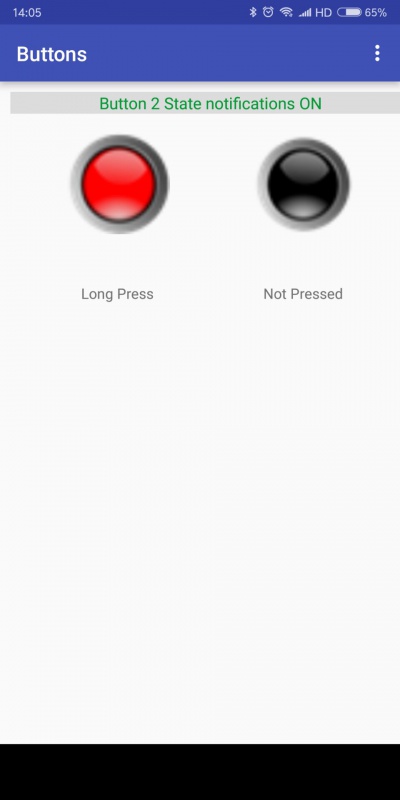
Open Buttons, press A or B button on your micro:bit, you can find that the corresponding icons on app will light green, and show "Pressed", if you long press buttons, led will light red and show "Long Pressed" at the same time.

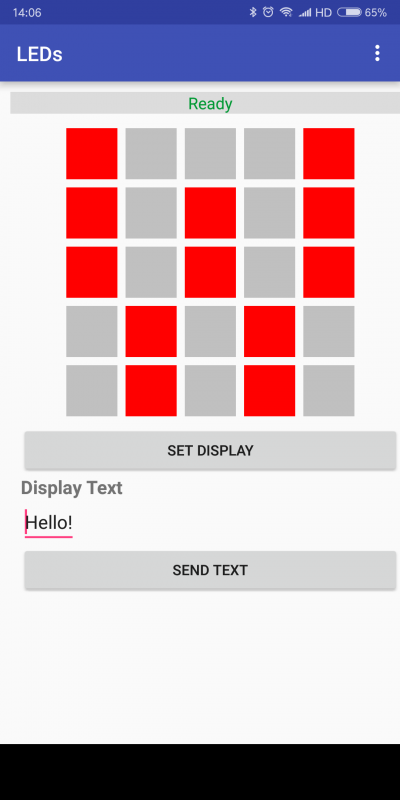
Open LEDs, edit the LED matrix and click SET DISPLAY, the led matrix on micro:bit will light on as what you set on app. If you click SEND TEXT, it will display the string you send.
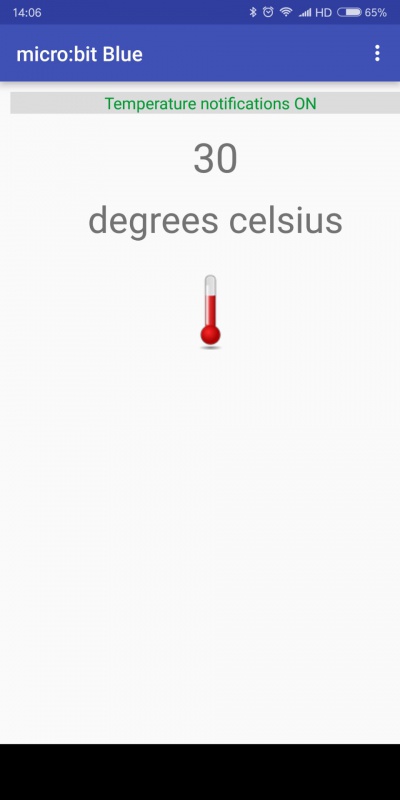
Open temperature, the app will display current temperature measured by micro:bit
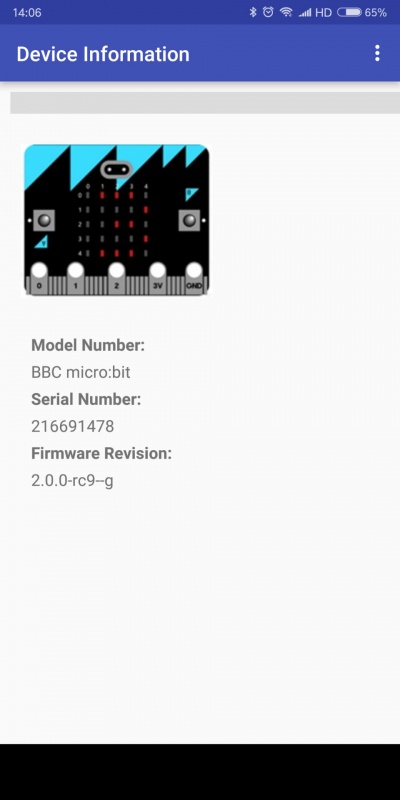
Open Device Information, current device information of micro:bit will be showed
【Note】The first code we made just opens some services, those services which don't be opened cannot be used in app.
Bluetooth connecting-2
We have learned how to connect micro:bit via Bluetooth, but the way is a little complex. Here we try to simplify it by modifying codes.
https://cdn.static.spotpear.com/uploads/picture/learn/micro-bit/micro-bit-kit/chapter-8-of-kitibot-microbit/chapter-8-of-kitibot-microbit-25.gif
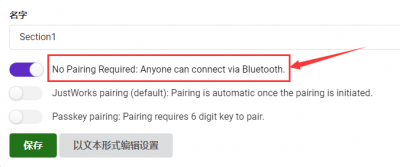
Click Settings-> project settings. Choose No Pairing Required:Anyone can connect via Bluetooth. With this setting, pairing isn't required anymore
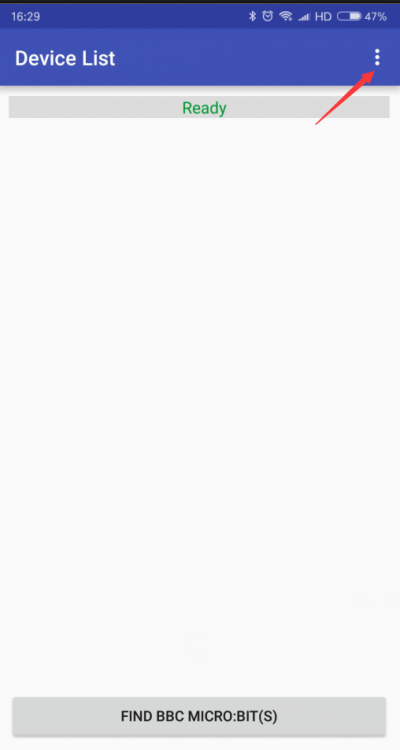
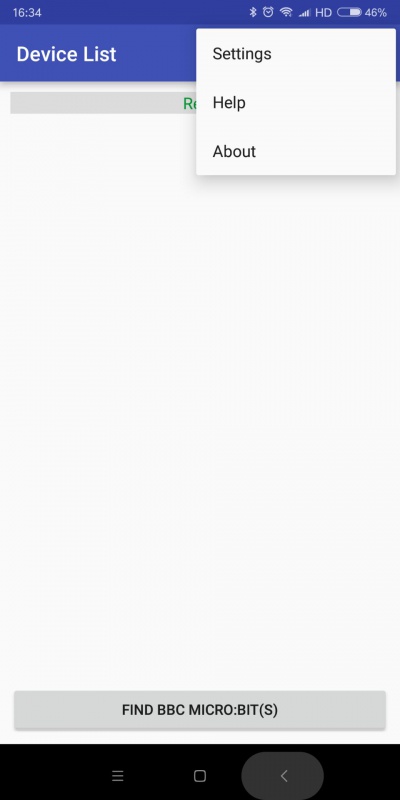
Download the code to micro:bit. And set the app, click settings.
Uncheck Filter the checkbox of "unpaired micro:bit from scan results?"
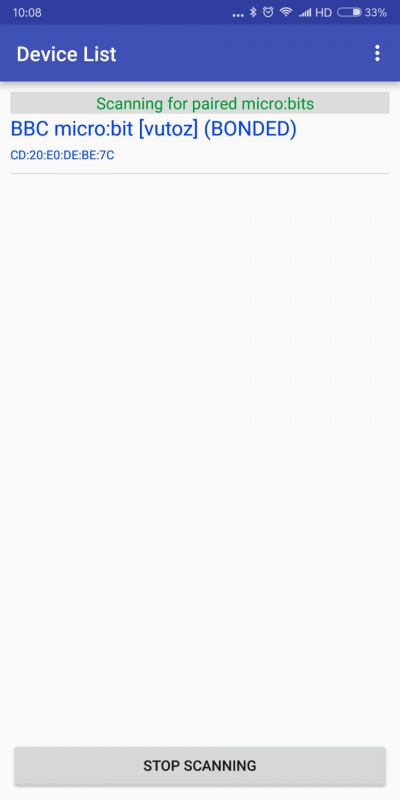
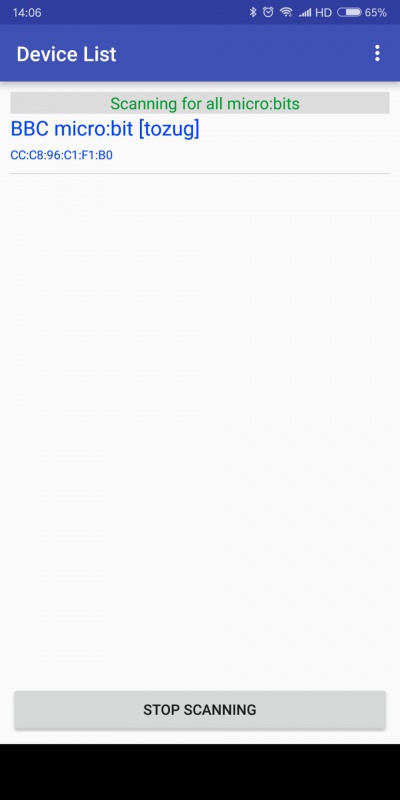
After setting, you can reach micro:bit devices, and click "BBC micro:bit[tozug]" to connect.
【Note】If you didn't delete paired devices as we said before, the device listed in app is "BBC micro:bit[tozug](BNONDED)", you need to delete paired devices and research
Control KitiBot via Bluetooth
There is an icon looks like game joystick in app, we can use it to control KitiBot
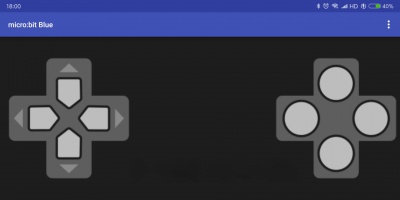
Connect micro:bit, and click the joystick icon, the control page is as below:
Click setting on right top of app to enter setting page.
If states of buttons change, signals will be sent to micro:bit to toggle Gamepad events. Different event values stand of different button events.
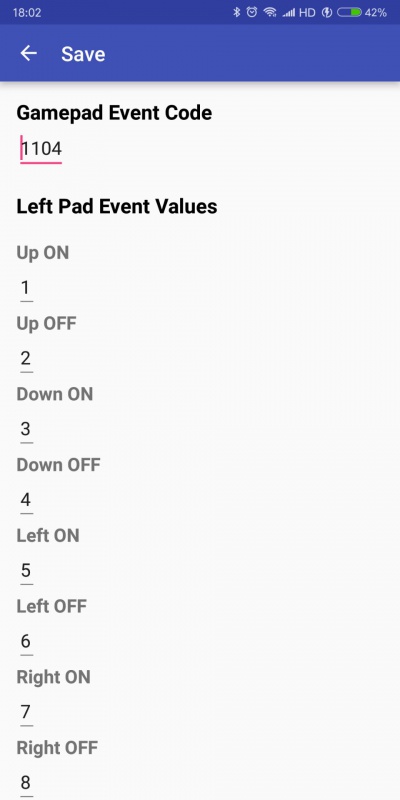
We use default setting. add an event handle code for Gamepad events. The event source is MES_DPAD_CONTROLLER_ID, event value is MICROBIT_EVT_ANY, different key value relate to different button event. Then we could control KitiBot by detect key values.
https://cdn.static.spotpear.com/uploads/picture/learn/micro-bit/micro-bit-kit/chapter-8-of-kitibot-microbit/chapter-8-of-kitibot-microbit-25.gif
Download the code to micro:bit and connect it to Bluetooth. You can control the robot to move by joystick in APP. Press to move and release to stop.
Control servo
At last section, we have tried to control robot via Bluetooth, here we add servo control to make robot shake.
https://cdn.static.spotpear.com/uploads/picture/learn/micro-bit/micro-bit-kit/chapter-8-of-kitibot-microbit/chapter-8-of-kitibot-microbit-27.gif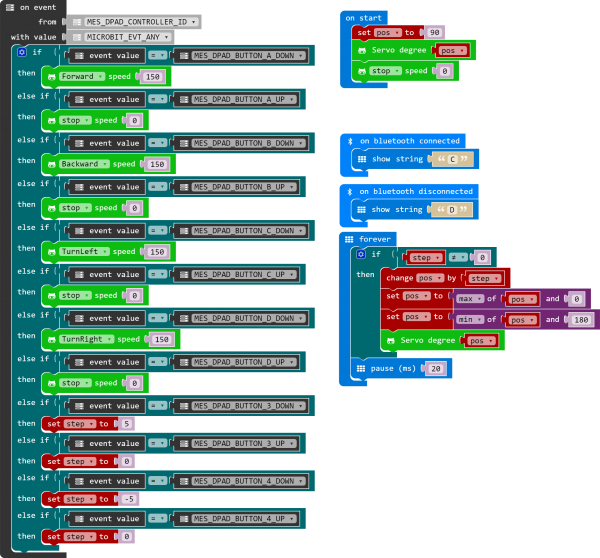
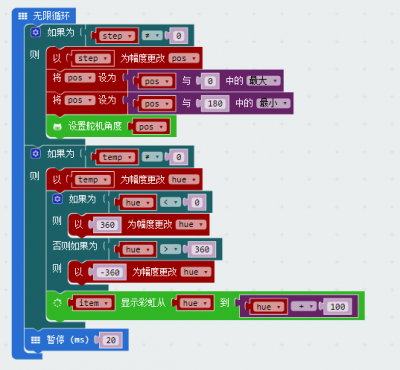
Control RGB LED
We add RGB LED control for flickering effect
https://cdn.static.spotpear.com/uploads/picture/learn/micro-bit/micro-bit-kit/chapter-8-of-kitibot-microbit/chapter-8-of-kitibot-microbit-29.gif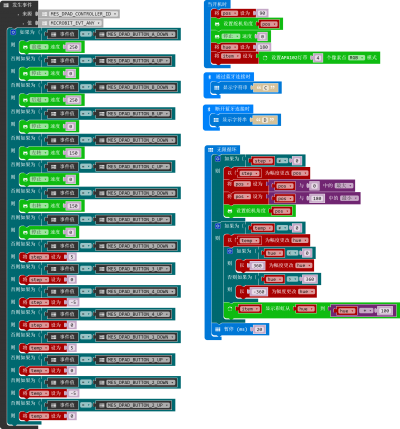
Same like the last code, it use a variable temp for color.
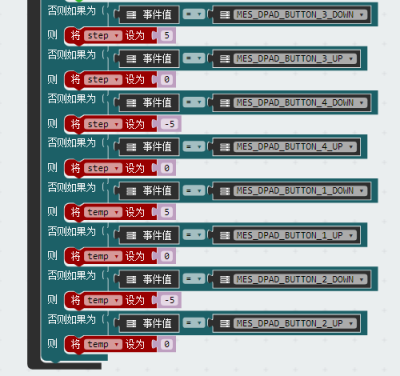
Set hue to 180 on start. Hue can be set in range 0~360 for different color.
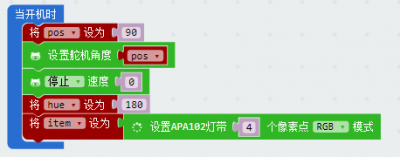
If temp is not equal to 0, it means that button is pressed and it will change hue value and show it.
Note: range of hue is 0~360, it will add 360 if hue is less than 0 and minus 360 if it is bigger than 36, to let the hue keeps in 0~360