


- sales/support
Google Chat:---
- sales
+86-0755-88291180
- sales01
sales@spotpear.com
- sales02
dragon_manager@163.com
- support
tech-support@spotpear.com
- CEO-Complaints
zhoujie@spotpear.com
- Only Tech-Support
WhatsApp:13246739196
- Purchase/Shipping/Refund
WhatsApp:13424403025
- HOME
- >
- ARTICLES
- >
- Common Moudle
- >
- UART Module
Modbus RTU Relay User Guide
Overview
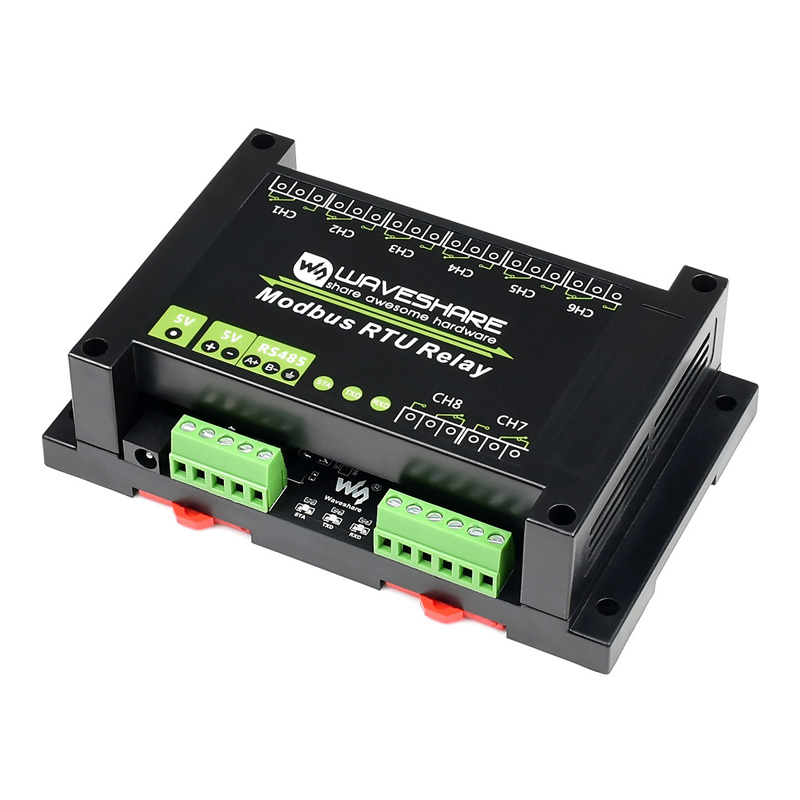
This is an industrial 8-ch relay module controlled via RS485 bus, utilizing Modbus RTU protocol. It features embedded protection circuits such as power isolation, ADI magnetical isolation, and TVS diode, etc. It also comes with an ABS enclosure.
The Modbus RTU Relay is very easy to use. Due to its fast communication, stability, reliability, and safety, it is an ideal choice for industrial control equipments and/or applications with high communication requirements.
Hardware testing
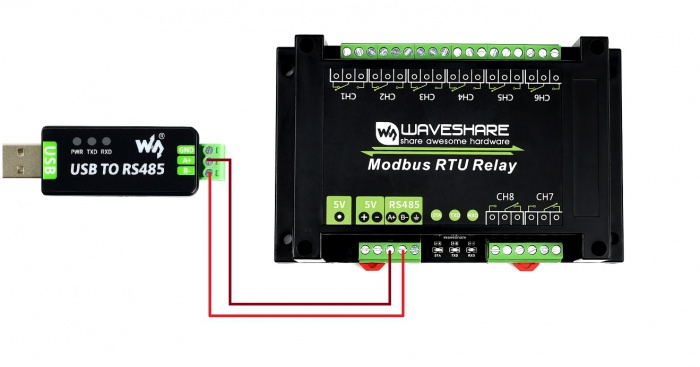
- Connect USB to 485 moduble to Modbus RTU Relay board by wires. Connect A to A and B to B. Then connect the USB to 485 module to your PC
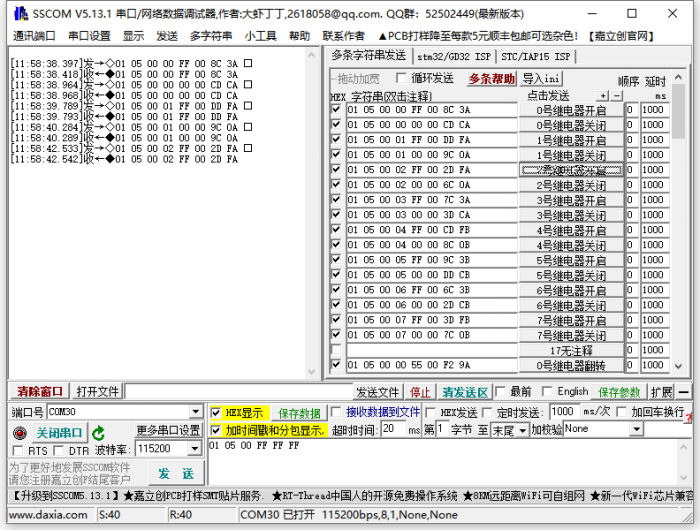
- Download the SSCOM software and Open it in your PC. Select the correct COM port (according to Devices Manager), set baud rate to 9600. Click Extension and send the commands to test
If you want to send other commands, please check HEX option and choose ModbusCRC16 parity. Input the commands and send.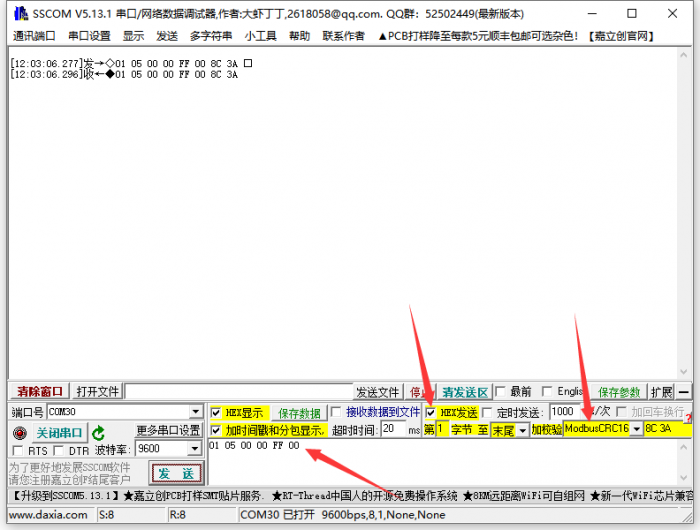
For more details of the commands, please refero Protocol Manual of Modbus RTU Relay
Examples
Raspberry Pi
- Enable Serial port
- Open terminal of Raspberry Pi
- Run the following command to configure
sudo raspi-config
- Choose Interfacing Options -> Serial -> No -> Yes
- Then reboot Raspberry Pi
sudo reboot
- Hardware connection
You need to connect and RS485 devices to Raspberry Pi (the demo codes provided is based on our RS485 CAN HAT), Connect Modbus RTU Relay module to the RS485 CAN HAT, A to A and B to B.
- Run example
Use the following commands to run the demo codes
sudo apt-get install p7zip
wget https://www.waveshare.com/w/upload/f/f9/Modbus_RTU_Relay_Code.zip
7zr x Modbus_RTU_Relay.7z -r -o./Modbus_RTU_Relay
cd Modbus_RTU_Relay/Python3
sudo python3 main.py
STM32
The Demo codes for STM32 is based on NULCEO-F103RB and RS485 CAN Shield module
Download the #demo codes and open the STM32 project by Keil software.
Program the codes to NUCLEO board
The codes will run and toggle the relay in turn.
Arduino
The Arduino demo is based on Waveshare UNO Plus and RS485 CAN Shield
Open Arduino project and program it to the UNO board.
The codes will run and toggle the relay in turn.