- sales/support
Google Chat:---
- sales
+86-0755-88291180
- sales01
sales@spotpear.com
- sales02
dragon_manager@163.com
- support
tech-support@spotpear.com
- CEO-Complaints
zhoujie@spotpear.com
- Only Tech-Support
WhatsApp:13246739196
- Purchase/Shipping/Refund
WhatsApp:13424403025
NanoKVM-USB Quick Start
1. Interface
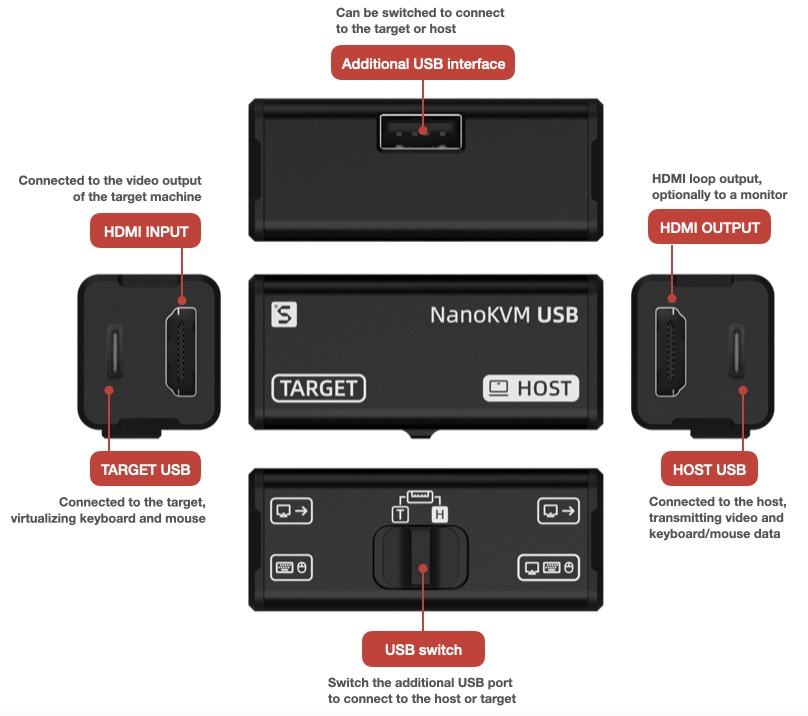
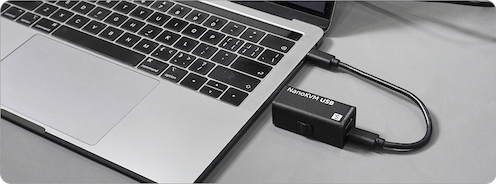
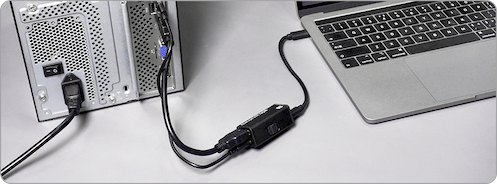
2. Wiring
Use a USB3.0 or Type-C cable to connect NanoKVM-USB and the Host device.
Use an HDMI cable to connect NanoKVM-USB and Target device.

Use a USB3.0 cable to connect NanoKVM-USB and Target device.
3. Use in Web
3.1. Open the webpage
Use Chrome browser to visit https://usbkvm.sipeed.com.
Please use the desktop Chrome browser, and the version number must be greater than 89.
Mobile Chrome or other browsers that do not support Web Serial API cannot use keyboard and mouse.
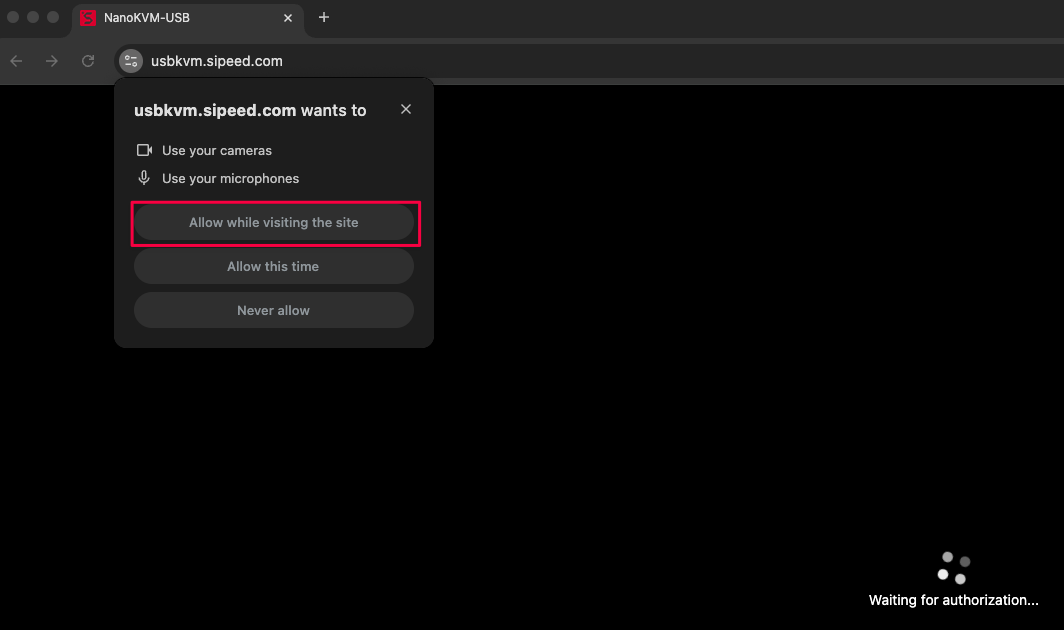
3.2. Authorization
NanoKVM-USB will simulate a USB camera to transmit video and audio data. Therefore, the web page must obtain permission to use the camera.
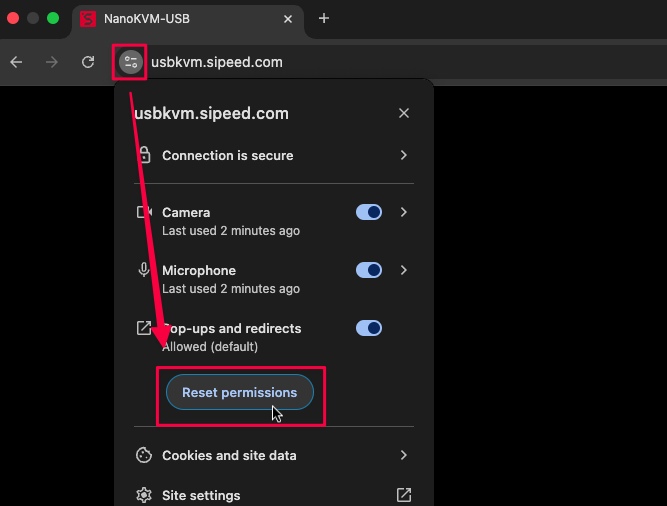
If you rejected the authorization or want to turn off the authorization, you can choose to reset all permissions.
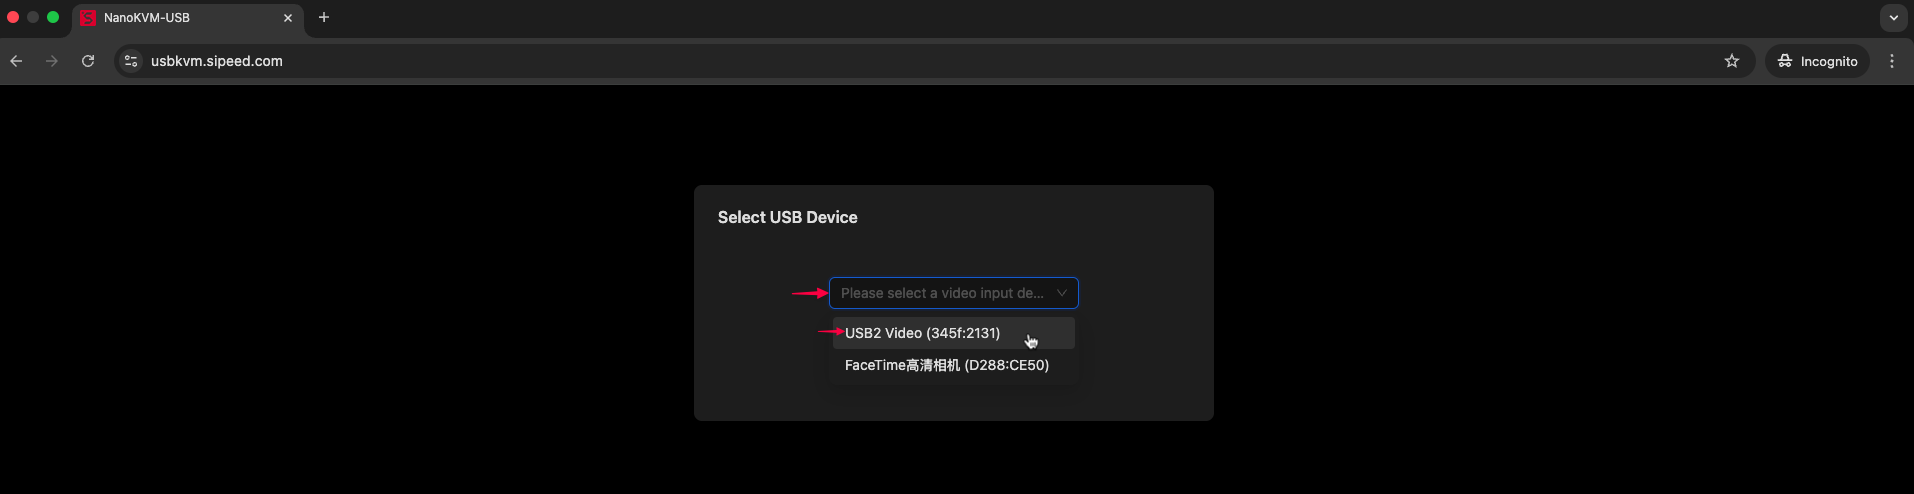
3.3. Select USB devices
After obtaining authorization, We need to select two USB devices:
- USB camera: for video and audio input;
- Serial device: for sending keyboard and mouse data.
3.3.1. USB Camera
Click the drop-down button and select the camera device named in the format of USB Video.
Once the device is selected, the web page will start to display the video image.
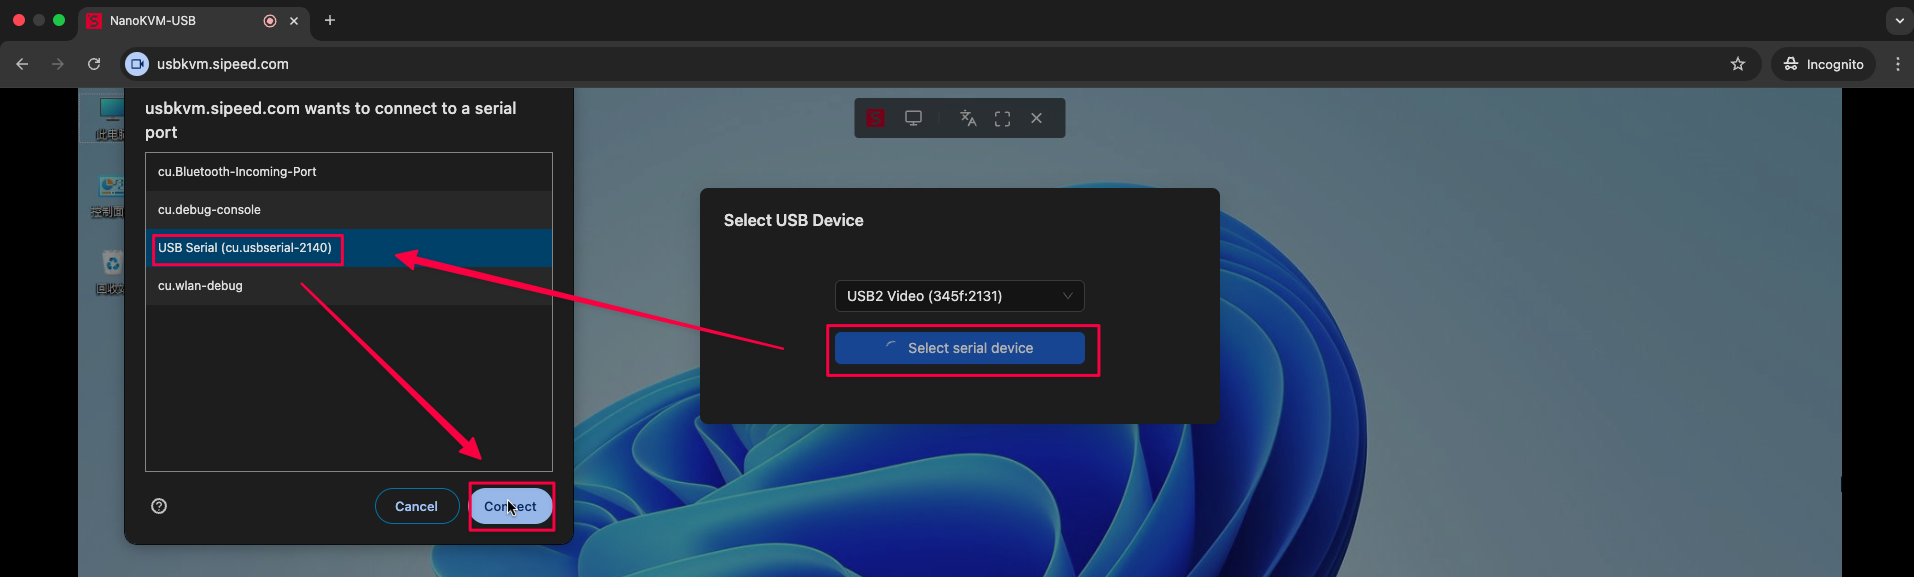
3.3.2. Serial Port Device
Click the "Select Serial Port" button to display a list of all available serial devices, from which you can choose the corresponding serial device.
On Windows, the format is
COMx; on macOS, it isUSB Serial; on Linux, it is generally/dev/ttyUSBx.
If the browser does not support Web Serial API, the button will not be displayed and the keyboard and mouse is not available.
Setup complete!
Enjoy it!
3.4. Audio
If the webpage does not play sound automatically, some manual setups are required.
Here is an example of Mac controlling Windows:
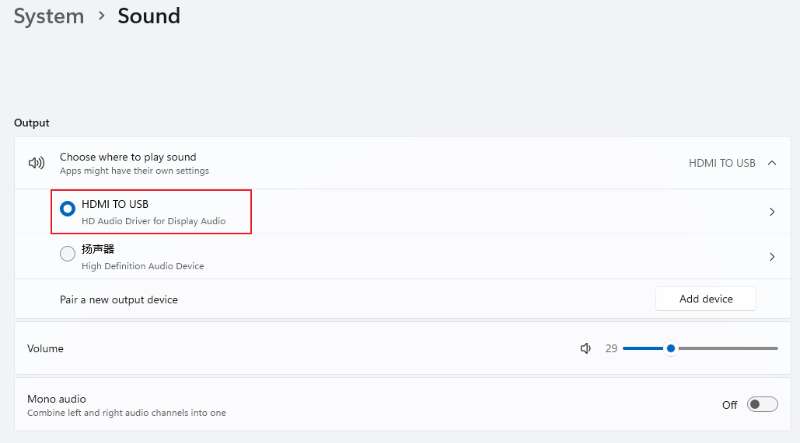
3.4.1. Target side
On the Target side(Windows), select NanoKVM as the audio output device.
The name of the audio device depends on whether a loopback device is connected:
- If the loopback device is not connected, the audio device name is
HDMI TO USB; - If the loopback device is connected, the name of the audio device is the same as the loopback device.
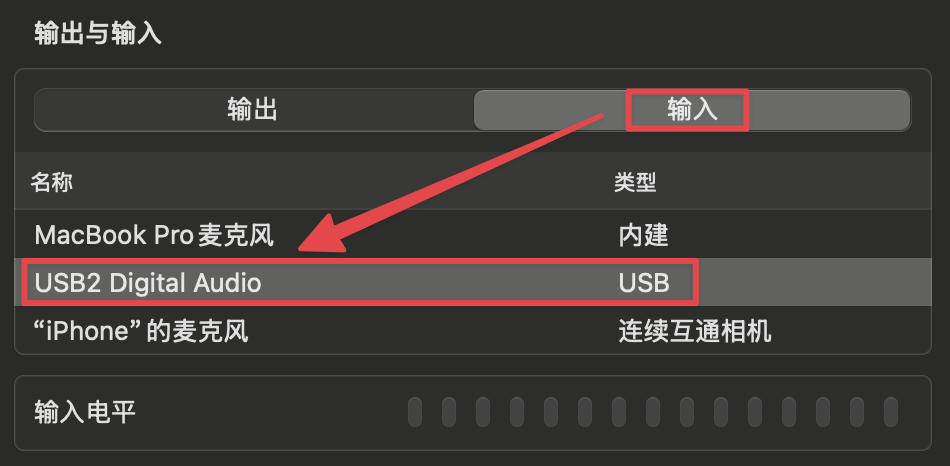
3.4.2. Host side
On the Host side(Mac), select NanoKVM as the audio input device.
The name format of the audio device is generally USB Digital Audio.
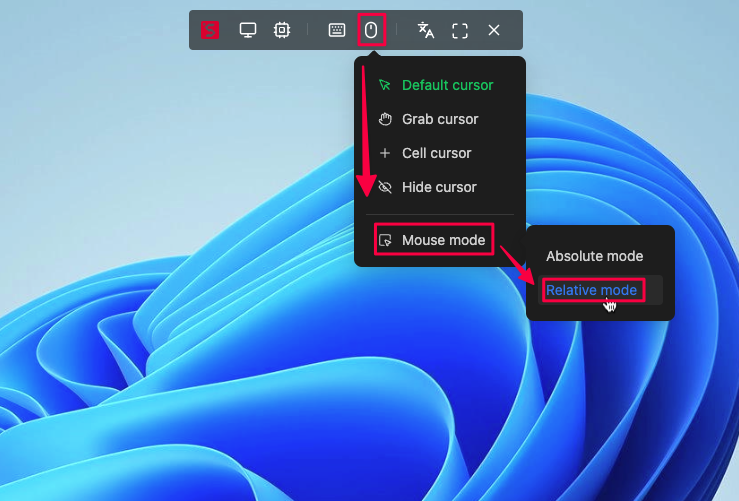
3.5. Mouse
The mouse uses the absolute mode by default.
In the BIOS or some systems, this mode may not work properly. Please switch to the relative mode if the mouse is not available.